Switch Pros mount locations?

Did you see my short write-up? It's here I think you were out of town when I posted that.

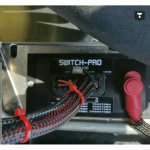
Besides the switch connections, there are only 4 wires. Batt+, Batt-, Accessory power in the fuse box, and a wire that connects to the side marker wire.

I think he is talking about the Outputs - How are you guys doing the cable management for your accessories - or is it just solder/crimp and shrink tube and tie wraps?
 

H8ROADS

Caught the Bug
Did you see my short write-up? It's here I think you were out of town when I posted that.

Besides the switch connections, there are only 4 wires. Batt+, Batt-, Accessory power in the fuse box, and a wire that connects to the side marker wire.

Jeff, thanks for that - could you give me a shot that's a bit more overview? I'd like to see how it all looks once it's wired up and tucked in. My only criticism of this system is that the under the hood solution looks far inferior to the competition, from what I'm seeing, but I don't want to be quick to judge. The switch pod itself looks fantastic. Just my constructive criticism. Anytime I have to use crimp splicers and/or inline fuse plugs, it's a no-go for me. That's not a good solution in my opinion. Again, I want to really see the overall picture before I make a final decision. Thanks!
 

boardsurfer

Active Member
Jeff, thanks for that - could you give me a shot that's a bit more overview? I'd like to see how it all looks once it's wired up and tucked in. My only criticism of this system is that the under the hood solution looks far inferior to the competition, from what I'm seeing, but I don't want to be quick to judge. The switch pod itself looks fantastic. Just my constructive criticism. Anytime I have to use crimp splicers and/or inline fuse plugs, it's a no-go for me. That's not a good solution in my opinion. Again, I want to really see the overall picture before I make a final decision. Thanks!


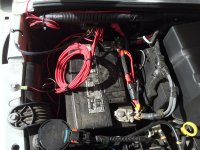
I hear what you're saying and my wiring is probably a bad example. I've never seen an SPOD wired up but for this device, everything is exposed which makes me a little uneasy. Wire to wire with a butt connector and heat-shrink if you choose. The battery tray has a perfect empty spot just to the side where all my wires rest after being connected. It is tough to get the lengths right so that it is neat. Keep in mind that I suck at this stuff and with a little effort it could look a lot cleaner.

The wires for your accessories to connect to are about 2.5-3 feet long. And there is nothing to do with them when not in use. I dont want to trim them shorter, because I dont know what the rest will be used for just yet. So they can be a bit cumbersome.

Here's a higher shot:
IMG_0194.jpg

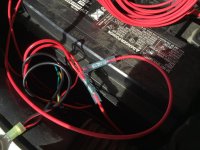
ARB on top, A pillar lights on the bottom:
IMG_0195.jpg

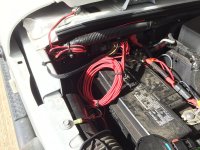
A pillar wires on the upper left there. The braided line is the cable to the switch panel on the dash.
IMG_0197.jpg

Dont laugh at my wiring. :D
 
Last edited:

H8ROADS

Caught the Bug
I hear what you're saying and my wiring is probably a bad example. I've never seen an SPOD wired up but for this device, everything is exposed which makes me a little uneasy. Wire to wire with a butt connector and shrink-wrap if you choose. The battery tray has a perfect empty spot just to the side where all my wires rest after being connected. It is tough to get the lengths right so that it is neat. Keep in mind that I suck at this stuff and with a little effort it could look a lot cleaner.

The wires for your accessories to connect to are about 2.5-3 feet long. And there is nothing to do with them when not in use. I dont want to trim them shorter, because I dont know what the rest will be used for just yet. So they can be a bit cumberso
Yeah, this could be done a lot better. It's not as bad as I thought, but not nearly as clean as an sPOD. I've owned an sPOD, and while I agree with a lot of folks that John can be an ass, their product is solid -- especially under the hood. That being said, I like what Switch Pros is doing with the switches and relays. Really looking for the best of both worlds here.

Dont laugh at my wiring. :D
Too late :D :D :D
 

Switch-Pros

New member
Terminal blocks in the engine compartment are not a good idea. The harsh enviroment will cause connections to corrode if they are not sealed, this is especially critical in high current applications. You dont see any terminal blocks used in any modern vehicle electrical system. That's why our system is completely sealed.
 
Terminal blocks in the engine compartment are not a good idea. The harsh enviroment will cause connections to corrode if they are not sealed, this is especially critical in high current applications. You dont see any terminal blocks used in any modern vehicle electrical system. That's why our system is completely sealed.

Thanks! Thats awesome to know
 

Switch-Pros

New member
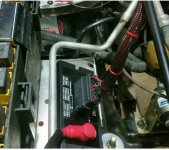
Here are some photos of the underhood installation, done by Scott Jones, into a 2005 TJ. ImageUploadedByWAYALIFE1431487361.480251.jpg ImageUploadedByWAYALIFE1431487371.960073.jpg ImageUploadedByWAYALIFE1431487391.955012.jpg
These photos show the leads neatly bundled in nylon expandable sleeving (included in the installation kit) and tie-wrapped out of the way.
 

Switch-Pros

New member
Switch-Pro Ignition signal tap

To tap into the ignition signal our installation kit now includes a wire with a terminal attached that can be inserted into a spare cavity in one of the TIPM (fuse box) connectors.
Fuse M7 still protects this circuit. This makes a clean reliable factory like connection for the ignition/accessory connection.

For any of you out there that have already purchased the SP8100 we can send you the kit free of charge. This will eliminate the tap-a-fuse.


Robert
 

Kpalas

New member
To tap into the ignition signal our installation kit now includes a wire with a terminal attached that can be inserted into a spare cavity in one of the TIPM (fuse box) connectors.
Fuse M7 still protects this circuit. This makes a clean reliable factory like connection for the ignition/accessory connection.

For any of you out there that have already purchased the SP8100 we can send you the kit free of charge. This will eliminate the tap-a-fuse.


Robert

How do I get the kit?
 

wayoflife

Administrator
Staff member
To tap into the ignition signal our installation kit now includes a wire with a terminal attached that can be inserted into a spare cavity in one of the TIPM (fuse box) connectors.
Fuse M7 still protects this circuit. This makes a clean reliable factory like connection for the ignition/accessory connection.

For any of you out there that have already purchased the SP8100 we can send you the kit free of charge. This will eliminate the tap-a-fuse.


Robert

That's great news! I still need to make some time to get mine installed. Please let me know how I can get my hands on one of these kits :thumb:
 

JAGS

Hooked
To tap into the ignition signal our installation kit now includes a wire with a terminal attached that can be inserted into a spare cavity in one of the TIPM (fuse box) connectors.
Fuse M7 still protects this circuit. This makes a clean reliable factory like connection for the ignition/accessory connection.

For any of you out there that have already purchased the SP8100 we can send you the kit free of charge. This will eliminate the tap-a-fuse.


Robert

Very cool news. I'll be contacting you guys. 👍

Also noticed you have an ARB fridge connector now too...for those with the fridge out there.
 

Switch-Pros

New member
The harness is only to interface with the air compressor and arb air lockers. But, sounds like a good idea. We will come up with something. Thanks!
 
Top Bottom