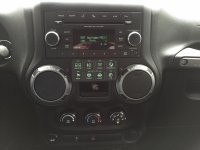
2014 SEMA Switch Pros - AWARD WINNING PRODUCT

So here's a really quick run down of a switch-pros install.

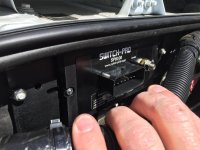
Step 1: mount the power module to the firewall mounting plate
ImageUploadedByWAYALIFE1428785947.840349.jpg

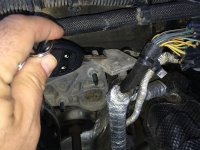
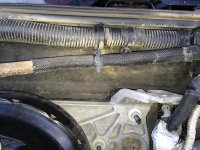
2: Separate the wiring loom from the firewall and attach the PM and bracket to the studs
ImageUploadedByWAYALIFE1428786003.612439.jpg
ImageUploadedByWAYALIFE1428786016.053973.jpg

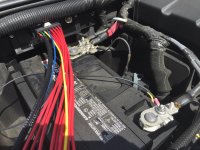
3: Connect black to ground
ImageUploadedByWAYALIFE1428786094.770678.jpg

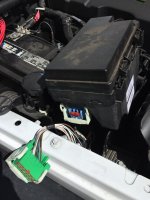
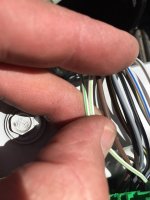
4: Locate the green/white wire coming from the side marker in the fender flair. I found it under the fuse box so I pulled that out to get a little room to work
ImageUploadedByWAYALIFE1428786123.081495.jpg
After much deliberating and sticking my head under the flair, I decided the one on the left was the one I wanted.
ImageUploadedByWAYALIFE1428786197.941305.jpg

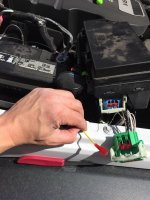
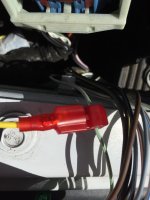
5: Connect the blade connector to the yellow wire
ImageUploadedByWAYALIFE1428786269.692466.jpg
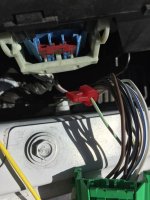
6: Connect the T-splice connector to the green/white wire and connect the two together
ImageUploadedByWAYALIFE1428786331.267715.jpg
ImageUploadedByWAYALIFE1428786345.466546.jpg

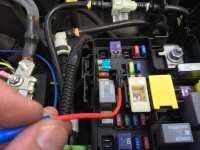
7: In the fuse box, locate M7. Pull that fuse, add it to the dongle and plug the dongle in its place, then attach the blue wire to the butt connector on the end of the dongle.
ImageUploadedByWAYALIFE1428786402.761470.jpg

You may notice at this point there doesn't seem to be a way to get that blue wire out of the fuse box without affecting the water tight integrity of the fuse box. At least I couldn't find a way. So I made a notch in the lip of the box and ran to wire out through there. With a small amount of silicon it's about as water tight as can be.

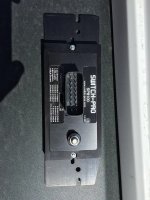
After all this, just run the plug through the firewall to your mount location of choice and plug it in to the switch panel.

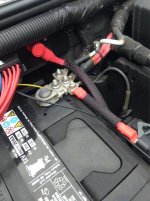
Final step, connect the PM to the positive side of the battery
ImageUploadedByWAYALIFE1428787063.942919.jpg
 
Last edited:
Update #1: the M7 fuse is a two position fuse. I had it in the interior two slots which caused my switch panel to be hot all the time. This is a straight battery connection. If you use the outboard two slots, this is accessory and will power the panel when the key is on.

Update #2: the connector that is supposed to go through the firewall is just plain too big. No amount of poking and prodding would get it through the access hole behind the side dash panel on the passenger side. So.. I cut it off. That hurt. But the wires will mate up with the switch panel wires just fine. I know there are other firewall access spots, but they are either very difficult to get to or are too far away for the cables to reach each other.

Edit for update 3: looking back at my pictures I noticed the firewall mounting plate has a corner trimmed off. I can't guarantee that the orientation I did was correct, but it went on fine. I suspect that trimmed corner should have been upper left of the power module. Either way, it went on with little fuss the way I did it.
 
Last edited:
Looks good. Mine just came today and hoping to get it installed in the next week or so.

Where did you end up mounting the switch panel?ImageUploadedByWAYALIFE1429037429.853878.jpg
 
I didnt get to it. The Honey-do list was looming and the wife was giving me the look:sigh:

I'm leaning towards putting it on the center console just in front of the change dish (I drive a manual). Removing the center console to mount it and run wires is feeling a little daunting still.
 
GOT IT TODAY!!!!!!!! This thing seems super-awesome, solid construction. Not sure where or how I'm going to mount it in my TJ but it's gonna be super cool
 
Anyone running their lockers through this system? I have an 05 Rubicon with air activated lockers and want to wire the switches and my bypass relay through the switchpro. Help please
 
This looks like an awesome product and a great alternative to the SPOD. When I add an ARB locker to the rear I will be getting one of these.

Also thanks for the write on install. Will come in handy in the future.
 
I'm really pleased I found this thread.

I live in the UK and drive a RHD Diesel. For the past 24 hours I've been planning how I'm going to fit a SPOD under the hood.

SPOD say it can't be done but I found some person on an Australian forum whose friends, cousin once made an install bracket for under the hood, and he might still have the plans on an old computer of his.

This seems a lot simpler and straightforward. It's probably a bit overkill as I've just ordered a light bar, some dually's and a CB, but Im going to order one now anyhow.

I have one really really stupid question though, the lights I've ordered are plug n' play so why is this better than say a Rugged Ridge A pillar switch mount?


Paul
 
Well the switch pro would allow for more accessories down the line, it's a cleaner install (in my opinion) and while I've never put in A pillar switches I'd bet the switch pro is easier to install. You will only have to come through the firewall once since all connections are made under the hood. And whatever switch wires come with your chosen accessory can pretty much be left in the box.

I did an ARB compressor a few weeks ago and all the wiring for the switches is unused. You wire into the power module under the hood and let it do the rest. I got it for that reason alone. Far simpler for someone like me who knows very little about the electrical stuff.

Thanks for the reply boardsurfer.

Do you have any pics of the control panel inside the Jeep?

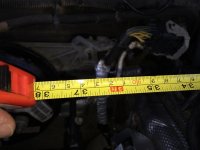
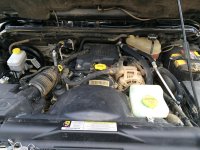
I have just sent some pics to Robert at Switch Pro as a RHD Diesel JK doesn't have much room at all. I spoke to Laura who explained a lot to me, however, the big issue is where can I fit this thing under the hood and what does it look like inside the Jeep. It's either got to go 3 ft away or perhaps on top of the battery on the clamp that holds it.

PaulIMG_0981.jpgIMG_0980.jpgIMG_0979.jpgIMG_0978.jpgIMG_0977.jpgIMG_0975.jpgIMG_0960.jpgIMG_0958.jpg
 
Here's where I mounted mine:
ImageUploadedByWAYALIFE1430677032.832743.jpg

Since you have a Jk, I would imagine the firewall studs are the same on the main wiring loom... Just a guess though. But I see your battery is on the opposite side and I'm pretty certain the positive connection to the battery won't go that far.

You don't have to use the bracket either. The module bolts to the bracket, and the bracket to the firewall.
 
the lights I've ordered are plug n' play so why is this better than say a Rugged Ridge A pillar switch mount?


Paul

I have wired a couple of switch pods such as the A pillar one and the daystar one in front of the shift knob and under the ac controls. It gets to be a total pain every time you wire a set of lights or any accessory because you have to go through the process of running wires through your firewall and behind your dash so you have loads of zipties stacked up and lots of wires looped around. The SPOD or SwitchPod makes your life easier by only running the wires in the cab into a one time deal with a clean look and super smart brain under the hood with solenoids and fuses so that nothing will ever go seriously wrong.
 
Though our typical battery cable doesn't have enough length for Paul's RHD, we have assured him we would custom build one for him for ease of proper installation. Same goes for anyone else with the same issue. One huge advantage of our system is its compact power module, so we certainly don't want lack of space to be a reason someone isn't able to use our system!
 
Do I need an adapter harness to run my arb compressor with this unit? If I recall you need one to use it with an spod.

Adaptor is not necessary for the ARB, although I believe they have one to make things a little easier. Having it would make things a lot easier. Without it, you need to make some cuts to the ARB harness and then you end up with 5 wires and only need 2 of them so it can be a bit confusing. H8ROADS has the adaptor on his, you may want to PM him for specifics.
 
Top Bottom