The "Mid Life" buy thread

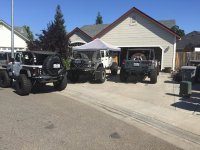
I would like to thank Jason(CrippledPetey) and Jenn(MagellenJenn) for opening their home and garage to me to get this done along with Ricky(2013Rubirick), Jill(Mrs2013Rubirick) and Rob(Panda) for stopping by and lending a hand. I couldn't have done it with out you. This was definitely a team effort. We all Cut, Drilled and Wrenched but Jason and Ricky really did most of the back breaking work and Rob was the savor on the last day with the thread repair.

I had a blast getting this done and learned so much :thumb: - True Friends Thank you :beer:

Thank you for coming up! I had a great time even though it was hotter than hell :cheesy: Sorry we couldn't finish it all but we will get the last part done and you will like it even more :thumb:

I would also like to thank everyone that came over to lend a hand. It was good to see Ricky even do some work :bleh: (he really helped out a lot :yup:.)

ImageUploadedByWAYALIFE1434380340.847433.jpg

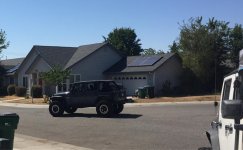
The First test drive!
ImageUploadedByWAYALIFE1434380386.156980.jpg
 
Our plan for the week was to install the following:
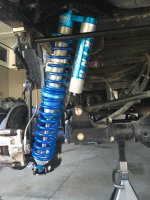
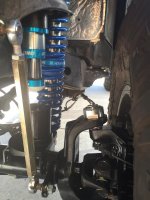
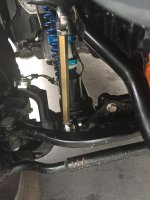
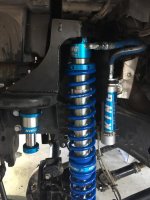
EVO Spec King Bolt on Coil-Overs
King Bump Stops
PR44 Housing
ProSteer Ball Joints
Ten Factory front axle shafts
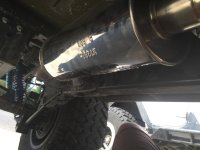
Dynomax Exhaust
EVO Tire Carrier

It was between 102-110 degrees the entire week. :eek:


Day 1
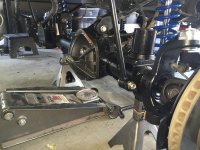
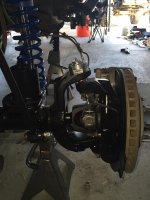
I arrived early afternoon and we got started around 3:00 - got her up on Jack Stands and pulled the Front Axle. after it was out we took it up to a friends shop to swap the internals and he was actually going to build it for us end to end. It turn out great - All new bearings, welded track bar bracket. Ten Factory Chromoly Axle Shafts with full circles and Pro Steer Ball Joints.

Back at Jasons we decided to keep working as it was cooler now so we through in the new exhaust and pulled the rear springs and got ready for the coil overs in the rear..

Day 2
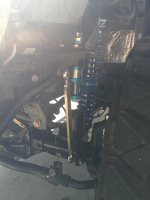
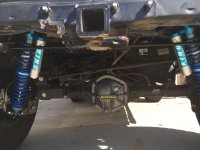
Time to cut and grind and make room for the Rock Stars - Key here is to make sure you have some good cutting tools and it is a pretty simple install depending on how beat up your existing LCA mounts are - Mine where lets say a little mis shaped :cheesy: (never been wheeled) so it took a little persuasion to get them on. The upper brackets are a joy but once you figure out where they go it's not to bad. The distractions mentioned removing the gas filler bracket bolt to clear the upper bracket - I removed mine but it is not required as the bolt would have cleared the bracket.

Later in the afternoon the axle was done so we drove up and picked that up - Brian painted the ends and everything - It looked awesome :thumb: Ricky and Jill showed up and Ricky ran relief for my tired old knees and jump under and helped Jason get the rear Coil Overs in.

Day 3
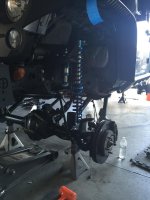
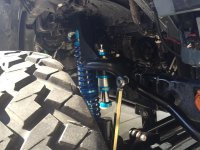
Today we started on the front C/0's Driver Tower is a piece of cake with minimal cutting of the plastic - The Passenger side is another story - there is a lot of cutting of the plastic and you need to cut into the battery box. We started with small chunks then finally just pulled the battery and went to town. If I was going to do it again I would pull the battery and the Battery Box first then install the tower then work on trimming the box to get it back in - I think this would be an easier way to go. After both Towers where drilled and in we cut the bump stop tube for the King Bumps - this needs to be straight so I grabbed the sawzall and cut them crooked and Jason just fixed them with the grinder - Done!

C/O's in and reservoirs mounted and Bump stops in all looking good :thumb: Time for the Axle - goes right in control arms bolted up, brakes back on, track bar in .......

Then comes the statement of "We will be test driving in no time"! :doh:

We drop the draglink in and can't get the bolt to start - no way no how - after cleaning the threads and trying a few bolts we realize that the end is mushroomed and messed up - not sure how this happen as we didn't even need to hit it to get it out.

We Call Panda and he has thread files so we call it a day and wait for his arrival. Plan is in the morning just fix the thread - bolt it up then away we go! leaving the rest of the day to do the tire carrier.

Day 4
I get up early and tie up some little items - get the battery back in and re tie wrap some of the lines and just double check some stuff waiting for Panda's arrival - While we wait we head over to the powder coater and get the tire carrier - came out awesome!

Panda Shows up and gets to work with the thread files - these where a bitch and took a long time but Finally the drag link bolt is on and good to go.

"We will be driving it soon!" is heard once again :thumb:

We grab the Tie-Rod and throw it in and what do you know both studs are mushroomed and the bolts won't start - even though the bolts where stored on the tie-rod and just taken off by hand :doh: So back to the files and a few hours have now passed and we get the Tie rod on!

"We will be driving it soon!" is heard once again

Now the steering stabilizer bracket on the tie-rod size hits the Diff cover - after a few head scratches and some discussion we re-drill the track bar bracket to move the steering stabilizer towards the passenger and now have plenty of room!

"We will be driving it soon! just bolt up the sway-bar links!"

Well as it turns out where the Senergy Trackbar bracket needed to go it won't allow you to use the sway bar tabs on the axle - no worries we will use the hole in the bracket for the sway-bar - only to discover we don't have the bracket to raise the hole on the drivers side to match and I had fixed length end links. - After lots of discussion we came up with a solution! We took the HD Links of of Jenns Jeep and used the adjustment in them to make up the difference! :rock: Thanks Jenn! (even though we didn't ask and just took them) ((your new ones will be there Tuesday)).

So All bolted up Tires on and away we go! first test drive - only issue was a crooked steering wheel which is what you would expect!

We did get it all done with the exception of the Tire Carrier. The plan for that was to have the Carrier powder coated (which came out great) and paint the skins myself to try and color match - I bought some Mopar touch up paint for the skins but after priming them and applying a few coats I realized this paint was crap and wasn't going to give me what I wanted. I spent a lot time applying many coats and even wet sanded a few times which made it better but it still sucked - so when we ran out of time it was an easy decision to not install this trip and send them out to the powder coater to have them try to color match.

Thanks again to everyone - couldn't have done it with out you (well maybe) but it would have taken we a month!:cheesy:

I didn't take many photos and they were all with my phone. but here are some random shots
2015-06-13 08.16.50.jpg

2015-06-13 08.17.04.jpg

2015-06-13 08.17.37.jpg

2015-06-13 08.46.43.jpg

2015-06-13 08.47.22.jpg

2015-06-13 08.47.35.jpg

2015-06-13 16.34.32.jpg

2015-06-13 16.34.53.jpg

2015-06-13 16.35.47.jpg

2015-06-13 16.36.02.jpg

2015-06-13 16.36.26.jpg

2015-06-13 16.47.12.jpg

2015-06-15 07.44.47.jpg

:beer::beer::beer:
 
Last edited:

10frank9

Web Wheeler
Looks great Brando! Your rig has definitely EVOlved.

What was the issue with the paint? Not turning out as expected, or was the color off?
 
Looks great Brando! Your rig has definitely EVOlved.

What was the issue with the paint? Not turning out as expected, or was the color off?


Thanks - The paint color was fine but the cans are these little 5oz cans and it seemed like the paint was bad, there was nothing to shake up and the ball in the can was loose from the get go and when you would spray it hardly any paint would come out and it wouldn't spray very far - you had to spray really close to the skin and then it was hard to get a even spray - It was just weird. I have rattle canned lots of things and i know I am not a expert but this stuff just sucked.
 

10frank9

Web Wheeler
Thanks - The paint color was fine but the cans are these little 5oz cans and it seemed like the paint was bad, there was nothing to shake up and the ball in the can was loose from the get go and when you would spray it hardly any paint would come out and it wouldn't spray very far - you had to spray really close to the skin and then it was hard to get a even spray - It was just weird. I have rattle canned lots of things and i know I am not a expert but this stuff just sucked.

Hmmm. That's discouraging, I was looking at adding a C Pillar in my cage and wanted to paint match them. I hope it was just a bad batch. I seem to remember Overlander having larger than 5 oz cans when he color matched his rings (orange).
 
Hmmm. That's discouraging, I was looking at adding a C Pillar in my cage and wanted to paint match them. I hope it was just a bad batch. I seem to remember Overlander having larger than 5 oz cans when he color matched his rings (orange).

The problem is my Color - I couldn't find it - other than Mopar Touch-Up and the funny thing is every Anvil Jeep is a little different - When I traded my painted top to a guy with the same year the color was a little off. there cans would probably work fine for just the c-pilar bar - It was really Hot so the conditions might have had something to do with it but with that being said I painted the inside of the skins with just Rustoleum flat black and they came out perfect.
 

10frank9

Web Wheeler
The problem is my Color - I couldn't find it - other than Mopar Touch-Up and the funny thing is every Anvil Jeep is a little different - When I traded my painted top to a guy with the same year the color was a little off. there cans would probably work fine for just the c-pilar bar - It was really Hot so the conditions might have had something to do with it but with that being said I painted the inside of the skins with just Rustoleum flat black and they came out perfect.

Cool. Well I will see if I can find a larger can of Billet Silver. Thanks Brando.
 

JKRicky

Member
Looks awesome Brandon! I think I'm going to order some EVO HD sway bar links today, those things look massive. How are you liking the ride on those coilovers?
 
How are you liking the ride on those coilovers?

Short answer is Awesome! :thumb:

Long Answer: There are 2 components here Ride and Handling - The ride is subjective but I feel it is a 50%+ improvement over the way it was and feel this is due to the 100% improvement with the handling due to the new axle housing and the added offset of pinion/castor. With my stock axle it was good and I never felt much driveline vibration but I know it was there because my side mirror would vibrate and make it blurry. And at high speeds my steering felt like I was in a Radio Flyer Wagon bombing a hill as a kid. But now I'm sitting at 3.5ish up pinion and 6.5ish castor (haven't really checked yet just ball park with angle gauge on front of pumpkin) and it is rock solid on the road at any speed and my side mirrors are solid and crystal clear. The coil overs help fill the holes and keep the Jeep very stable.

Plush rides / Shocks / Stock axle with LCA's = Great

PR44 Housing and the EVO Spec C/O's = Friggin Awesome!
 

JKRicky

Member
Awesome! I went from stock to coilovers so I had a huge noticeable difference. But this makes me even more excited to eventually throw on a PR44. The coilovers def soak up the bumps very well. It's funny because every time I know I'm gonna hit a bump I still "brace" for it but then fly over it super smooth lol so I'm still getting used to them.

Your rig looks great though buddy. Enjoy!
 

big dr

New member
Very nice weekend of upgrading :thumb: super stoked for you. Lets wheel mid week soon. I'm going through withdrawls:yup:
 

Irish JK

Caught the Bug
The problem is my Color - I couldn't find it - other than Mopar Touch-Up and the funny thing is every Anvil Jeep is a little different - When I traded my painted top to a guy with the same year the color was a little off. there cans would probably work fine for just the c-pilar bar - It was really Hot so the conditions might have had something to do with it but with that being said I painted the inside of the skins with just Rustoleum flat black and they came out perfect.

FYI, from what I can tell and have heard, there are six shades of the mopar anvil paint.
 

Panda

New member
Everything came out great Brandon, looks awesome! Wish I could've been there with you guys all week but looking forward to the next build party :thumb:
 
Everything came out great Brandon, looks awesome! Wish I could've been there with you guys all week but looking forward to the next build party :thumb:

The next one should either be Jills or a combo of Brandon's and Jenn's skins :yup:

Mrs.Badass let me know when we are installing and Jenn and I will be there :thumb:
 
Top Bottom