What was done to your rig this week?

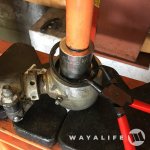
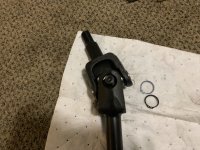
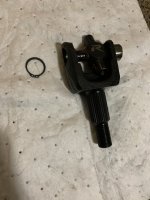
I did a rebuild on one of my control arm joints that was making some racket. Getting is apart is easy.. snap ring, press it out, no problem. Cleaned out the inside of the johnny joint and the center piece and tried to get it all back together. Huge hassle.

Drop the new retaining ring in, the new cup, then the center ball section and the other cup on top. Not too bad after I found the right combination of sockets and spacers to fit in the vise and squeeze it all together. Then comes the final snap ring. Holy hell. I think I started with my axle nut socket on the back side and the pitman arm socket on the front to compress the whole thing so the snap ring can go in its place. Nope, too big, wont fit in the vise. Swap out the back side socket for some old retainer rings from previous rebuilds, cram it all back in the vise and it fits.. barely. Except now the front socket Im using to compress the cups is too wide. No room for the snap ring. Take it all apart and dig for the perfect socket to use. Has to be wide enough to press the retainer ring, but narrow enough to leave room for the snap ring. Finally come up with a 1 1/8 impact socket that looks to fit just right.

Cram it all back in the vise and squeeze the shit out of it. Aaaand the snap ring pliers broke. 15 minutes of cussing and a trip to the store later and I got the ring in.

Only 13 more to go! 😫
Johnny Joint Assembly / Disassembly Tool, worth the price (y)
Summit racing carries it if you have a store near you.
 
I think the shop press is a better investment. I've used this tool and found the shop press to be quicker and it is more versatile.
Yup, using a shop press, you can work vertically and let gravity hold things in place and the press arbors will do the job of a second socket. Everything can be done a lot faster and easier and with just one socket.
IMG_5813.jpg
 
Yup, using a shop press, you can work vertically and let gravity hold things in place and the press arbors will do the job of a second socket. Everything can be done a lot faster and easier and with just one socket.
View attachment 390076
Well that settles that. Trying to hold my ridiculous contraption in one hand (spacers, socket, joint, etc) and snug up the vise in the other was an exercise in frustration, For $170 I'll make room in the garage lol.
 
Well that settles that. Trying to hold my ridiculous contraption in one hand (spacers, socket, joint, etc) and snug up the vise in the other was an exercise in frustration, For $170 I'll make room in the garage lol.
LOL - trust me, you'll be kicking yourself for not making the investment sooner 😁
 
I washed my Jeep today! I did not get underneath with a Q-Tip (like Eddie does with Moby) to make sure that the bottom is totally clean but at least it is presentable for the moment. Maybe next month I will try the Q-Tips.
 
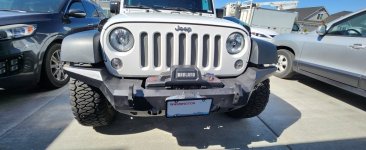
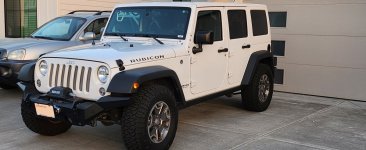
Got my winch put on. I am working with a friend who has access to a CNC Mill. We are going to mill out some aluminum blocks to allow the license plate to sit vertically and place the license plate below the fairlead as I don't really like how the license plate currently is mounted.
 

Attachments

  • 20230603_160703.jpg
    20230603_160703.jpg
    129.6 KB · Views: 11
  • 20230603_202709.jpg
    20230603_202709.jpg
    119.7 KB · Views: 11
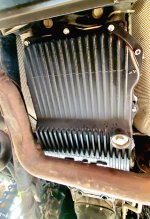
took off the EVO ProTek oil/transmission pan skid to service the transmission, the shift points have been feeling off with the hotter days.

Since I knew I would need to remove the pan, I decided to install a PPE pan for the extra capacity and hopefully cooler temps, I feel 203* transmission temperature is too high.

Forgot it was kind of a PIA to remove the ProTek skid since the nuts are not welded on so I removed it assembled at the engine mount bolts.

Had to remove the exhaust flange bolts to install the new pan, 3 of 4 came out easily, the 4th broke as soon as I put some leverage on it :mad:

After an hour of spraying the broken stud with PB Blaster and tapping a 1/4-inch splined socket on it, still would not budge. Then my brain kicked in... I got a can of compressed air, held it upside down and focused the spray on the broken bolt, side closest to the nut, for a good 2 minutes, put the 1/4-inch socket on the stud and it came out like it was never rusted on. (y)

After this, the pan went on easily, the fill process was bleh, but overall process was easy enough.

I never throw bolts away, the stock tire carrier 13mm bolt was the same size needed to replace the exhaust flange bolt.

Had I not spent so much time on the broken bolt, removing the skid and looking for tools it's about a 1-hour job for a fat guy on the ground.

I did not install the ProTek skid, I need to find an easier transmission skid to install; the stock skid will not fit with the long arm suspension.

PPE_TransPan.jpg
 
I really like those. Interested to hear how they take a beating.
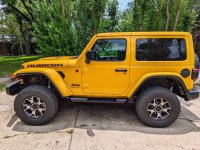
It has been reported that the JLU version does get deformed by falling on rocks. This one is shorter, so there is hope.

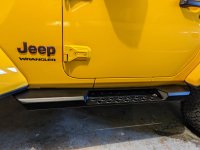
Most significantly, my wife is not even 5' tall and she has some arthritis now so she was barely making it in, and someday she might be injured. Adding steps is my gateway to being able to change to 35" tires.
My wife and kids use the plastic Mopar side steps on mine all the time. If I go to take it off road I'll have to remove them and put in the factory rock rails. I like the idea of something like this in the future to solve both issues.
 
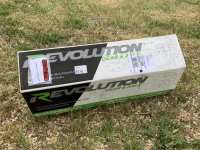
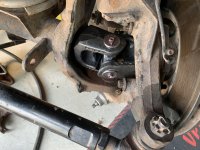
Assembled the Revolution chromoly axle shafts I ordered
6845B64B-EA23-4FEB-B8C3-E7C4DE172EB8.jpeg
D96D4F4C-3C22-45C4-B29E-AE91E148C0DE.jpeg

PRO TIP- Place the full circle clips (snap rings) on the u joint cross as you set the cross in the ears and BEFORE pressing the caps in place. The u joint will have to be pressed out if you forget this step.
9259D66B-9A1D-48E4-A251-69E2152B65D5.jpeg

Axle shafts installed
1320088B-7CDF-4C14-A630-83D07BB592E5.jpeg

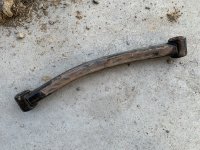
While I was at it, I replaced the lower front control arms. @duktrx was kind enough to send me a like new set for the cost of shipping.

Here’s the bent control arm
0AA6D2DC-DC64-45A6-88F4-180B559DA61E.jpeg

The Jeep steers MUCH better now! Thanks duktrx!
 
Top Bottom