JAGS
Hooked
This isn’t the toughest project out there. I mean, even a JAGS could do it. I had posted some info about this in my ENVY thread. Received some good feedback and had taken pictures along the way. Since I likely won’t have very opportunities to do a write up, figured I’d take a stab so others can see more pics and maybe that will help if you want to build your own.
My concept: Based on other decks and enclosures I’ve seen in mass production and other custom ones like MTG and Sharkey have built.
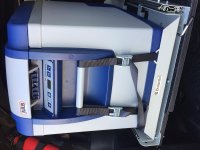
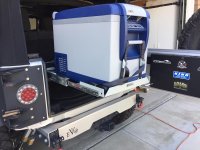
My goal: Maximize storage space under the deck. As a sports coach, I wanted to be able to store things like chairs and soccer balls with no problem. Make it easy to remove the entire deck if need be. For offroading trips, want it to secure things like tools and spare parts (axle/drive shafts). Have it be able to hold my new ARB 50qt fridge and slide on top.
Materials:
Tape Measure
Masking Tape
Box cutter/exacto knife
staple gun
protractor
hammer/nails
wood strips (I used free paint stirrers)
4 ft - 2 x 1/2 inch cheap lumber
cardboard
Jigsaw
Circular Saw
5-6 5inch L brackets
2-4 4inch L brackets
2 5 7/8 x 5 7/8 heavy duty roofing L Brackets
Smaller/other brackets as needed
9/16 metal drill bit
4-6 Half inch hex head nuts/bolts/washers
4 3/8 inch hex head nuts/bolts/washers
Wood screws varying lengths
I sheet ¾ plywood
10 x 2 (4ft)
Paint – 1 can primer, 2 BK paint, 1 plastidip
Outdoor carpet
Carpet adhesive
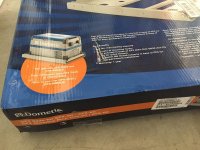
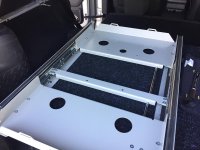
Dometic fridge slide
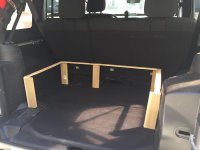
Started by creating a template for the top. My general goal was to have approx 9” inches of clearance under the deck. I knew by testing that height, the fridge would fit (close) and I could get chairs and soccer balls to fit. Trimmed out the wood to 8 3/4” and used the stirrer sticks and some nails to keep things together. Then used cardboard and the protractor to mirror the lines of the trunk. A bit harder since I had a 2012 with sub. Secured cardboard to sticks using staple gun. Left about ½ clearance all the way around.
I knew from pre-measuring, that the max dimensions of the deck would be 48 x 31. So I had HD trim my sheet to that rough size. The sheet yielded two tops and enough trim to use elsewhere.
Transferred the template to the rough cut top and traced. Then used a jigsaw to cut it to the markings.
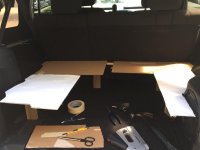
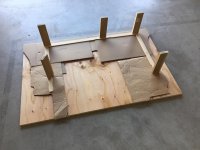
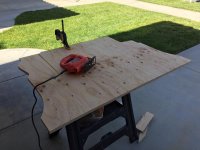
Here is pic of the top trimmed and setting on top of the template for a rough fit.
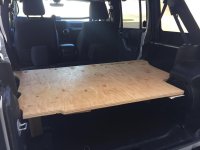
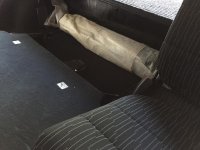
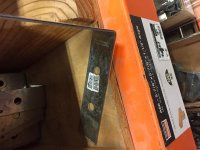
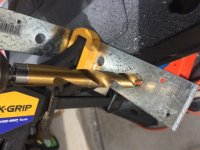
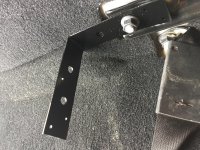
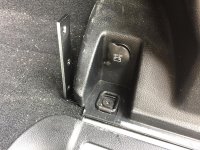
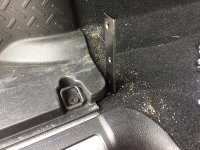
Initially I thought I would use just the trunk tie down bolts and 4” and 5” L brackets. It worked, but I was not happy with the strength I was getting. So back the hardware with a new idea. Picked up two of the larger construction grade L brackets and planned to use the rear seat bolts to secure. But the holes in the brackets were just slightly too small. So I drilled the holes big enough. The brackets fit perfectly and blended in well once painted. I used two 5” L in the mid section and painted those black as well.
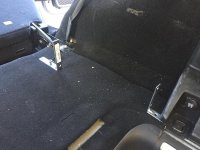
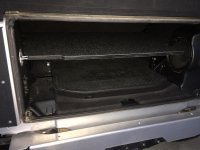
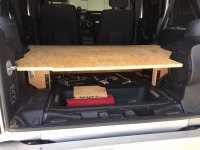
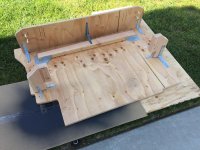
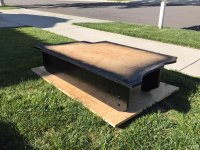
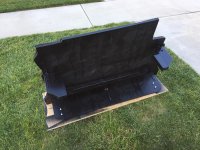
At this point I used some of the extra plywood and the 10 x 2 to make the front panel and what would be my two support legs and trimmed as I wanted and then did another test fit. After the test fit I marked off underneath where the supports were then flipped everything over and basically added as many L brackets underneath as I could. Wanted to help distribute the weight of the fridge or anything on top of the deck. I also added what I will call a streamer across the rear section using a ripped piece of the 10 x 2 drilled wood screws from the top down. Did this to prevent/limit any bowing of the top. You can’t see it too much, but there is an overhang on the other side and I used smaller L brackets on that side as well.
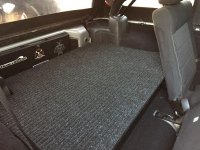
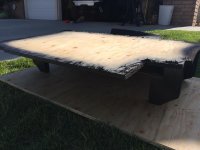
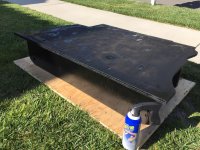
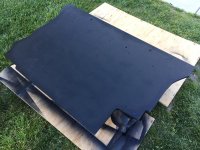
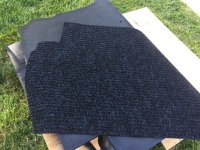
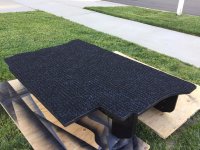
Then it was on to primer and paint. I decided to use plastidip on the top to add a little more weather protection to the plywood. At HD I found some outdoor carpet that was already cut to 48 x 36. This particular carpet was variegated in color. Use whatever you want or can find so long as it is outdoor grade (my recommendation). Trimmed the carpet, added adhesive. I used loctite polyurethane construction adhesive that would work on many surfaces and was rated indoor/outdoor.
My concept: Based on other decks and enclosures I’ve seen in mass production and other custom ones like MTG and Sharkey have built.
My goal: Maximize storage space under the deck. As a sports coach, I wanted to be able to store things like chairs and soccer balls with no problem. Make it easy to remove the entire deck if need be. For offroading trips, want it to secure things like tools and spare parts (axle/drive shafts). Have it be able to hold my new ARB 50qt fridge and slide on top.
Materials:
Tape Measure
Masking Tape
Box cutter/exacto knife
staple gun
protractor
hammer/nails
wood strips (I used free paint stirrers)
4 ft - 2 x 1/2 inch cheap lumber
cardboard
Jigsaw
Circular Saw
5-6 5inch L brackets
2-4 4inch L brackets
2 5 7/8 x 5 7/8 heavy duty roofing L Brackets
Smaller/other brackets as needed
9/16 metal drill bit
4-6 Half inch hex head nuts/bolts/washers
4 3/8 inch hex head nuts/bolts/washers
Wood screws varying lengths
I sheet ¾ plywood
10 x 2 (4ft)
Paint – 1 can primer, 2 BK paint, 1 plastidip
Outdoor carpet
Carpet adhesive
Dometic fridge slide
Started by creating a template for the top. My general goal was to have approx 9” inches of clearance under the deck. I knew by testing that height, the fridge would fit (close) and I could get chairs and soccer balls to fit. Trimmed out the wood to 8 3/4” and used the stirrer sticks and some nails to keep things together. Then used cardboard and the protractor to mirror the lines of the trunk. A bit harder since I had a 2012 with sub. Secured cardboard to sticks using staple gun. Left about ½ clearance all the way around.
I knew from pre-measuring, that the max dimensions of the deck would be 48 x 31. So I had HD trim my sheet to that rough size. The sheet yielded two tops and enough trim to use elsewhere.
Transferred the template to the rough cut top and traced. Then used a jigsaw to cut it to the markings.


Here is pic of the top trimmed and setting on top of the template for a rough fit.

Initially I thought I would use just the trunk tie down bolts and 4” and 5” L brackets. It worked, but I was not happy with the strength I was getting. So back the hardware with a new idea. Picked up two of the larger construction grade L brackets and planned to use the rear seat bolts to secure. But the holes in the brackets were just slightly too small. So I drilled the holes big enough. The brackets fit perfectly and blended in well once painted. I used two 5” L in the mid section and painted those black as well.


At this point I used some of the extra plywood and the 10 x 2 to make the front panel and what would be my two support legs and trimmed as I wanted and then did another test fit. After the test fit I marked off underneath where the supports were then flipped everything over and basically added as many L brackets underneath as I could. Wanted to help distribute the weight of the fridge or anything on top of the deck. I also added what I will call a streamer across the rear section using a ripped piece of the 10 x 2 drilled wood screws from the top down. Did this to prevent/limit any bowing of the top. You can’t see it too much, but there is an overhang on the other side and I used smaller L brackets on that side as well.


Then it was on to primer and paint. I decided to use plastidip on the top to add a little more weather protection to the plywood. At HD I found some outdoor carpet that was already cut to 48 x 36. This particular carpet was variegated in color. Use whatever you want or can find so long as it is outdoor grade (my recommendation). Trimmed the carpet, added adhesive. I used loctite polyurethane construction adhesive that would work on many surfaces and was rated indoor/outdoor.


