Even before Cindy and I decided to bring Jane home with us, I noticed that she had an odd lean or maybe I should say, a sag on the passenger side but only on the rear corner. At the time, I assumed that her frame was just twisted as that is something you do see on intermediate CJ-5, especially being that they have an open frame. However, after giving things a closer look, I started to think that maybe her problem was suspension related and before I spent too much time on her frame, I decided it might be better to just change out her springs and shackles to see if that'd help things out. The only real question was, what springs should I get? While she looked totally stock, she did have a transfer case drop installed and maybe enough to be running as much as a 2.5" lift. Needless to say, that's what I decided to go with and as luck would have it, I was right.
In this short write-up, you'll get to see just how easy it is to swap out a set of leaf springs on an intermediate CJ-5 or in my case, install a 2.5" Rancho lift kit complete with RS9000 shocks and a set of new Rugged Ridge HD Shackles, just for good measure.
What you will need
• Rancho 2.5" Suspension Lift Kit for 72-75 Jeep - Part #07KIT
• Rancho RS9000 Shock Absorbers 22.25" / 14" eye to eye
• Rugged Ridge Shackle Kit Part #1-805BL
• 1/2, 5/8, 11/16, 3/4, 13/16" Socket & Wrench
• Ratchet
• Torque Wrench
• Drill
• 1/2" Drill Bit or Unibit
• Floor Jack
• (4) Jack Stands
• Bench Vice
• Penetrating Oil
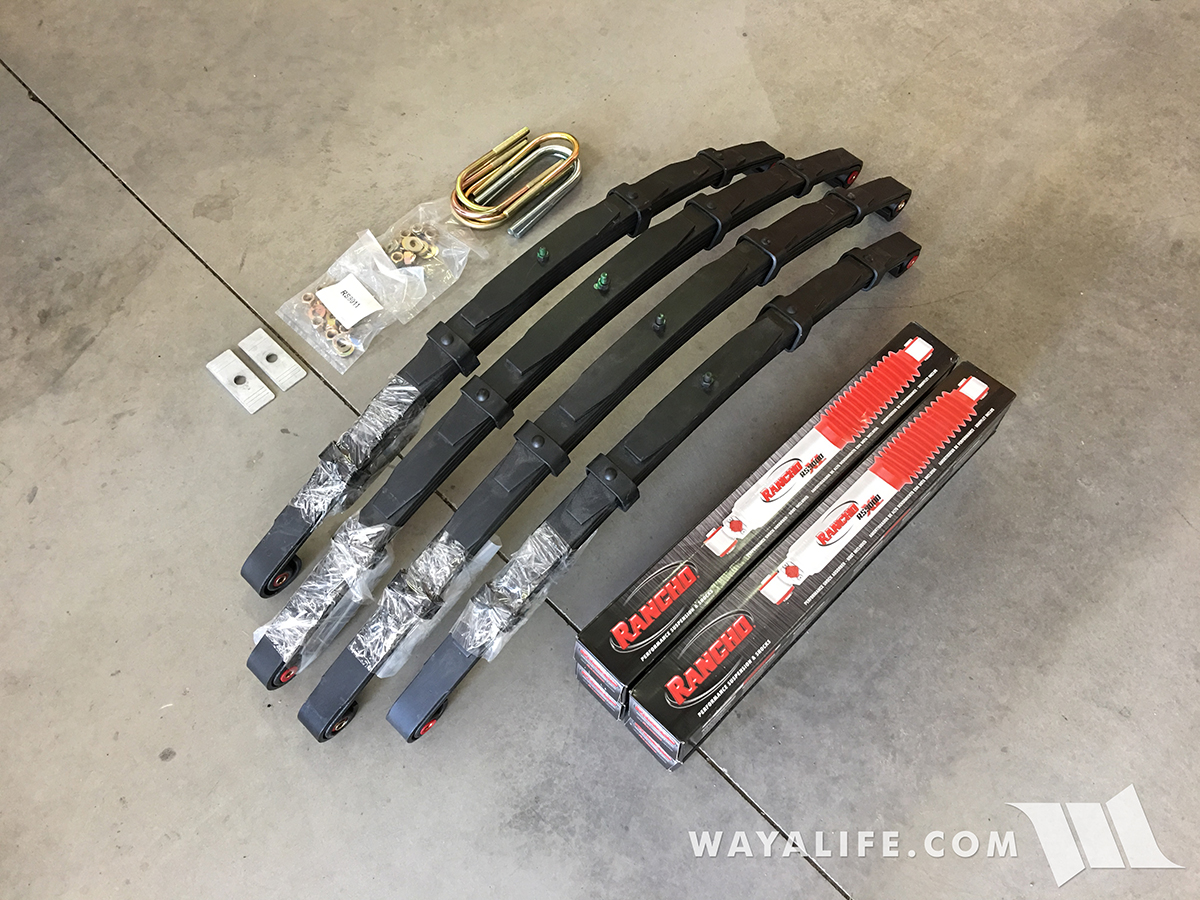
Here's a shot of the Rancho 2.5" leaf spring lift kit along with a complete set of Rancho RS9000 shocks. As you can see, the kit comes with new hardware including HD u-bolts and shims.
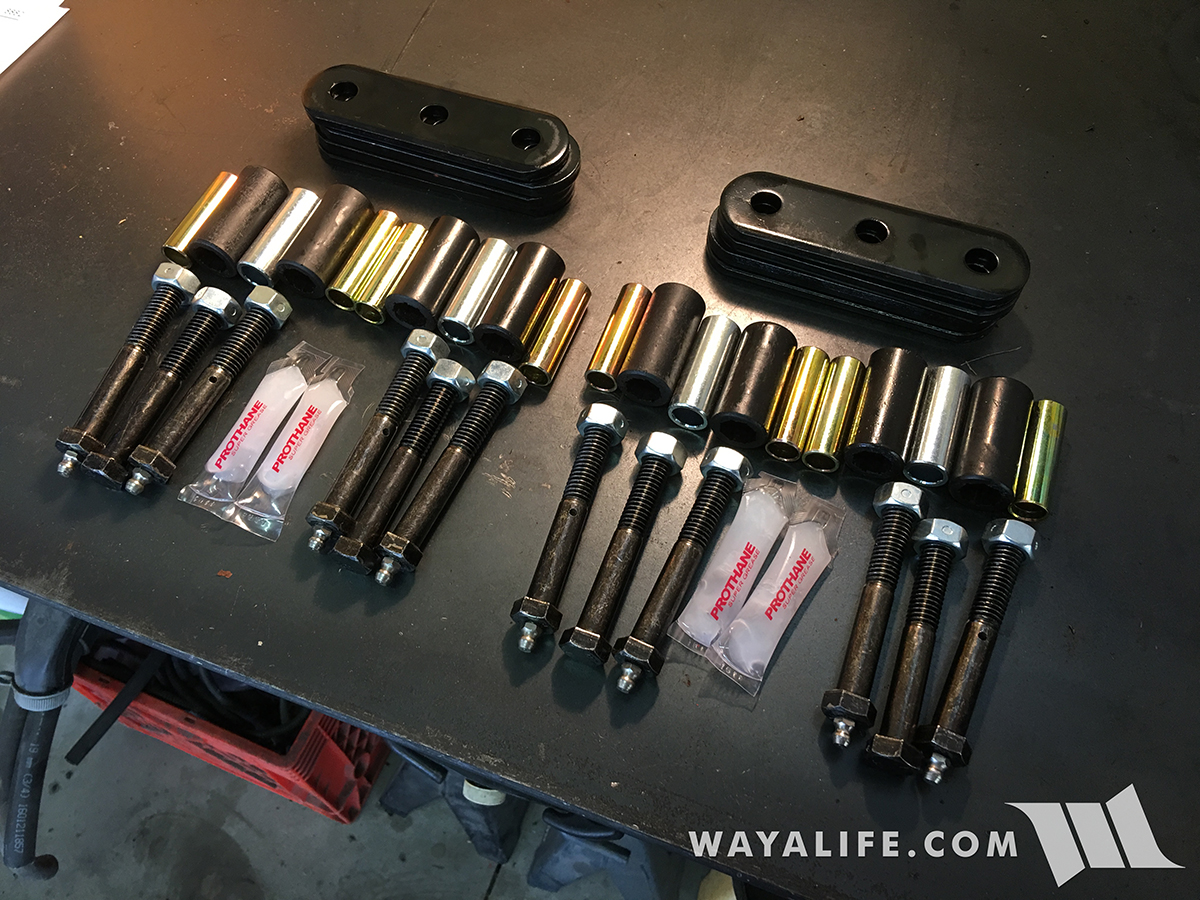
This is a shot of everything you get with a Rugged Ridge HD shackle kit.
Instructions
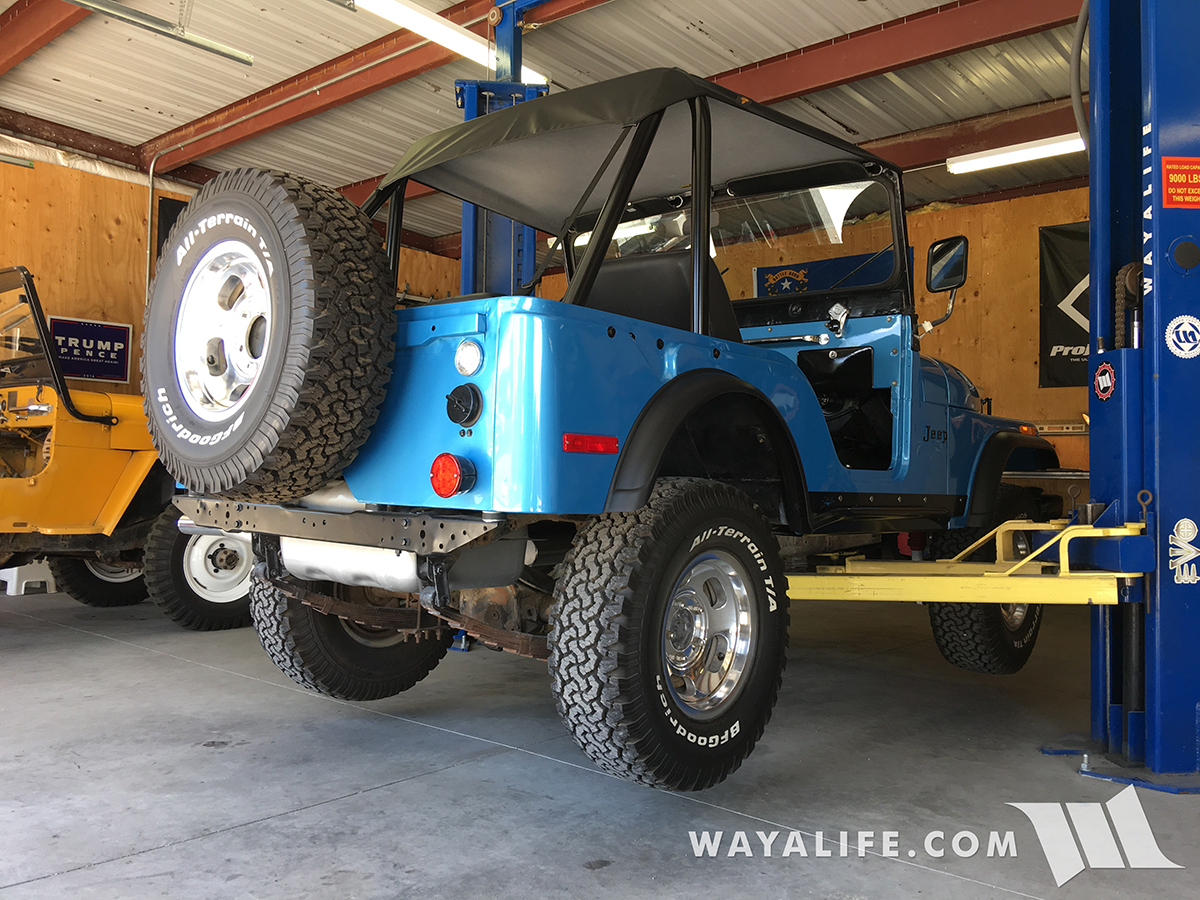
1. To get started, you want to use a floor jack to lift your CJ-5 from the axle high enough to get the tires off the ground and then set it back down on jack stands positioned underneath the frame rails. For my purposes, I have a lift and so I just racked Jane up.
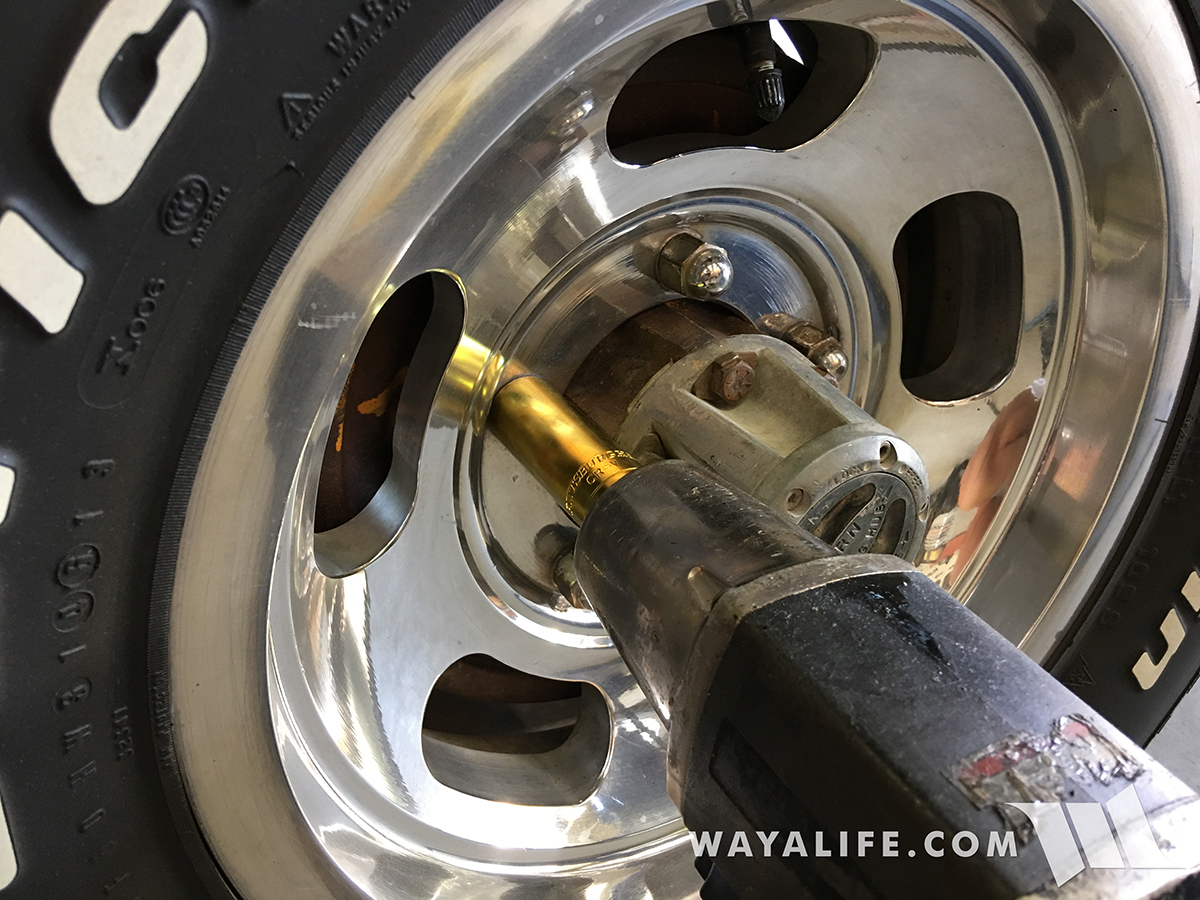
2. With your CJ-5 up on jack stands, you can now remove remove all 4 wheels. Jane came with lug nuts that required a 13/16" socket to remove them.
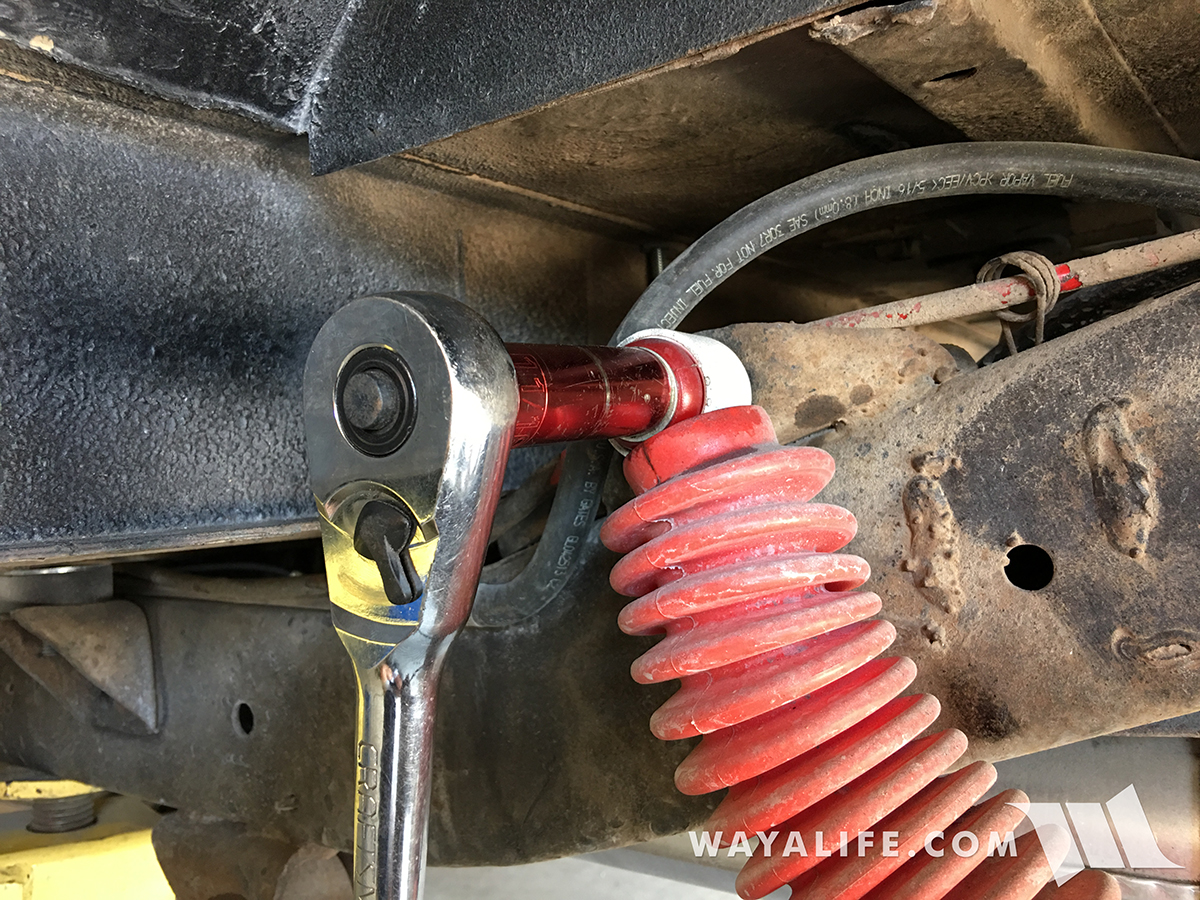
3. Using a 3/4" socket, remove the nuts securing your front shocks to the frame rails.
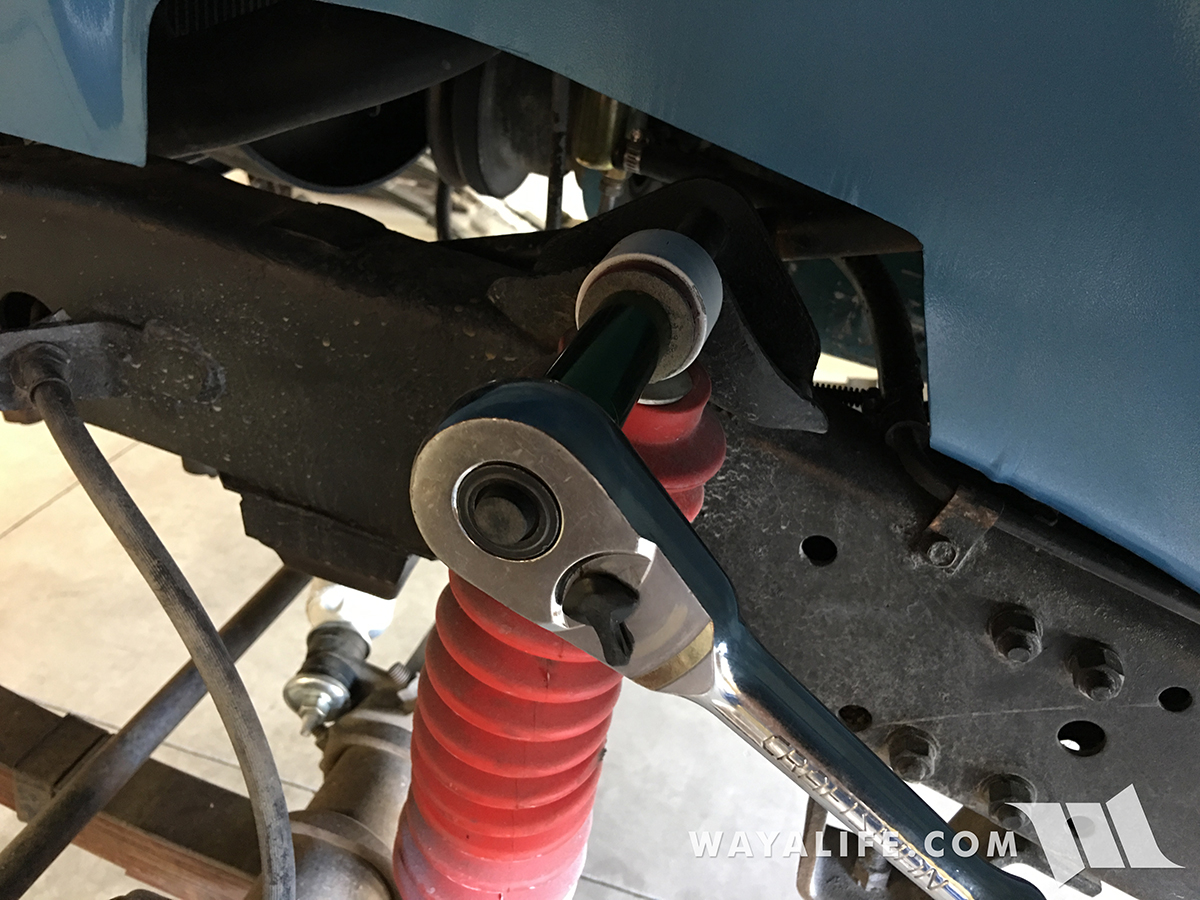
4. Again, using a 3/4" socket, remove the nut securing your front shocks to the base plate of your leaf springs.
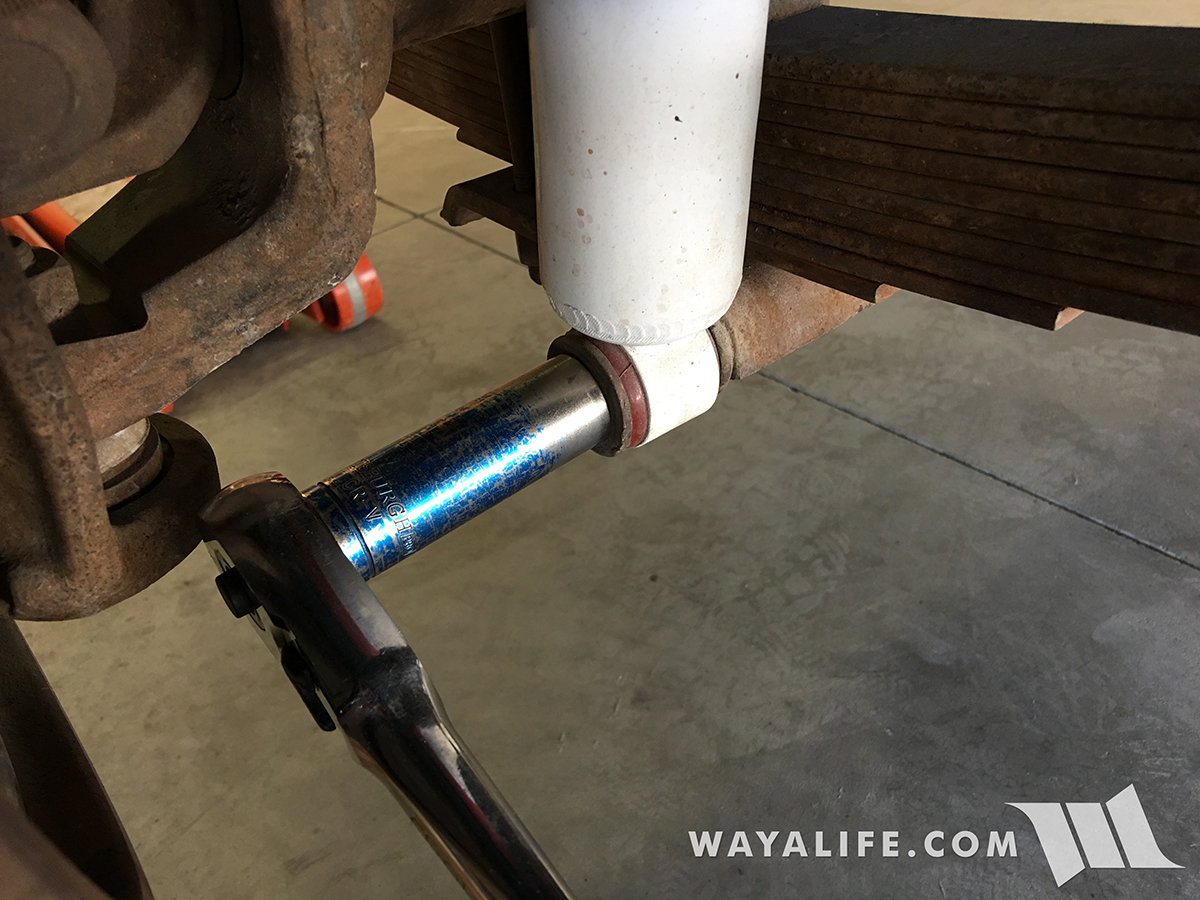
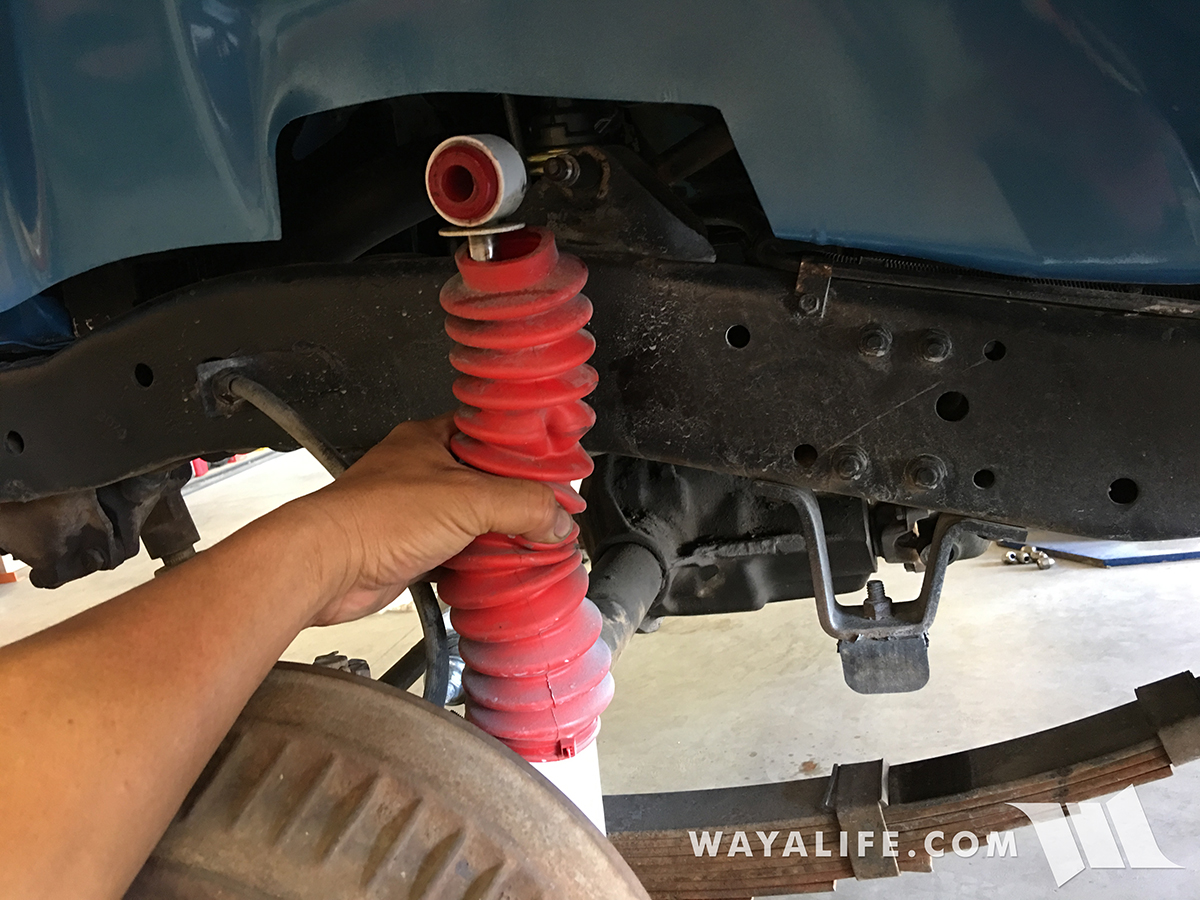
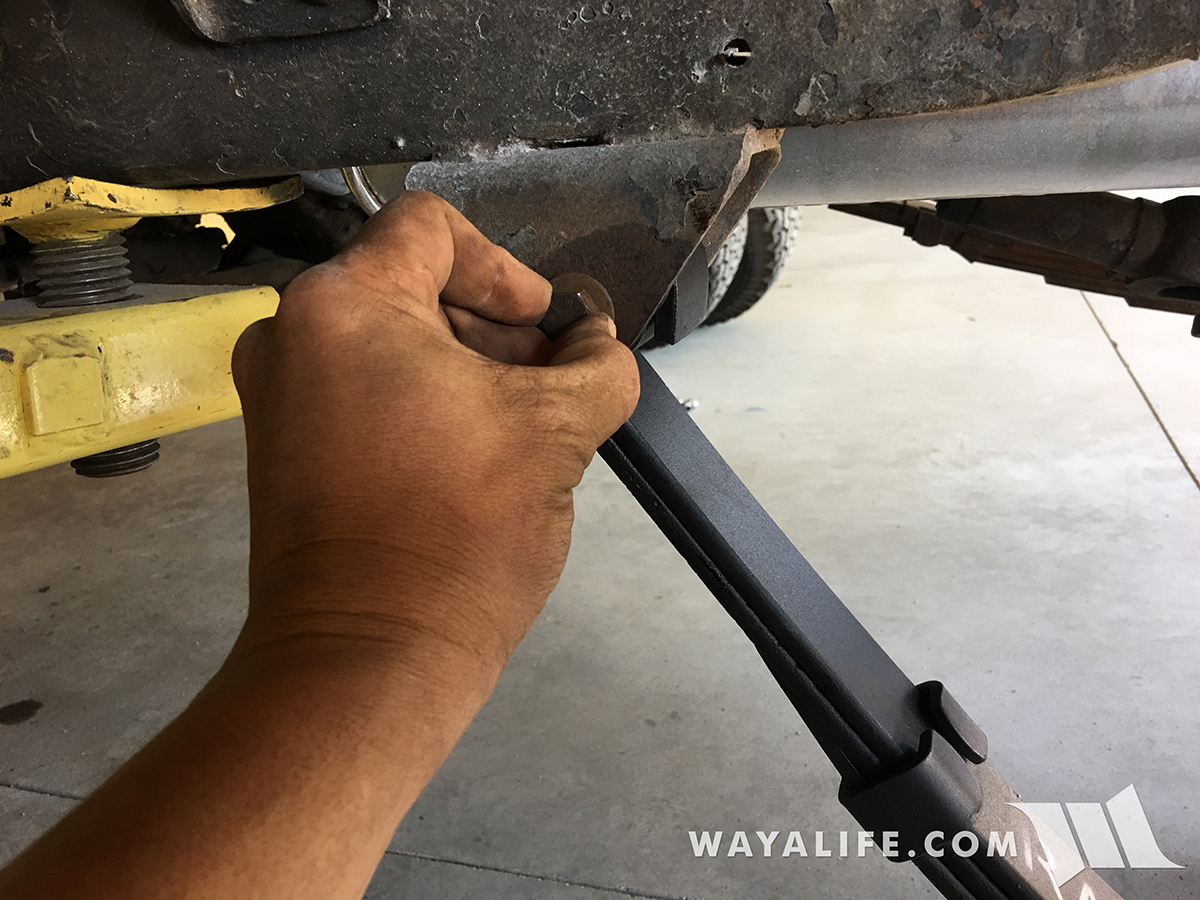
5. With the nuts removed, you can now pull the front shocks off your CJ-5
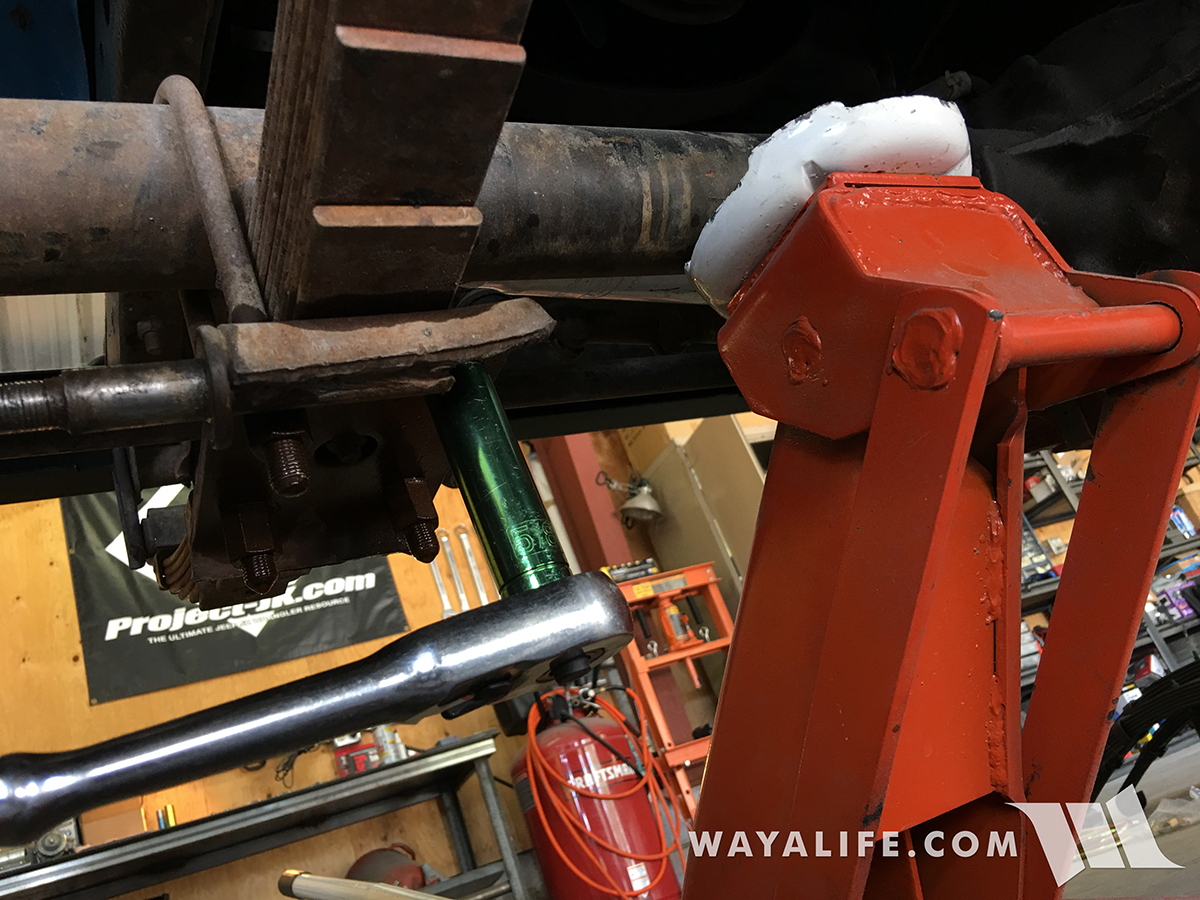
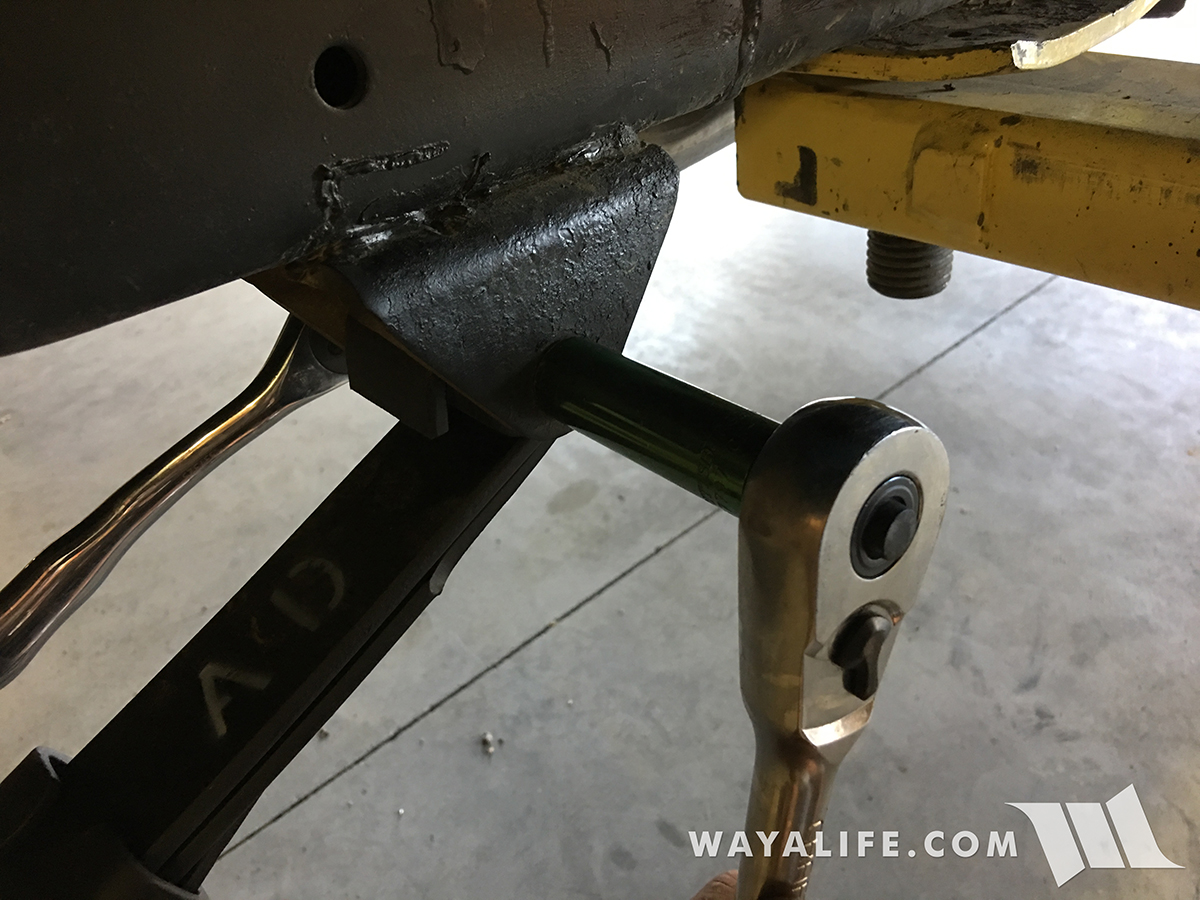
6. Starting on the driver side of your CJ-5, soak the u-bolt nuts on your front axle with some PB Blaster or other penetrating oil. Support the base of the axle using a floor jack and then, use a 5/8" socket to remove the u-bolt nuts.
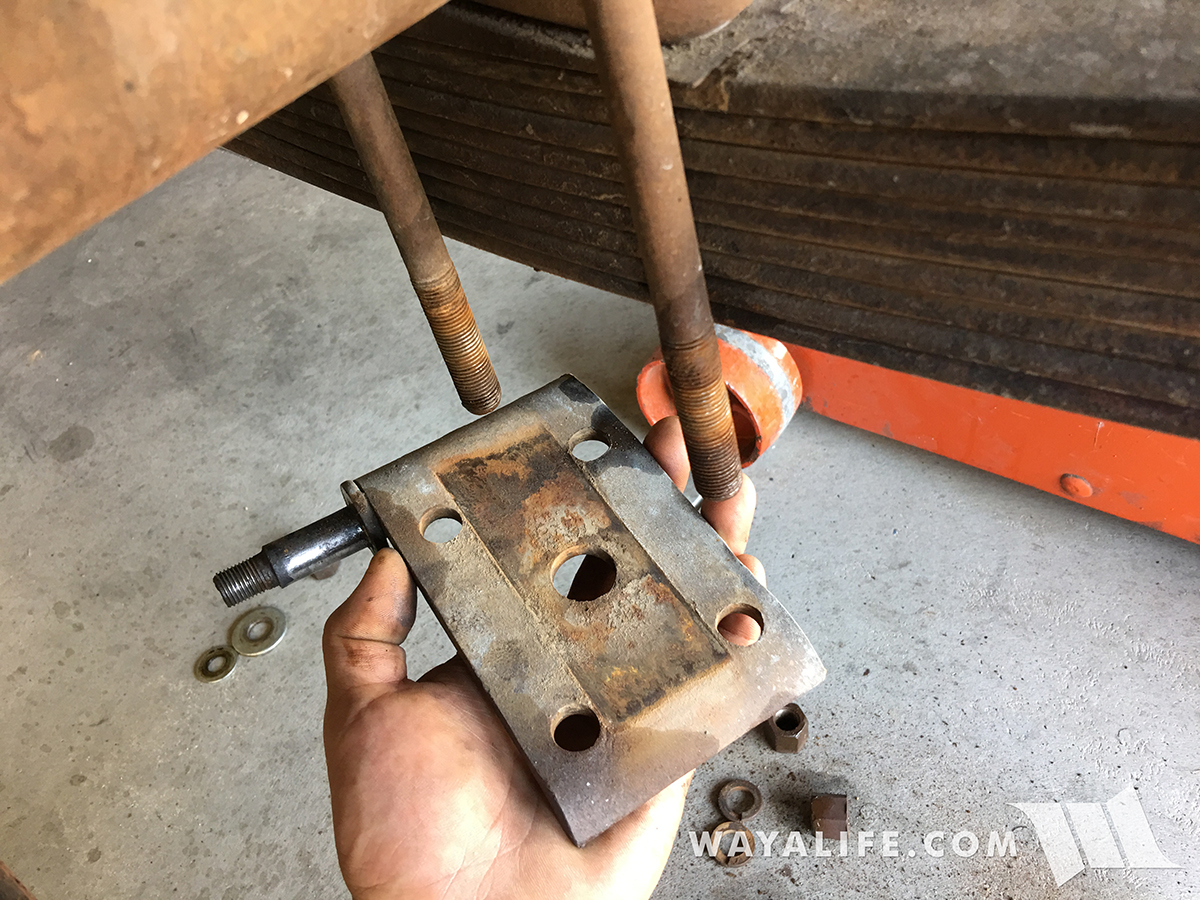
7. With the nuts removed, separate the base plate from the u-bolts.
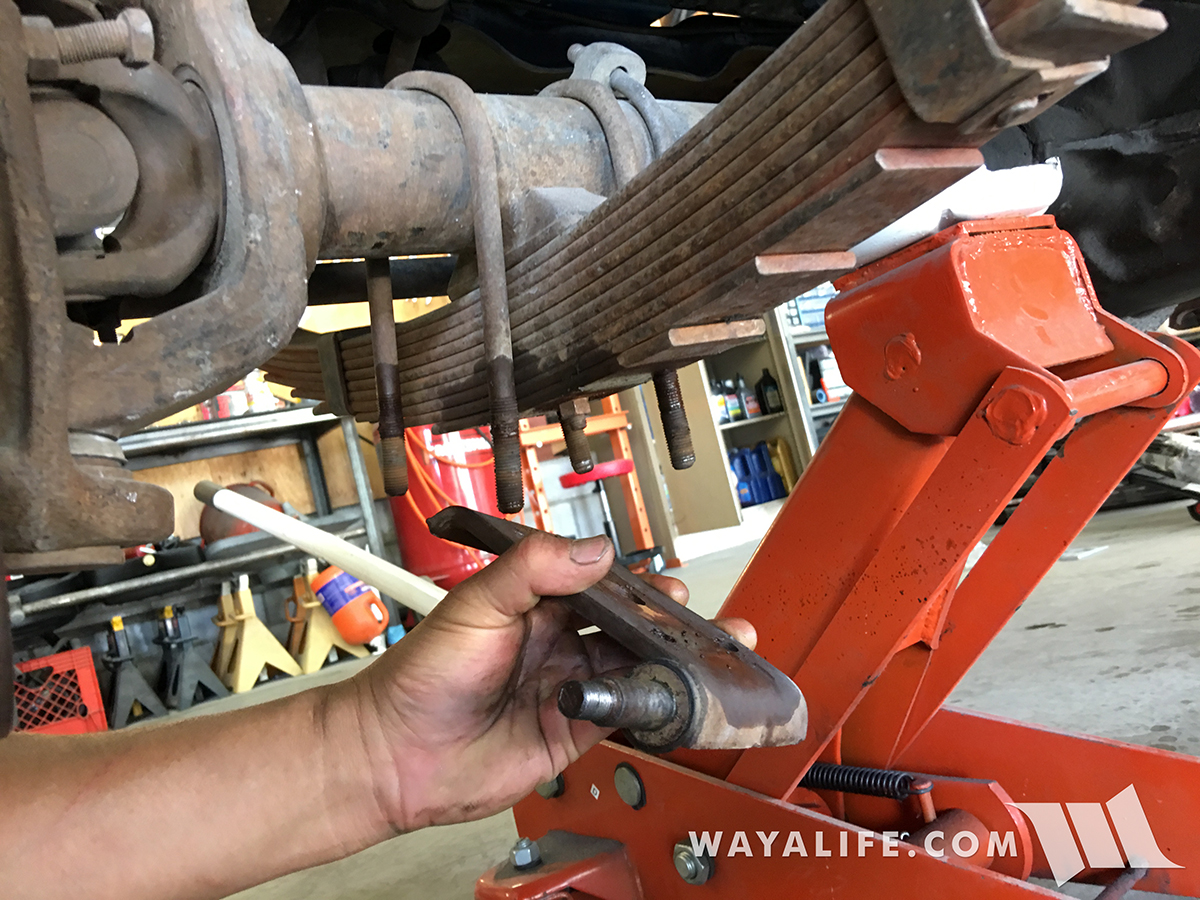
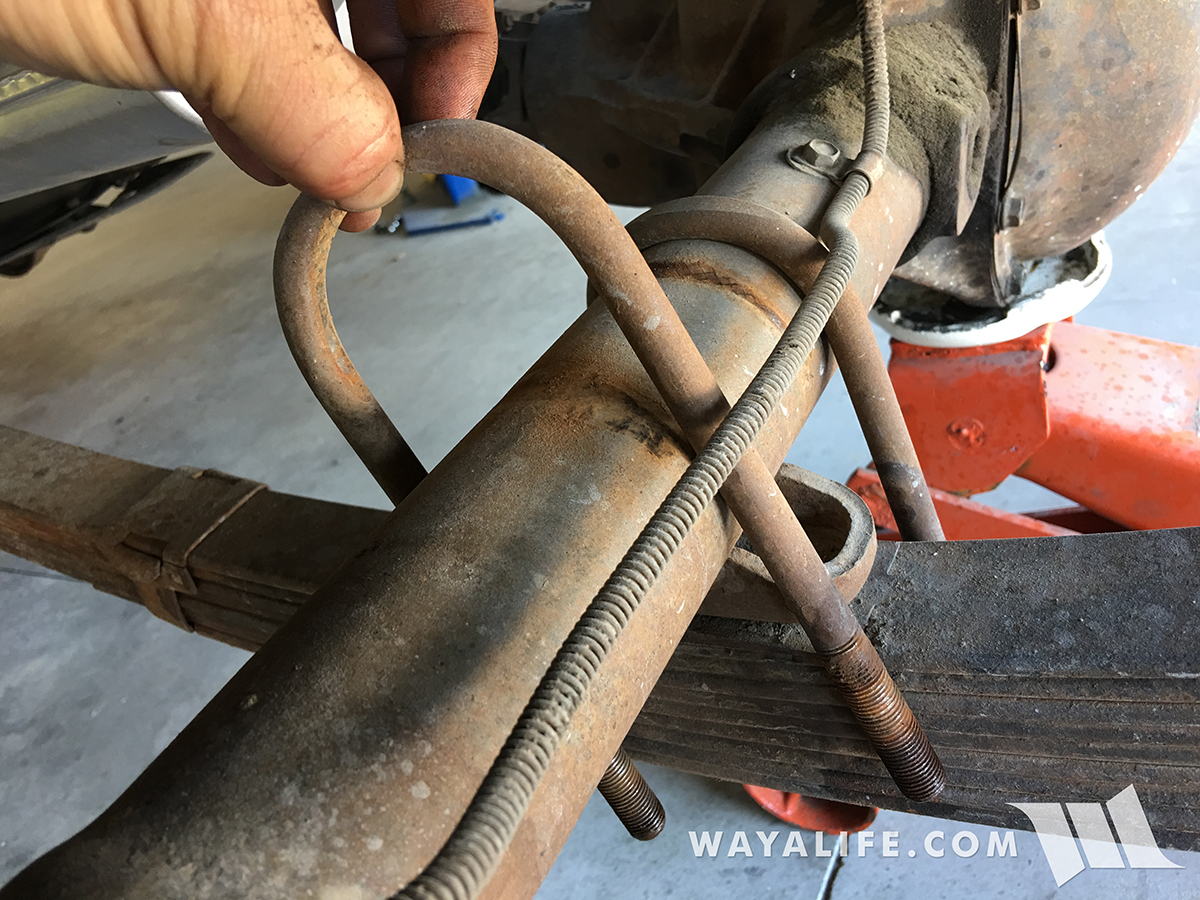
8. You can now remove the u-bolts from the axle.

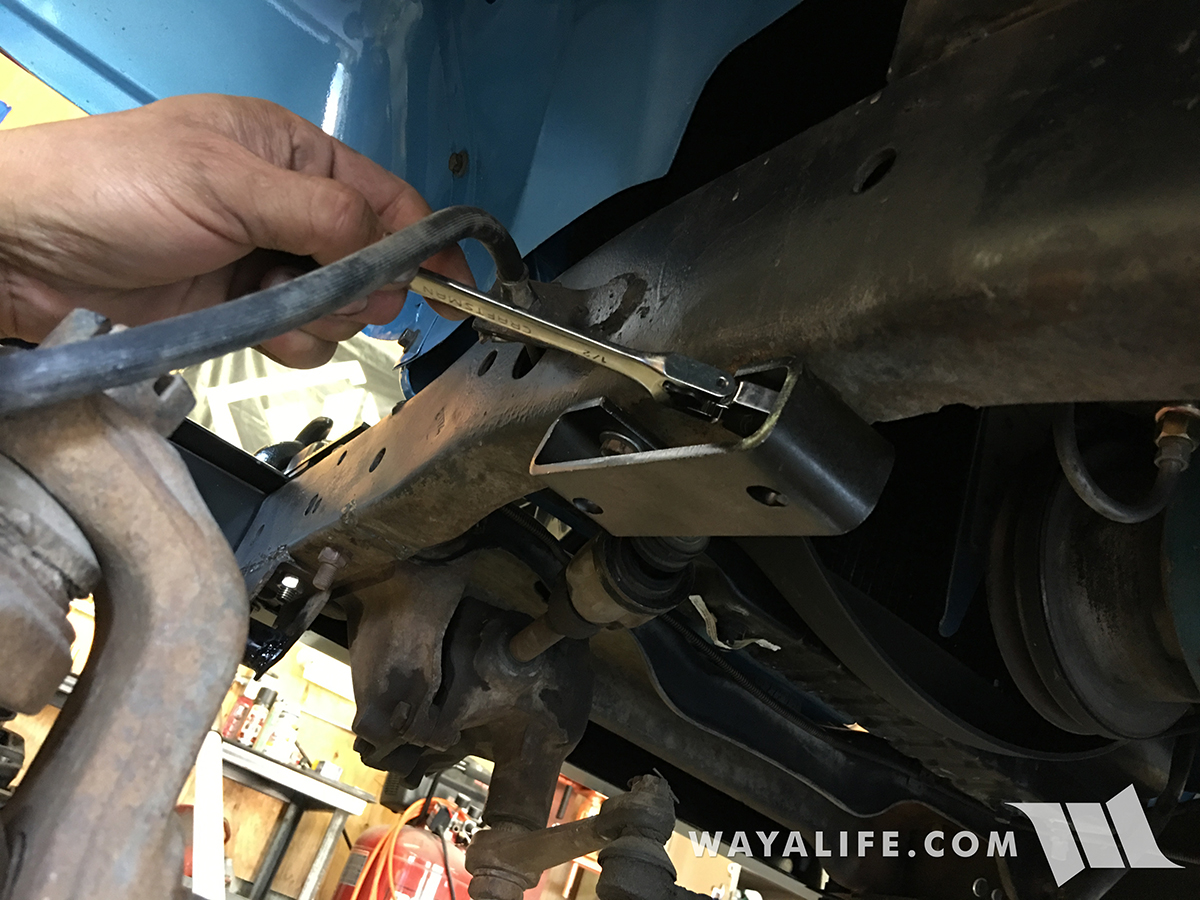
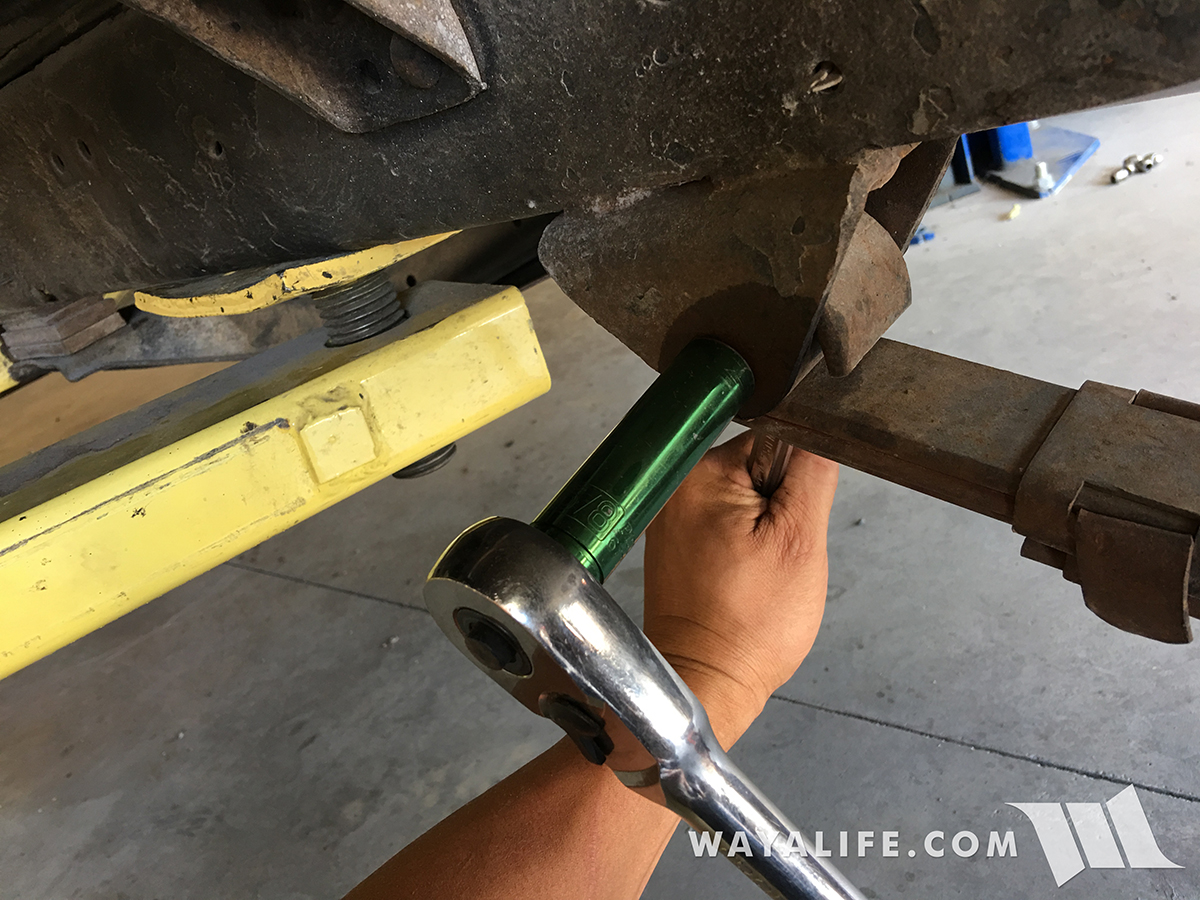
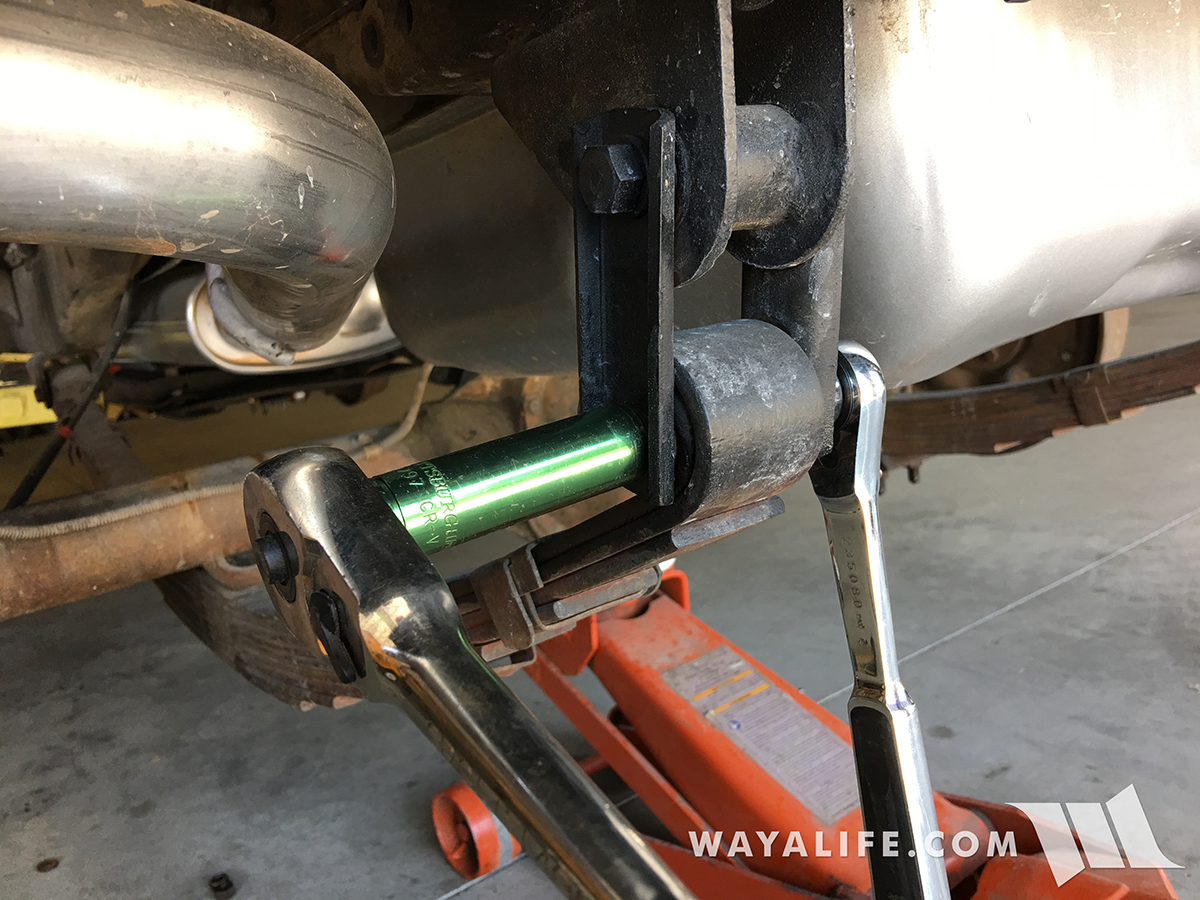
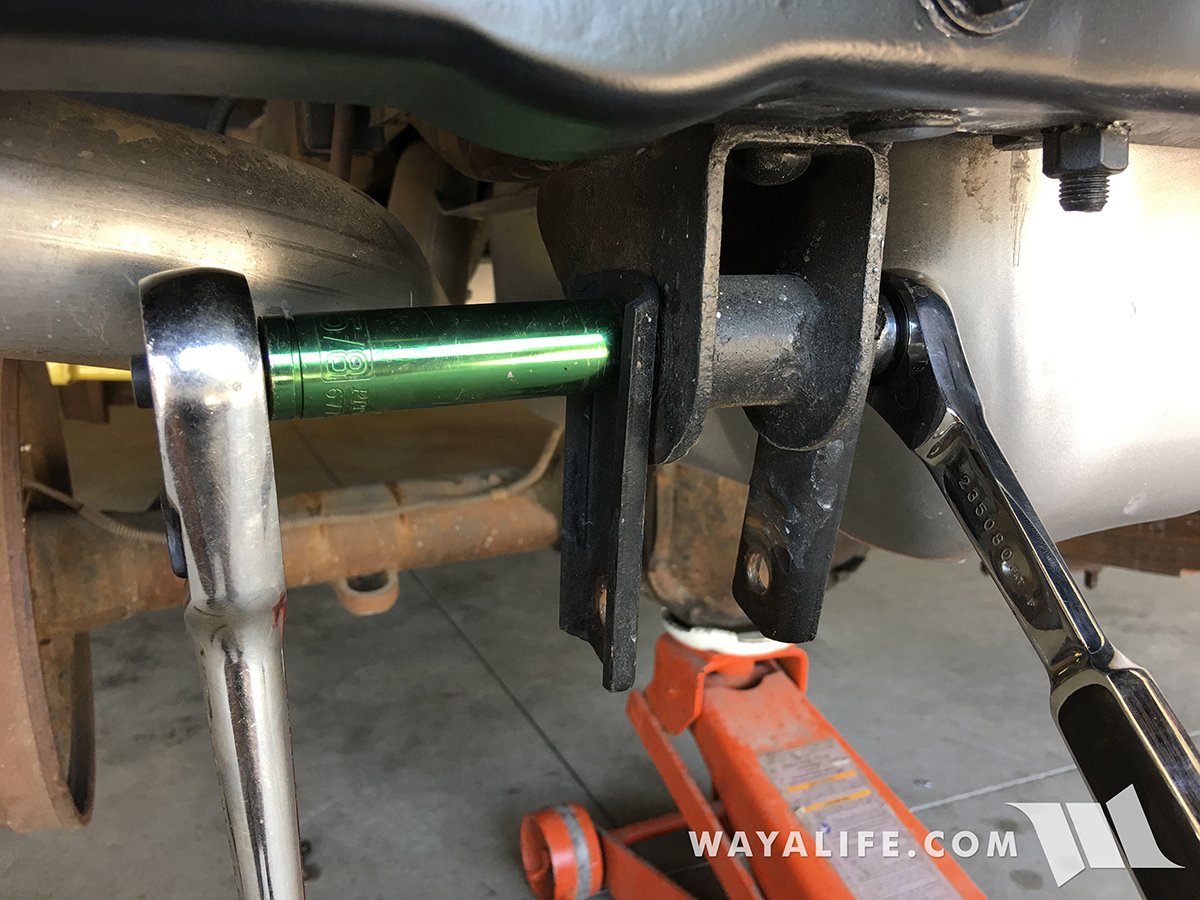
9. Using a 5/8" socket and wrench, remove the bolt and nut securing the driver side front leaf spring to the shackle.
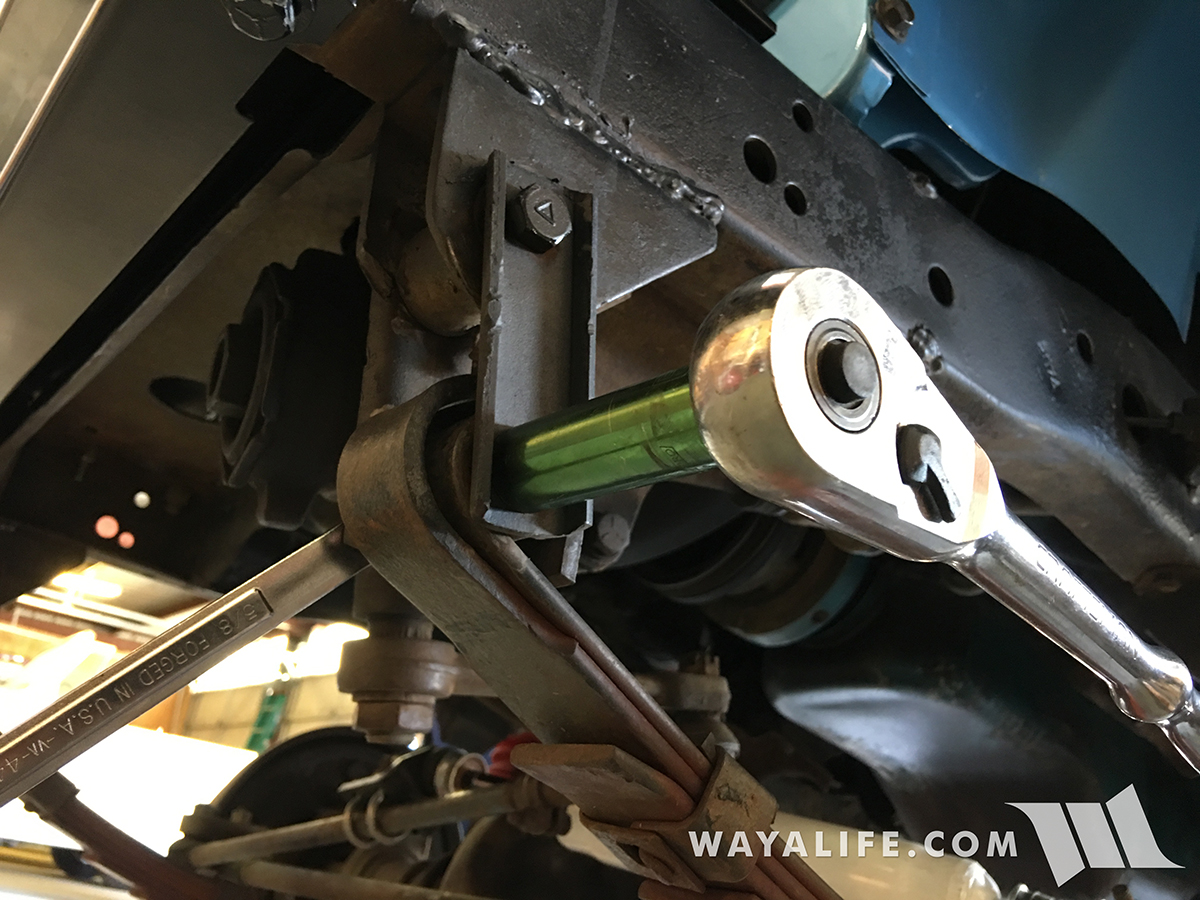
10. Using a 5/8" wrench and 11/16" socket, remove the bolt and nut securing the driver side front leaf spring to the hanger on the frame rail. You can now remove and discard your old leaf spring.
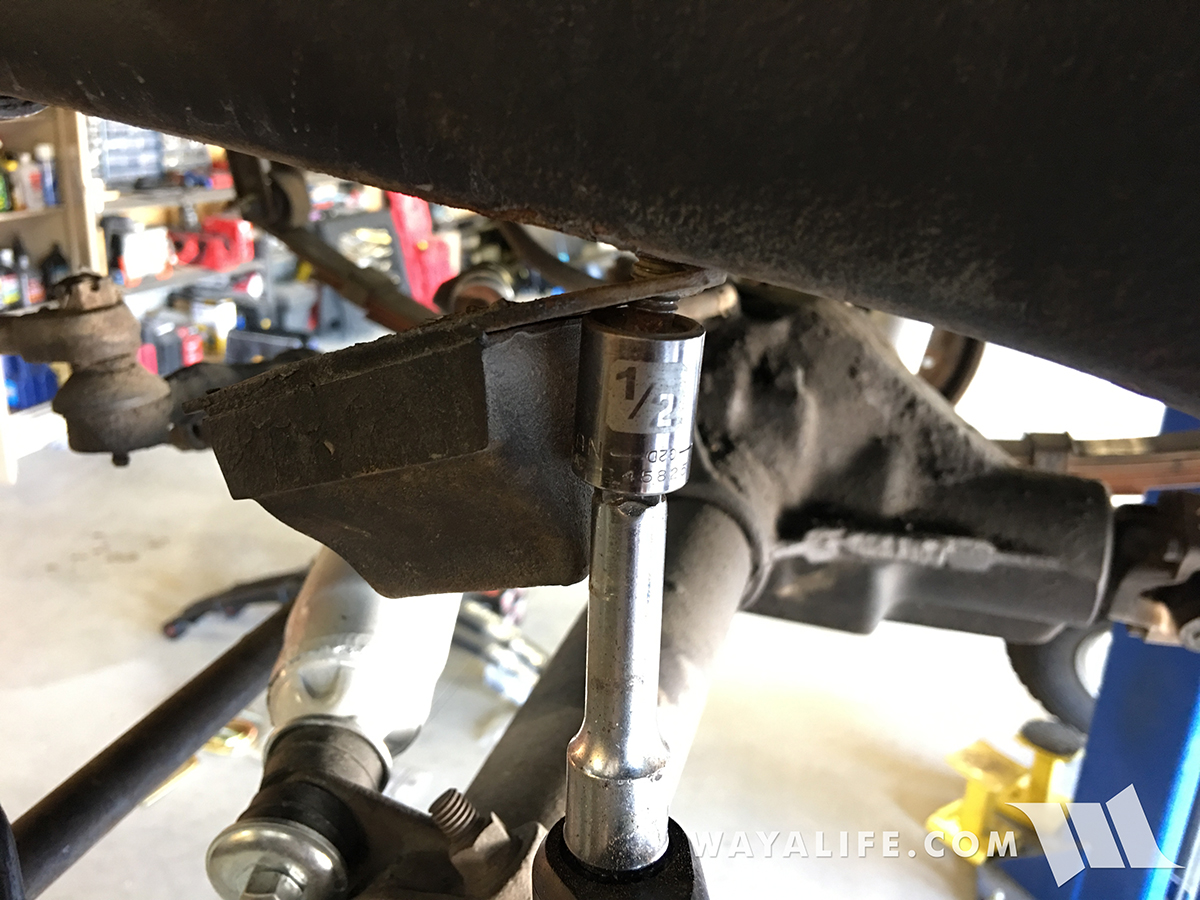
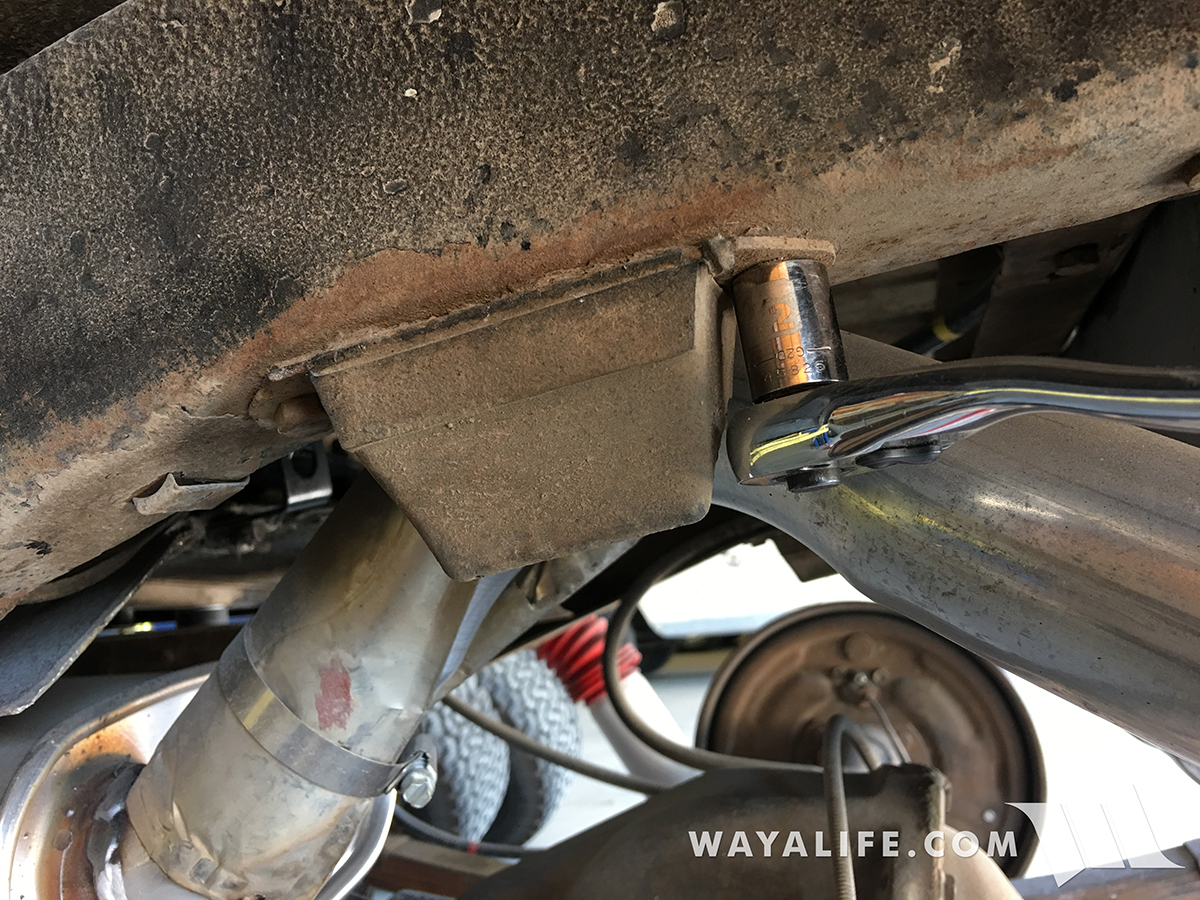
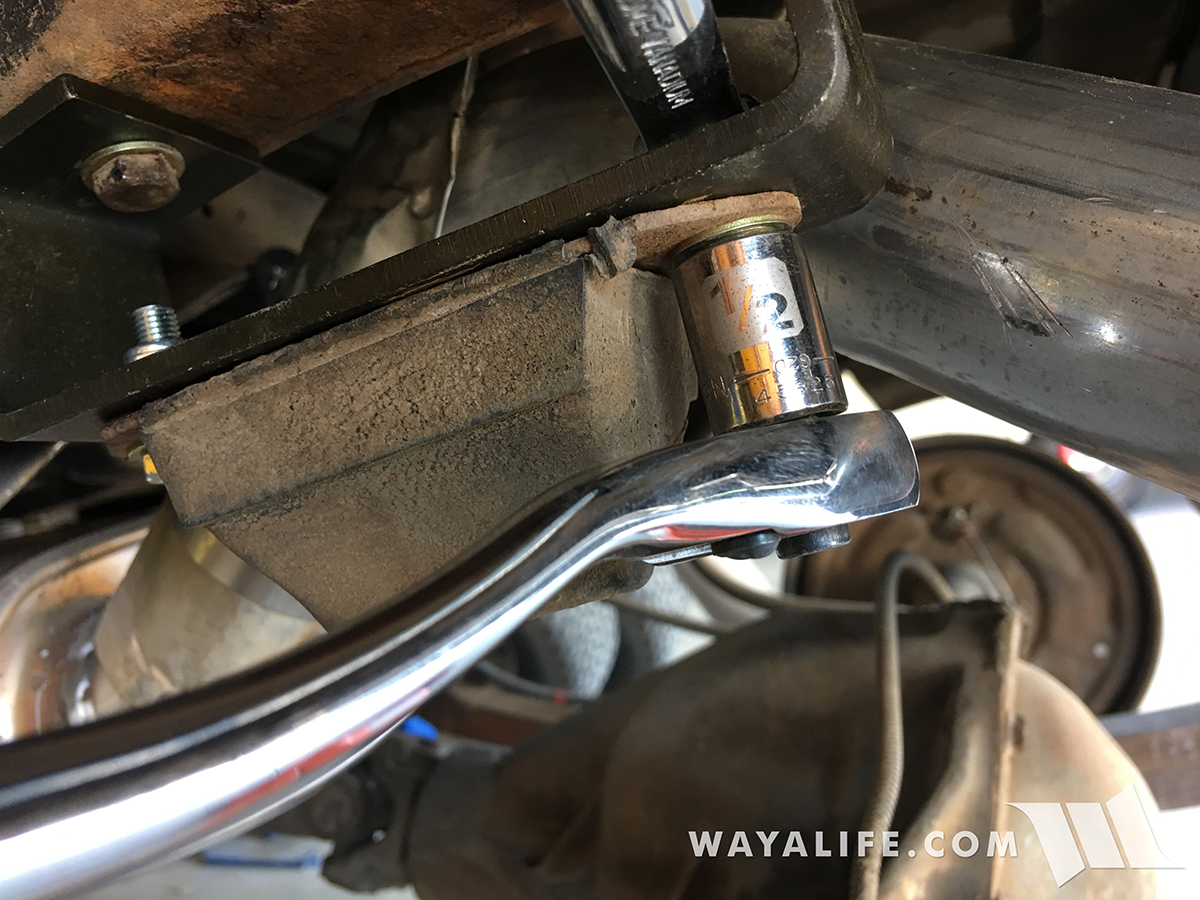
11. Use a 1/2" socket to remove the bolts securing the front bump stop to the frame rail.
12. The Rancho lift kit comes with bump stop extensions. While it isn't required, it is helpful to have a 1/2" gearwrench to secure them to the frame rail using the factory bolts.
13. Using the bolts, washers and nylock nuts provided, secure the factory bump stop to the extension you just installed.
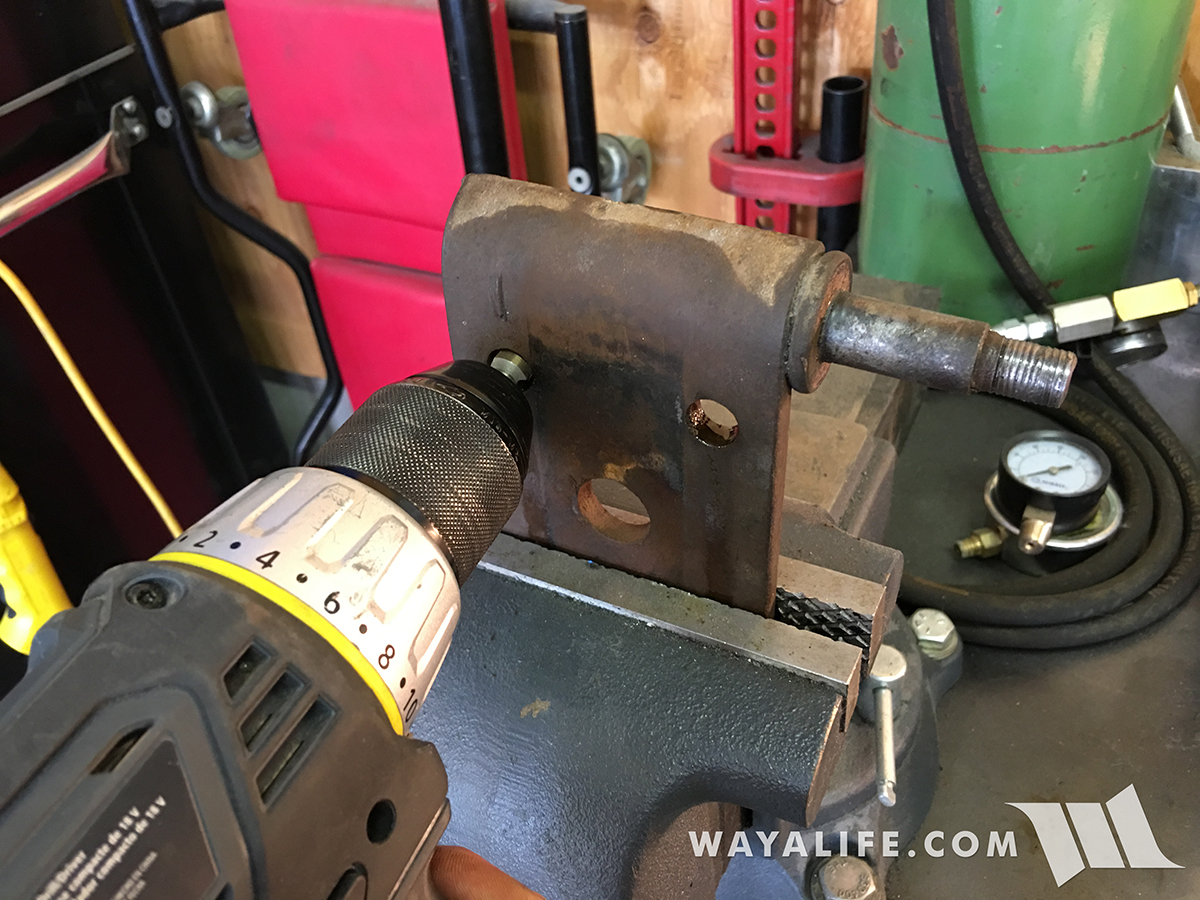
14. The new u-bolts that come with the 2.5" Rancho lift kit have a larger diameter than stock and you will need to drill out the holes on the factory base plate using a 1/2" drill bit or unibit.
15. The new 2.5" Rancho 2.5" leaf springs came with new bushings and 3 of the 4 shackle bushings on Jane were still in good enough condition to reuse but the one on the driver side front was bad and needed to be replaced. If the frame side shackle bushings are bad on your CJ-5, you will need an air hammer to remove them. Fortunately, the new Rugged Ridge HD Shackles I got came with new polyurethane bushings to replace what I had and to install them, you'll want to start by apply the provided lube onto the bushing.
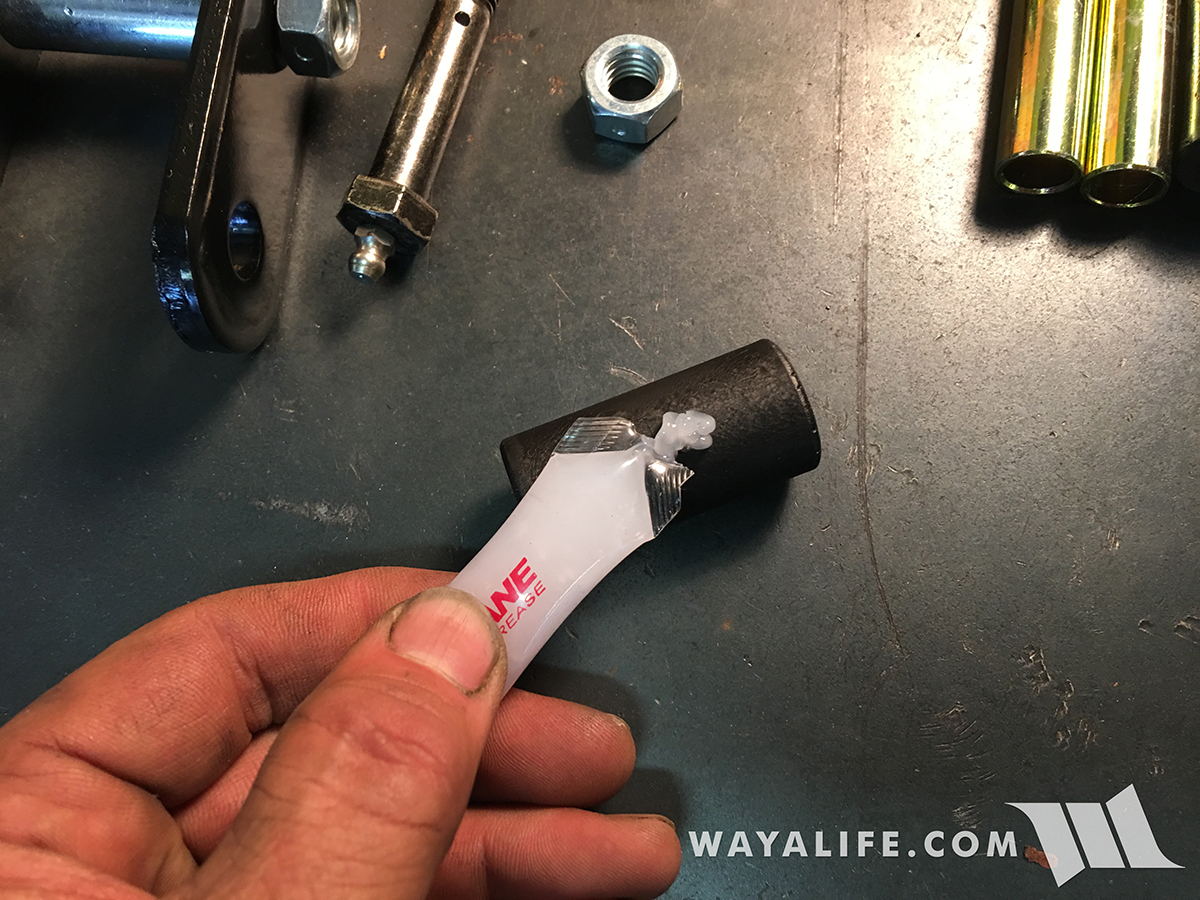
16. Push the lubed bushing into the shackle hanger.

17. Lube up the crush sleeve and then push it into the bushing.

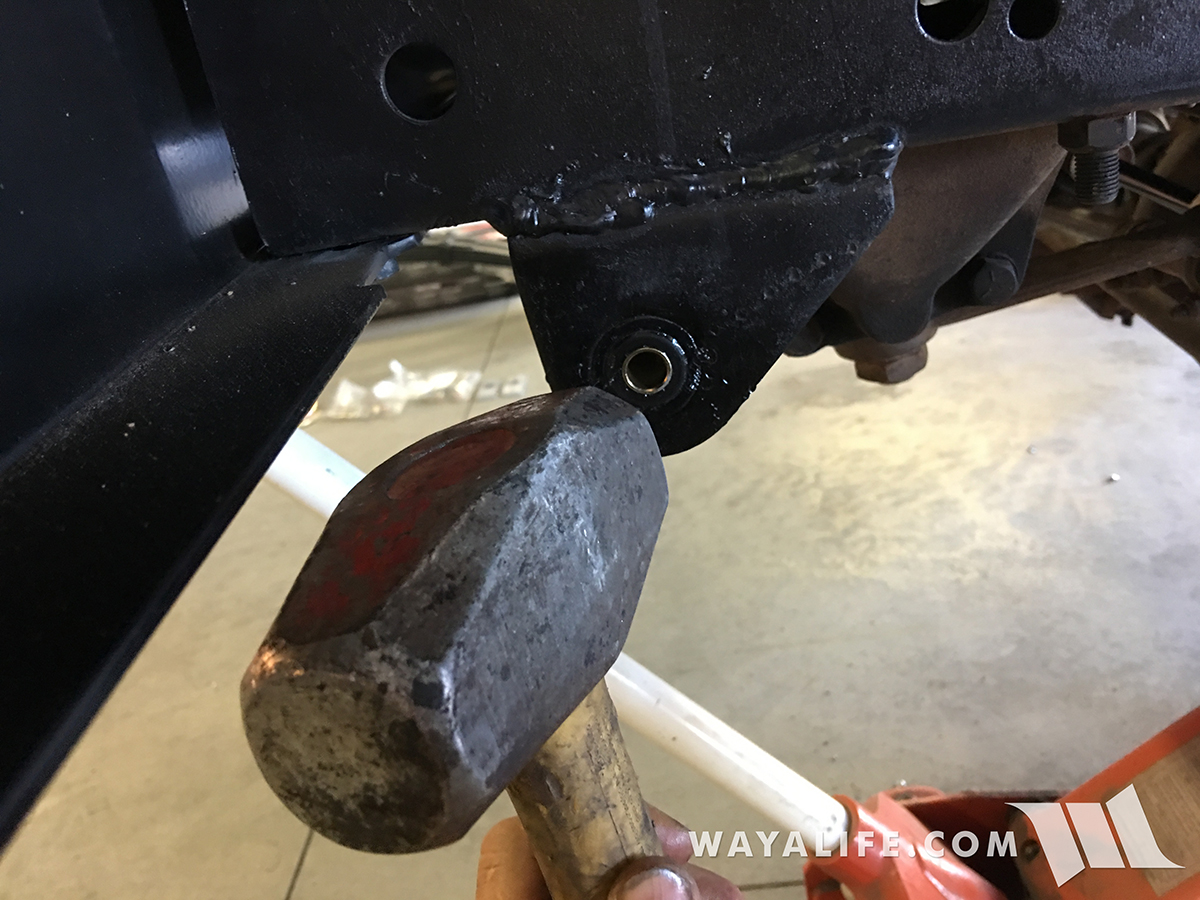
18. You may find it necessary to tap the crush sleeve all the way in using a hammer.
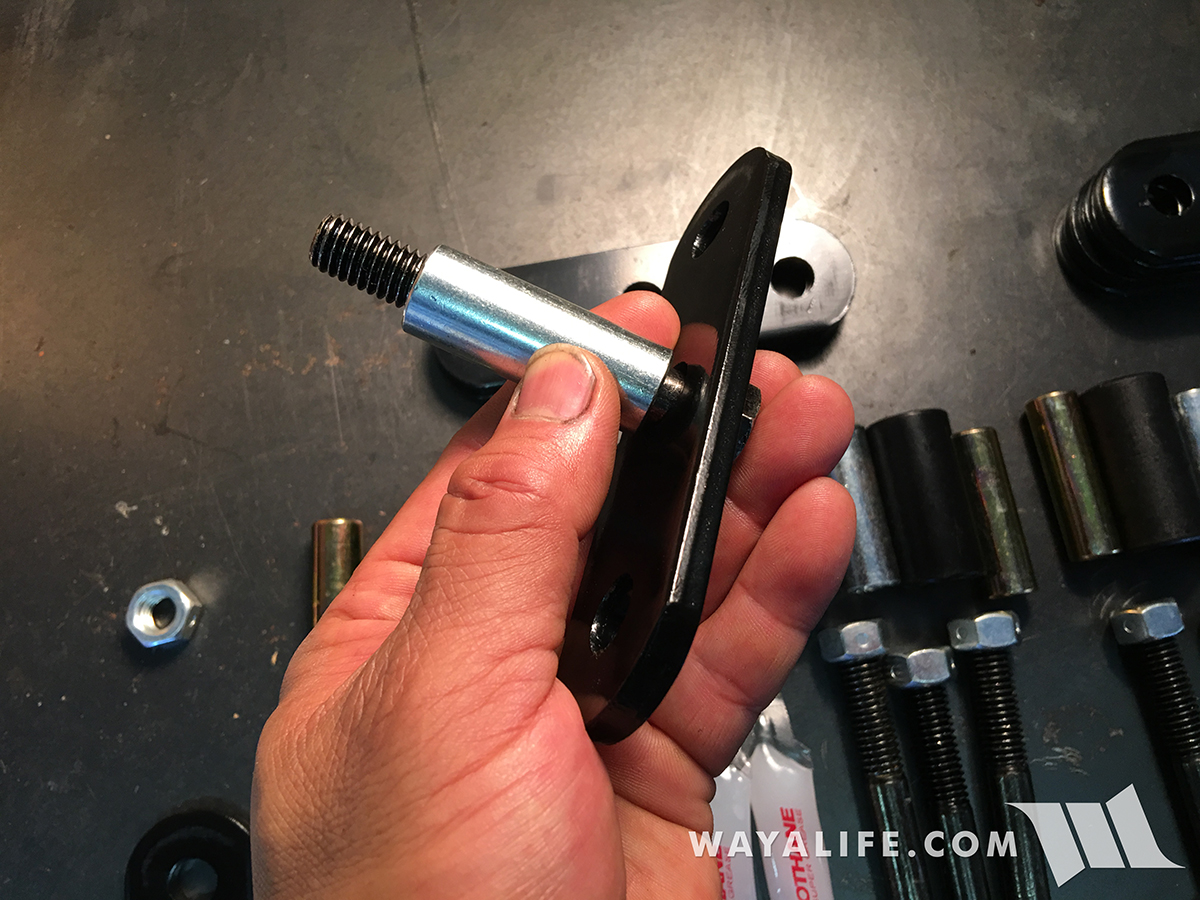
19. Loosely assemble the Rugged Ridge HD Shackles using the non-greaseable bolt and silver crush sleeve.
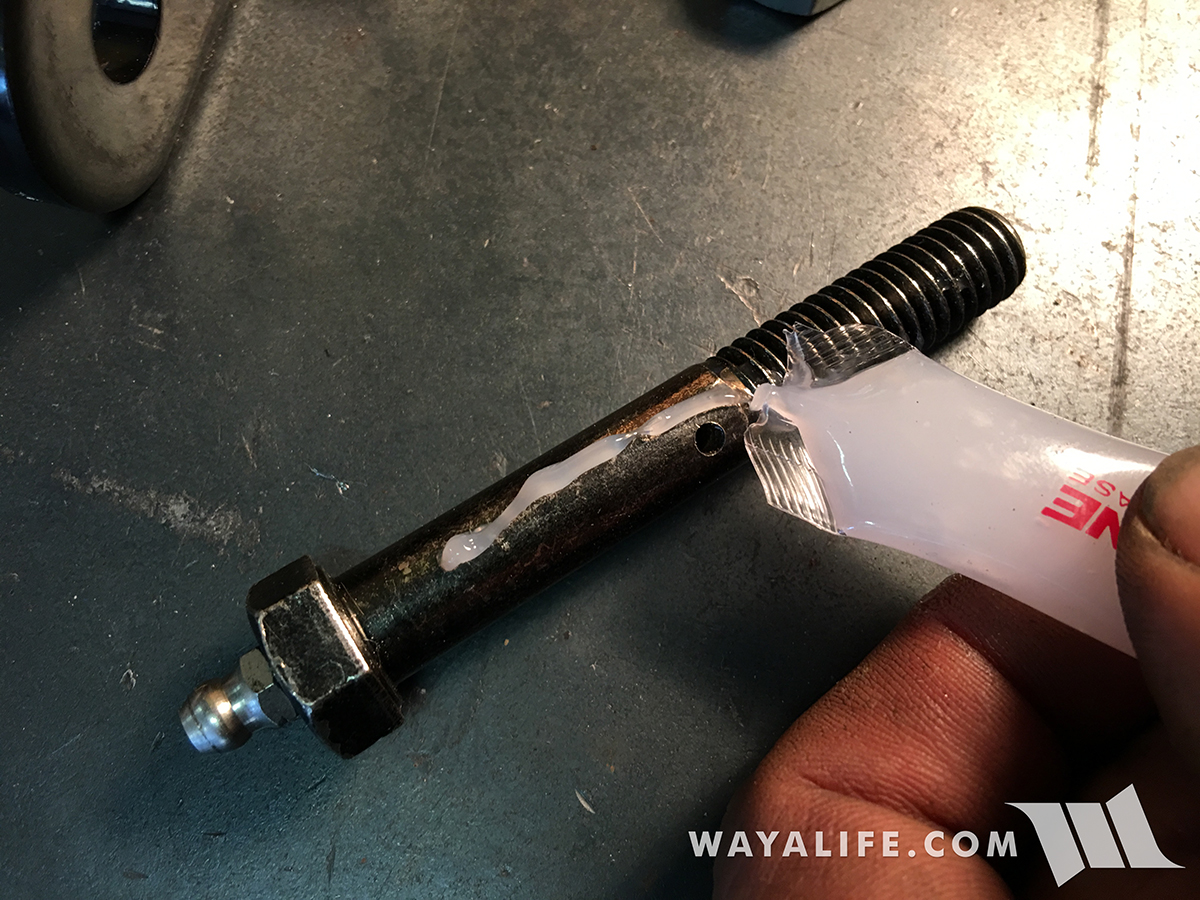
20. Apply the provided lubricant onto the greaseable bolts.
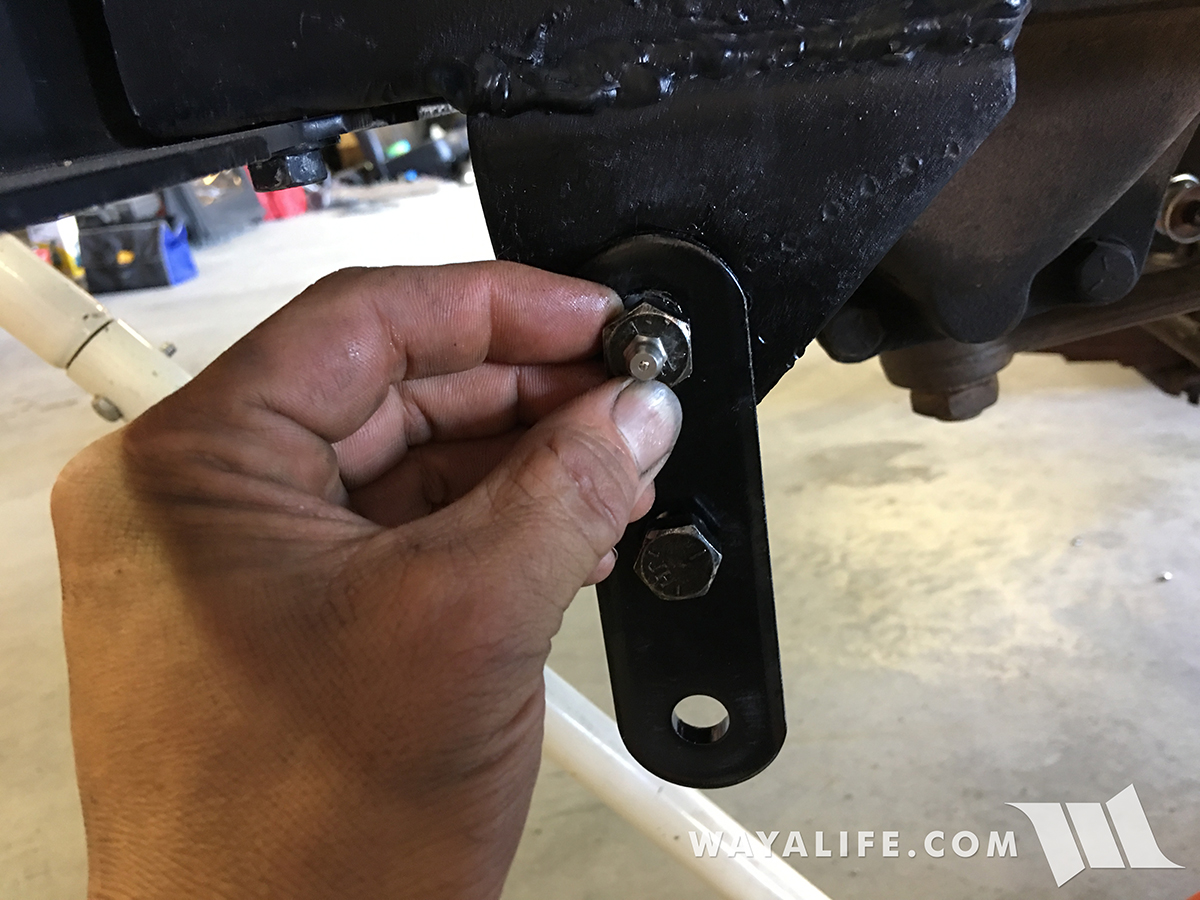
21. Loosely install the Rugged Ridge HD Shackle onto the hanger.
22. You can now loosely install your new 2.5" Rancho front leaf spring onto the shackle using greaseable bolt included with the Rugged Ridge kit.
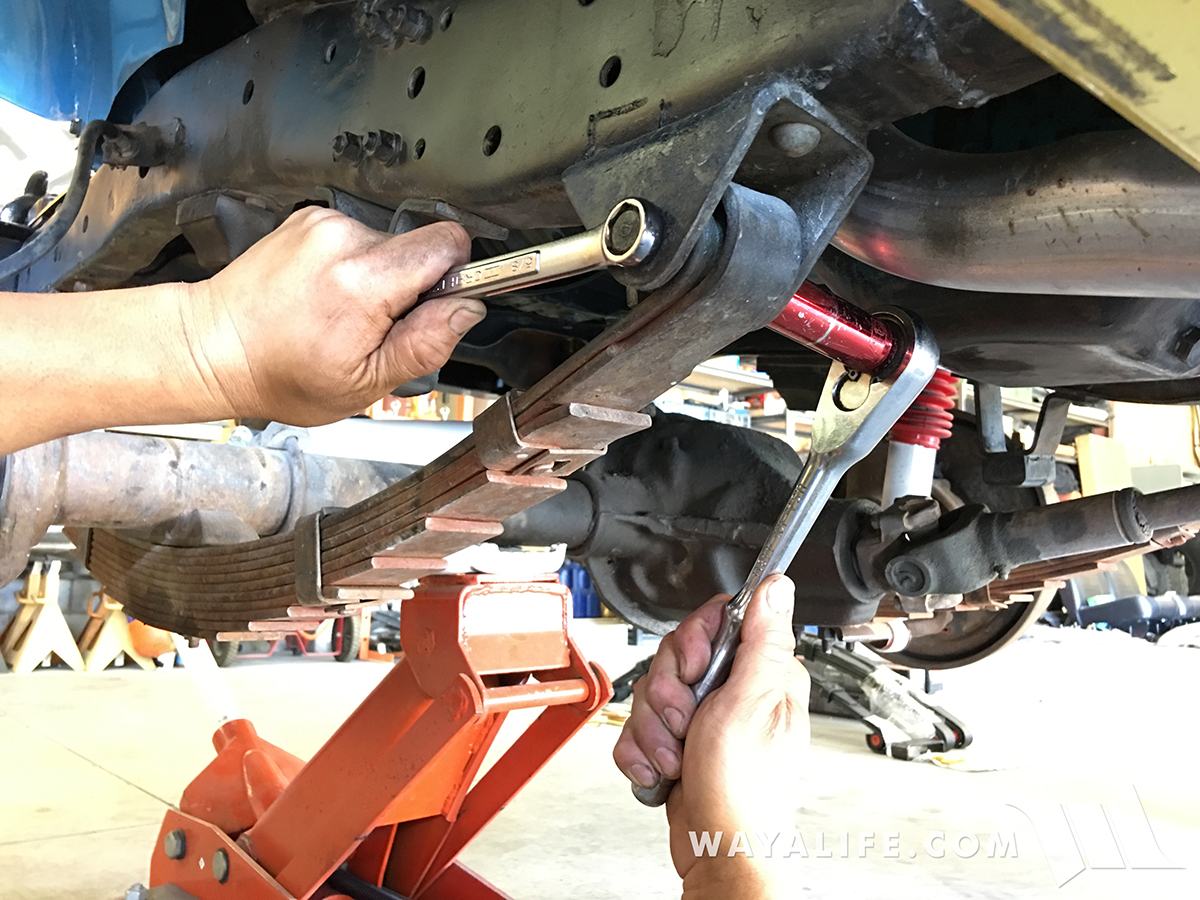
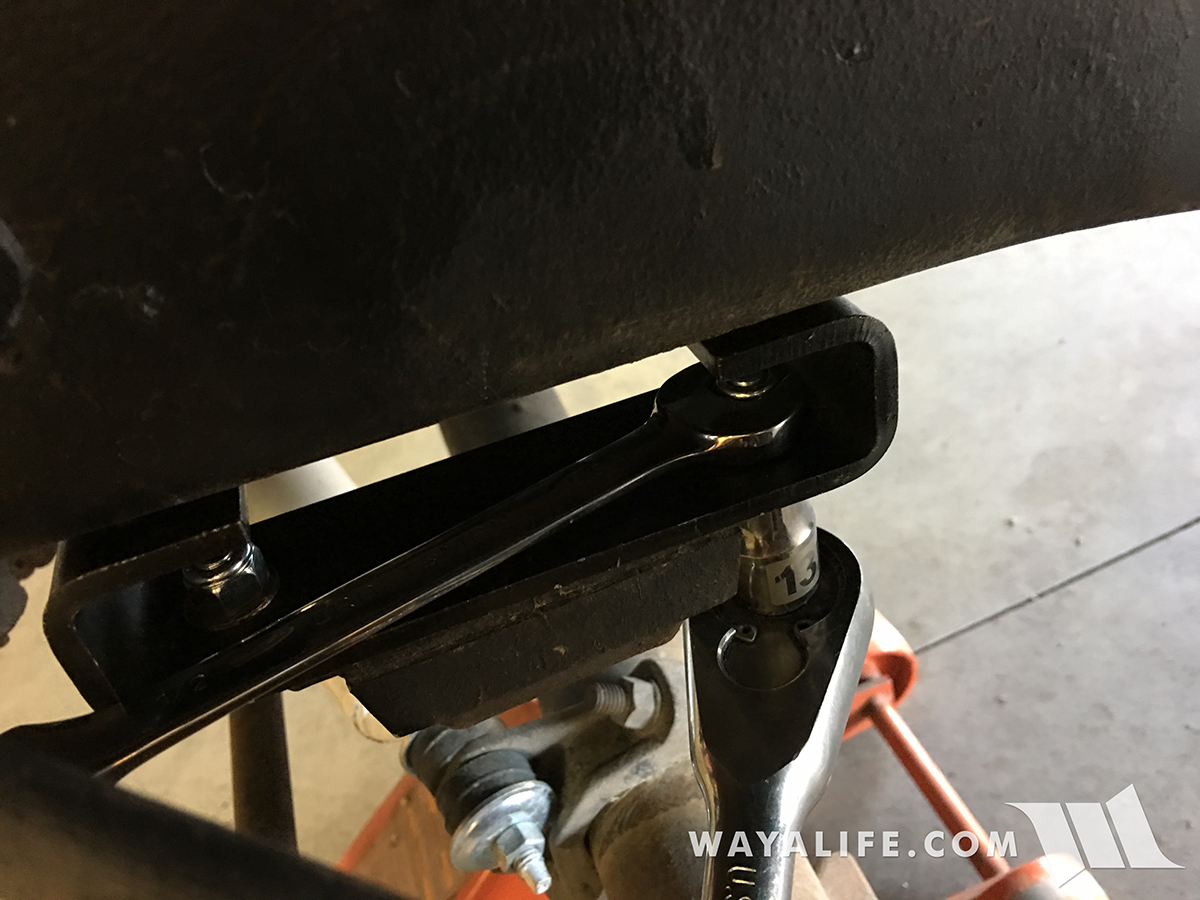
23. Secure the leaf spring onto the hanger on the frame rail using the factory bolts and tighten them to 45-60 ft. lbs. of torque. You will need a 5/8" wrench and an 11/16" socket for this job.
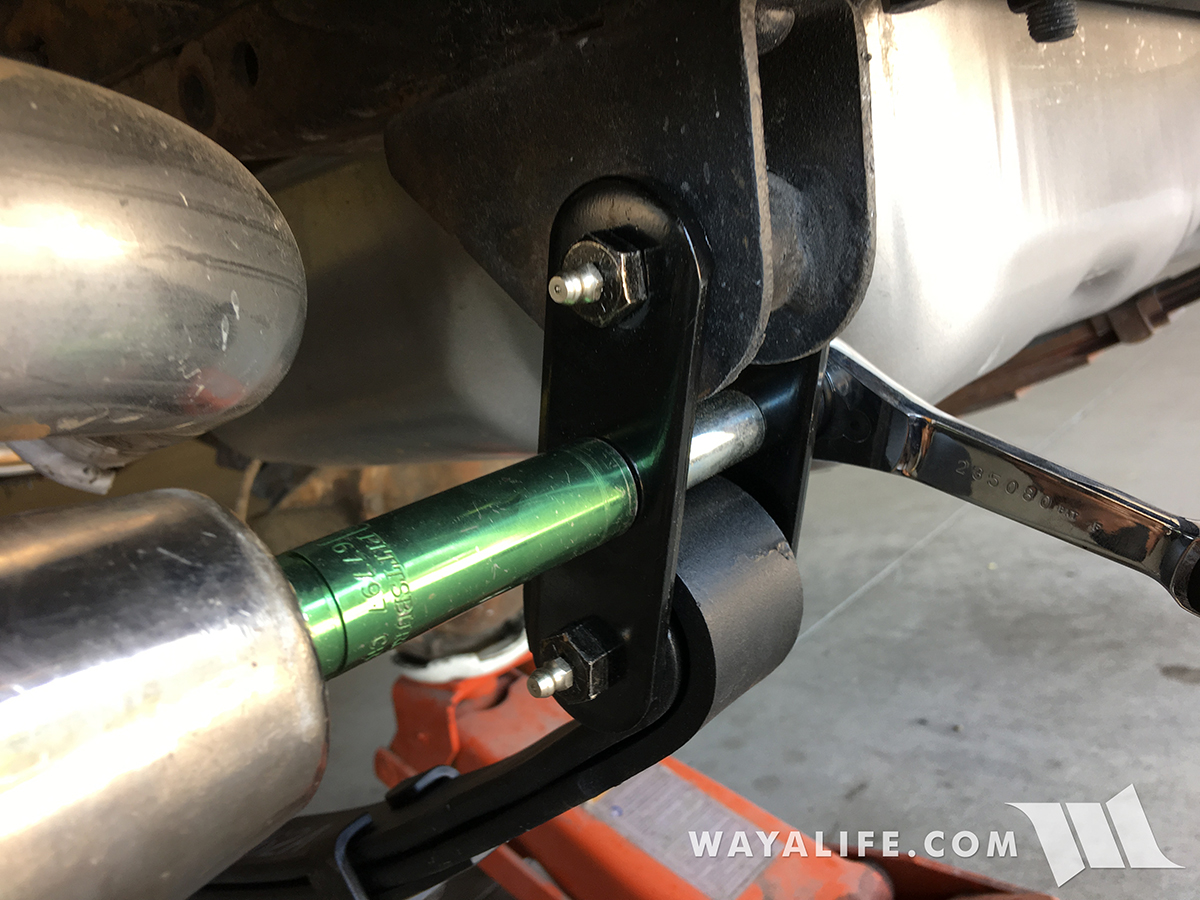
24. All the nuts provided with the Rugged Ridge HD Shackles are stovers or pinch nuts to help ensure they will not come loose. These are provided as it is important to NOT over tighten the shackle bolts and nuts. Using a 5/8" socket and 11/16" wrench, secure the shackle's center bolt and nut to 60 ft. lbs. of torque.
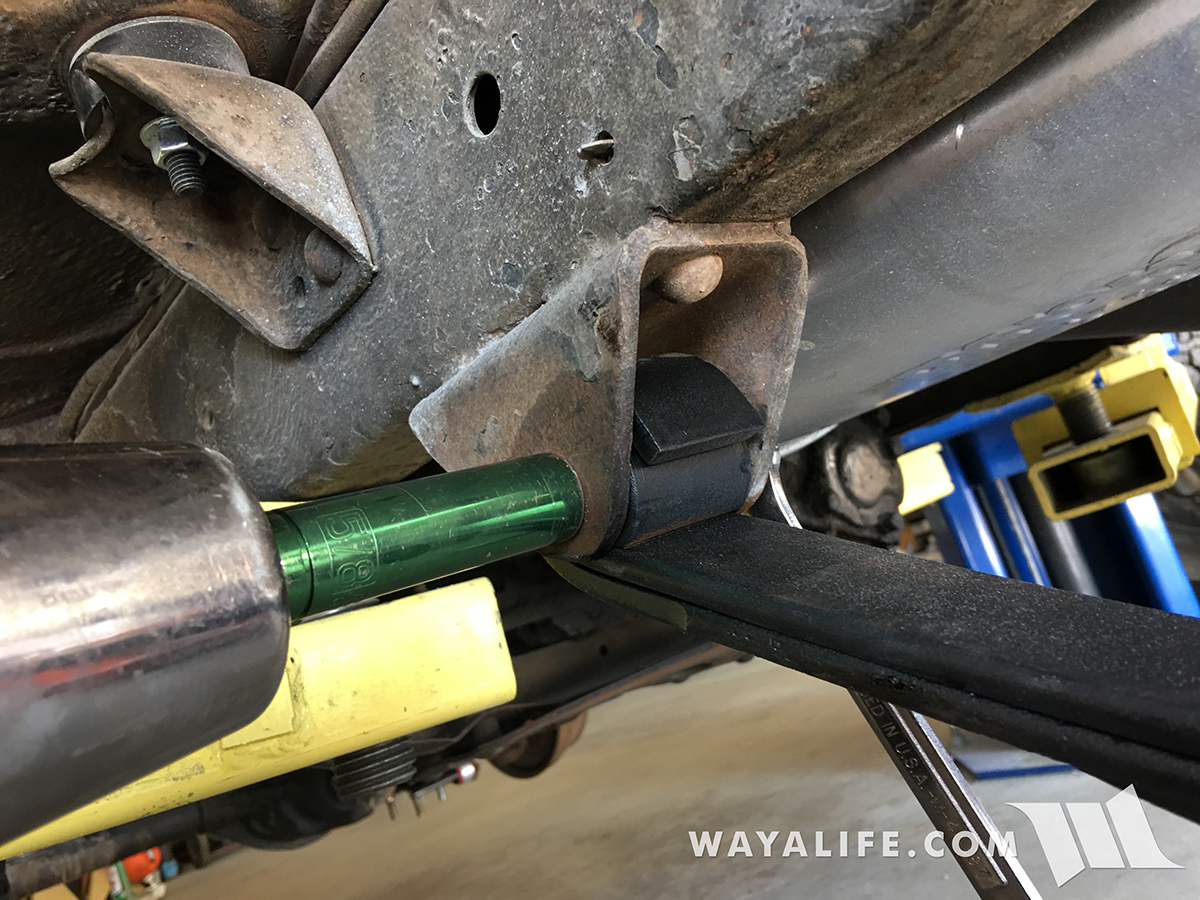
25. Again, using a 5/8" socket and 11/16" wrench, tighten the pivot and leaf spring bolt to only about 20-25" ft. lbs. of torque.

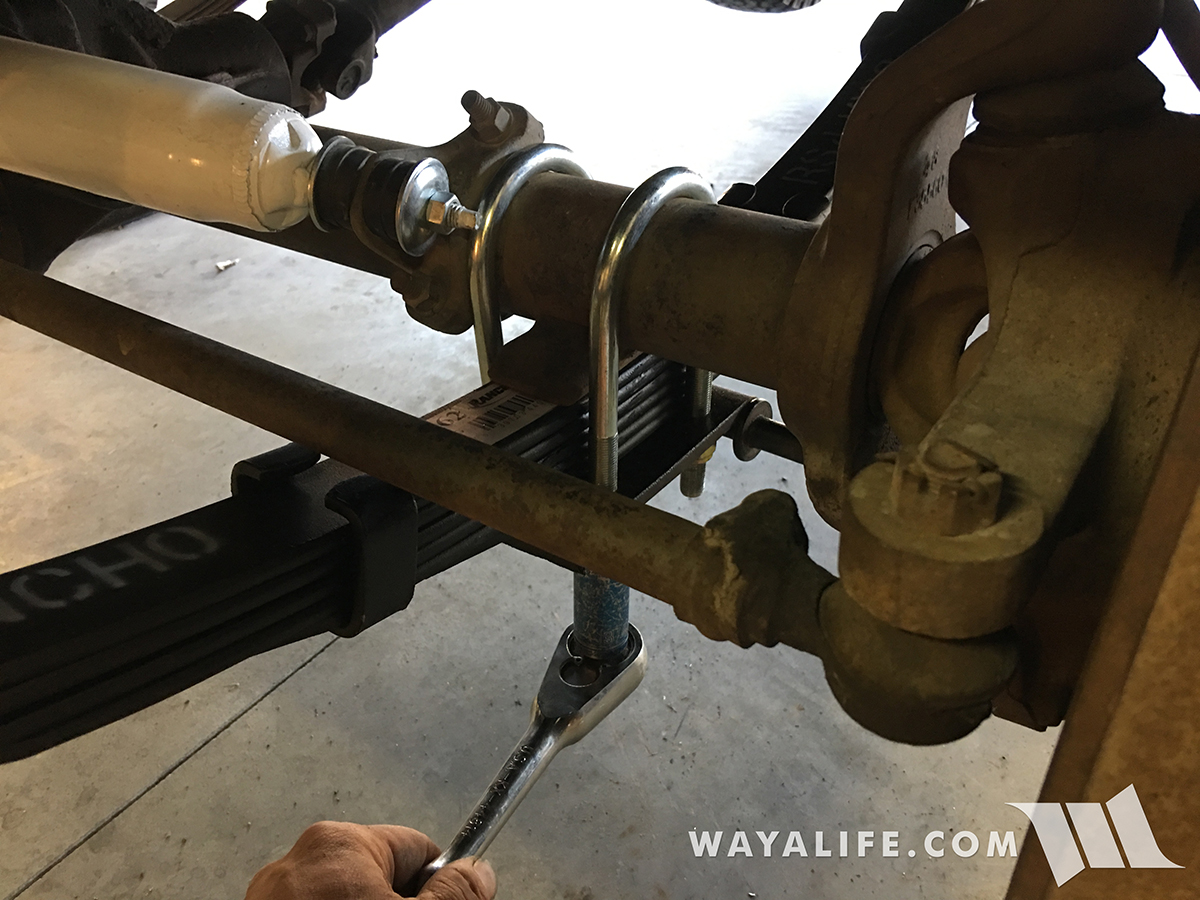
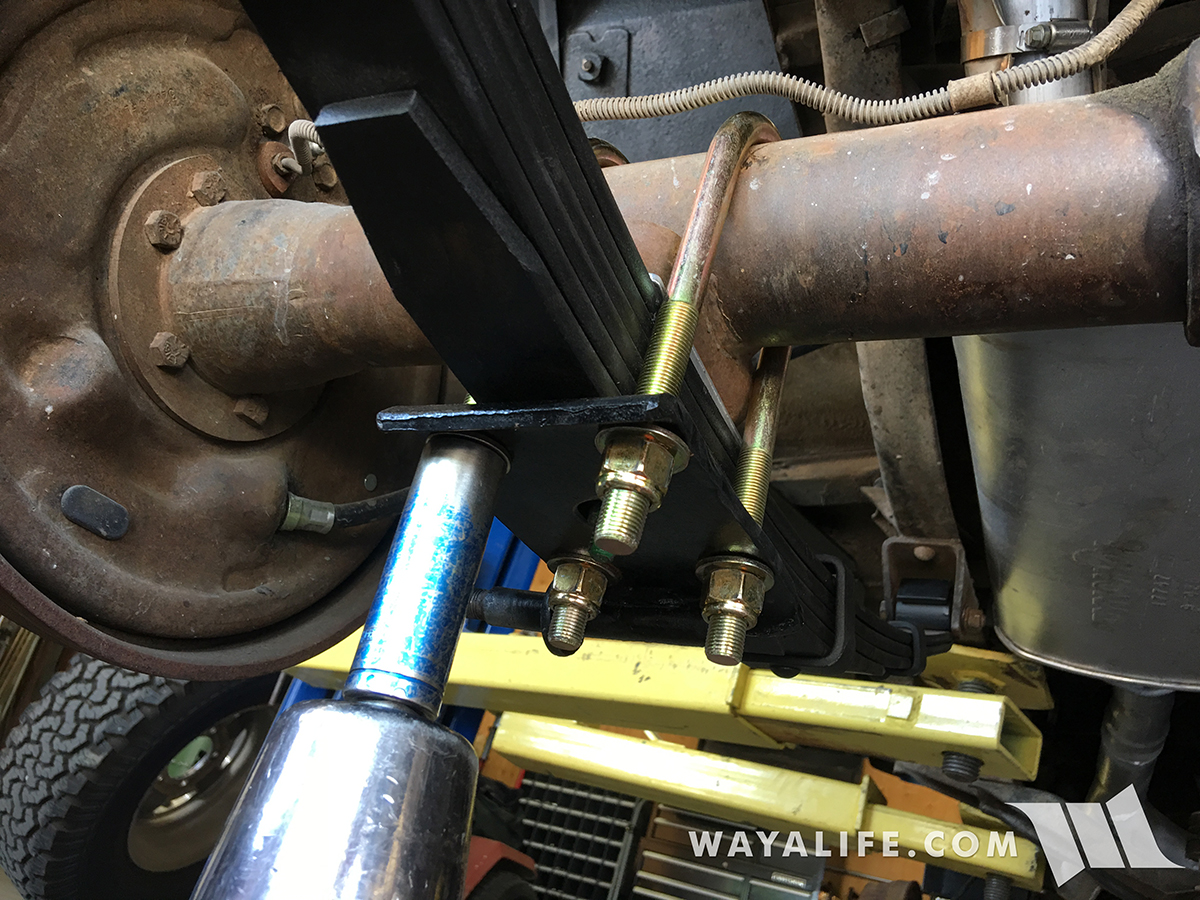
26. Place 2 of the same size u-bolts that come with the 2.5" Rancho lift kit onto your front axle, install the factory base plate onto them and then secure it in place using the provided washers and nylock nuts. You will need a 3/4" socket for this job.
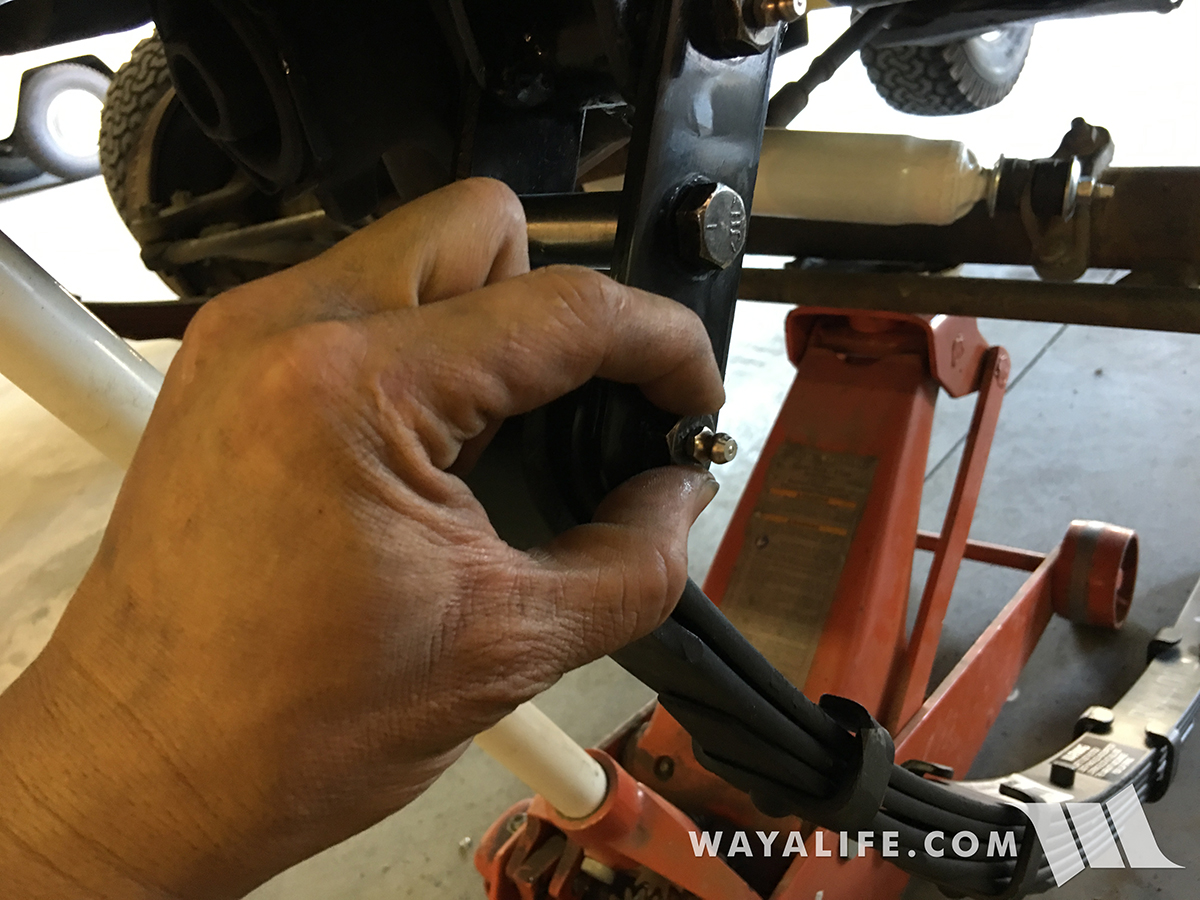
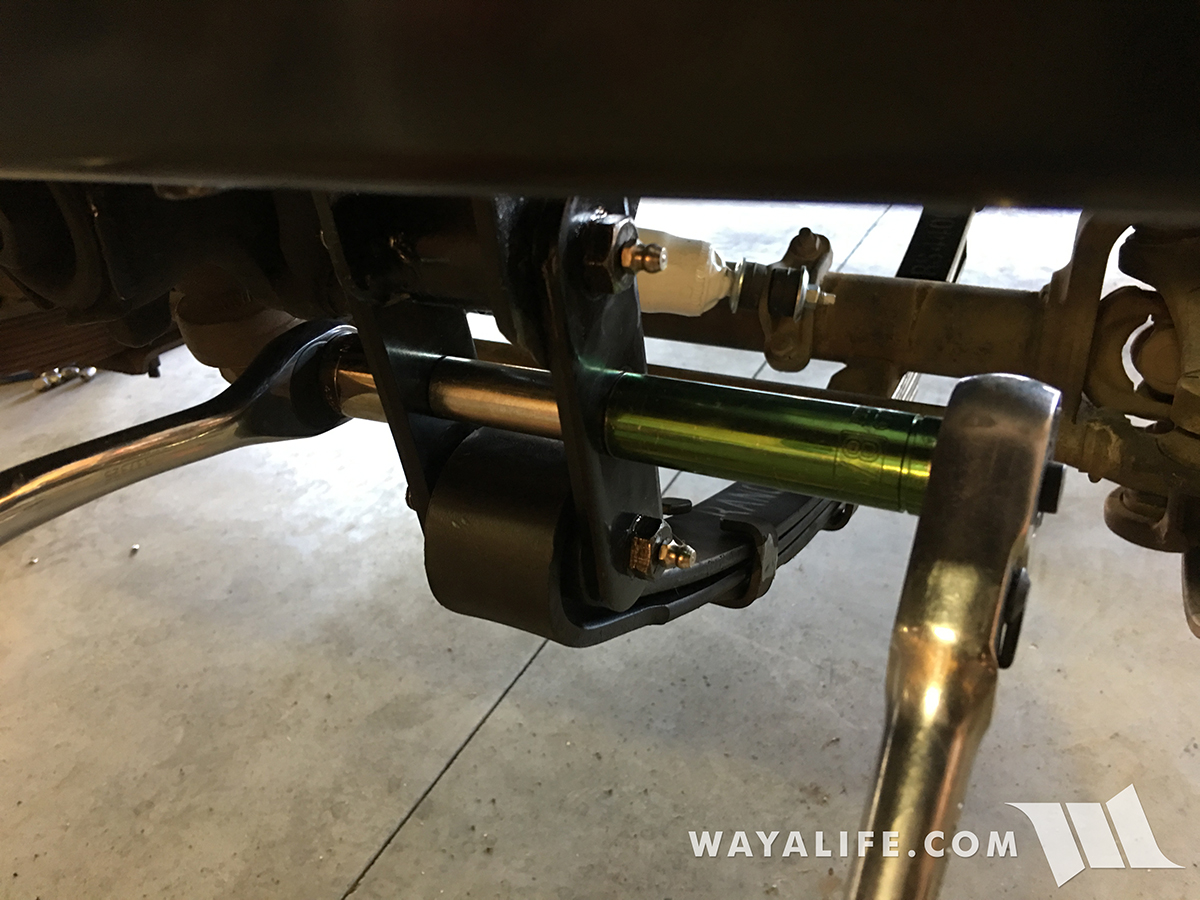
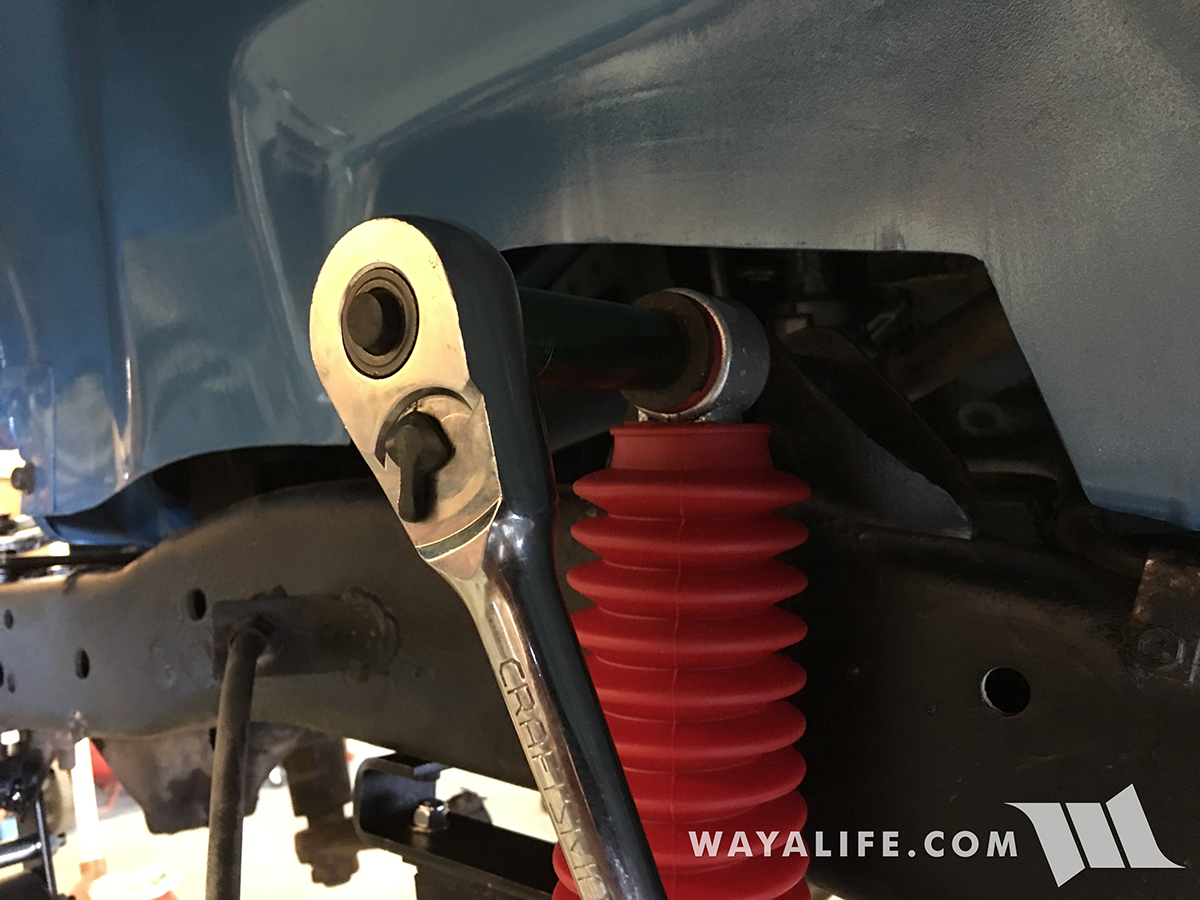
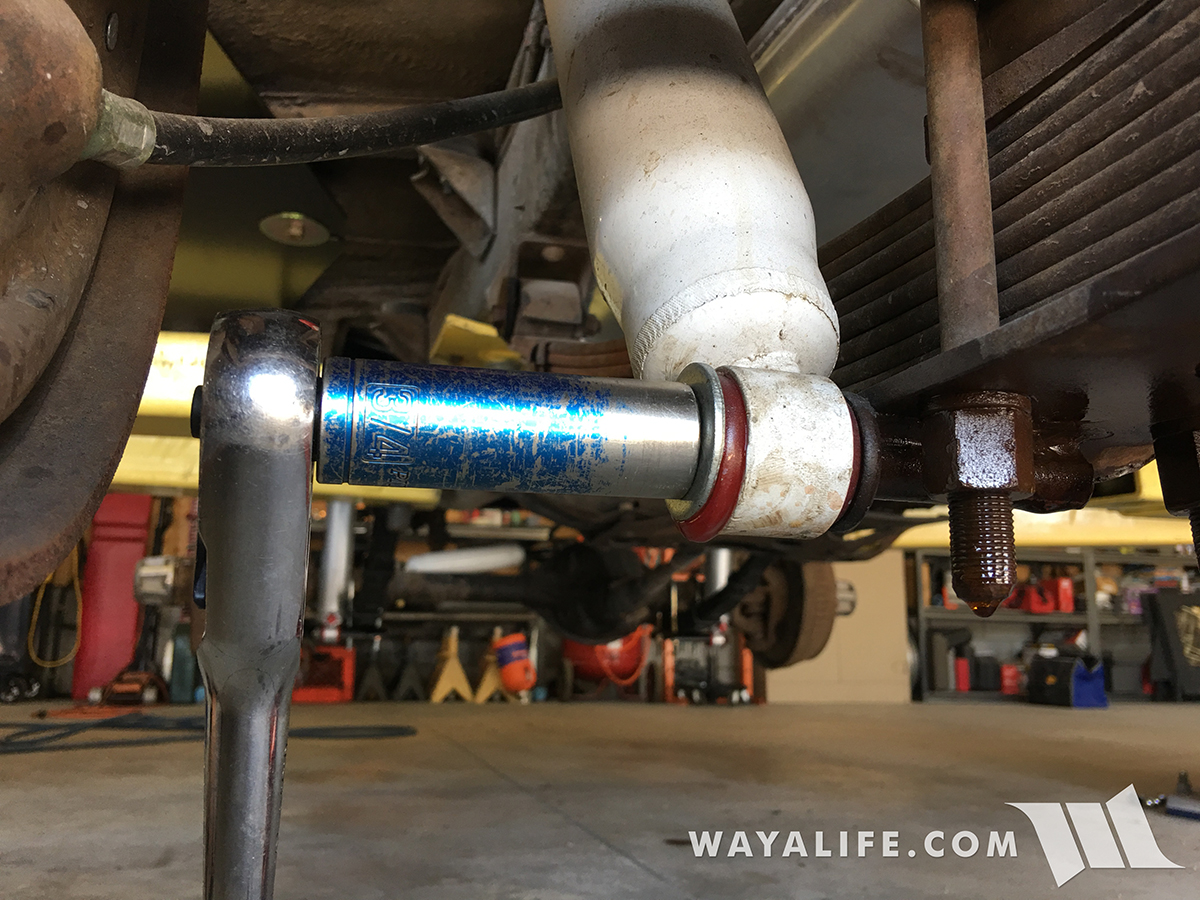
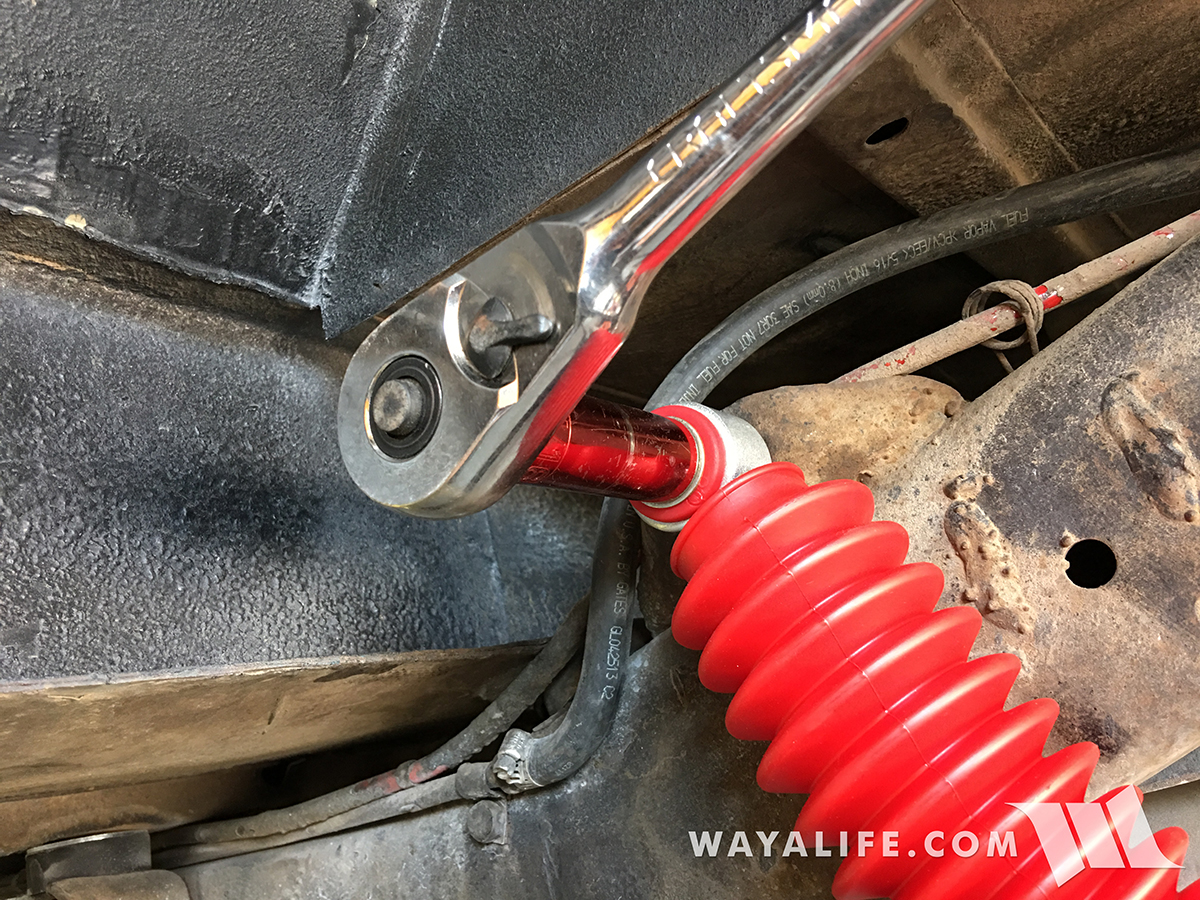
27. Install the new Rancho RS9000 shock onto the frame mount and secure it in place using the factory nut. Use a 3/4" socket to tighten the nut to 25 ft. lbs. of torque.
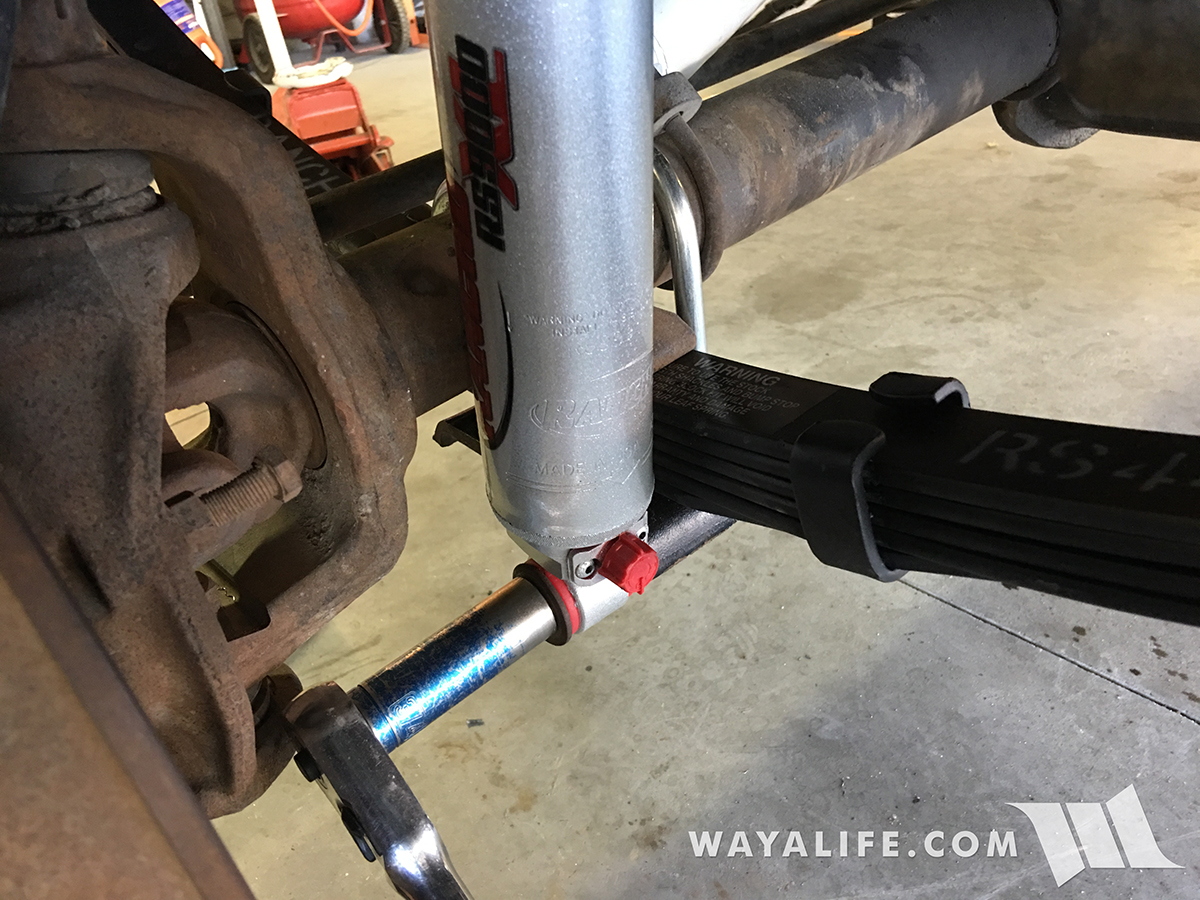
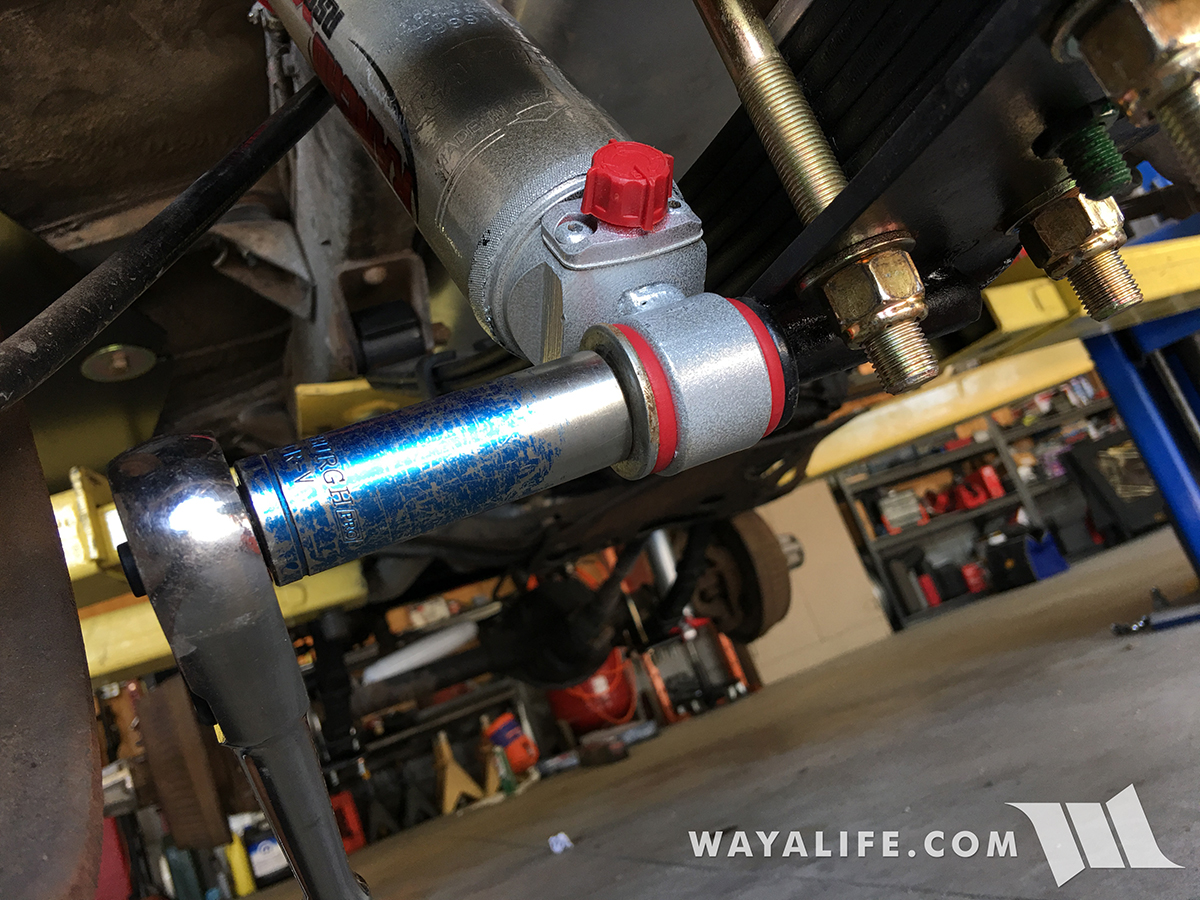
28. Install the Rancho RS9000 shock onto the base plate stud and secure it in place using the factory nut. Again, use a 3/4" socket to tighten the nut to 40 ft. lbs. of torque.
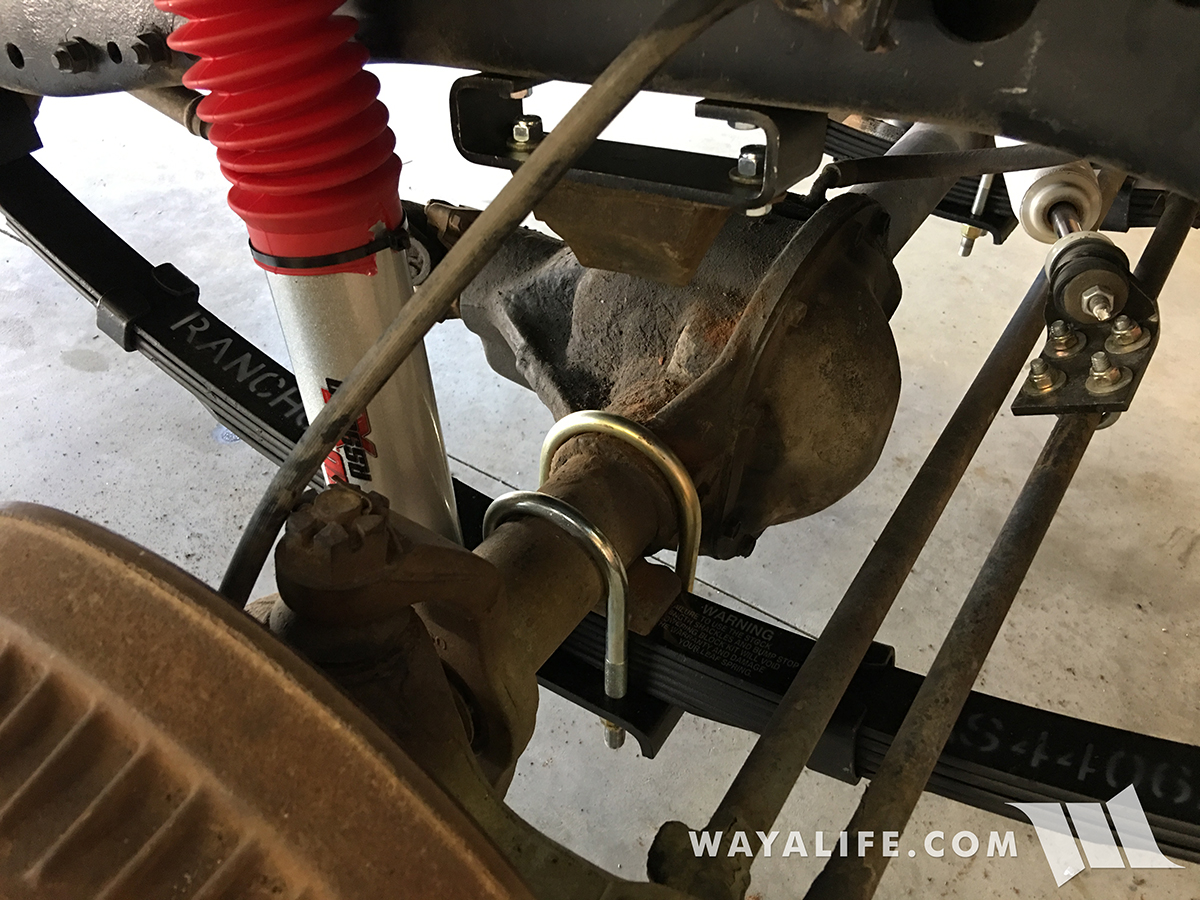
29. Repeat steps 3-28 on the passenger side of your CJ-5. Make sure you use the LARGEST of the 4 u-bolt provided with the Rancho kit to go over the differential housing as shown.
30. Moving to the driver side rear of your CJ-5, use a floor jack to support the axle. Then, use a 3/4" socket to remove the nut securing your shock to the leaf spring base plate.
31. Using an 11/16" socket, remove the bolt securing the nut securing your shock to the frame mount.
32. As before, soak the u-bolt nuts with penetrating oil and then use a 3/4" socket to remove them.

33. With all 4 nuts removed, you can now separate the base plate from the u-bolts.
34. Because the 2.5" Rancho lift kit comes with new HD u-bolts, you can remove the factory u-bolts from the axle.
35. Using a 5/8" socket and an 11/16" wrench, remove the bolt and nut securing the leaf spring to the hanger on the frame rail.
36. Again, using a 5/8" socket and an 11/16" wrench, remove the bolt and nut securing the leaf spring to the shackle.
37. Use the same 5/8" socket and 11/16" wrench to remove the bolt and nut securing the shackle to the frame.
38. Use a 1/2" socket to remove the bolts securing the front bump stop to the frame rail.
39. As before, it is helpful to have a 1/2" gearwrench to secure the provided bump stop extensions to the frame rail. You will need to use the factory bolts for them and then use the provided bolts, washers and nylock nuts to secure the bump stop to the extension.
40. Using the factory nut and bolt, loosely install the new rear 2.5" Rancho leaf spring on to frame rail hanger.
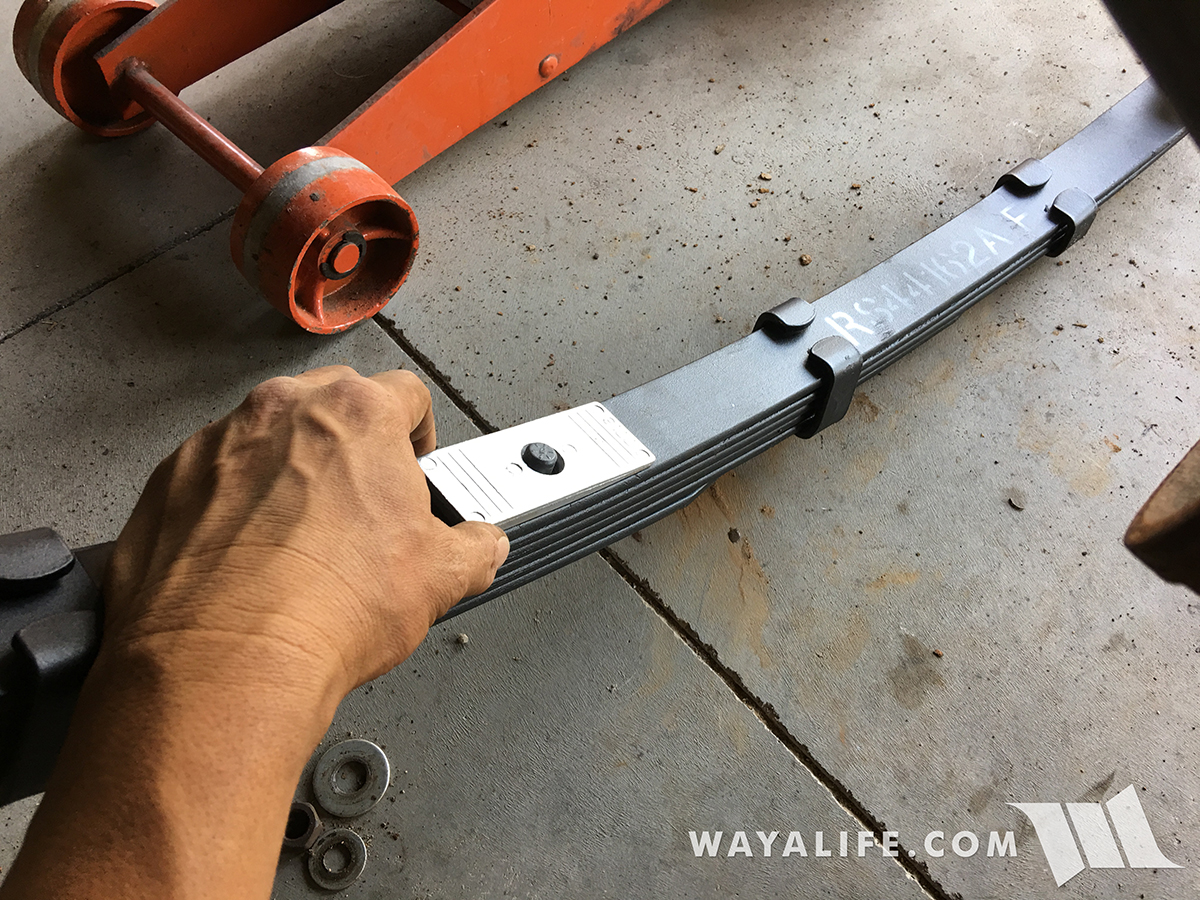
41. The 2.5" Rancho lift kit comes with degree shims that you will need to install to help prevent driveline vibrations. You will need to take note that one side of the shim is slightly curved and the other is flat. The curved side needs to go down and sit on top of the spring.
42. As you did up front on steps 19-22, install your Rugged Ridge HD Shackle onto the frame, install the Rancho leaf spring on to it and then tighten the center bolt and nut to 60 ft. lbs. of torque. The pivot and leaf spring bolt will only need about 20-25" ft. lbs. of torque. You will need a 5/8" socket and 11/16" wrench for this job.
43. Secure the leaf spring onto the hanger on the frame rail using the factory bolts and tighten them to 45-60 ft. lbs. of torque. You will need a 5/8" wrench and an 11/16" socket for this job.
44. Place the new Rancho u-bolts provided with the kit onto your rear axle, install the factory base plate onto them and then secure everything in place using the provided washers and nylock nuts. You will need a 3/4" socket for this job.
45. Install your new Rancho RS9000 shock onto the frame mount and secure it in place using the factory nut. Use an 11/16" socket to tighten the nut to 25 ft. lbs. of torque.
46. Install the Rancho RS9000 shock onto the base plate stud and secure it in place using the factory nut. Again, use a 3/4" socket to tighten the nut to 40 ft. lbs. of torque.
47. Repeat steps 30-46 on the passenger side of your CJ-5 and you should be done.
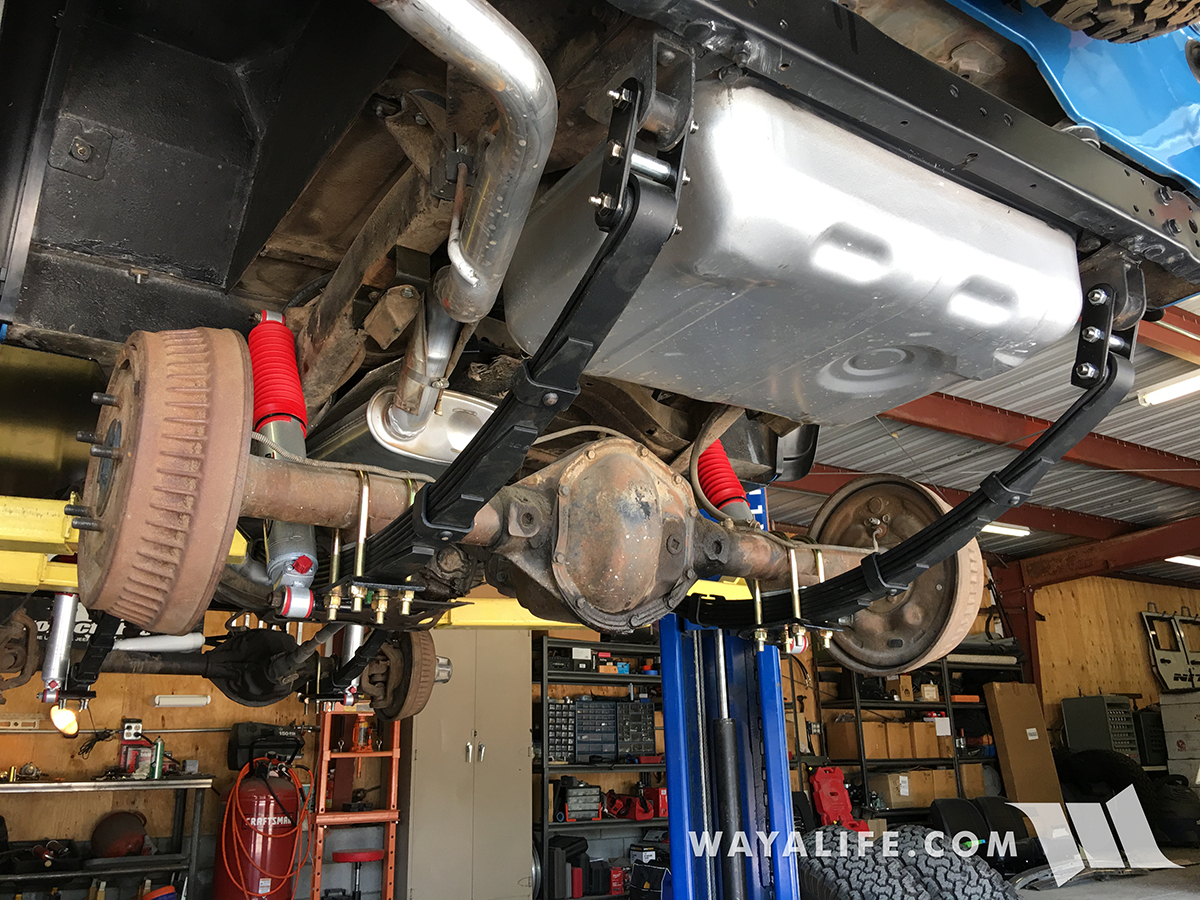
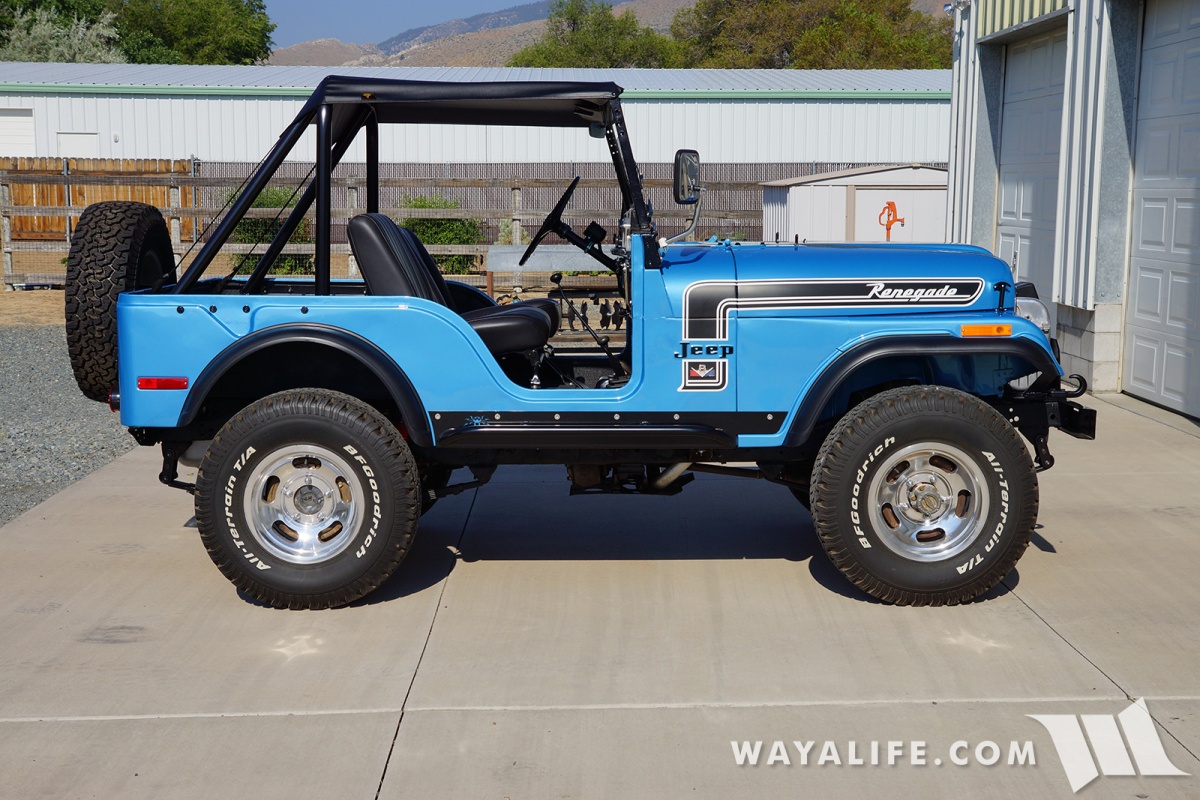
And here she is! Jane with a new spring in her step and I should note, without the sag that she that had before. In other words, her old springs and shackles were the cause of what I was seeing and replacing them did fix the problem. And, as you can see here, Jane still stands at about the same height as she did.
I should note that the information I've provided in this write-up were based on what was on my CJ-5 and the parts that I installed. As is the case with any old iron, the nuts and bolts you come across may be different and the torque specs for them may have different requirements as well. ALWAYS refer to your factory service manual and the instructions that come with the parts you buy for the most accurate information.
Please let me know if you have any questions.
In this short write-up, you'll get to see just how easy it is to swap out a set of leaf springs on an intermediate CJ-5 or in my case, install a 2.5" Rancho lift kit complete with RS9000 shocks and a set of new Rugged Ridge HD Shackles, just for good measure.
What you will need
• Rancho 2.5" Suspension Lift Kit for 72-75 Jeep - Part #07KIT
• Rancho RS9000 Shock Absorbers 22.25" / 14" eye to eye
• Rugged Ridge Shackle Kit Part #1-805BL
• 1/2, 5/8, 11/16, 3/4, 13/16" Socket & Wrench
• Ratchet
• Torque Wrench
• Drill
• 1/2" Drill Bit or Unibit
• Floor Jack
• (4) Jack Stands
• Bench Vice
• Penetrating Oil
Here's a shot of the Rancho 2.5" leaf spring lift kit along with a complete set of Rancho RS9000 shocks. As you can see, the kit comes with new hardware including HD u-bolts and shims.
This is a shot of everything you get with a Rugged Ridge HD shackle kit.
Instructions
1. To get started, you want to use a floor jack to lift your CJ-5 from the axle high enough to get the tires off the ground and then set it back down on jack stands positioned underneath the frame rails. For my purposes, I have a lift and so I just racked Jane up.
2. With your CJ-5 up on jack stands, you can now remove remove all 4 wheels. Jane came with lug nuts that required a 13/16" socket to remove them.
3. Using a 3/4" socket, remove the nuts securing your front shocks to the frame rails.
4. Again, using a 3/4" socket, remove the nut securing your front shocks to the base plate of your leaf springs.
5. With the nuts removed, you can now pull the front shocks off your CJ-5
6. Starting on the driver side of your CJ-5, soak the u-bolt nuts on your front axle with some PB Blaster or other penetrating oil. Support the base of the axle using a floor jack and then, use a 5/8" socket to remove the u-bolt nuts.
7. With the nuts removed, separate the base plate from the u-bolts.
8. You can now remove the u-bolts from the axle.
9. Using a 5/8" socket and wrench, remove the bolt and nut securing the driver side front leaf spring to the shackle.
10. Using a 5/8" wrench and 11/16" socket, remove the bolt and nut securing the driver side front leaf spring to the hanger on the frame rail. You can now remove and discard your old leaf spring.
11. Use a 1/2" socket to remove the bolts securing the front bump stop to the frame rail.
12. The Rancho lift kit comes with bump stop extensions. While it isn't required, it is helpful to have a 1/2" gearwrench to secure them to the frame rail using the factory bolts.
13. Using the bolts, washers and nylock nuts provided, secure the factory bump stop to the extension you just installed.
14. The new u-bolts that come with the 2.5" Rancho lift kit have a larger diameter than stock and you will need to drill out the holes on the factory base plate using a 1/2" drill bit or unibit.
15. The new 2.5" Rancho 2.5" leaf springs came with new bushings and 3 of the 4 shackle bushings on Jane were still in good enough condition to reuse but the one on the driver side front was bad and needed to be replaced. If the frame side shackle bushings are bad on your CJ-5, you will need an air hammer to remove them. Fortunately, the new Rugged Ridge HD Shackles I got came with new polyurethane bushings to replace what I had and to install them, you'll want to start by apply the provided lube onto the bushing.
16. Push the lubed bushing into the shackle hanger.
17. Lube up the crush sleeve and then push it into the bushing.
18. You may find it necessary to tap the crush sleeve all the way in using a hammer.
19. Loosely assemble the Rugged Ridge HD Shackles using the non-greaseable bolt and silver crush sleeve.
20. Apply the provided lubricant onto the greaseable bolts.
21. Loosely install the Rugged Ridge HD Shackle onto the hanger.
22. You can now loosely install your new 2.5" Rancho front leaf spring onto the shackle using greaseable bolt included with the Rugged Ridge kit.
23. Secure the leaf spring onto the hanger on the frame rail using the factory bolts and tighten them to 45-60 ft. lbs. of torque. You will need a 5/8" wrench and an 11/16" socket for this job.
24. All the nuts provided with the Rugged Ridge HD Shackles are stovers or pinch nuts to help ensure they will not come loose. These are provided as it is important to NOT over tighten the shackle bolts and nuts. Using a 5/8" socket and 11/16" wrench, secure the shackle's center bolt and nut to 60 ft. lbs. of torque.
25. Again, using a 5/8" socket and 11/16" wrench, tighten the pivot and leaf spring bolt to only about 20-25" ft. lbs. of torque.
26. Place 2 of the same size u-bolts that come with the 2.5" Rancho lift kit onto your front axle, install the factory base plate onto them and then secure it in place using the provided washers and nylock nuts. You will need a 3/4" socket for this job.
27. Install the new Rancho RS9000 shock onto the frame mount and secure it in place using the factory nut. Use a 3/4" socket to tighten the nut to 25 ft. lbs. of torque.
28. Install the Rancho RS9000 shock onto the base plate stud and secure it in place using the factory nut. Again, use a 3/4" socket to tighten the nut to 40 ft. lbs. of torque.
29. Repeat steps 3-28 on the passenger side of your CJ-5. Make sure you use the LARGEST of the 4 u-bolt provided with the Rancho kit to go over the differential housing as shown.
30. Moving to the driver side rear of your CJ-5, use a floor jack to support the axle. Then, use a 3/4" socket to remove the nut securing your shock to the leaf spring base plate.
31. Using an 11/16" socket, remove the bolt securing the nut securing your shock to the frame mount.
32. As before, soak the u-bolt nuts with penetrating oil and then use a 3/4" socket to remove them.
33. With all 4 nuts removed, you can now separate the base plate from the u-bolts.
34. Because the 2.5" Rancho lift kit comes with new HD u-bolts, you can remove the factory u-bolts from the axle.
35. Using a 5/8" socket and an 11/16" wrench, remove the bolt and nut securing the leaf spring to the hanger on the frame rail.
36. Again, using a 5/8" socket and an 11/16" wrench, remove the bolt and nut securing the leaf spring to the shackle.
37. Use the same 5/8" socket and 11/16" wrench to remove the bolt and nut securing the shackle to the frame.
38. Use a 1/2" socket to remove the bolts securing the front bump stop to the frame rail.
39. As before, it is helpful to have a 1/2" gearwrench to secure the provided bump stop extensions to the frame rail. You will need to use the factory bolts for them and then use the provided bolts, washers and nylock nuts to secure the bump stop to the extension.
40. Using the factory nut and bolt, loosely install the new rear 2.5" Rancho leaf spring on to frame rail hanger.
41. The 2.5" Rancho lift kit comes with degree shims that you will need to install to help prevent driveline vibrations. You will need to take note that one side of the shim is slightly curved and the other is flat. The curved side needs to go down and sit on top of the spring.
42. As you did up front on steps 19-22, install your Rugged Ridge HD Shackle onto the frame, install the Rancho leaf spring on to it and then tighten the center bolt and nut to 60 ft. lbs. of torque. The pivot and leaf spring bolt will only need about 20-25" ft. lbs. of torque. You will need a 5/8" socket and 11/16" wrench for this job.
43. Secure the leaf spring onto the hanger on the frame rail using the factory bolts and tighten them to 45-60 ft. lbs. of torque. You will need a 5/8" wrench and an 11/16" socket for this job.
44. Place the new Rancho u-bolts provided with the kit onto your rear axle, install the factory base plate onto them and then secure everything in place using the provided washers and nylock nuts. You will need a 3/4" socket for this job.
45. Install your new Rancho RS9000 shock onto the frame mount and secure it in place using the factory nut. Use an 11/16" socket to tighten the nut to 25 ft. lbs. of torque.
46. Install the Rancho RS9000 shock onto the base plate stud and secure it in place using the factory nut. Again, use a 3/4" socket to tighten the nut to 40 ft. lbs. of torque.
47. Repeat steps 30-46 on the passenger side of your CJ-5 and you should be done.
And here she is! Jane with a new spring in her step and I should note, without the sag that she that had before. In other words, her old springs and shackles were the cause of what I was seeing and replacing them did fix the problem. And, as you can see here, Jane still stands at about the same height as she did.
I should note that the information I've provided in this write-up were based on what was on my CJ-5 and the parts that I installed. As is the case with any old iron, the nuts and bolts you come across may be different and the torque specs for them may have different requirements as well. ALWAYS refer to your factory service manual and the instructions that come with the parts you buy for the most accurate information.
Please let me know if you have any questions.