The WAYALIFE ACM Breather Relocation and Air Chuck Mount is designed to be installed under the hood of a Jeep JL Wrangler or JT Gladiator, as high up as possible on the firewall and is made to be used with an original ARB CKMA12 or the all NEW CKBLA12 Brushless Single Air Compressor, which puts out about as much air as the original twin compressor. The mount is made out of laser cut and bent stainless steel and the kit comes complete with all the hardware and hoses necessary and for less than half the cost of using parts made by ARB. This write-up will show you just how easy it is to install and without any drilling or cutting and with just basic tools.
WHERE TO BUY
ACM Breather Relocation & Air Chuck Mount
WHAT COMES WITH THE KIT
Laser cut and bent stainless steel mount that's Made in the USA
(1) 24" Air Up Hose w/Fittings Installed
(1) 24" Breather Hose
(2) MNPT Elbows
(1) FNPT Elbow
(1) Bulkhead Fitting
(1) T Fitting (Not included with Brushless Compressor kit)
(1) MNPT Quick Connect Coupler
(1) 6mm nut/washer
WHAT YOU WILL NEED
• 10, 18mm Socket & Wrench
• 9/16" Wrench
• Socket extension
• Ratchet
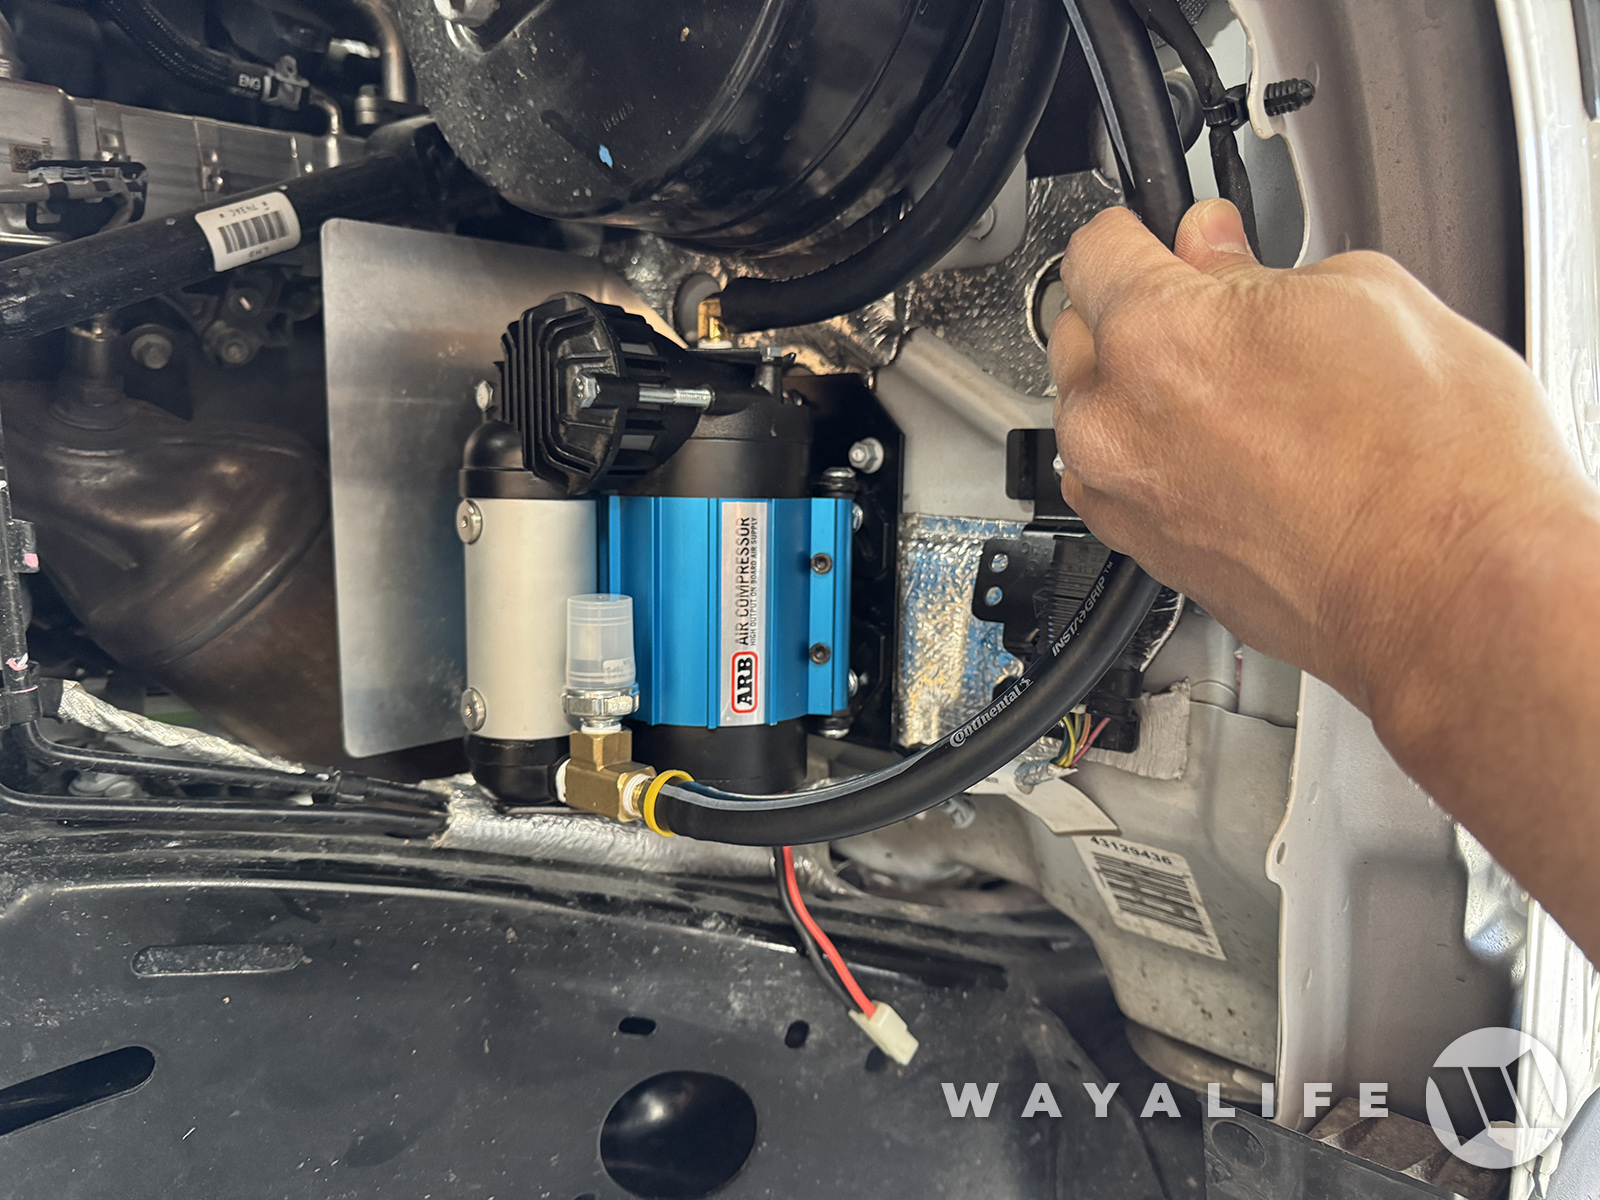
• Crescent Wrench
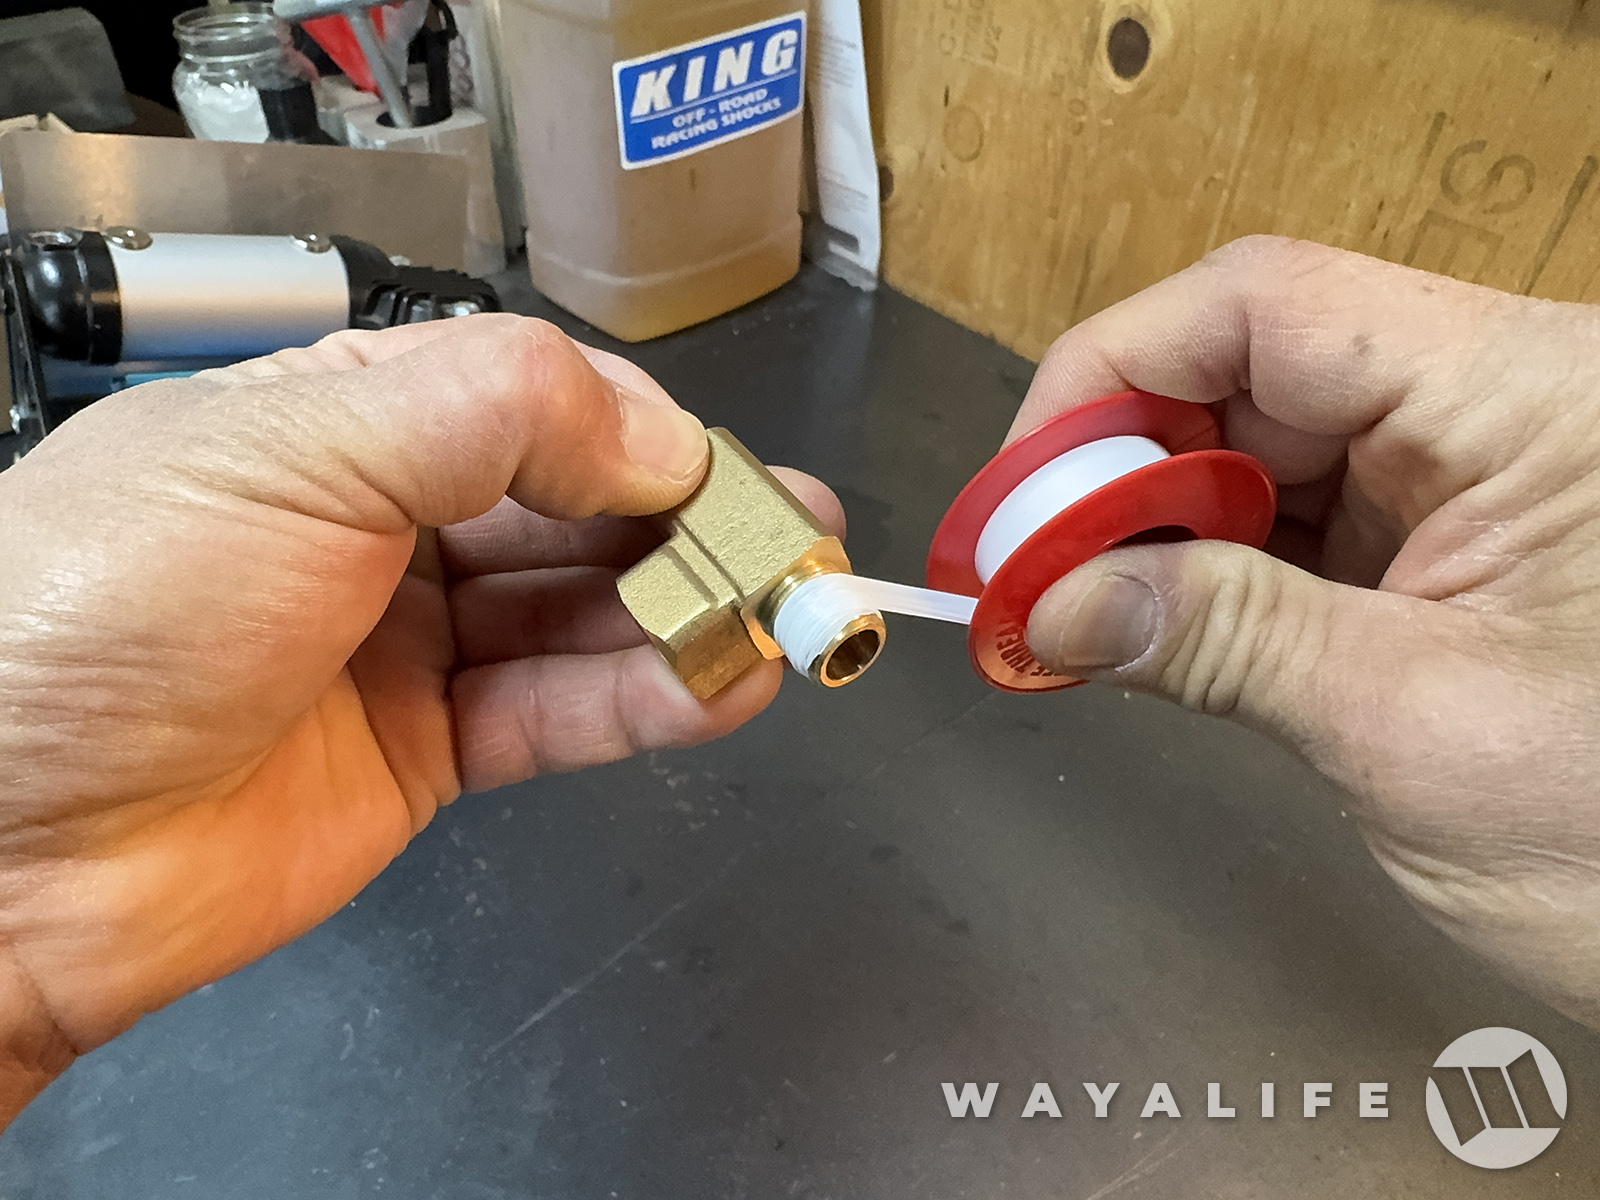
• Teflon Tape
INSTALLATION
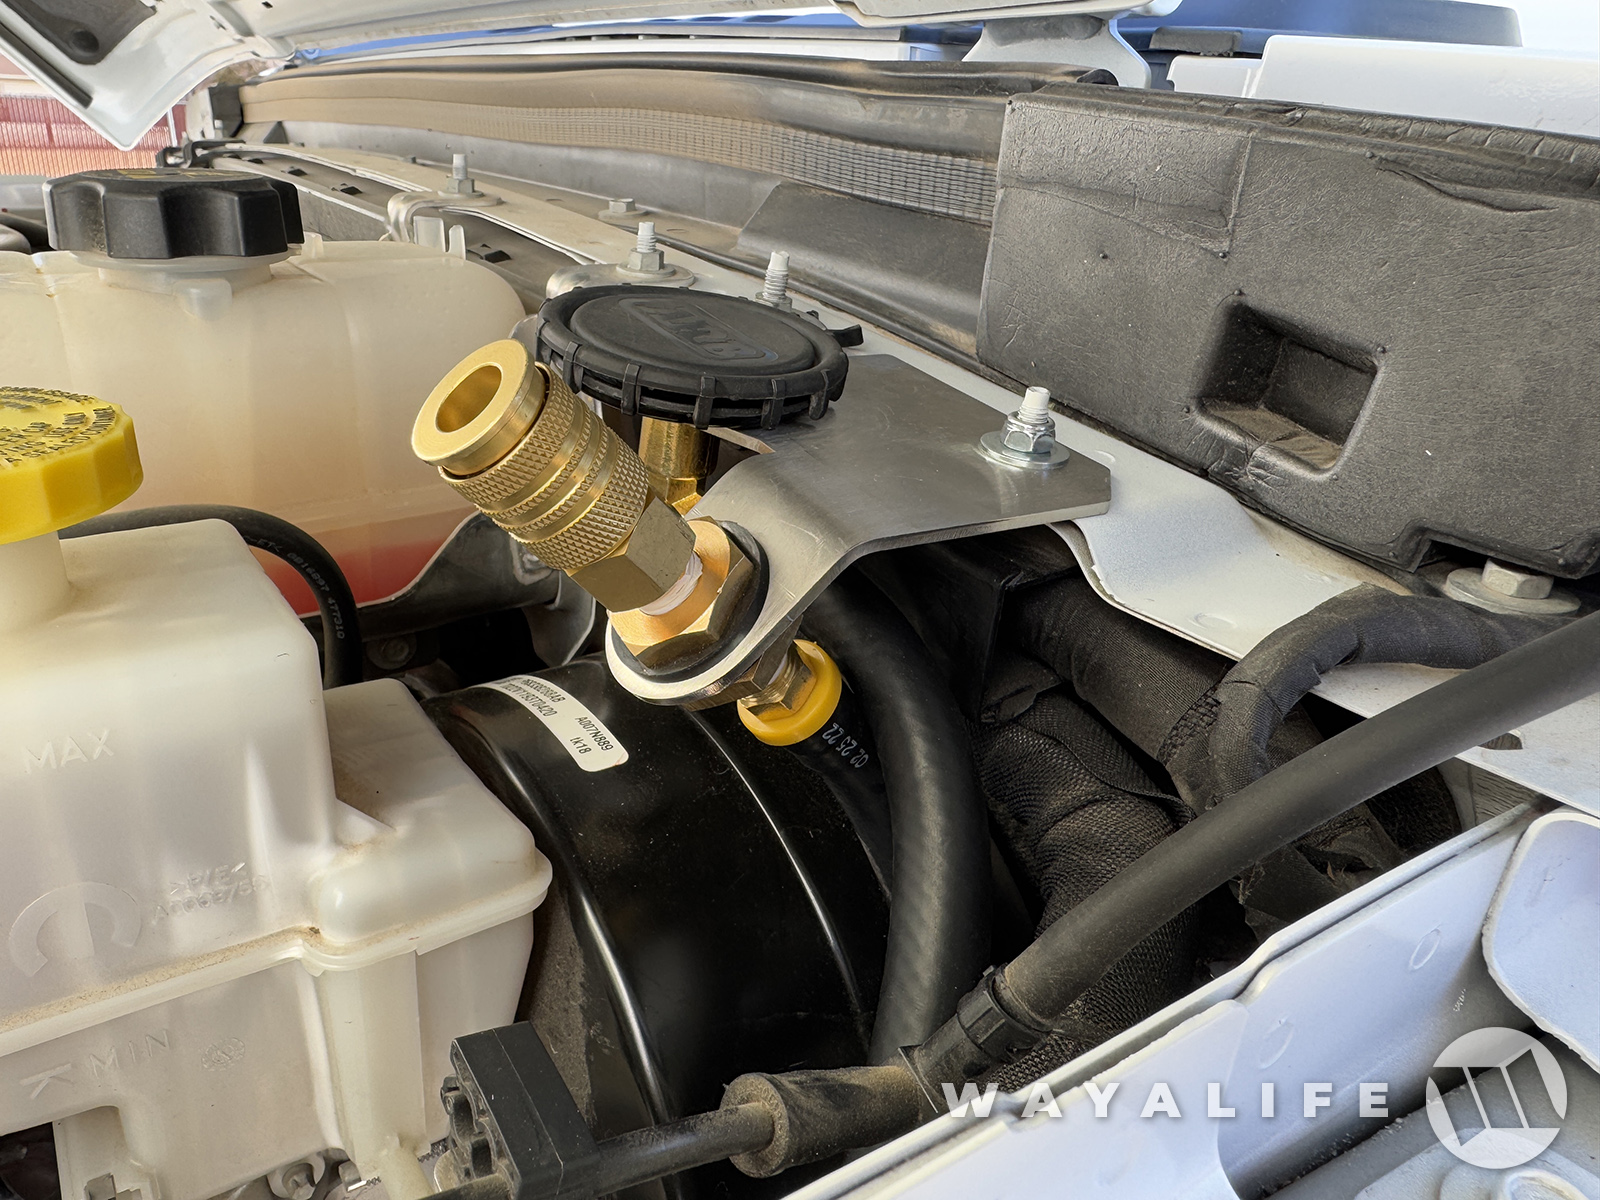
NOTE : This Breather Relocation and Air Chuck Mount needs to be installed at the same time as the ACM.
WRITE-UP : WAYALIFE ACM - Jeep JL / JT Under the Hood ARB Air Compressor Mount
One of the cheapest and easiest things you can do to improve the quality of your Jeep JL Wrangler or JT Gladiator's ride and overall performance off-road, is to air down your tires before hitting the trail. Reducing the PSI or lowering pressure in your tires will do wonders to soften things up...
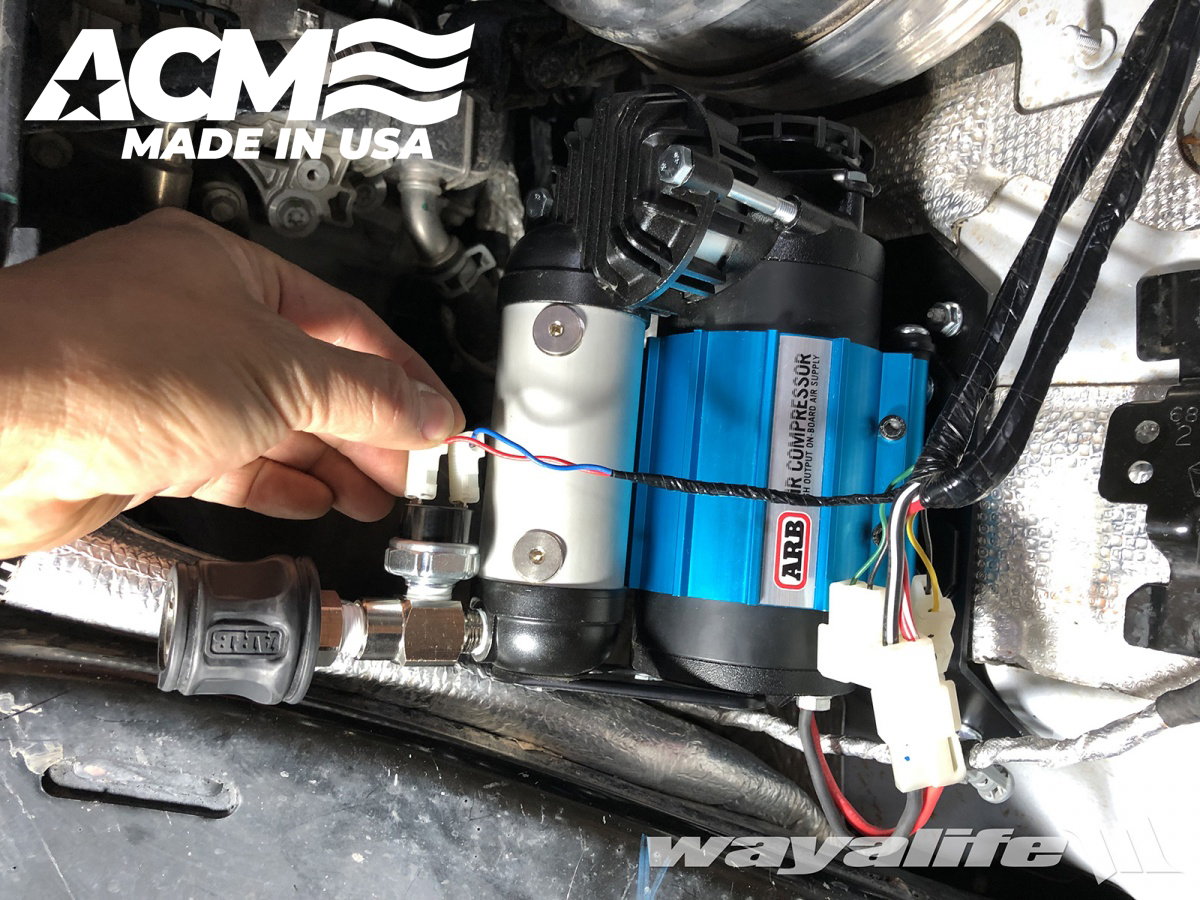
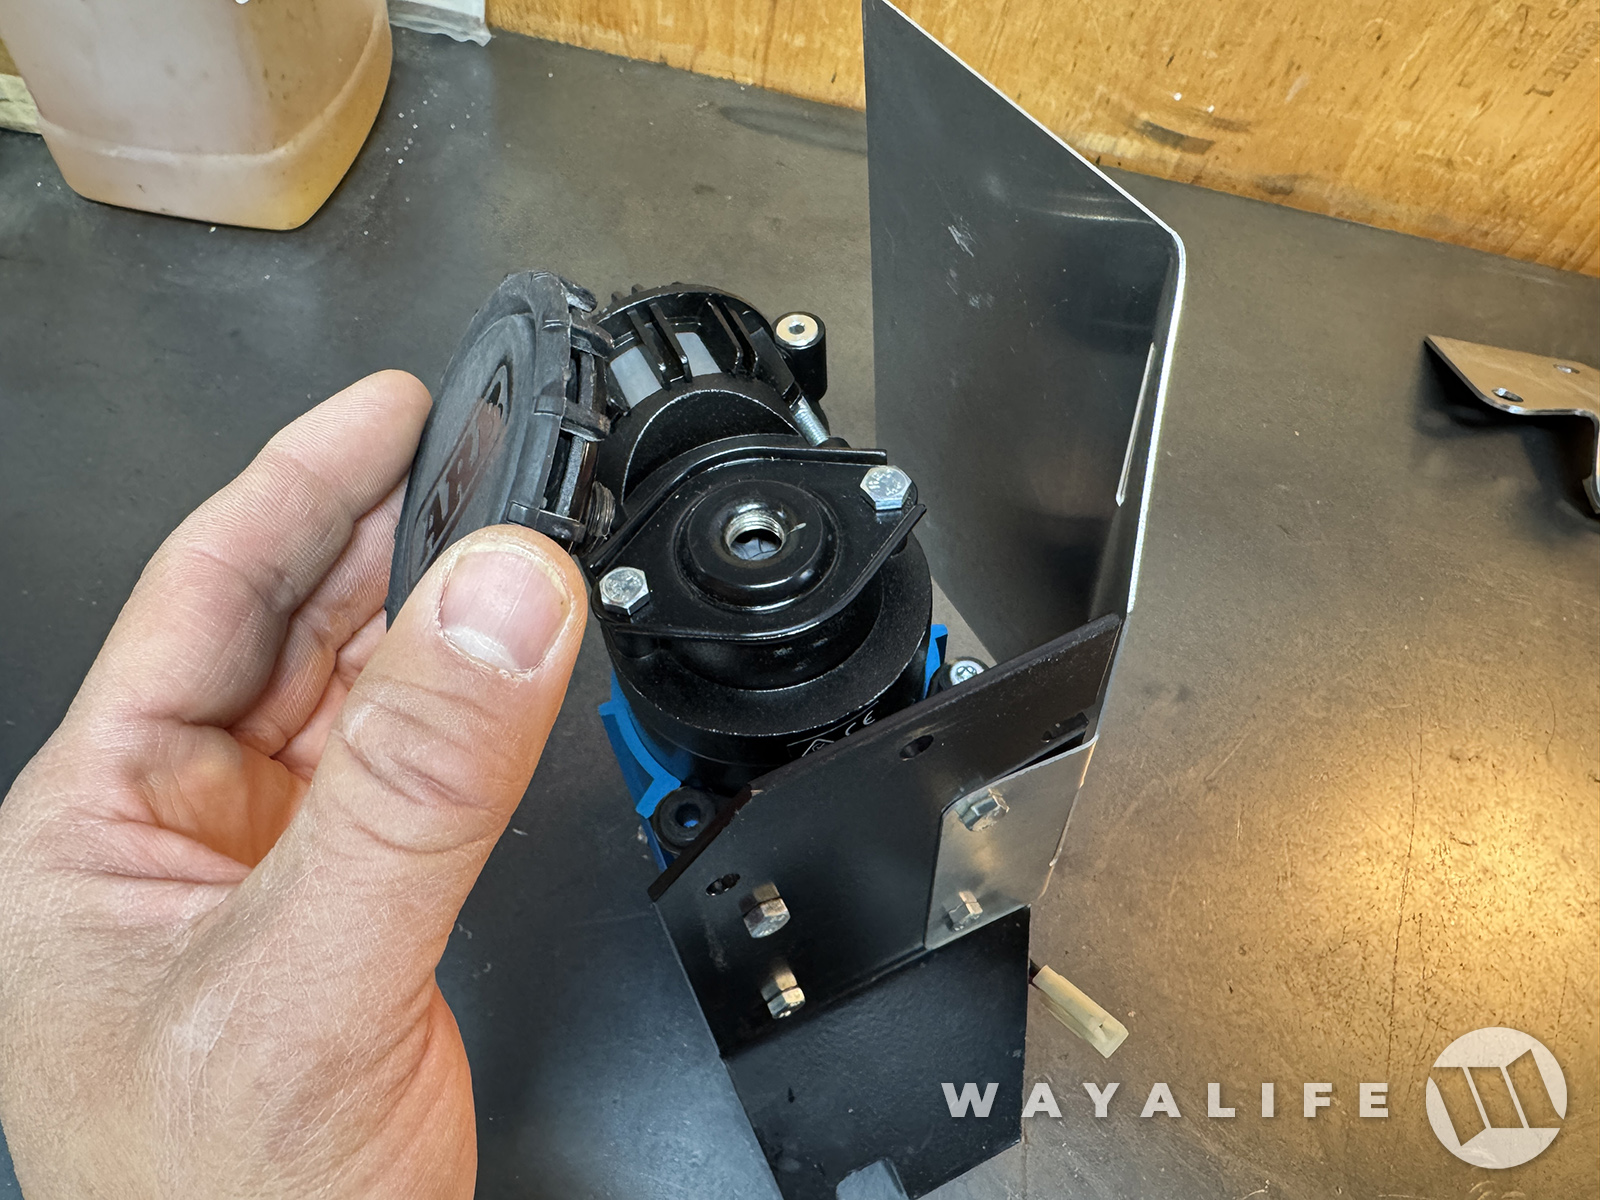
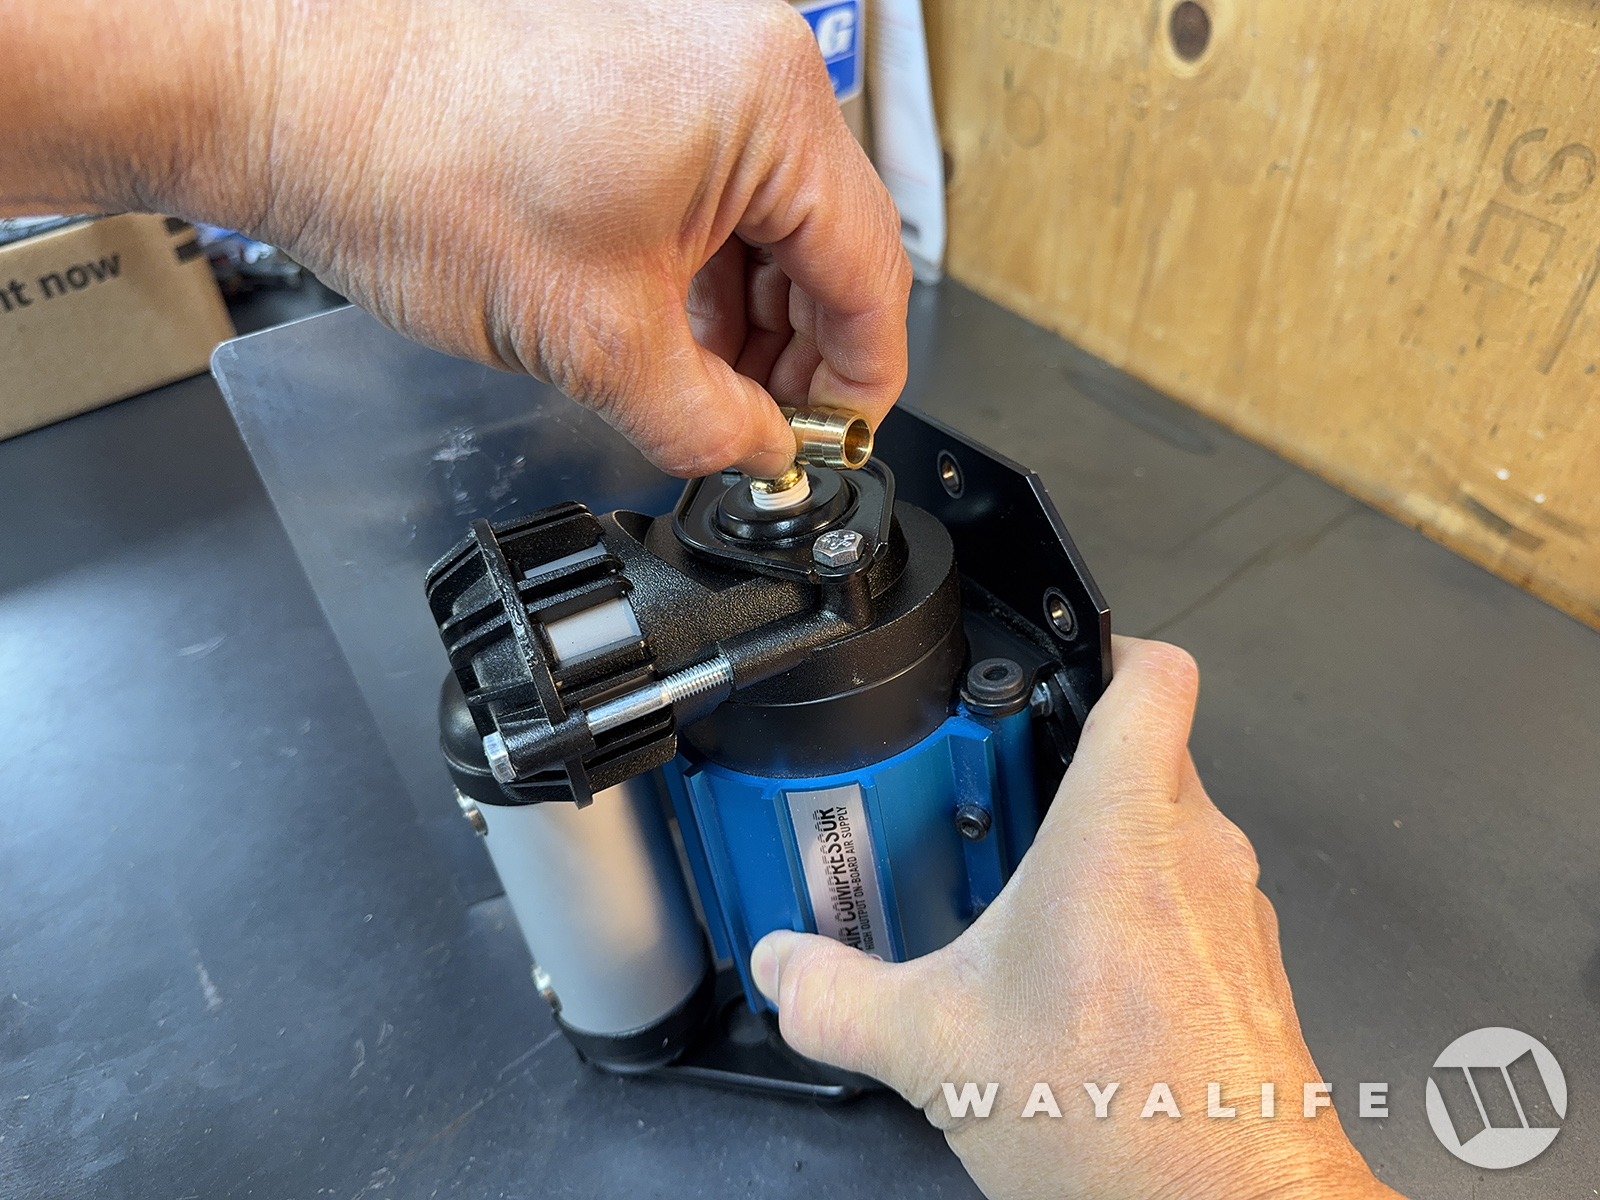
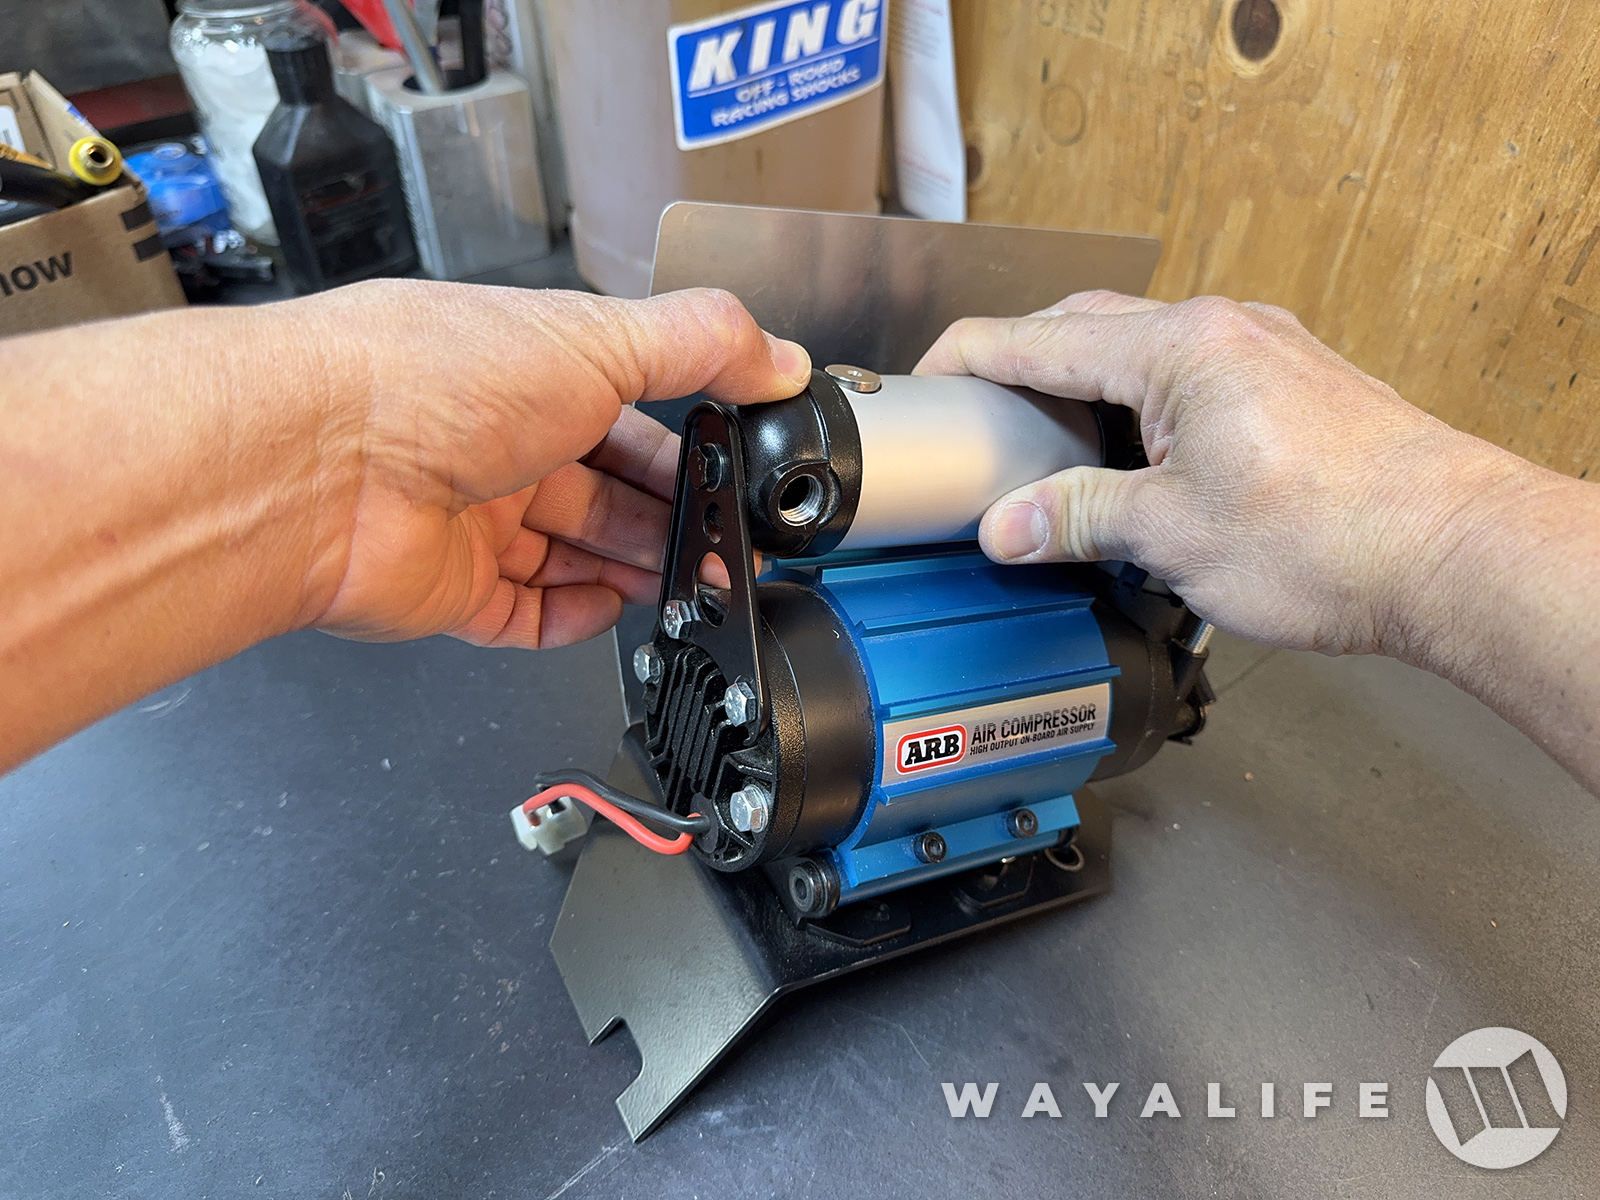
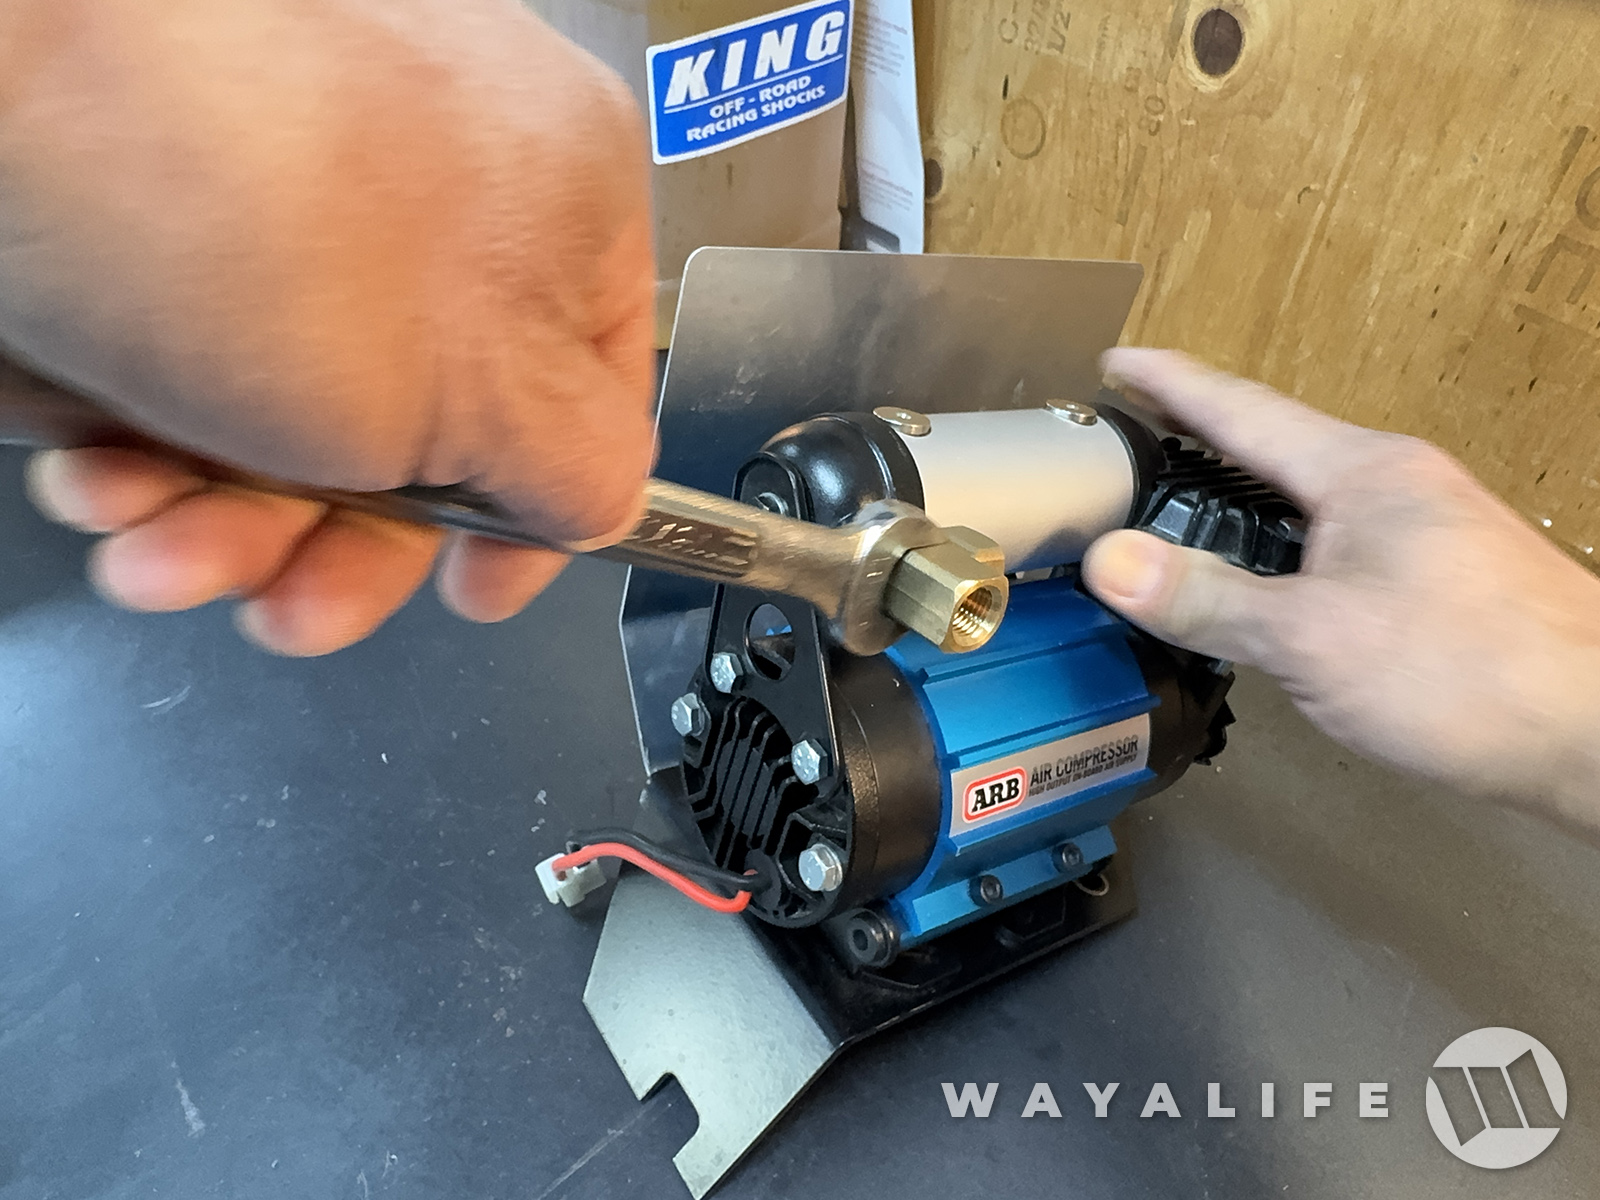
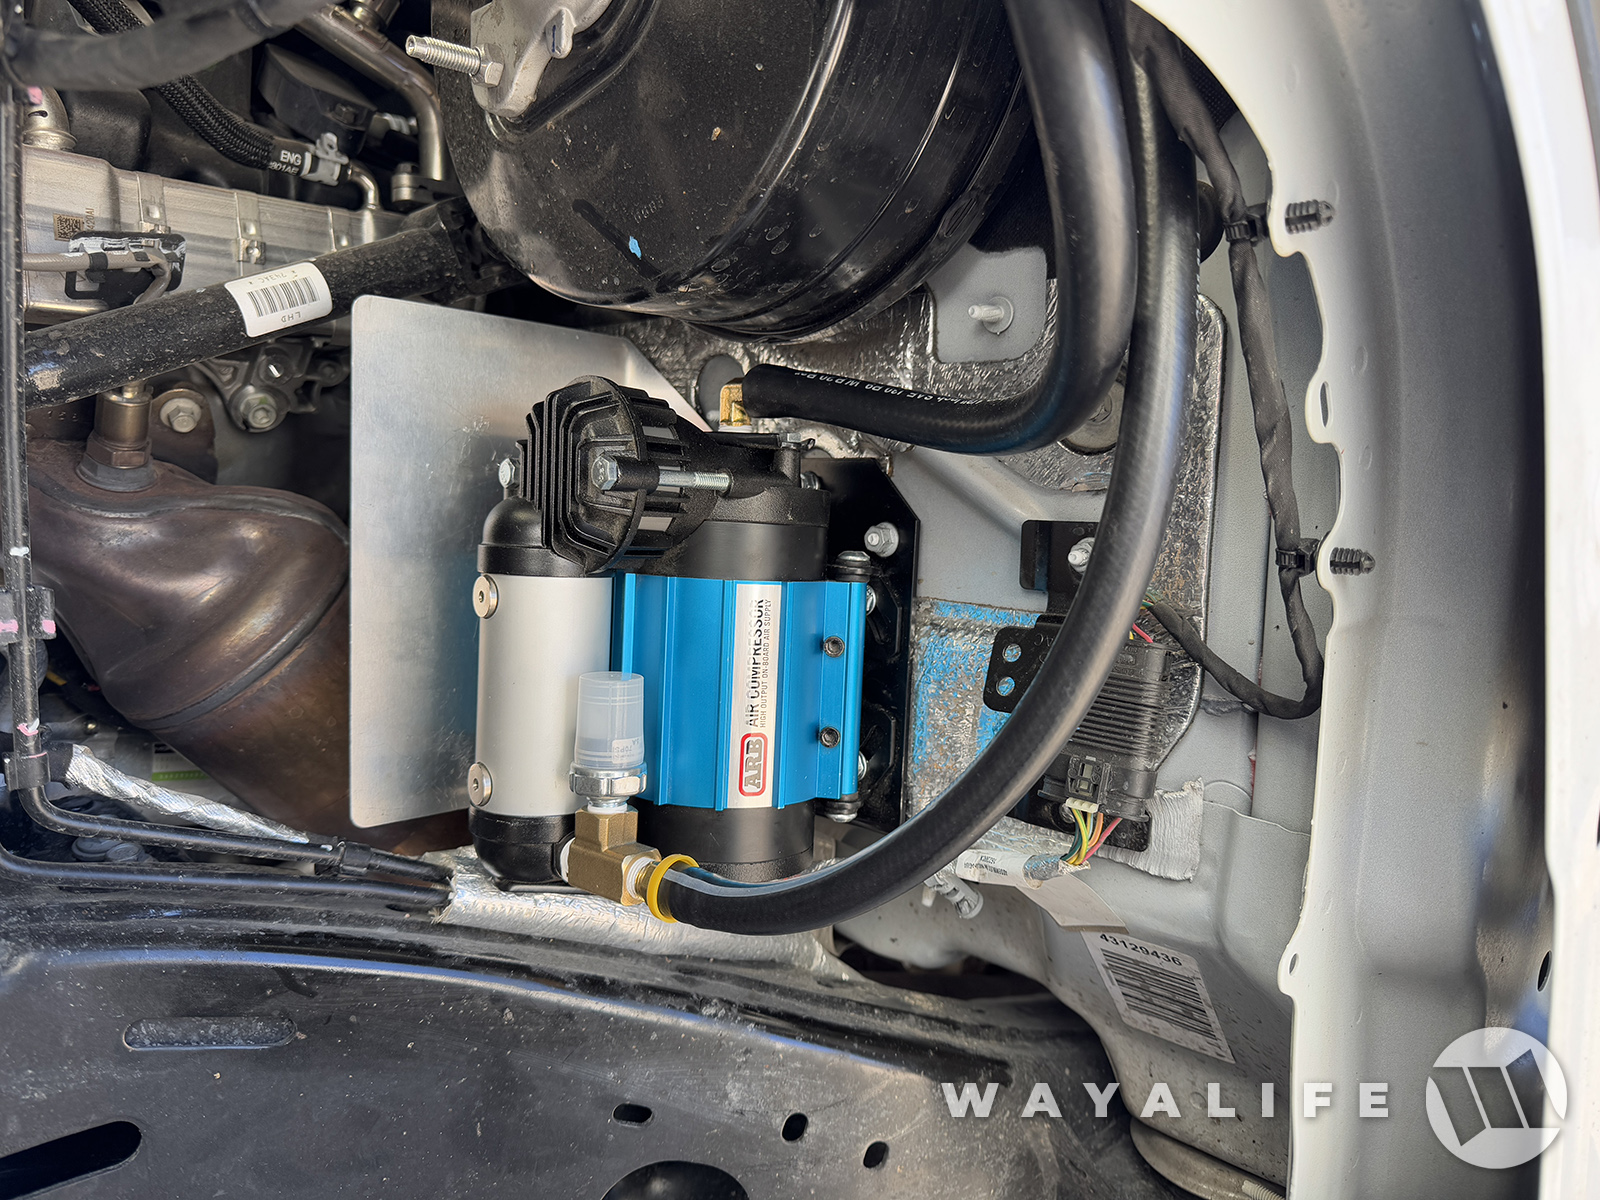
1. After you install your ARB Single Compressor on the ACM with heat shield, remove the filter housing attached on top.
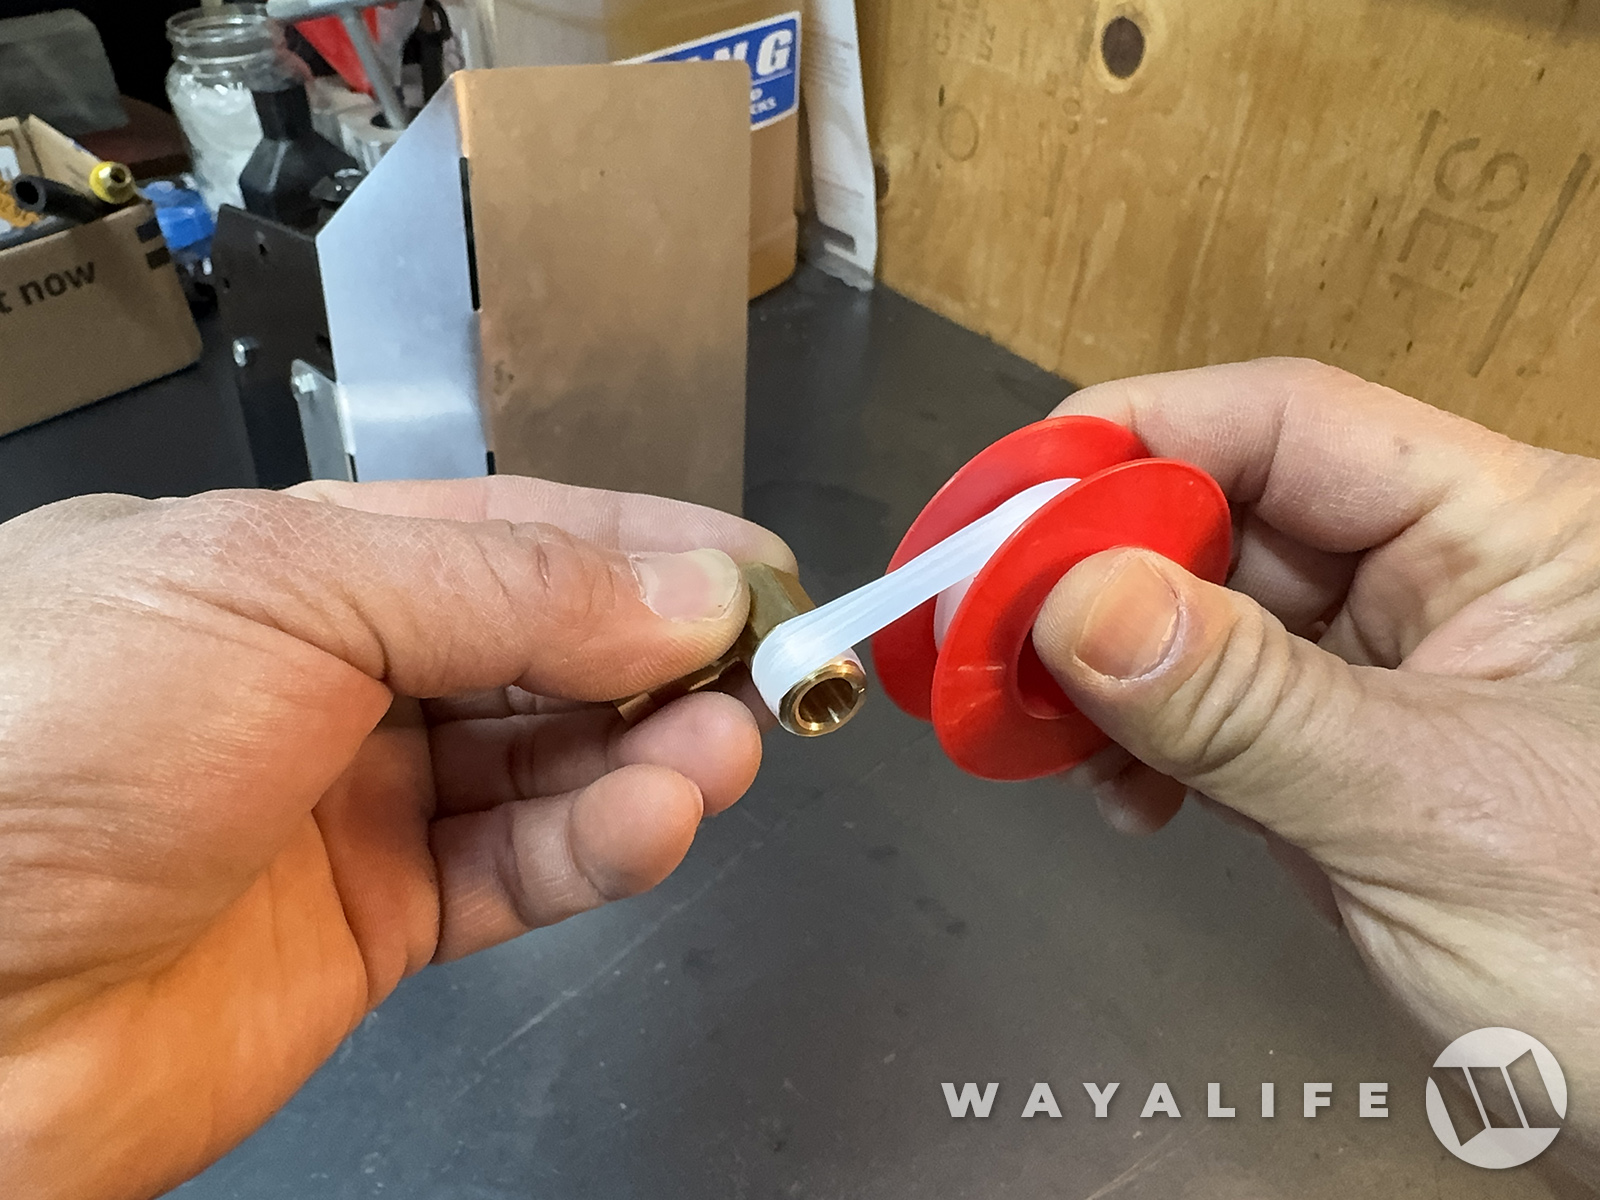
2. Apply teflon tape on the thread of the MNPT Elbow.
3. Install the MNPT Elbow on the top of the ARB compressor where the filter housing was attached to and so that it's facing outward when done and as shown.
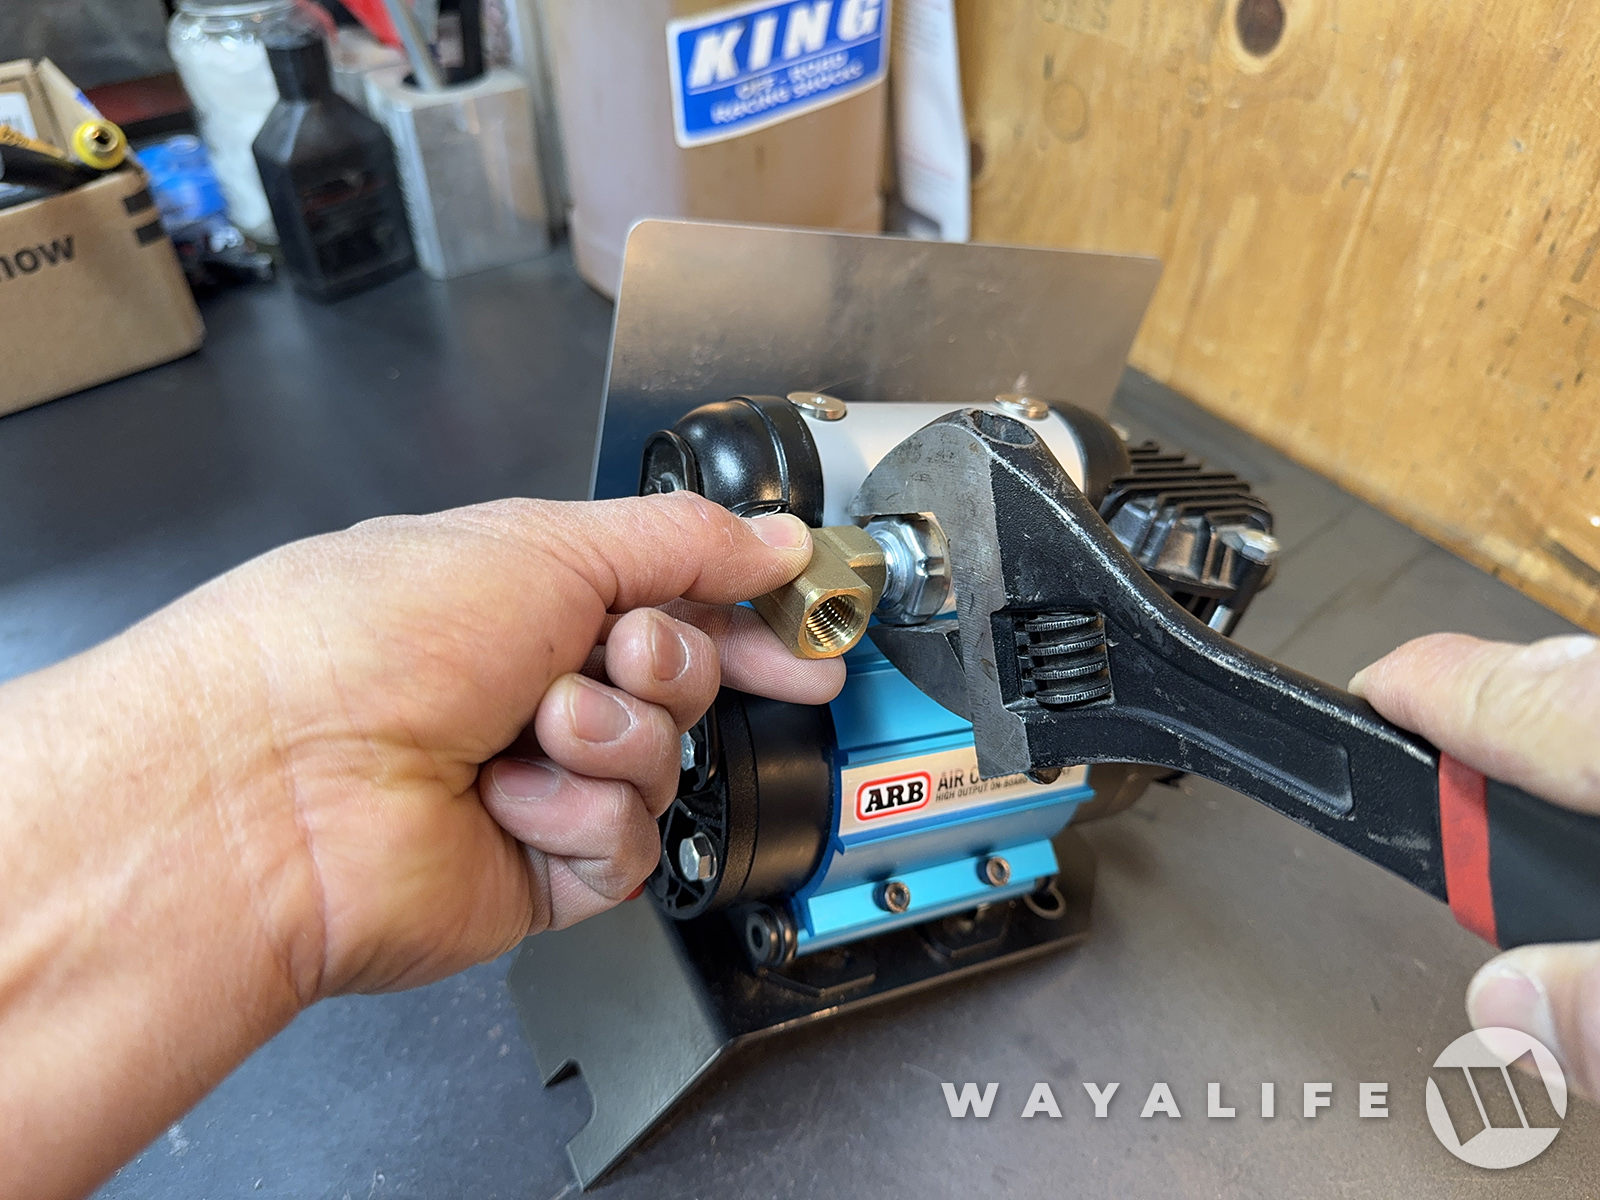
4. Apply teflon tape to the threads of the T Fitting.
5. Use a 10mm socket to loosen but do NOT remove the 2 bolts securing the air tank in place.
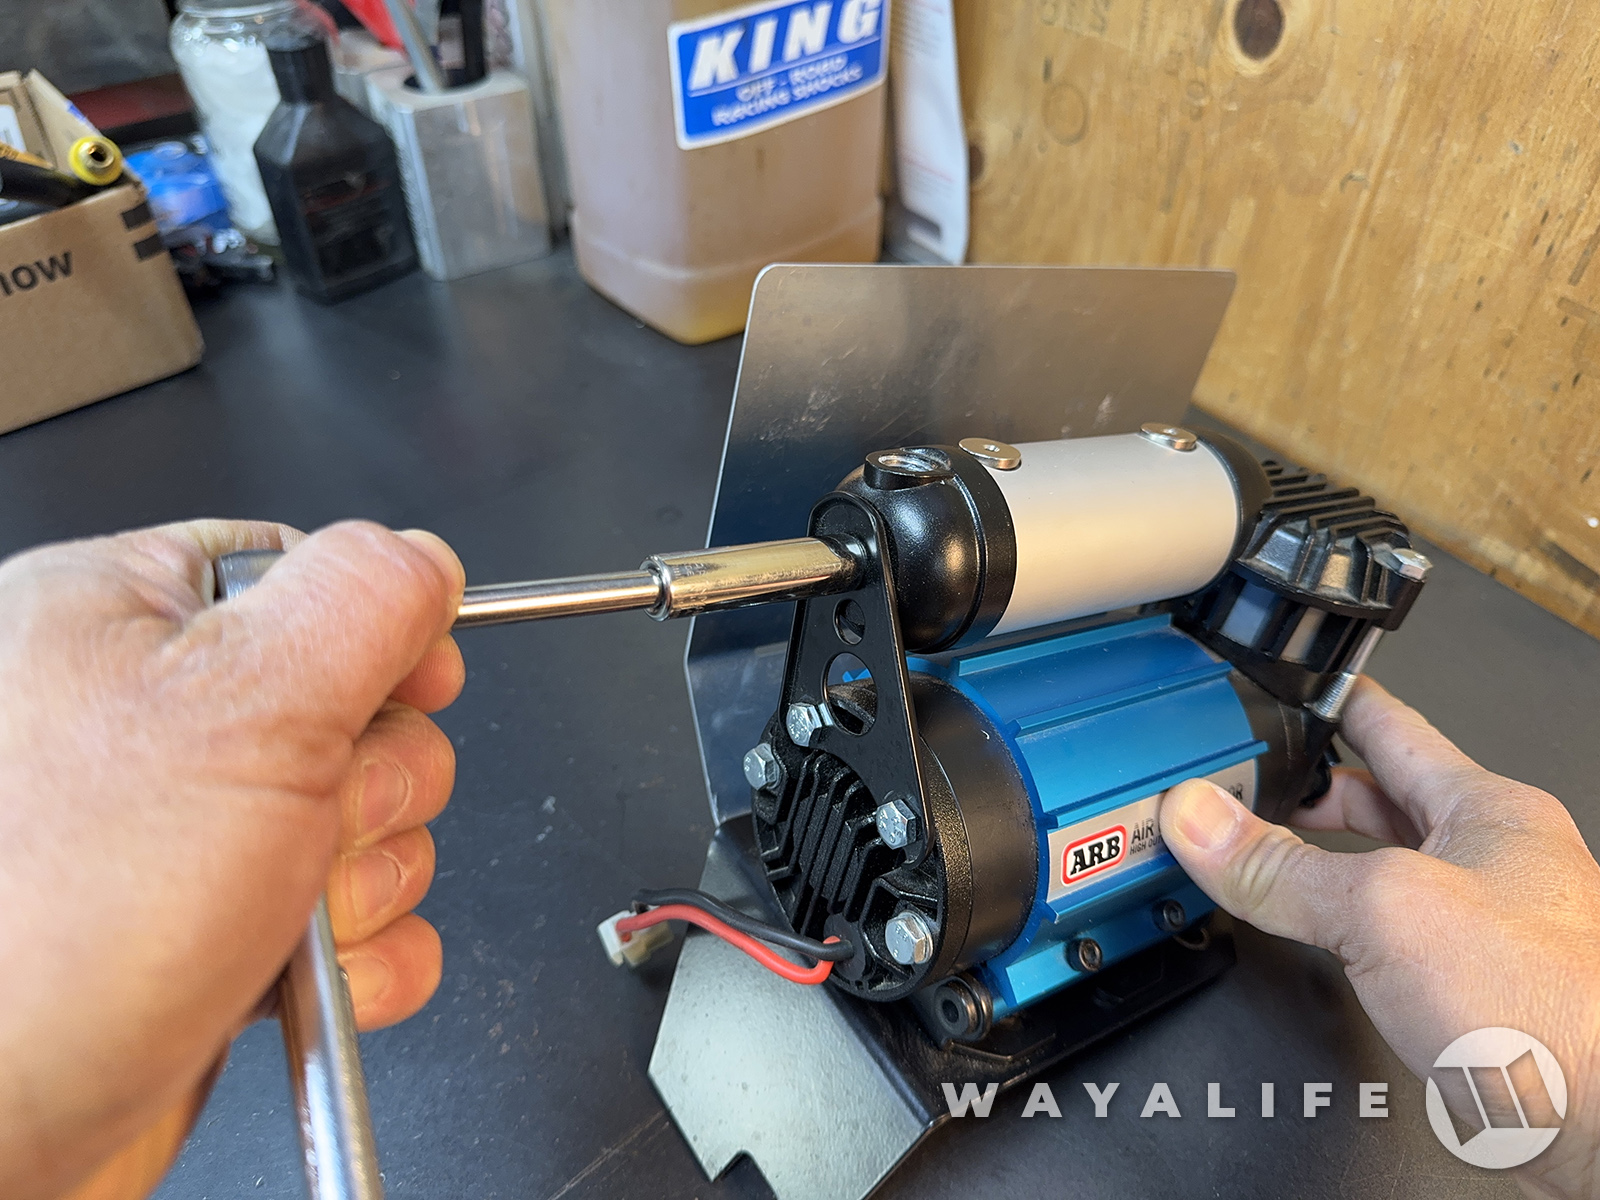
6. Rotate the air tank 90° so that the port on it is facing outward as shown.
7. Using a 10mm socket, tighten the 2 air tank bolts to secure it in place.

8. Use an 18mm wrench to secure the T Fitting on the base of the air tank port on the ARB compressor and so that the top of the T is facing up.
9. Apply teflon tape on the threads of the pressure switch and then install it on top of the T Fitting. Use a crescent wrench to secure it in place.
10. Continue with the ACM installation on the firewall (Step #20) using the instructions for it:
WRITE-UP : WAYALIFE ACM - Jeep JL / JT Under the Hood ARB Air Compressor Mount
One of the cheapest and easiest things you can do to improve the quality of your Jeep JL Wrangler or JT Gladiator's ride and overall performance off-road, is to air down your tires before hitting the trail. Reducing the PSI or lowering pressure in your tires will do wonders to soften things up...
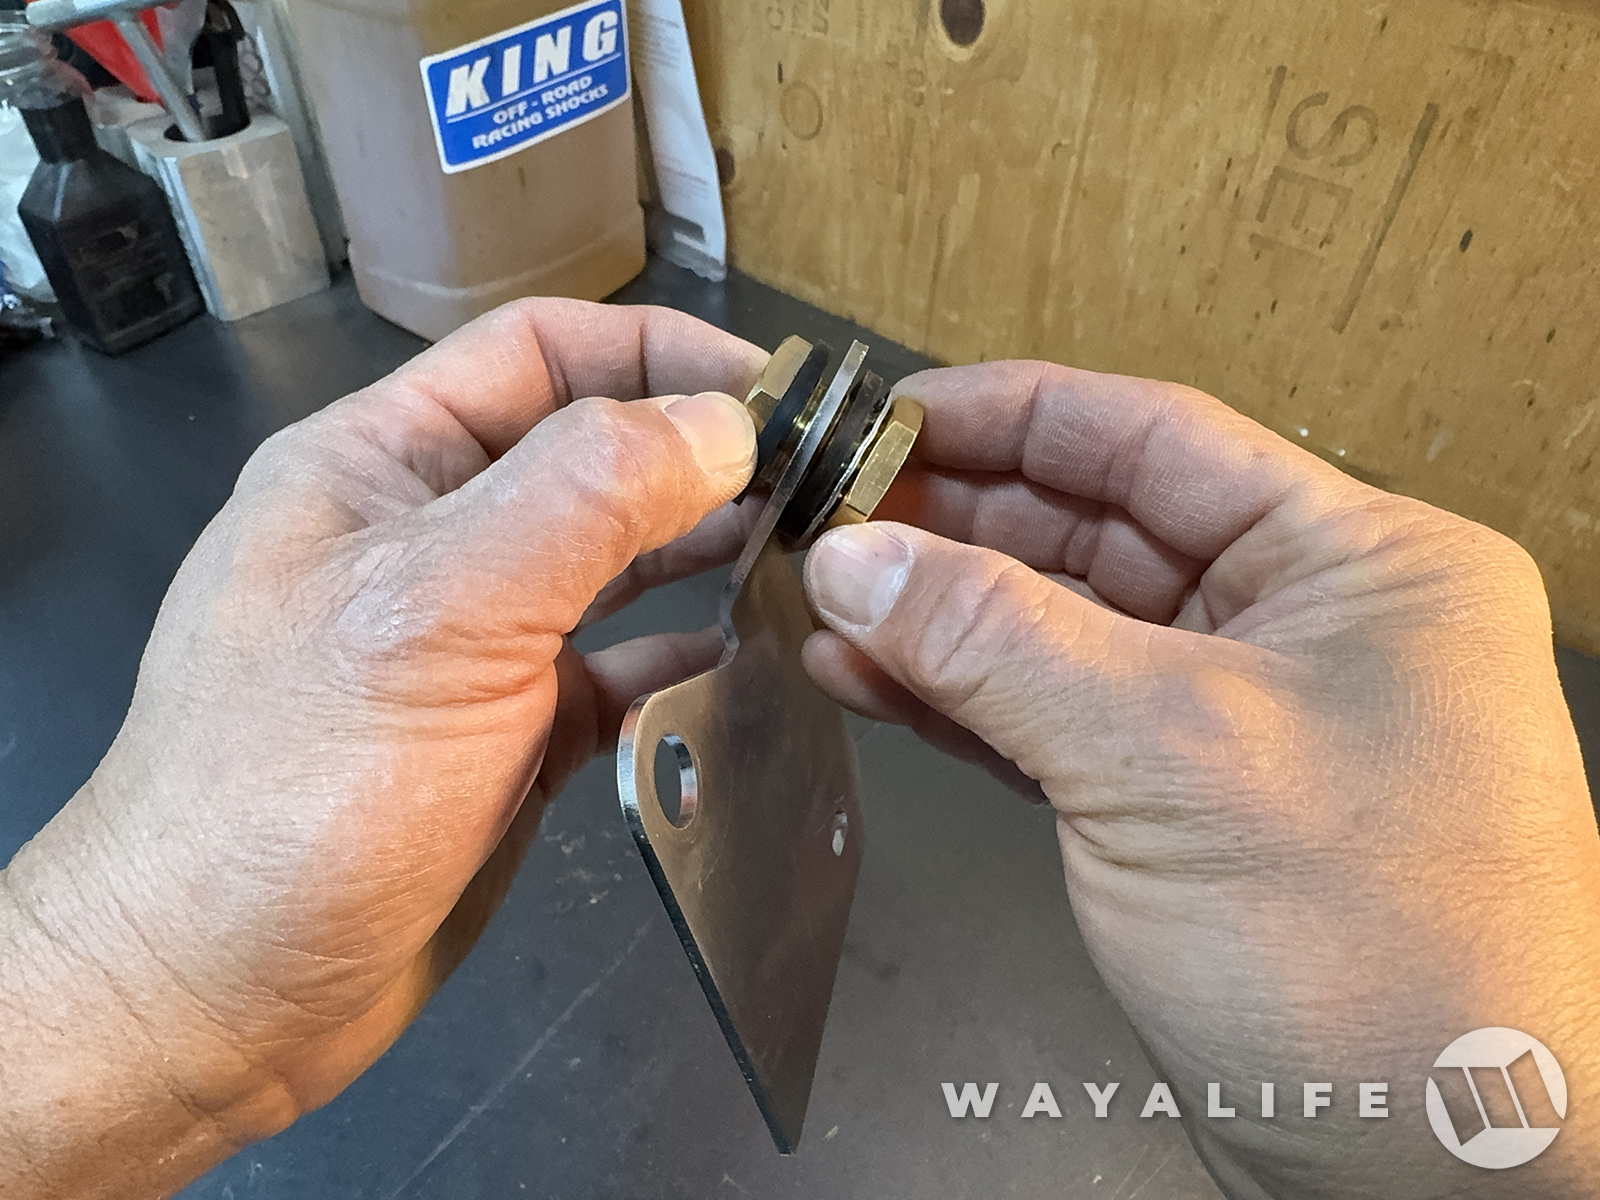
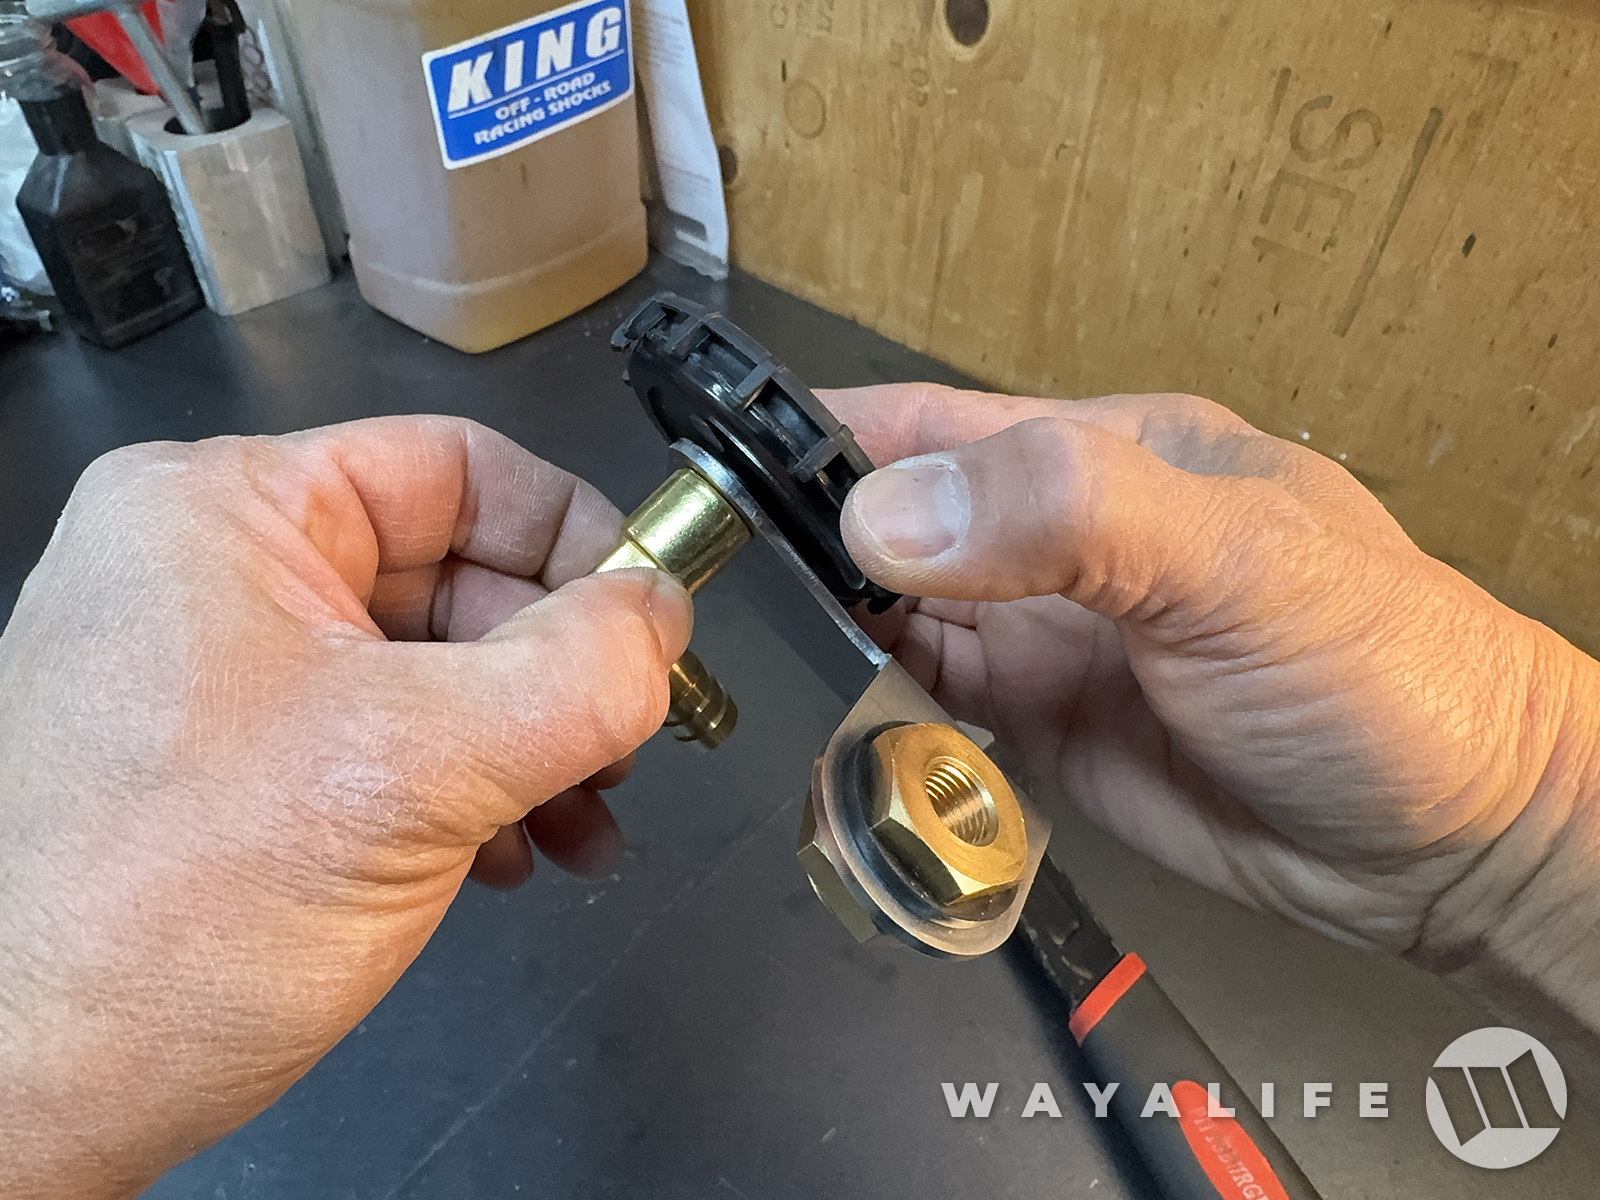
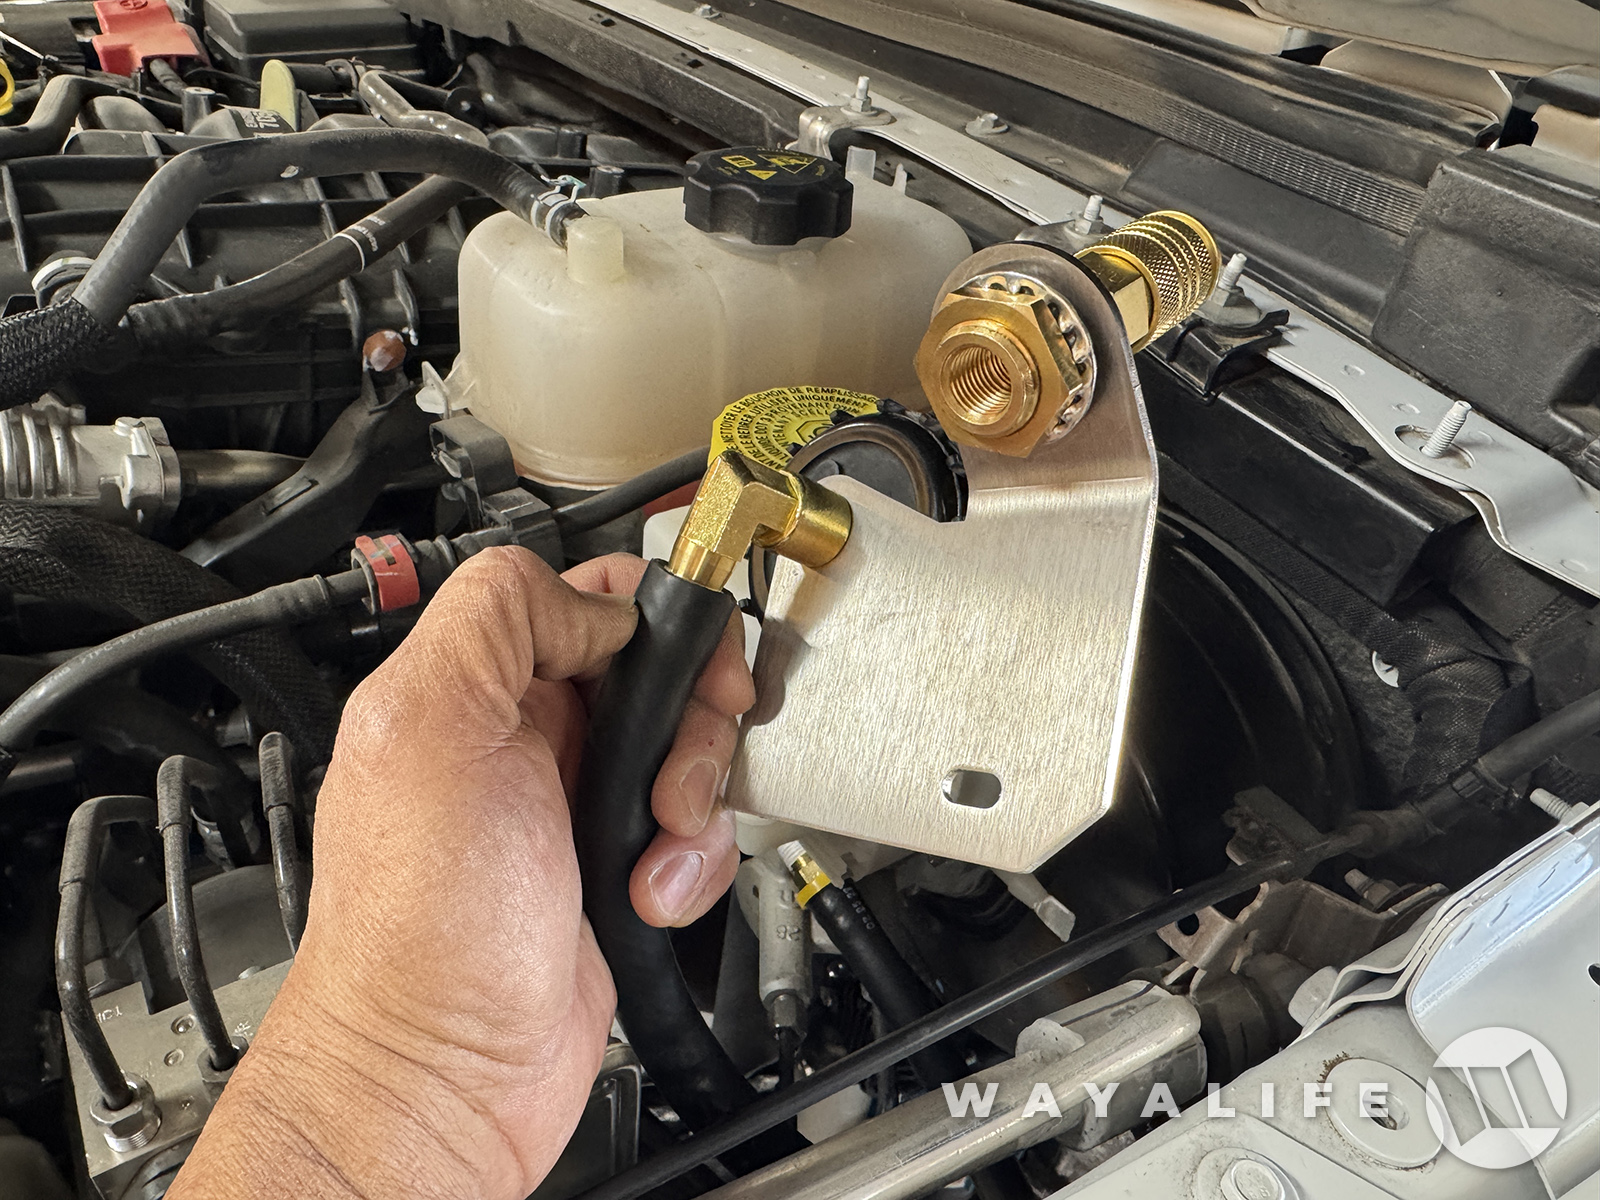
11. With the ARB Compressor mounted on the ACM and installed on your Jeep, begin the assembly of the breather relocation and air chuck mount by attaching the bulkhead fitting on it. Please note, you will want the mount sandwiched in between the 2 rubber washers and spoked washer as shown.
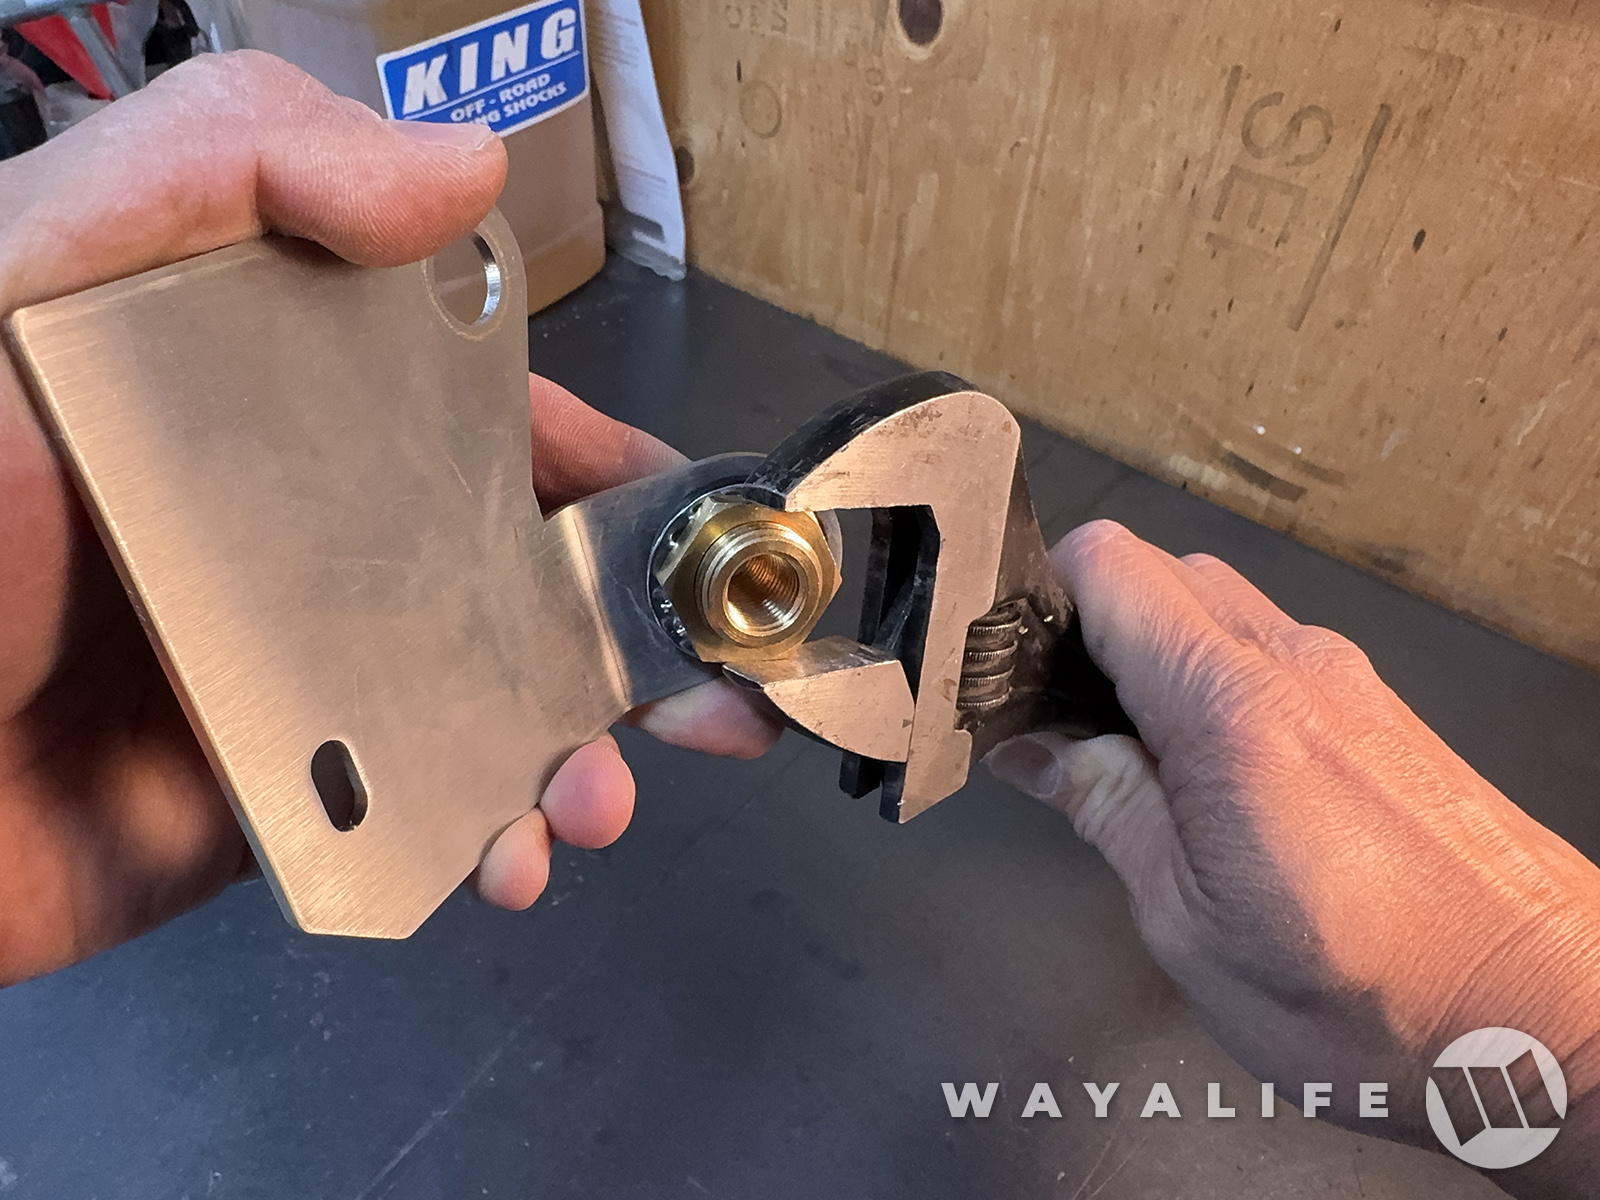
12. Use a crescent wrench to secure the bulkhead fitting onto the mount.
13. Take the ARB filter housing you removed earlier and secure it to the mount by threading it into the FNPT Elbow.
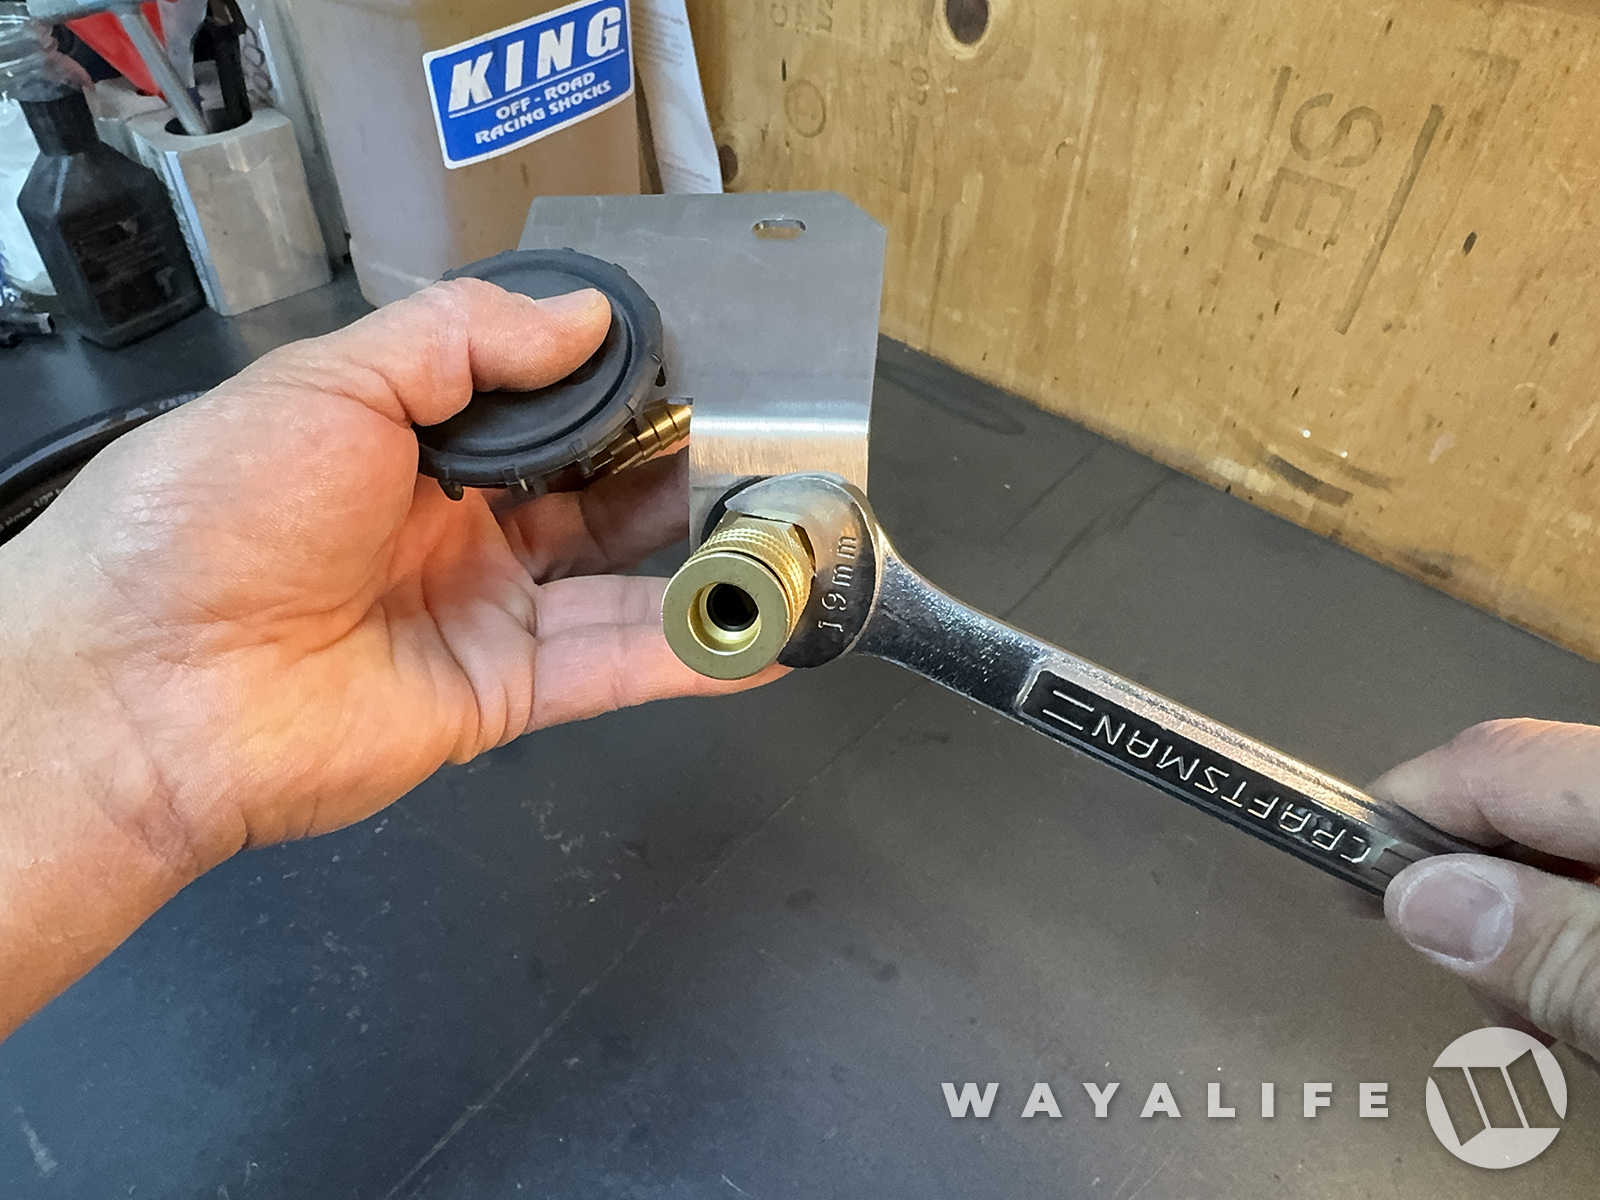
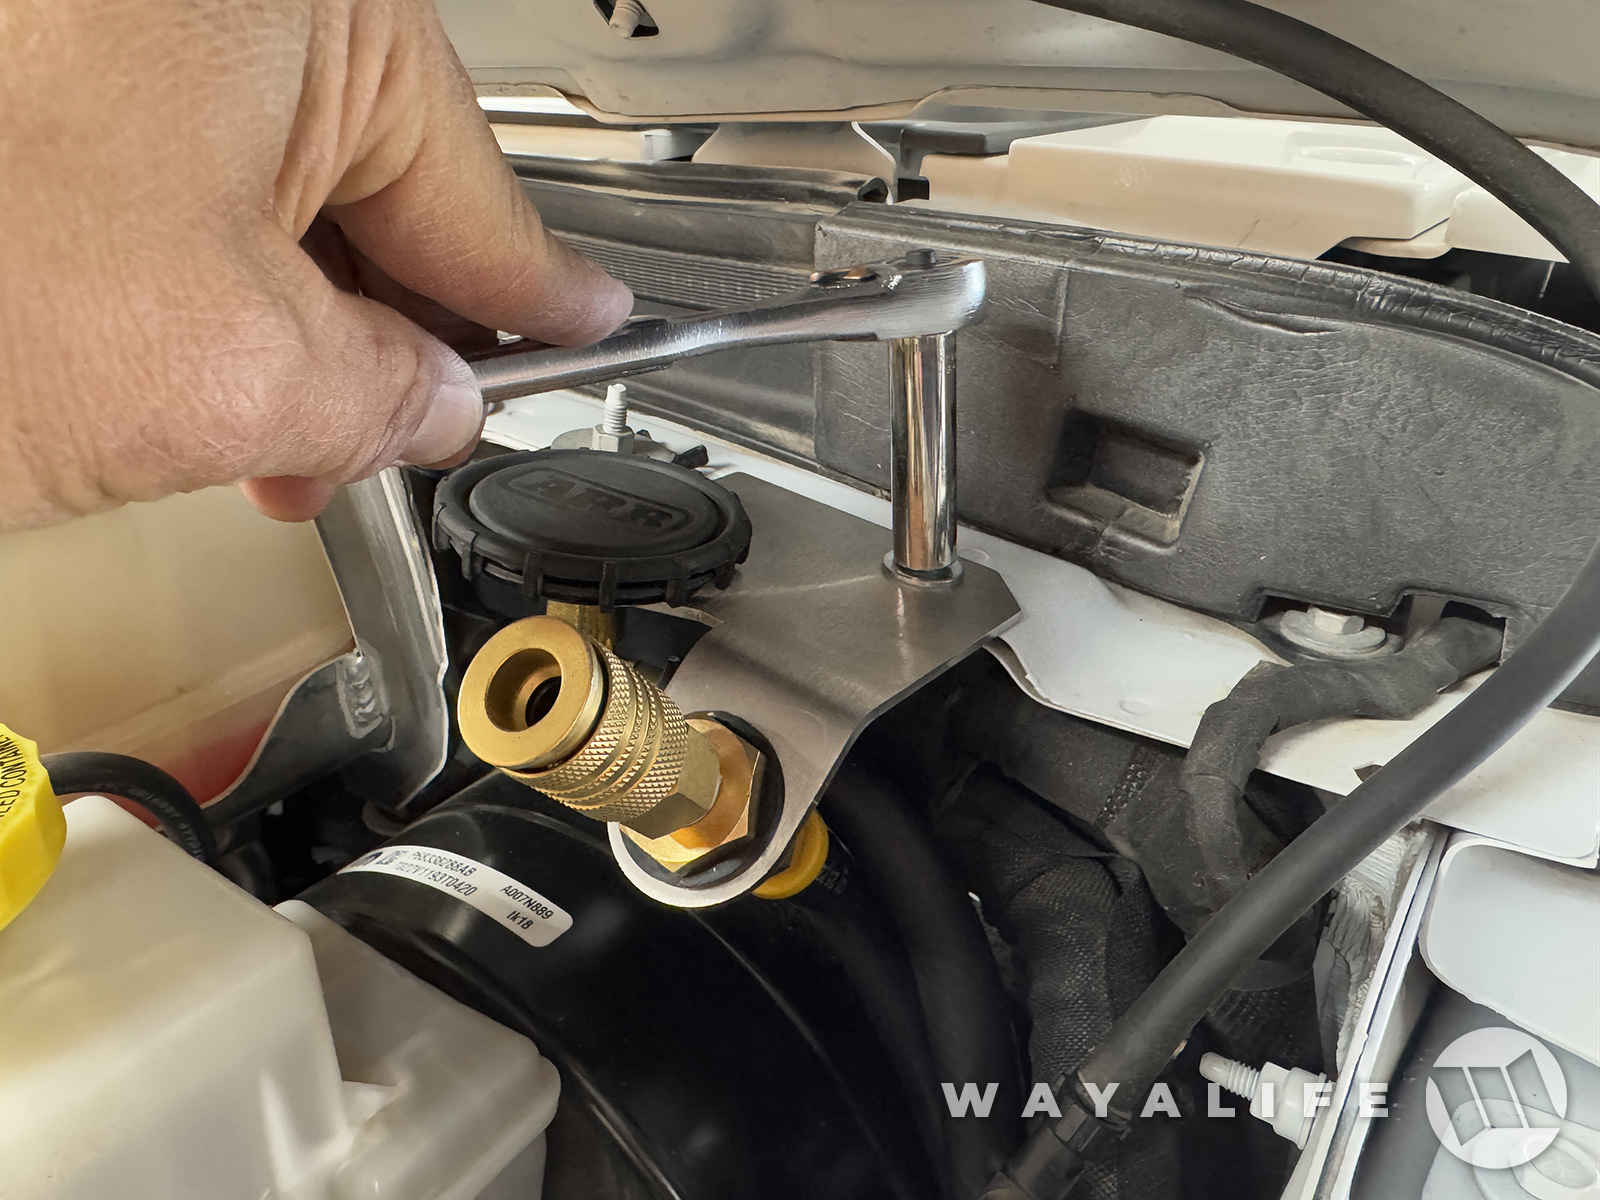
14. Apply teflon tape to the threads of the MNPT Quick Connect Coupler and secure it onto the front face of the bulk head fitting using a 19mm wrench.
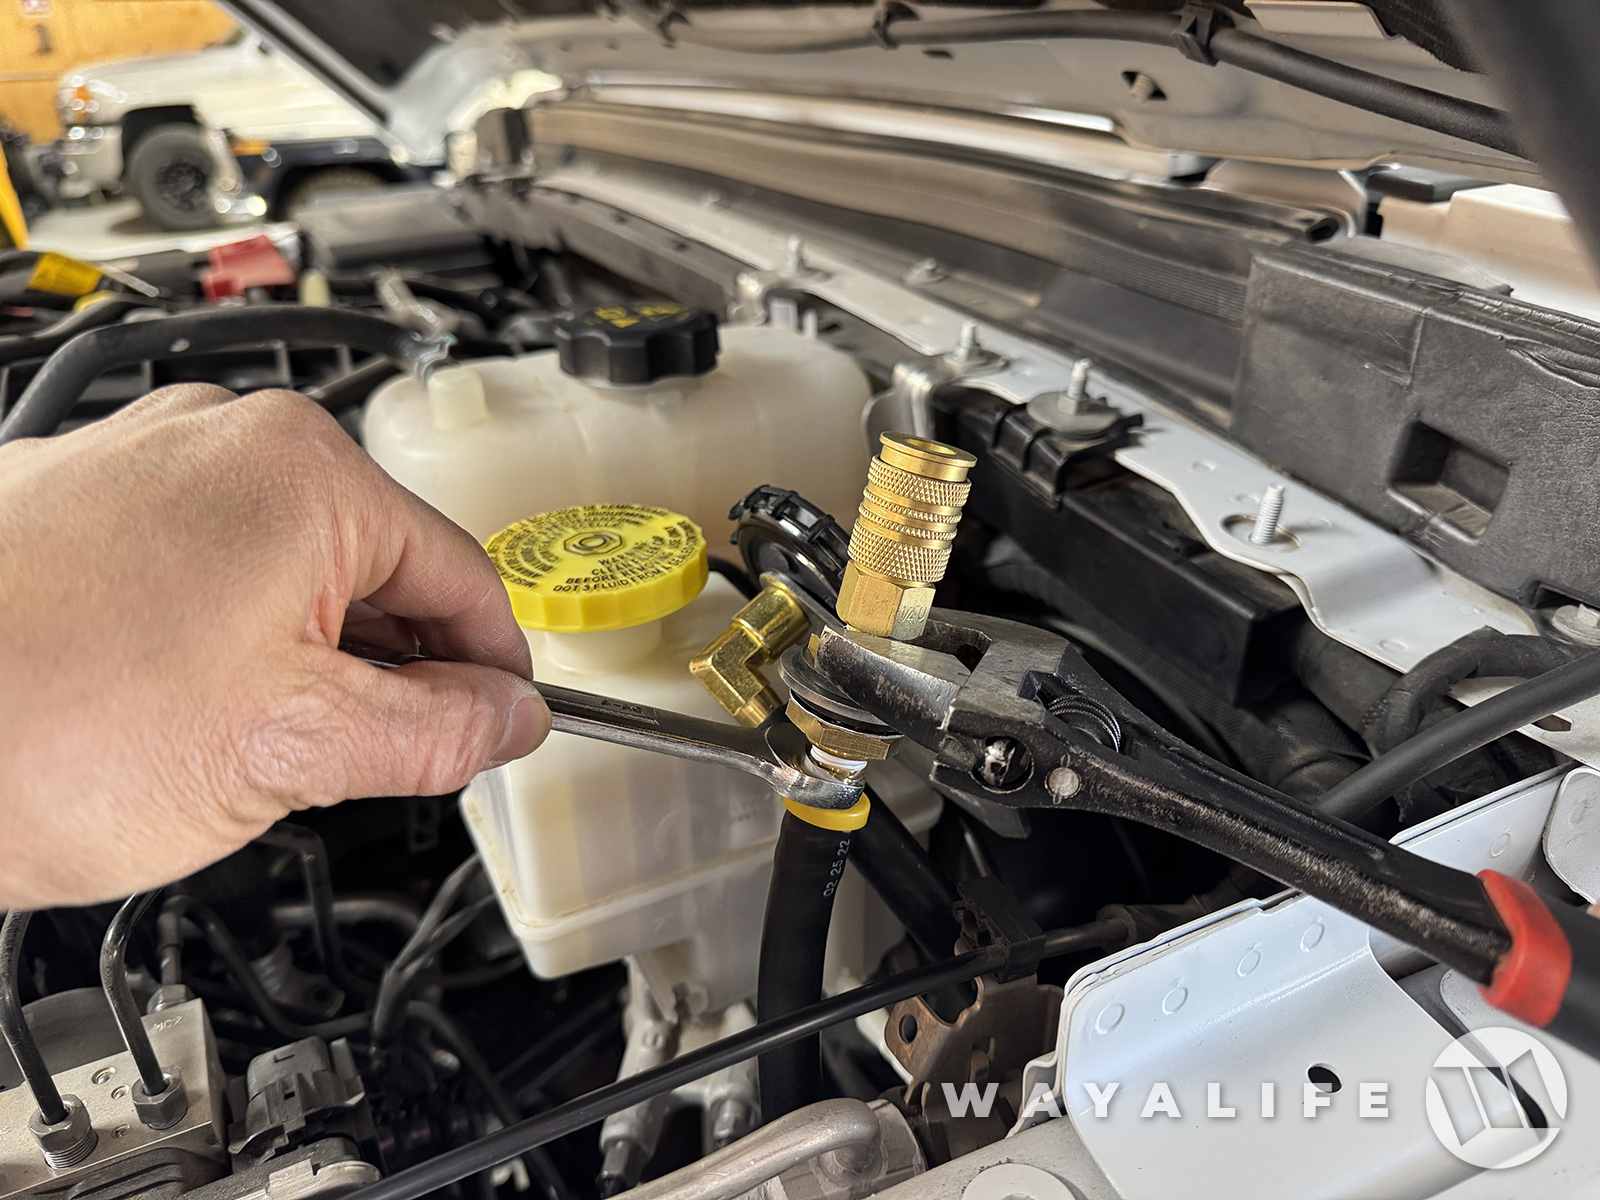
15. Apply teflon tape to the threads on both ends of the air up hose.
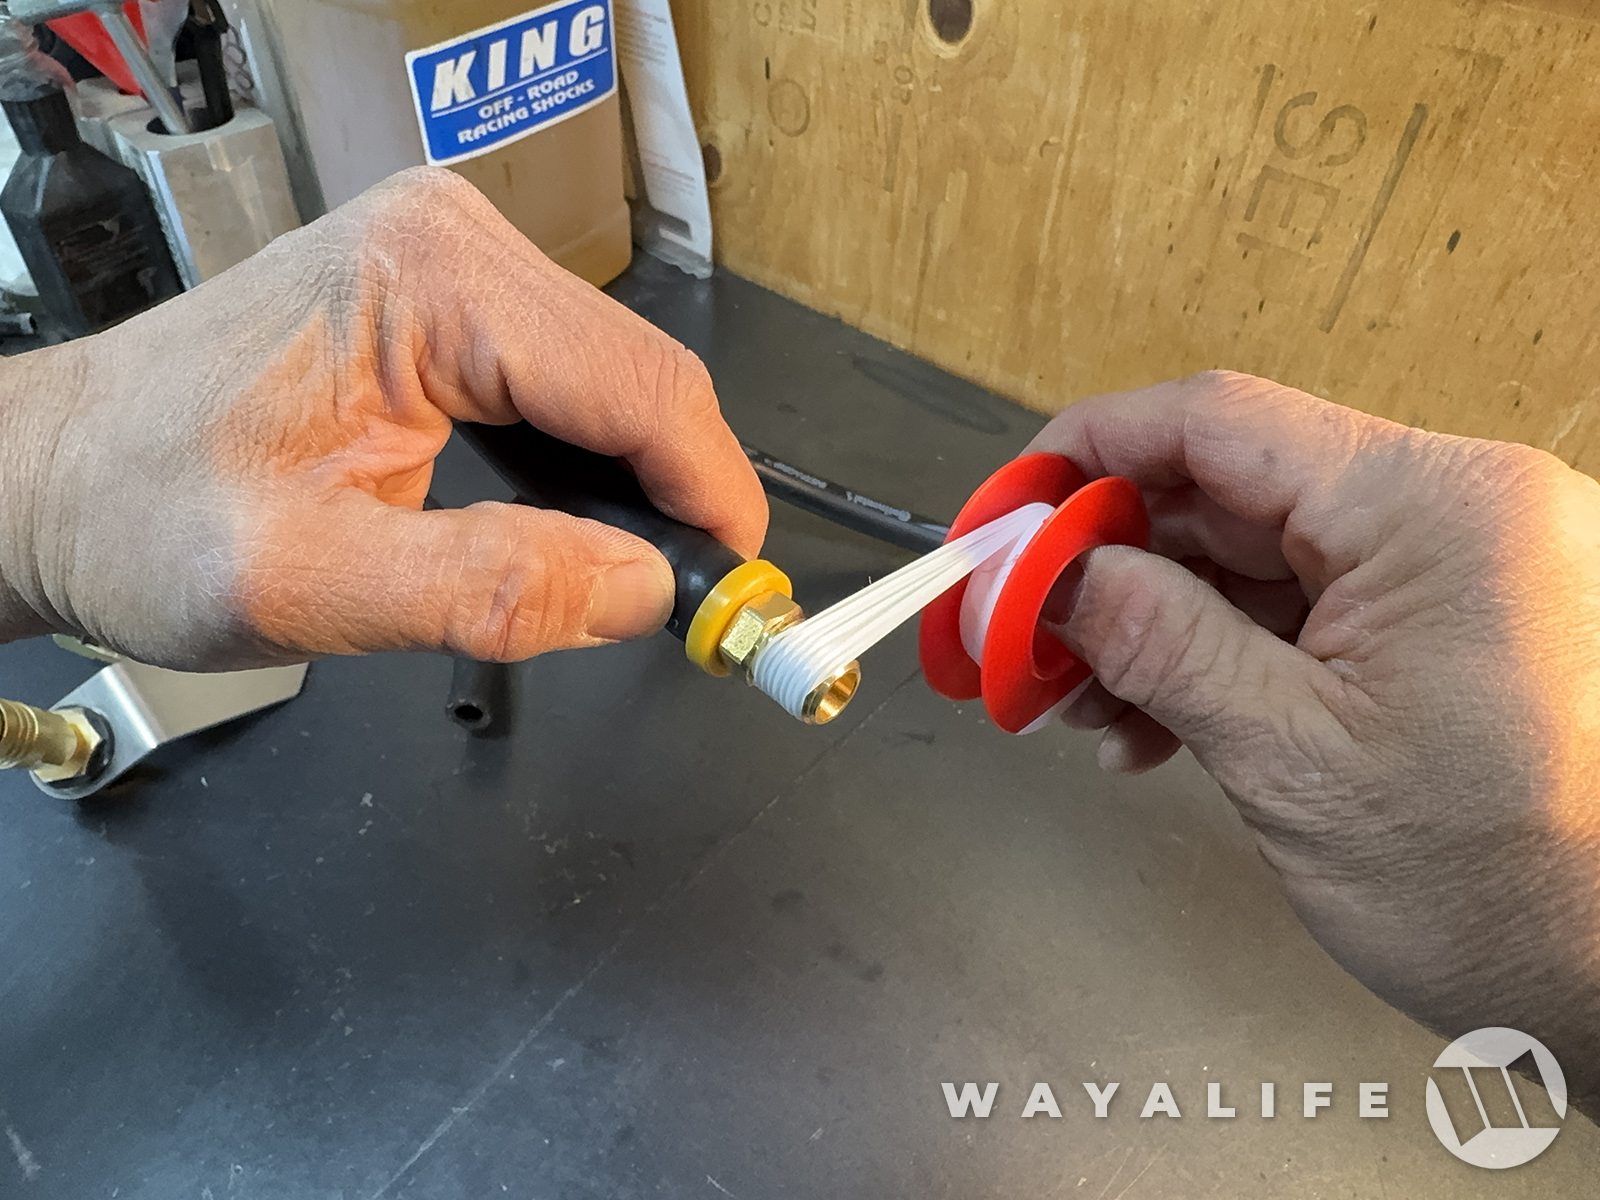
16. Use a 9/16" wrench to secure one end of the air up hose.

17. Attach one end of the breather hose onto the barbed fitting on top of the compressor.
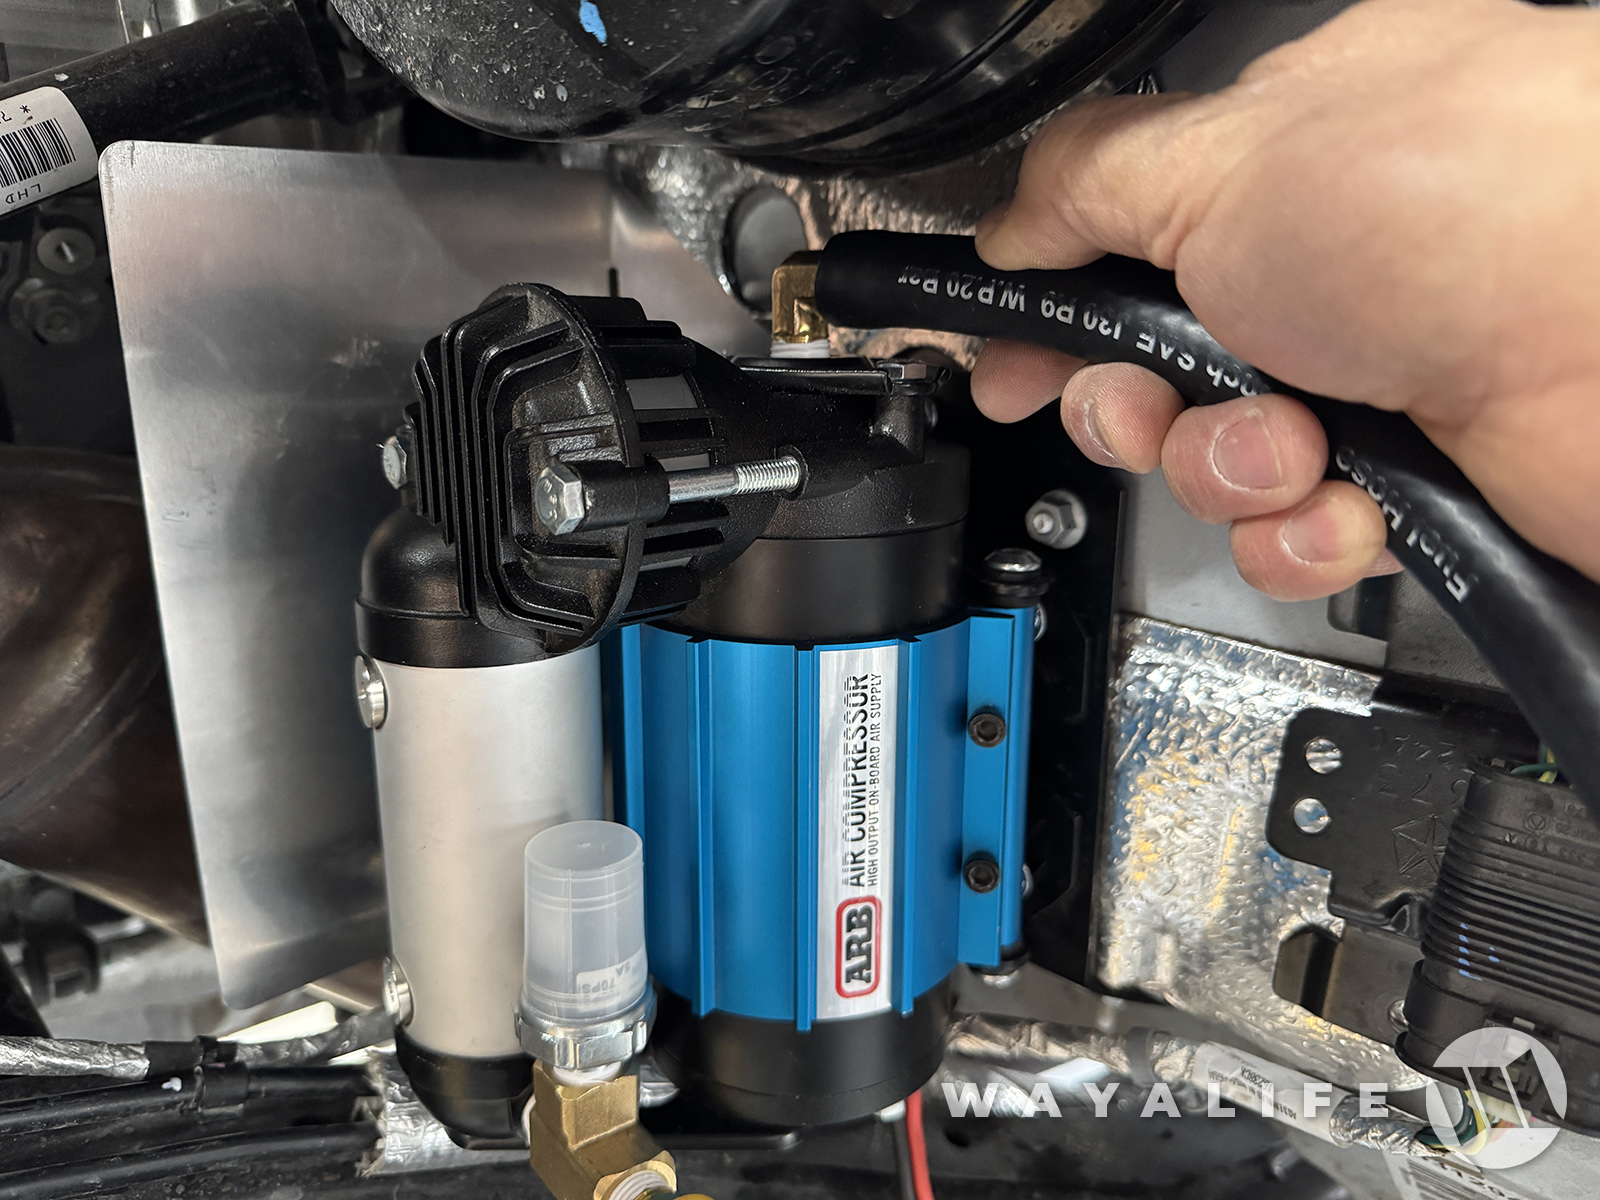
18. Route both the air up and breather hoses up along the firewall and up to the top of the engine bay.

19. Attach the breather hose onto the barbed fitting on the bottom of the relocation mount and attached to the filter housing.
20. Using a 9/16" wrench and crescent wrench, secure the air up hose onto the bottom of the bulkhead fitting.
21. Place the relocation and air chuck mount on top of the fire wall just above the brake booster and secure it to the existing stud using the provided 6mm nut and washer. A 10mm socket will be needed for this.
And that's all there is to it! Here are a few shots of what everything should look like when all is said and done.
From here, you just need to use the ACM Installation Write-Up to finish up your wiring and then reinstall your fender

Last edited:
