If you’re in need of re-calibrating your speedometer after installing a bigger set of tires, are wanting to change the threshold of your TPMS or would just like to modify how some of the electrical features on your Jeep JL Wrangler work, you’ll be needing a programmer to do this and the Tazer JL is the one you’re gonna want. Made by Z Automotive, the Tazer JL is a super compact unit that plugs into your OBDII, works off your EVIC (Electronic Vehicle Information Center) or screen in the middle of your instrument cluster and the buttons on your steering wheel. The following write-up will show you just how easy it is to install and use.
What You Will Need
Z Automotive TAZER JL
Use Discount Code: jlwf10
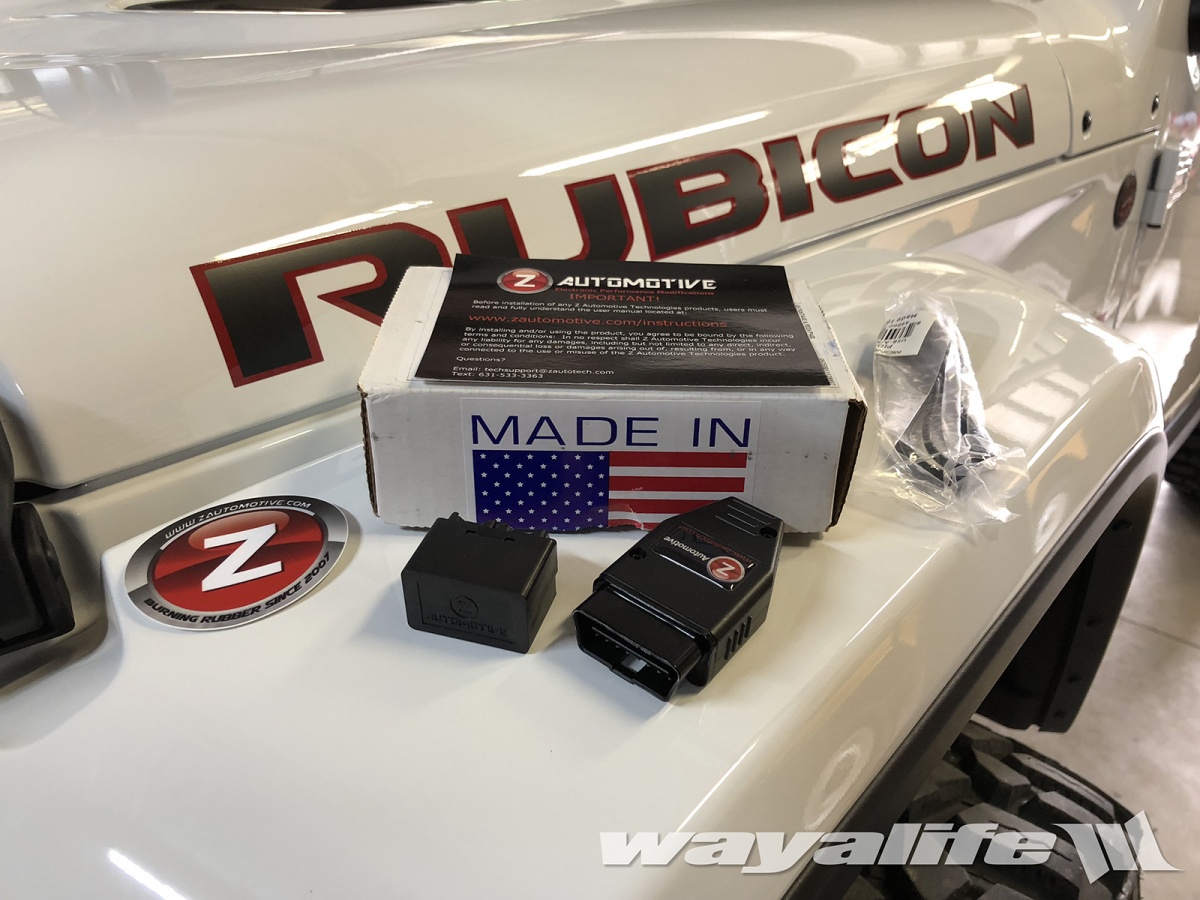
Here's a shot of everything you'll get with your TAZER JL. As you can see, you'll get a SGW Bypass Module, the TAZER JL Programmer and a USB cable that will allow you to download firmware updates online as they become available.
TAZER JL OPTIONS
Perf menu:
Adjust for alternate tire sizes up to 41″
Adjust for alternate axle gear ratios
Adjust for an alternate transfer case LO range ratio
TPMS menu:
Disable TPMS system if desired
Change front/rear TPMS warning PSI limit
Radio menu:
Disable Backup camera
Enable Cargo Camera input
Enable CD audio input
Disable TravelLink (weather warnings included)
Lighting Menu:
Change DRL region (type)
Change DRL location
Disable DRL Dropout
Enable Fog lamp output
Disable Fog lamp dropout
Set LED 3rd brake light type
Set LED tail lamp type
Set Trailer Tow output for use with Mopar kit
Other menu:
Enable Aux switch settings on the radio
Enable Blind spot detection
TAZER JL LIVE FEATURES
Live features can only be used only while the TAZER JL is plugged into your JL Wrangler's OBDII port. The following are options that will be available to you.
Light shows: Can be accessed from the key fob or from the on-screen menu. 6 pre-set light shows and 3 make-your-own shows included. Set from the factory to only operate when parked, but can be unlocked for off-road and emergency personnel use.
Disable Navigation in-motion lockout: Enter addresses while the vehicle is moving
Auto Traction Kill: can be set to turn off traction control upon start-up
Auto StopStart Disable: can be set to disable AutoStopStart upon vehicle start-up 0-30 and 0-60 timers
Cooldown mode: run engine fans when Jeep is off, to aid in cooldown
INSTRUCTIONS
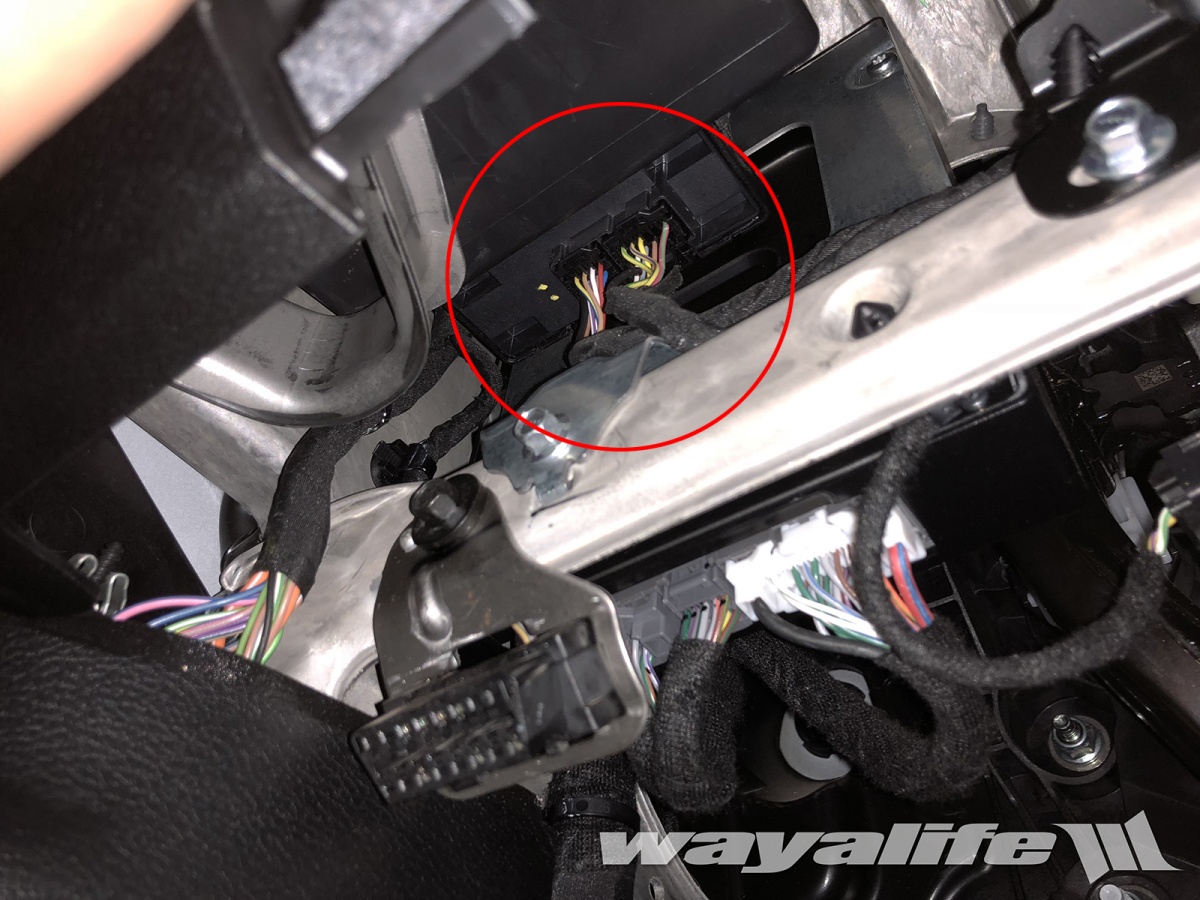
1. To install your Tazer JL, you’ll need to first unplug the 2 connectors attached to SGW. These connectors are located above the OBDII port and just above the metal dash cross support. While it isn't necessary, I removed the kick panel on the dash to help show you where they are located. The SGW connectors are circled in red.
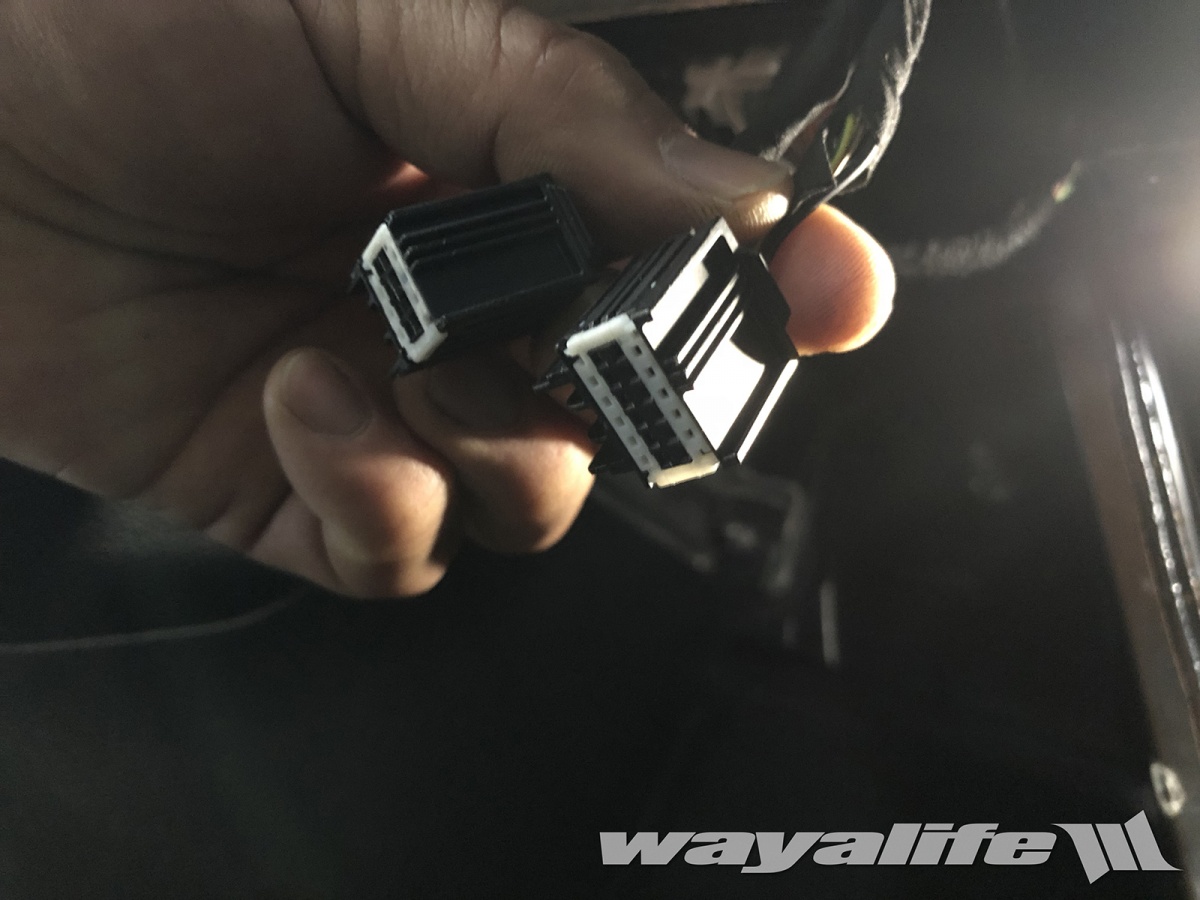
2. To remove the SGW connectors, you will need to depress the tabs on the back of each connector and then pull straight down. Here's a shot of what they look like once removed.
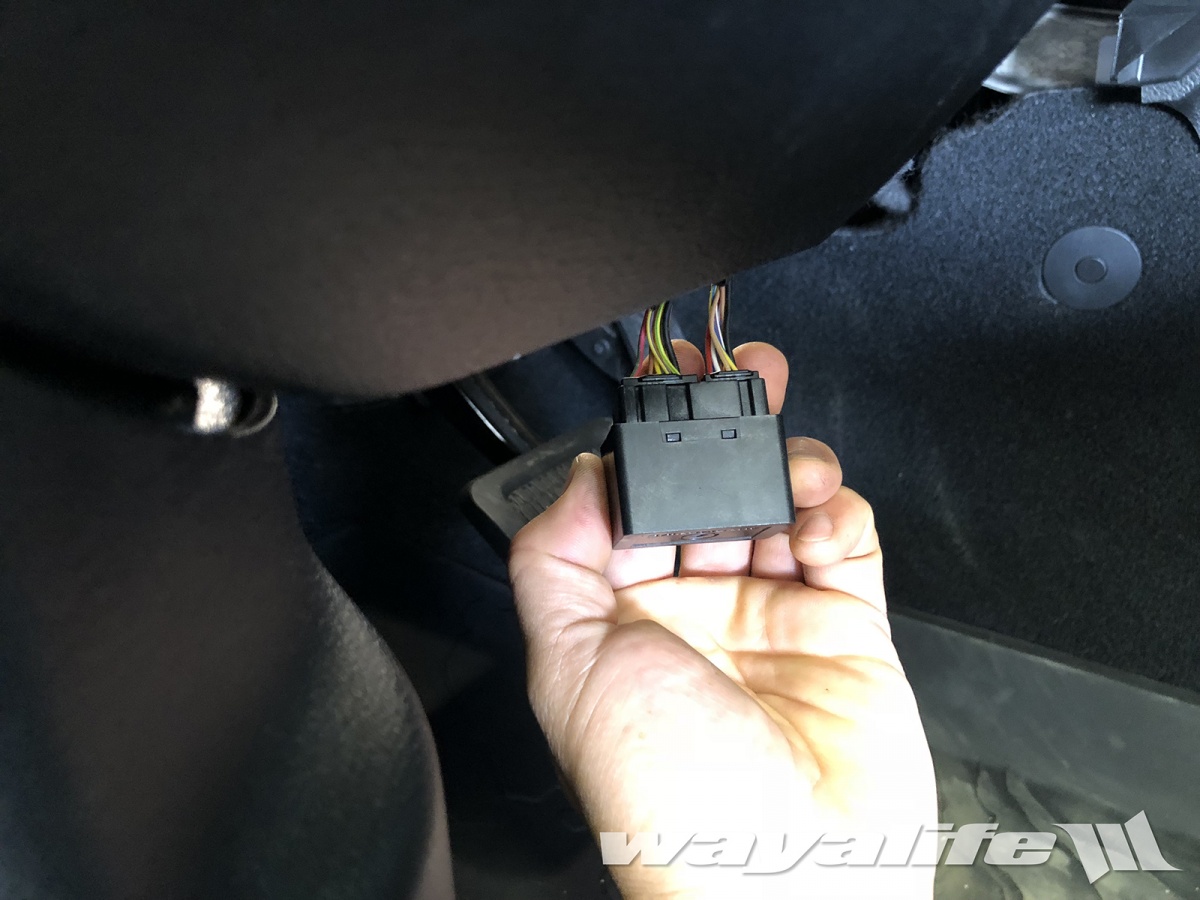
3. Plug the connectors into the SGW Bypass Module that comes with your TAZER JL. Being that they’re size specific and have a keyed fit, you can’t get this wrong.
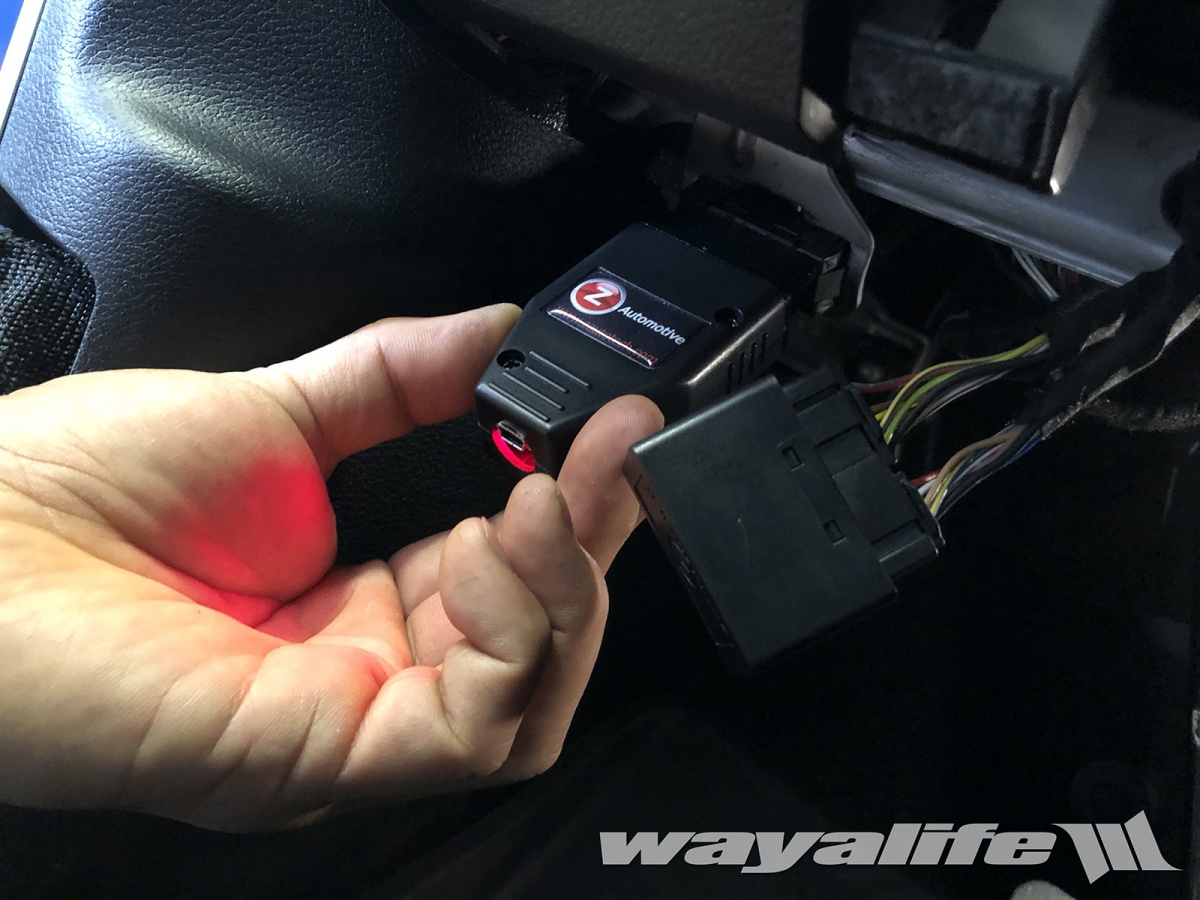
4. With the SGW bypassed, you can now plug your Tazer JL programmer into your JL Wrangler's OBDII port. A red LED light will illuminate once it's plugged in.
5. From here, you will need to turn your key or push your START button until it’s in the RUN position but without starting the engine.

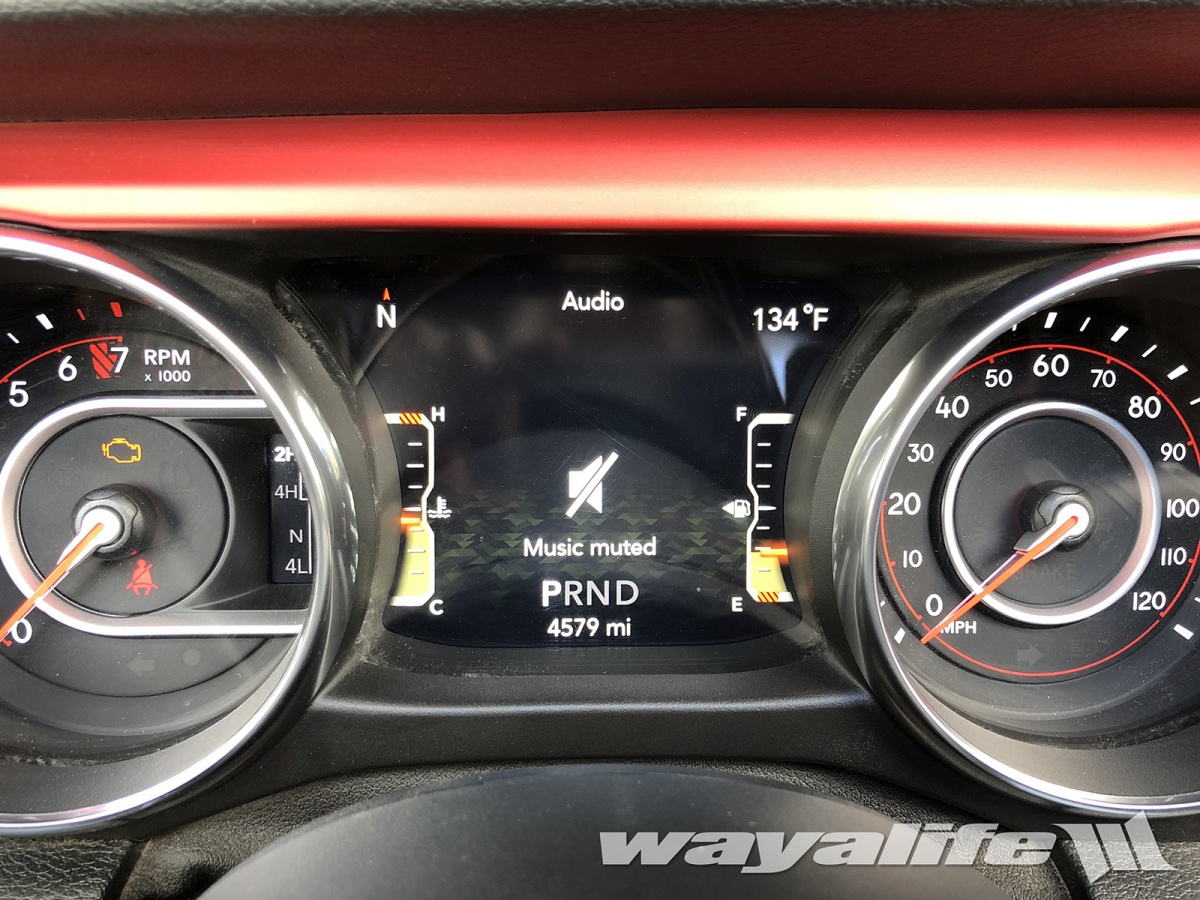
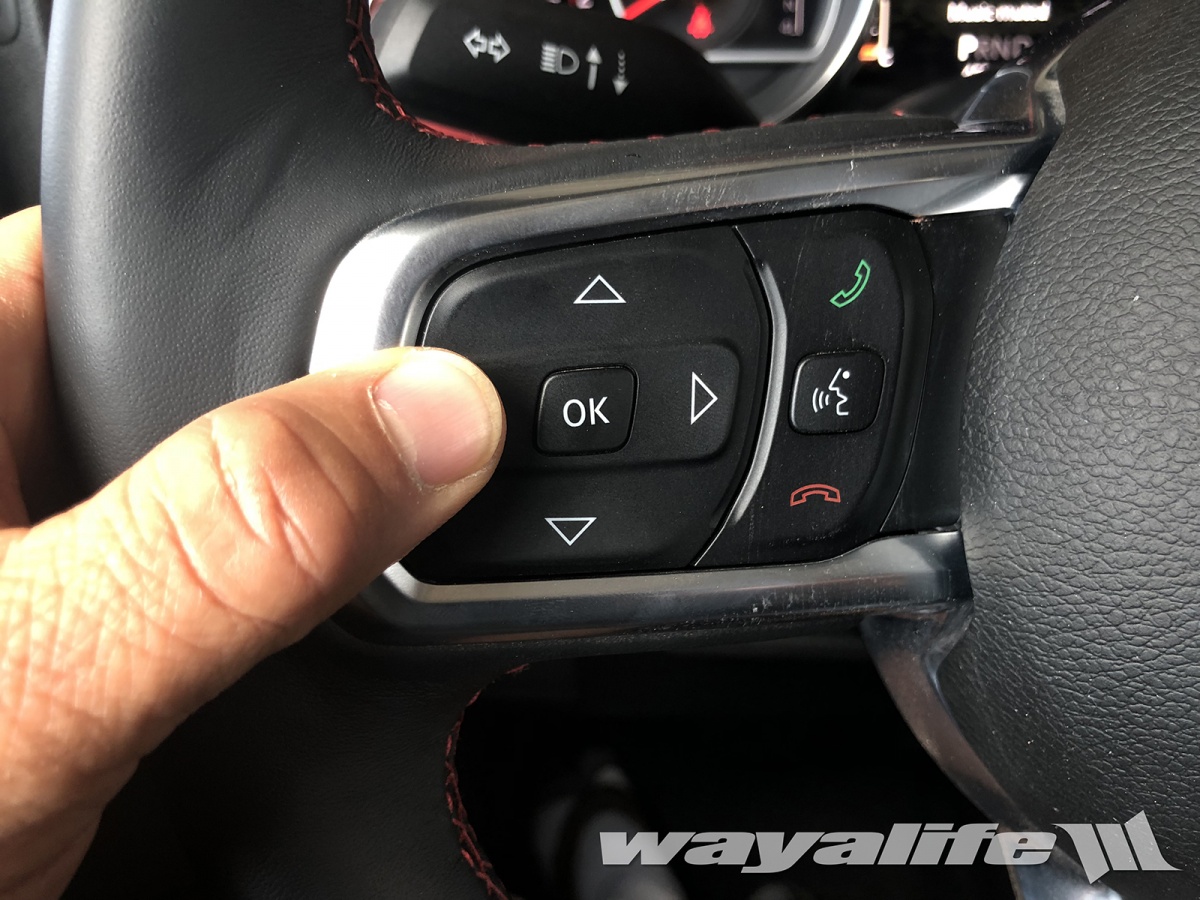
6. Use the UP/DOWN arrow buttons on the left hand side of your steering wheel to scroll through the EVIC screen until the word "AUDIO" appears on top.
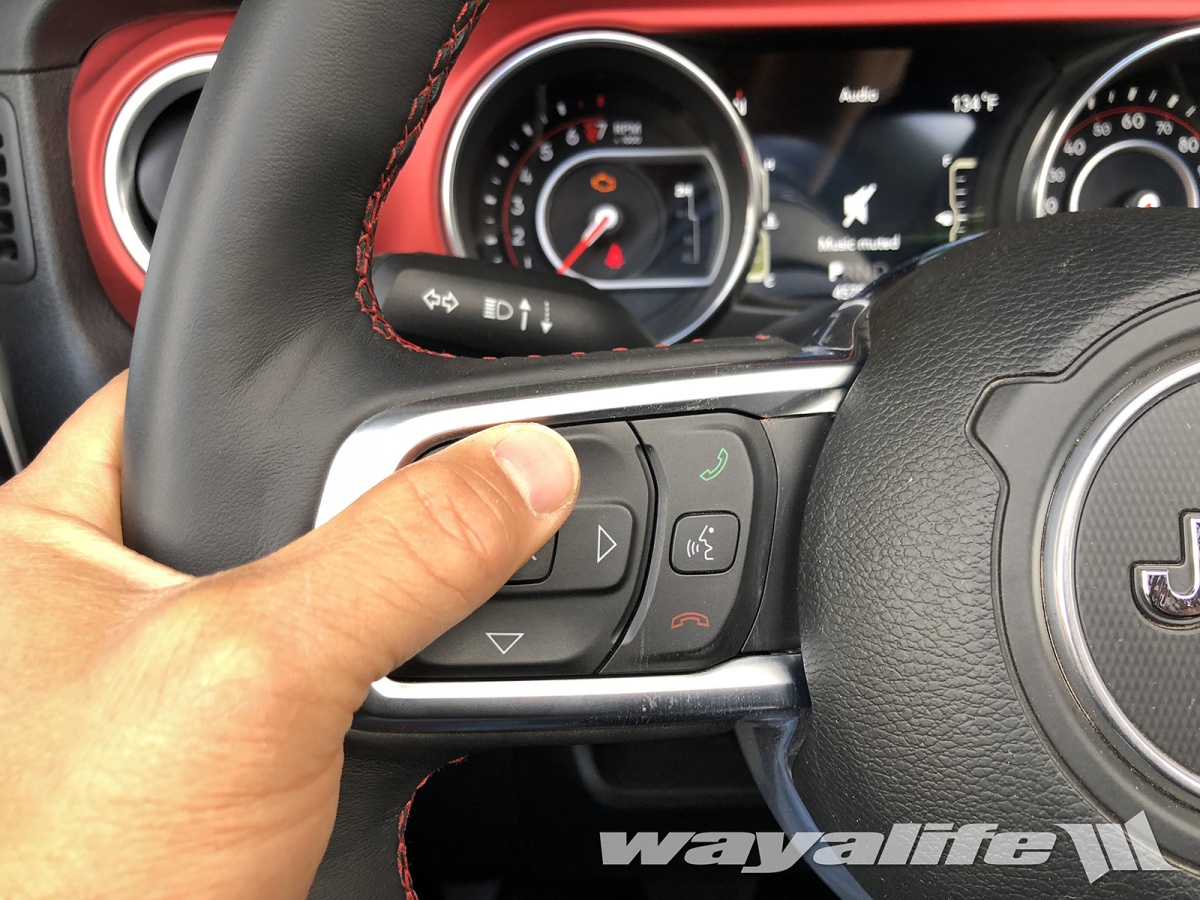
7. From here, you will need to press and hold the LEFT ARROW button on the left hand side of your steering wheel and then press the CRUISE CANCEL button to enter the TAZER JL menu screen.
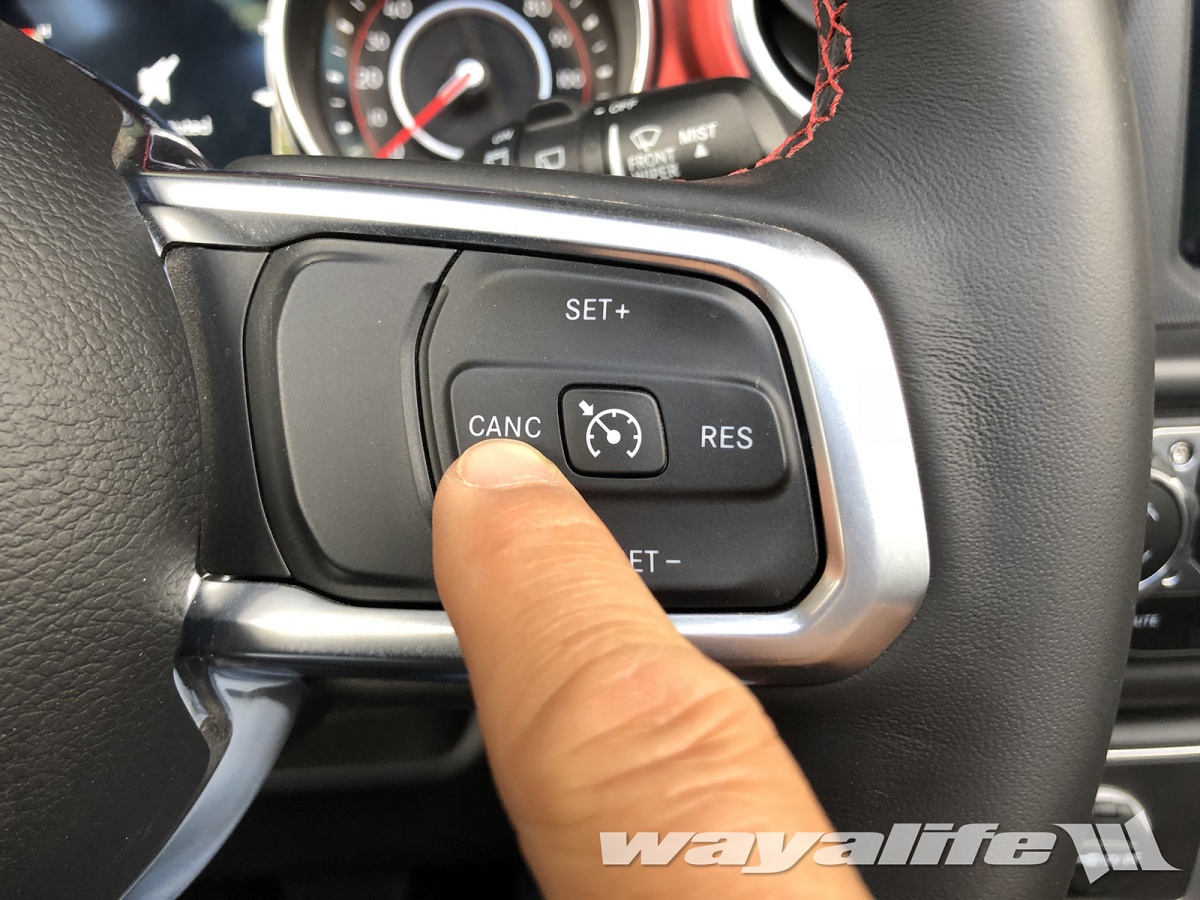
8. The first option you will see is for the "LIGHT SHOW" but if you continue to hold the LEFT ARROW button down and slowly click the CRUISE CANCEL button, you will be able to scroll through the menu options. Continue to do this until you get to the option, "MARRY?"
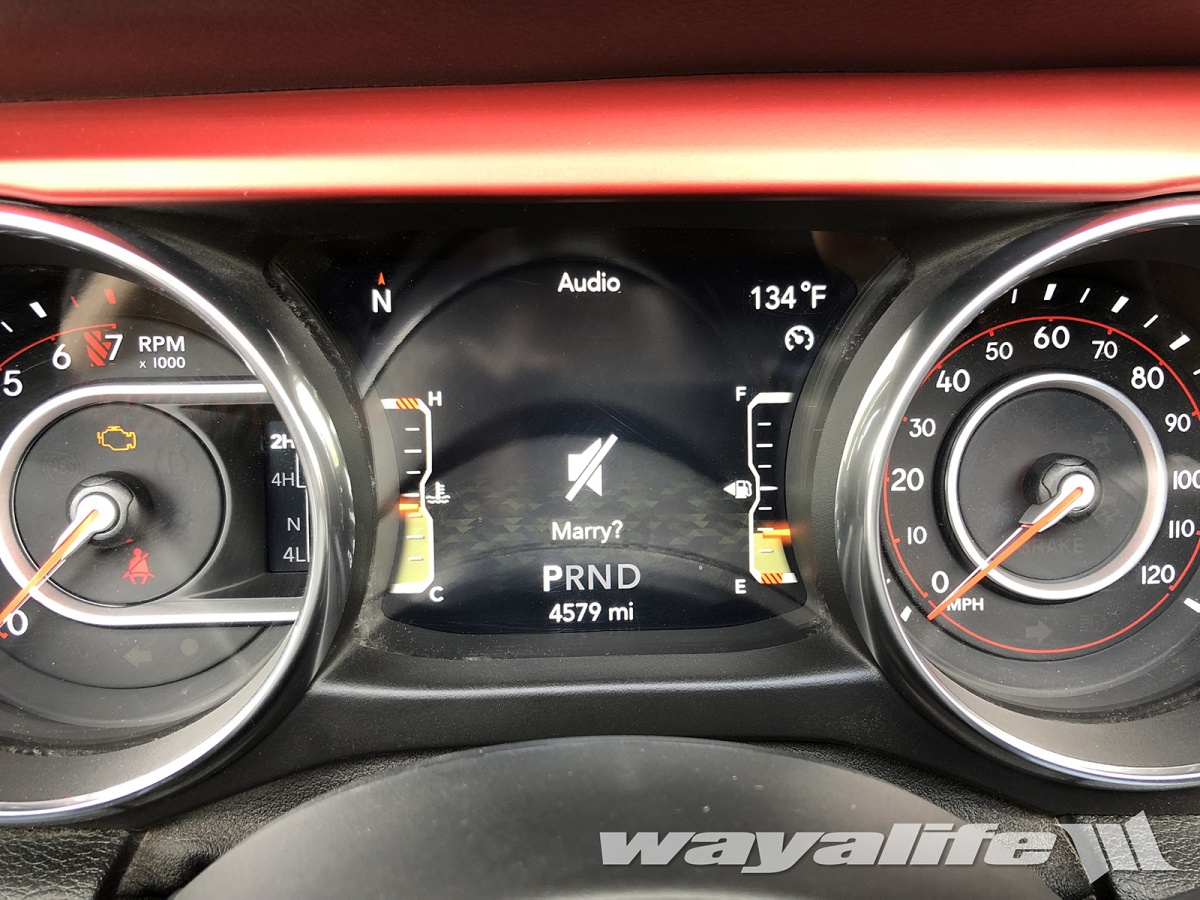
9. In order to make changes to the electronic features on your JL Wrangler, you will need to MARRY the TAZER JL to its computer. To do this, you will need to press and holding the LEFT ARROW button down and then click on the CRUISE ON/OFF button to select it. The TAZER JL will take about 15 seconds to download your JL Wrangler's stock settings and you should NOT disturb it during this process.
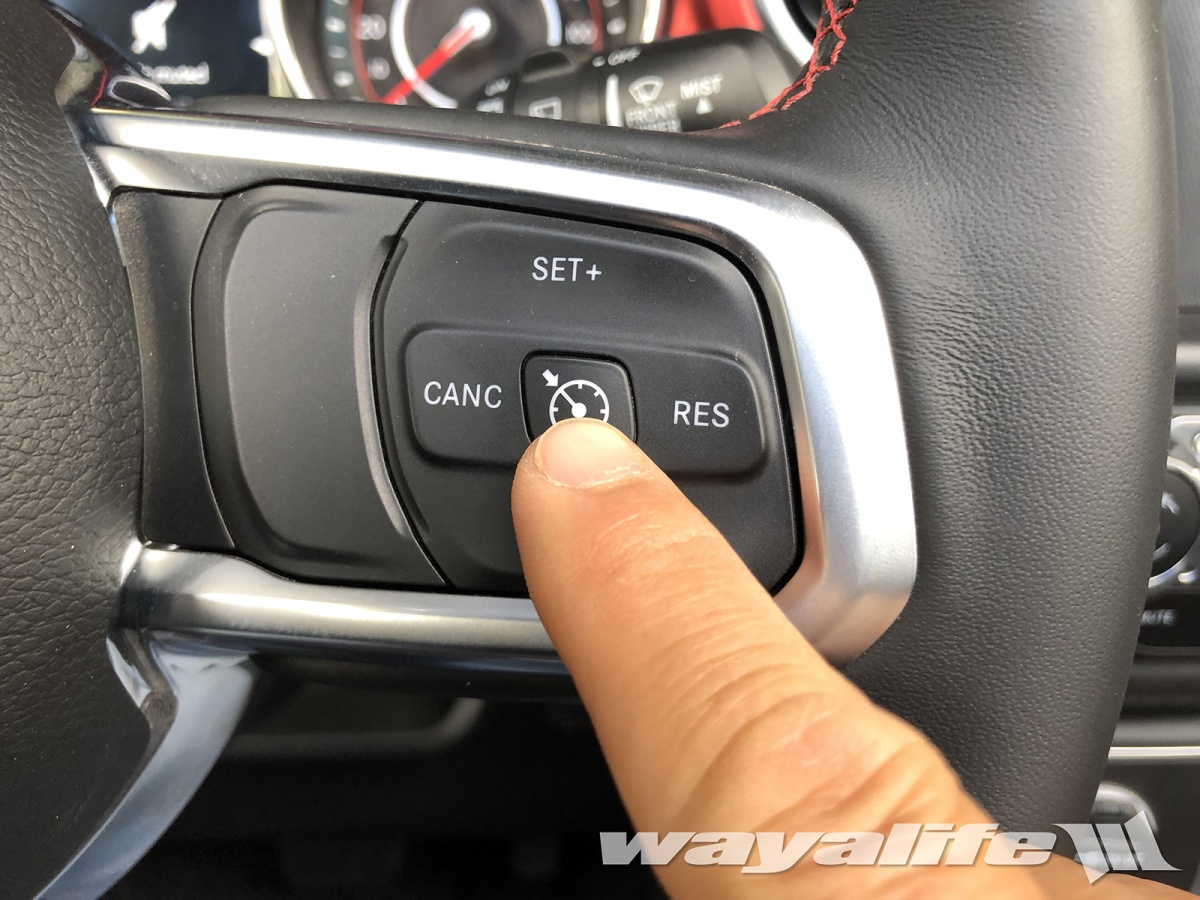
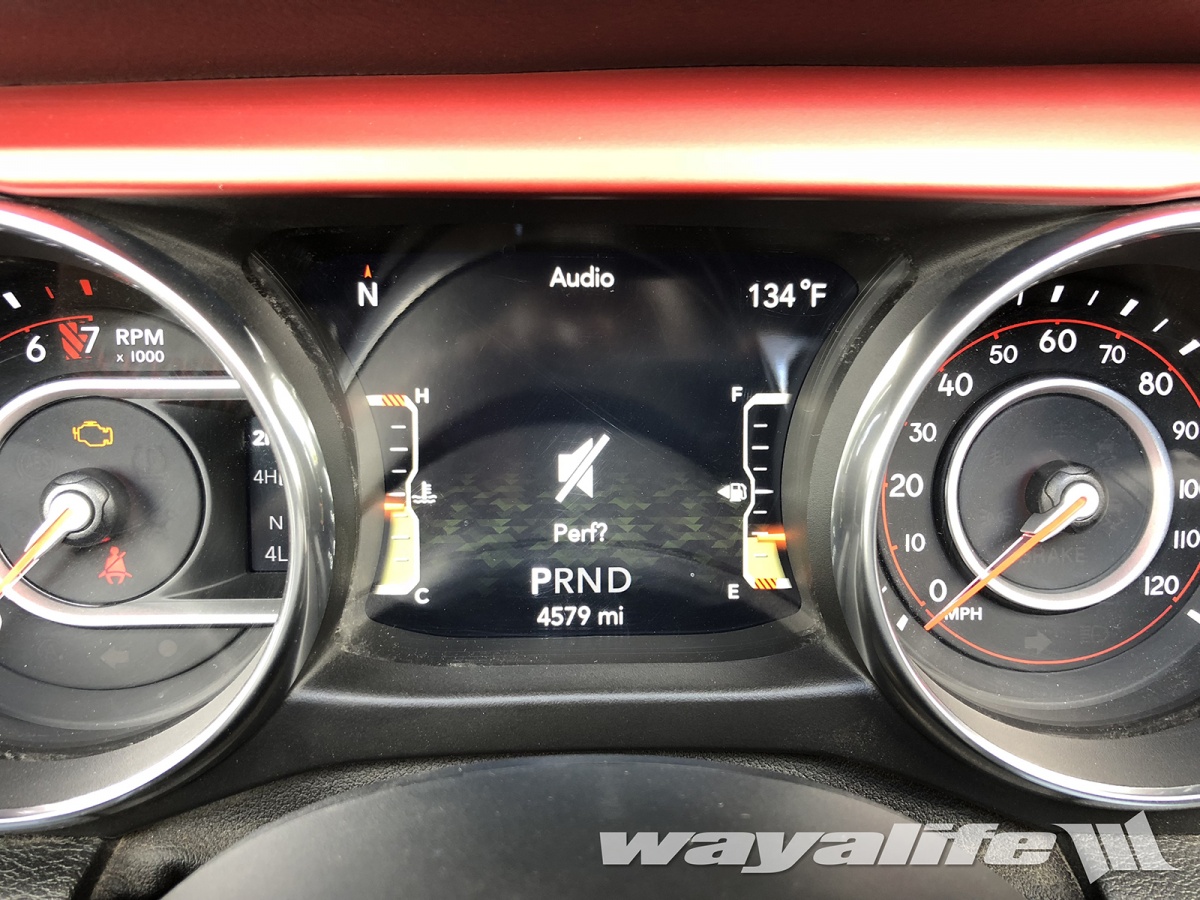
10. With your TAZER JL married to your JL Wrangler, you should now be able to scroll through several sub-menus using the same button process as before. Press and hold the LEFT ARROW button down and slowly click on the CRUISE CANCEL button to cycle through all the options. For those of you who are wanting to calibrate your speedometer, scroll through until you reach the option "PERF?" Still holding the LEFT ARROW button down, click on the CRUISE ON/OFF button to select it.
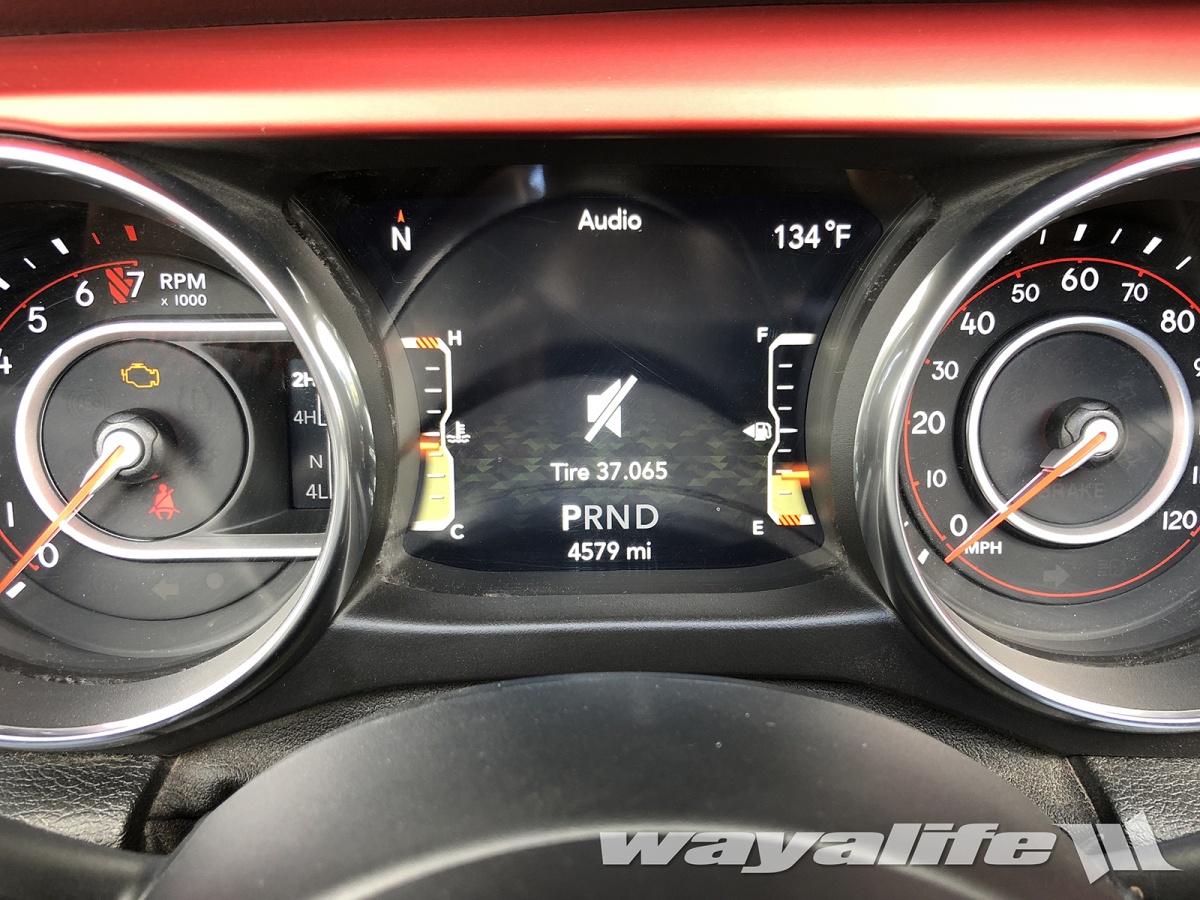
11. With tire size selected, click on the CRUISE SET + or CRUISE SET - buttons to raise or lower the tire size being displayed on the EVIC screen.
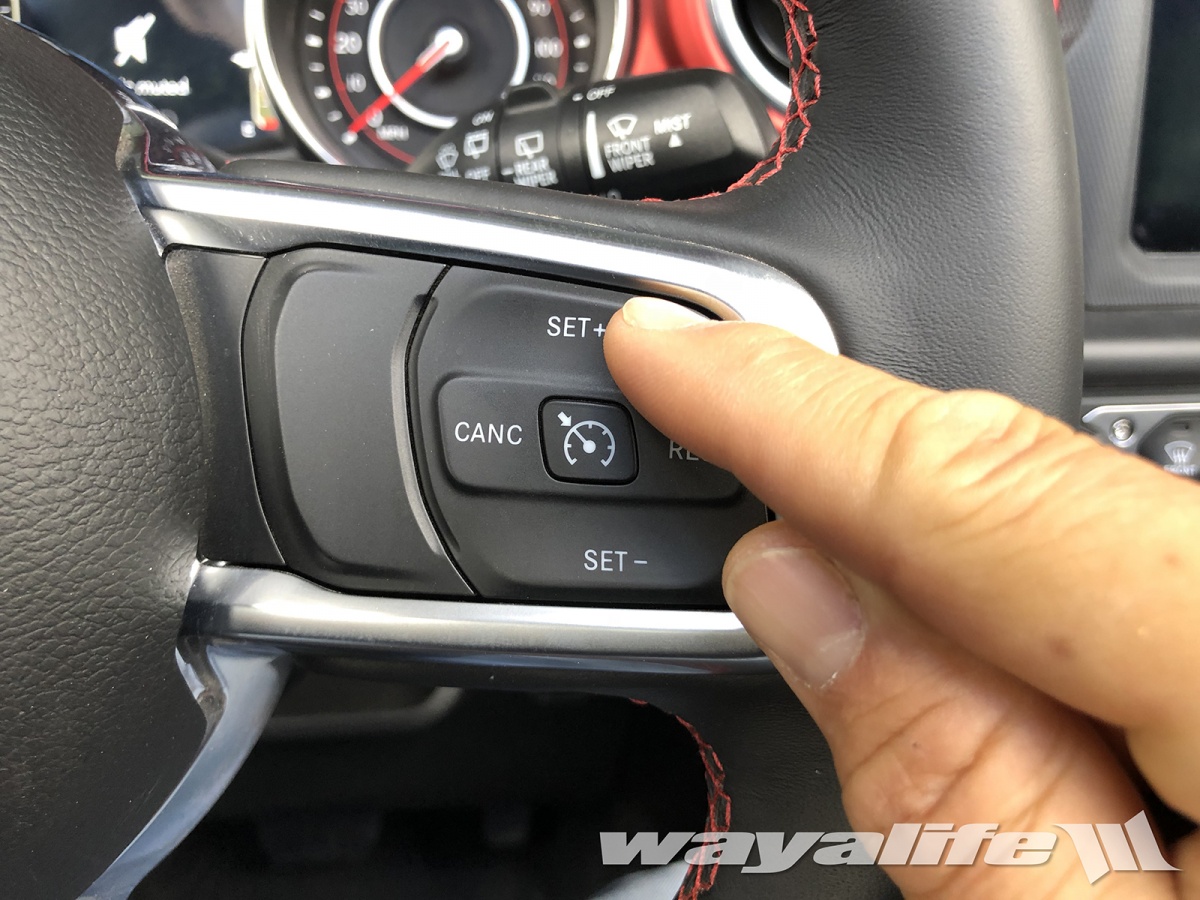
12. Unlike the previous JK Wrangler which required you to enter in the ACTUAL measurement of your tires, the new JL Wrangler simply requires that you enter in what is written on your sidewall. In our case, we are running a set of 37x13.50R17 Cooper STT Pros and so 37 what should be selected. That being said, the TAZER JL will not give an exact 37 number to choose from and so I selected "37.065" being that it was the closest to it. Click on the CRUISE ON/OFF button to set your tire size.
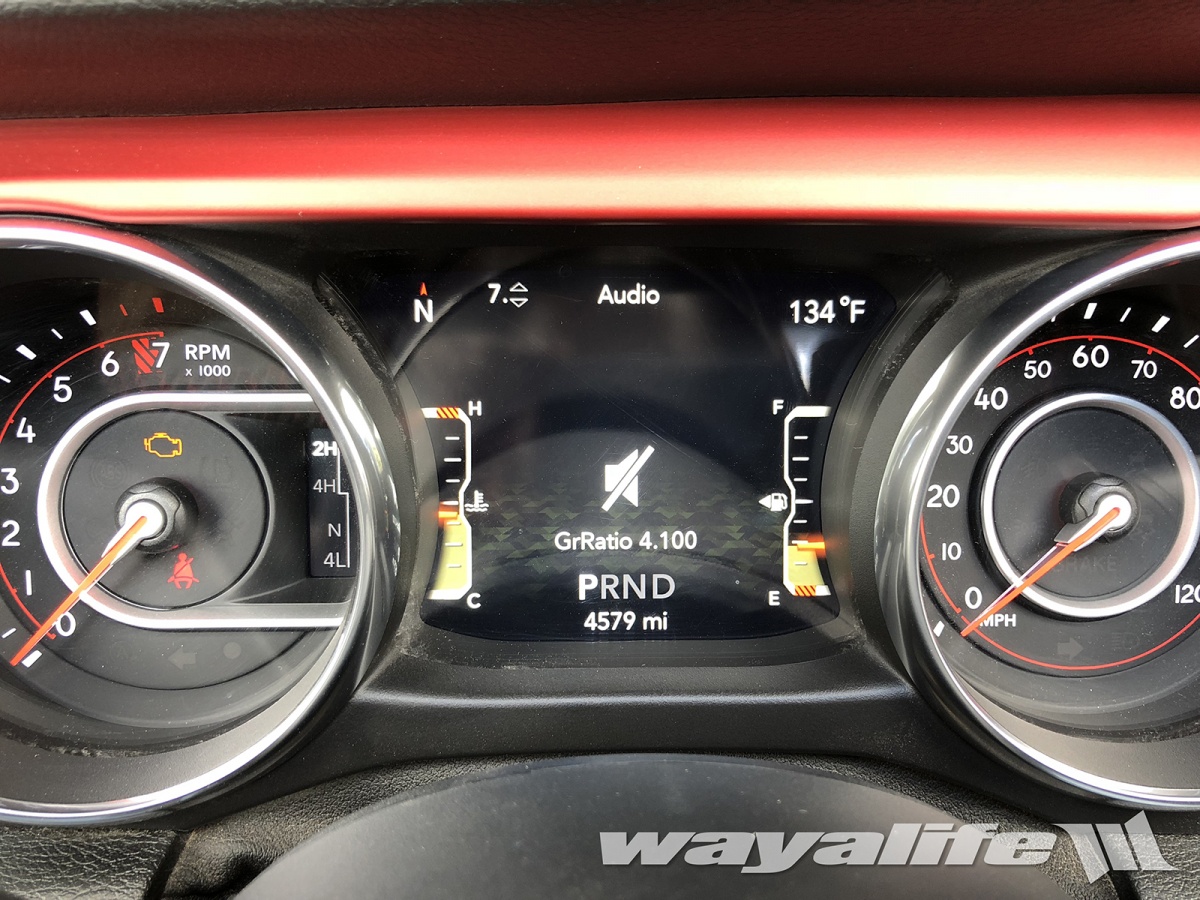
13. Continuing to press and hold the LEFT ARROW button down, click on the CRUISE CANCEL button once and you should see "GRRATIO" and a number next to it. Being that we have a Rubicon with 4.10 gears, you can see that our EVIC screen is displaying "GrRatio 4.100". If you've changed the gear ratio in your axles, you can change them to what you're now running using the same CRUISE SET + or CRUISE SET - buttons as before. Once done, simply click on the CRUISE ON/OFF button to set them.
14. Continuing to press and hold the LEFT ARROW button down, slowly click on the CRUISE CANCEL button until you reach "TPMS?" If you're wanting to turn your TPMS off or would just like to lower the PSI threshold, select this option by holding the LEFT ARROW button down and clicking on the CRUISE ON/OFF button.
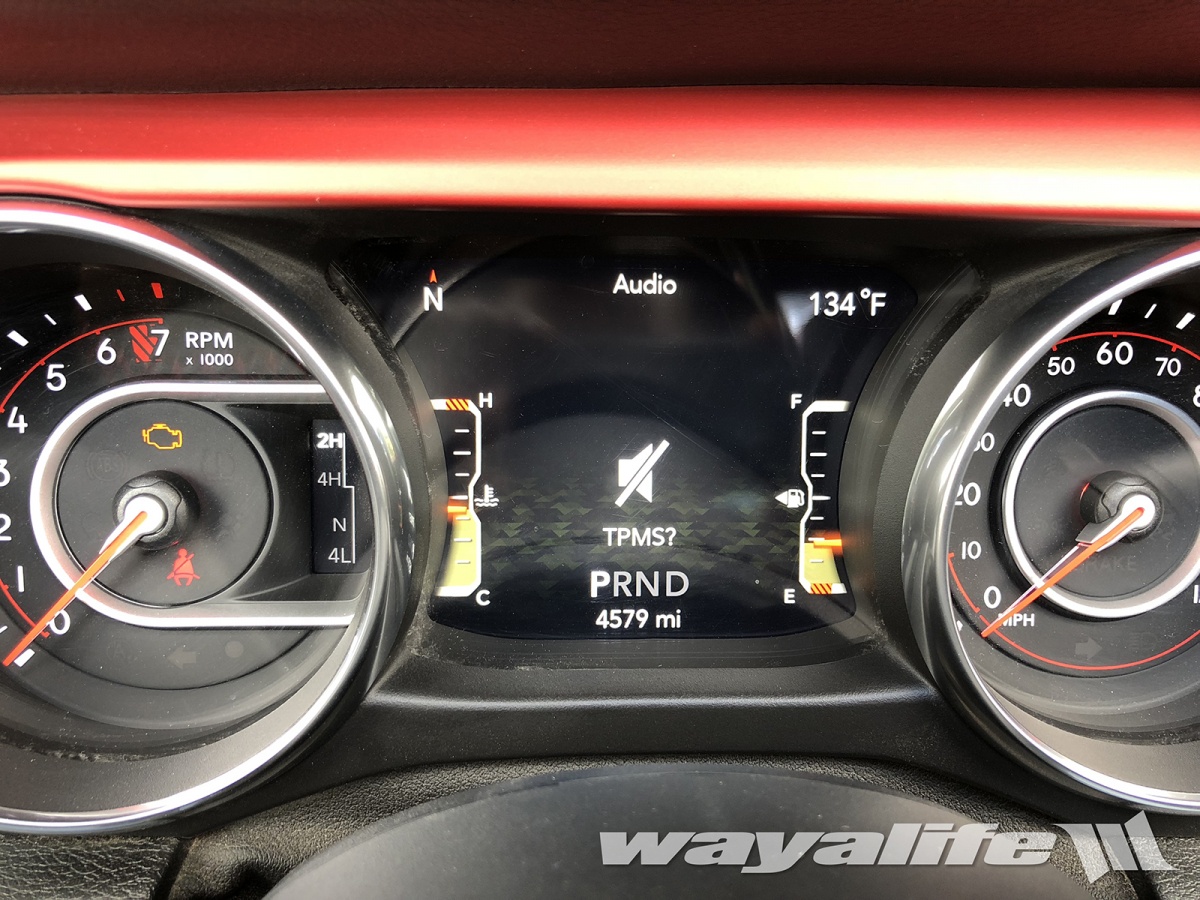
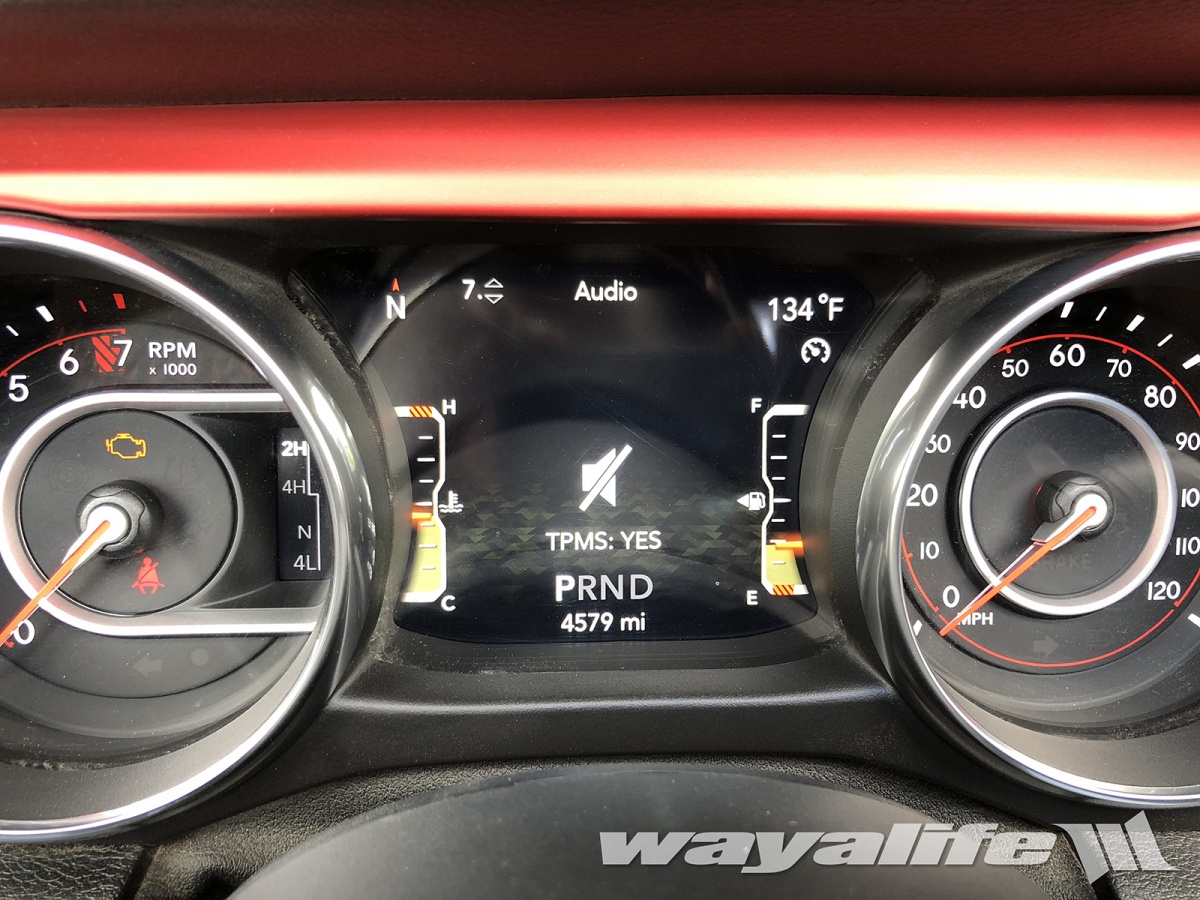
15. The first screen you'll see after selecting this option is "TPMS: YES". If you've installed new tires and without TPMS sensors and would like to disable the warning light, simply click on the CRUISE ON/OFF button once. The word "TPMS NO" should appear and that will indicate that it is now disabled.
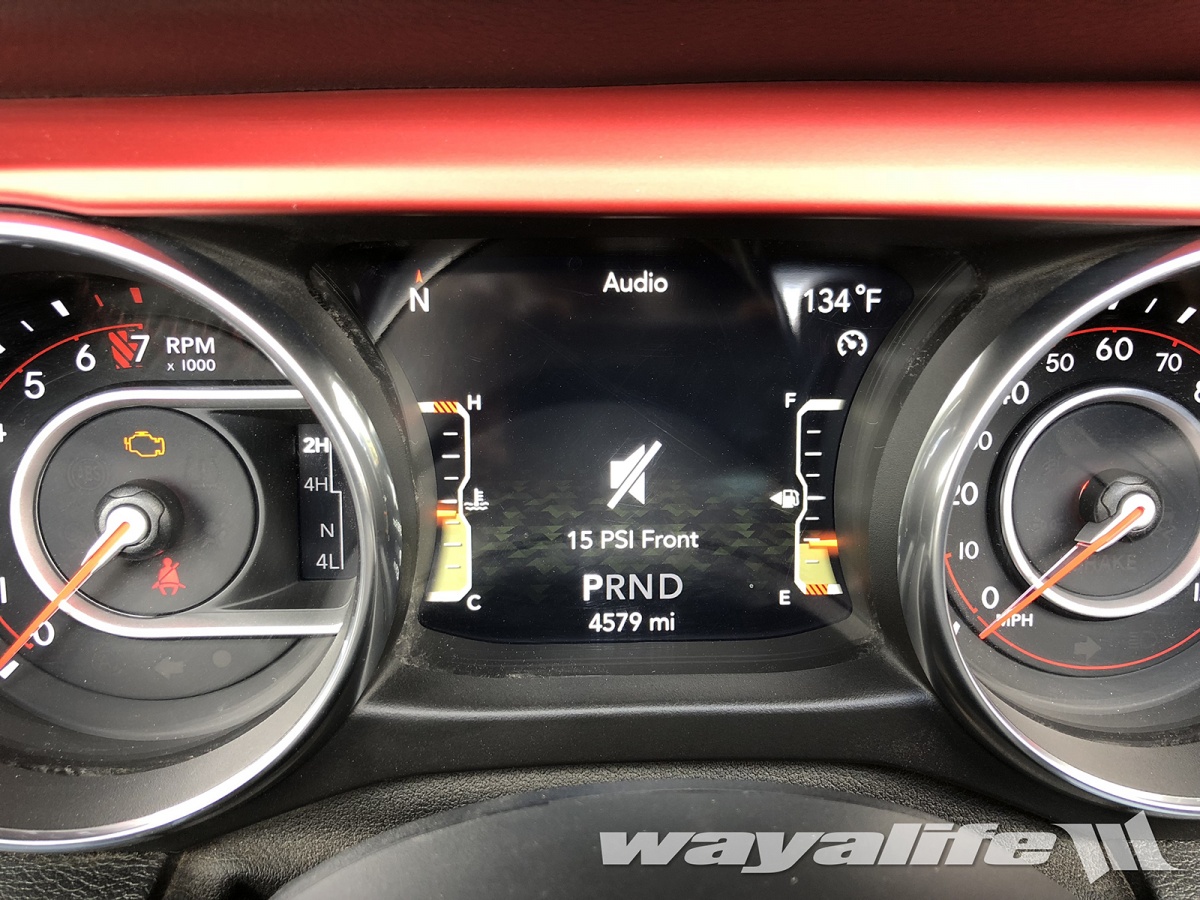
16. If you installed new tires or just wish to run what you have at a lower PSI and without causing the TPMS warning light to come on, hold the LEFT ARROW button down and click on the CRUISE CANCEL button once. This will take you to a screen that shows you what the PSI in your front tires are set to. Click on the CRUISE SET + or CRUISE SET - buttons to raise or lower the PSI and then click on the CRUISE ON/OFF button to set it. As you can see, I lowered my PSI to 15.
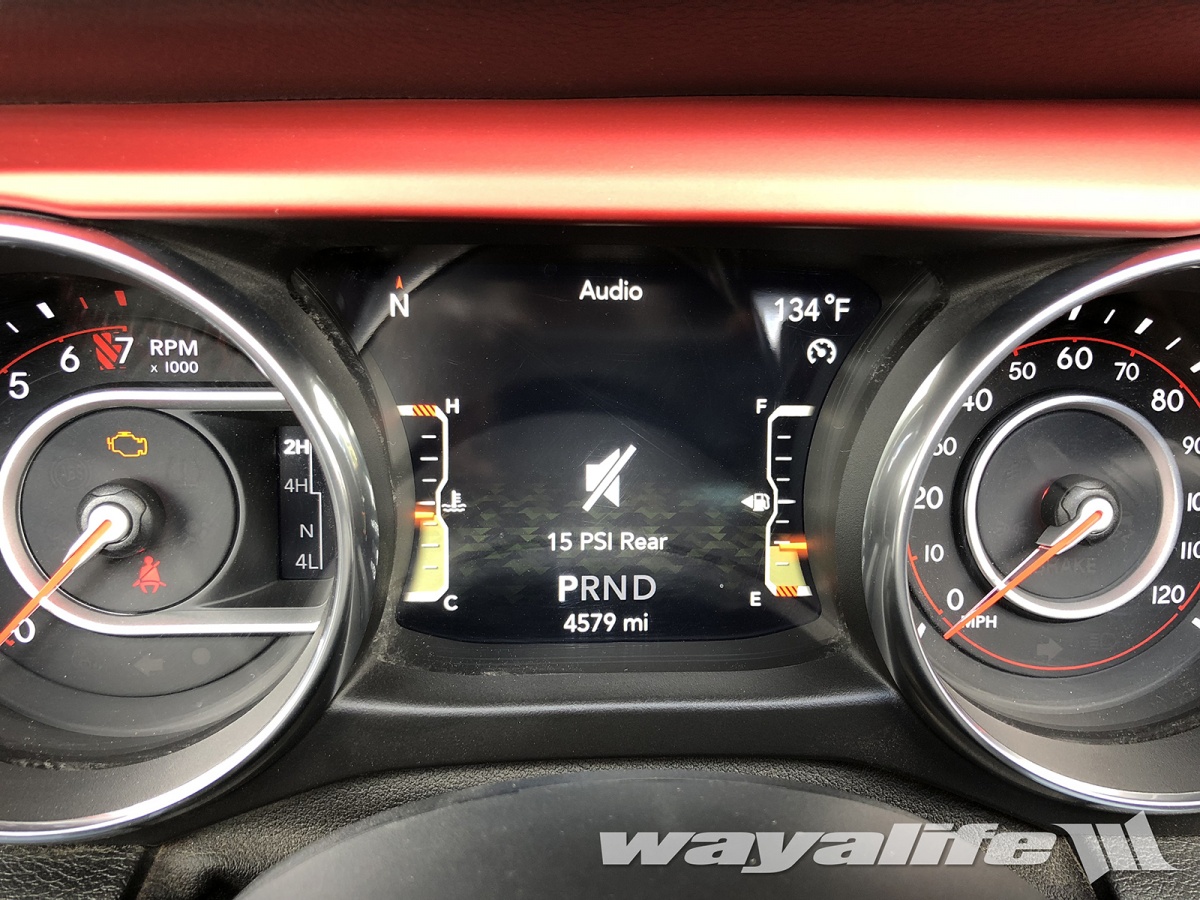
17. Continuing to hold the LEFT ARROW button down, click on the CRUISE CANCEL button once and you will see the PSI for your rear tires. You can now set them the same way.
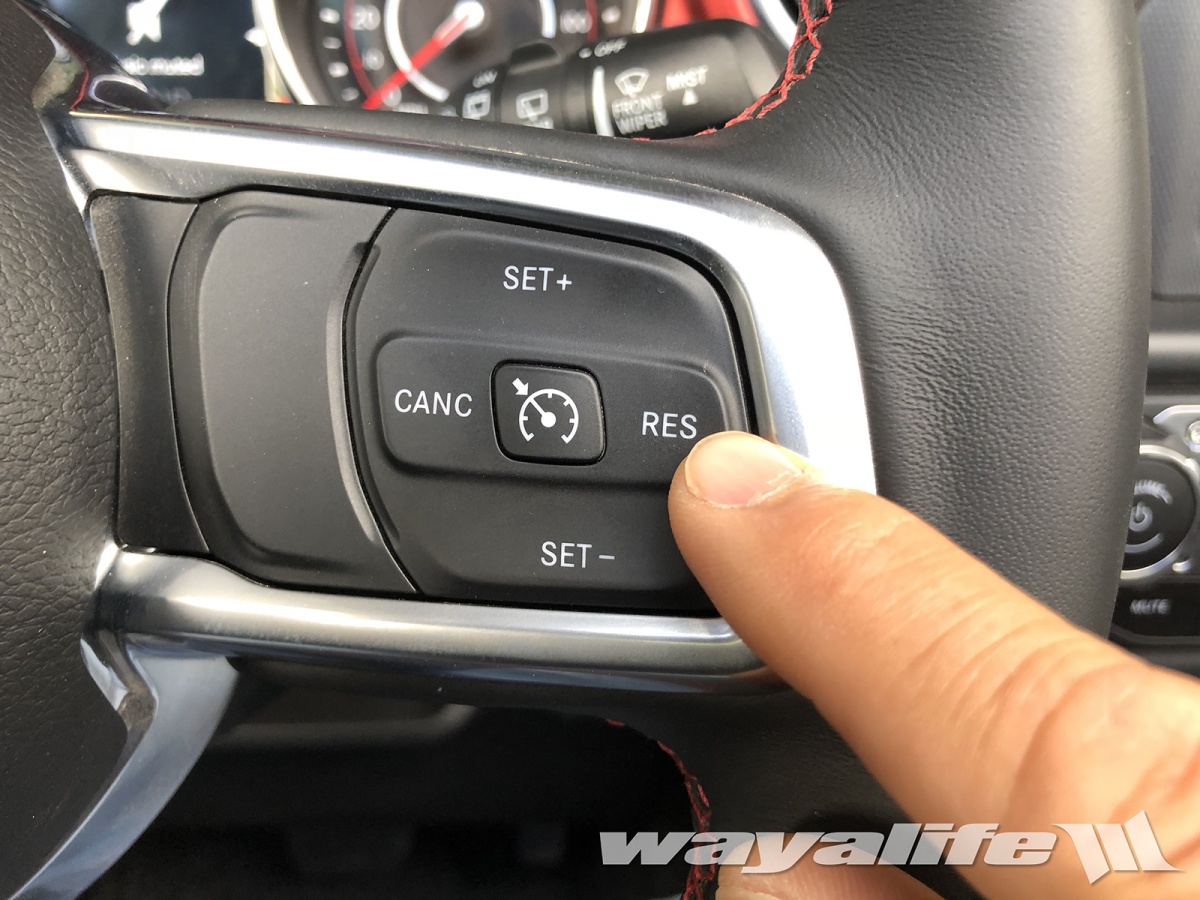
Obviously, there are myriad of other options you can play with and all of them can all be accessed and modified in the exact same way. To safely exit the TAZER JL at any time, all you need to do is hold the LEFT ARROW button down and press the CRUISE RESUME button. Doing this will give you a REBOOT countdown and once it's done, you can remove the TAZER JL from the OBDII port.
Now, I should mention that there are a number LIVE options available on the TAZER JL that you might be interested in, includihg a means to turn off the Auto Start/Stop and Traction Control systems. Of course by LIVE, I mean that your TAZER JL will need to remain plugged into the OBDII port in order for these setting to work.
Finally, I should point out that Z Automotive does provide regular updates for the Tazer JL and they can be downloaded using their program utility software. You can download it now by clicking on the following link:
https://zautomotive.com/z-automotive-programming-uti/
So that’s the Tazer JL in a nutshell – a programmer that every JL Wrangler owner really needs to have. Please let me know if you have any questions.
What You Will Need
Z Automotive TAZER JL
Use Discount Code: jlwf10
Here's a shot of everything you'll get with your TAZER JL. As you can see, you'll get a SGW Bypass Module, the TAZER JL Programmer and a USB cable that will allow you to download firmware updates online as they become available.
TAZER JL OPTIONS
Perf menu:
Adjust for alternate tire sizes up to 41″
Adjust for alternate axle gear ratios
Adjust for an alternate transfer case LO range ratio
TPMS menu:
Disable TPMS system if desired
Change front/rear TPMS warning PSI limit
Radio menu:
Disable Backup camera
Enable Cargo Camera input
Enable CD audio input
Disable TravelLink (weather warnings included)
Lighting Menu:
Change DRL region (type)
Change DRL location
Disable DRL Dropout
Enable Fog lamp output
Disable Fog lamp dropout
Set LED 3rd brake light type
Set LED tail lamp type
Set Trailer Tow output for use with Mopar kit
Other menu:
Enable Aux switch settings on the radio
Enable Blind spot detection
TAZER JL LIVE FEATURES
Live features can only be used only while the TAZER JL is plugged into your JL Wrangler's OBDII port. The following are options that will be available to you.
Light shows: Can be accessed from the key fob or from the on-screen menu. 6 pre-set light shows and 3 make-your-own shows included. Set from the factory to only operate when parked, but can be unlocked for off-road and emergency personnel use.
Disable Navigation in-motion lockout: Enter addresses while the vehicle is moving
Auto Traction Kill: can be set to turn off traction control upon start-up
Auto StopStart Disable: can be set to disable AutoStopStart upon vehicle start-up 0-30 and 0-60 timers
Cooldown mode: run engine fans when Jeep is off, to aid in cooldown
INSTRUCTIONS
1. To install your Tazer JL, you’ll need to first unplug the 2 connectors attached to SGW. These connectors are located above the OBDII port and just above the metal dash cross support. While it isn't necessary, I removed the kick panel on the dash to help show you where they are located. The SGW connectors are circled in red.
2. To remove the SGW connectors, you will need to depress the tabs on the back of each connector and then pull straight down. Here's a shot of what they look like once removed.
3. Plug the connectors into the SGW Bypass Module that comes with your TAZER JL. Being that they’re size specific and have a keyed fit, you can’t get this wrong.
4. With the SGW bypassed, you can now plug your Tazer JL programmer into your JL Wrangler's OBDII port. A red LED light will illuminate once it's plugged in.
5. From here, you will need to turn your key or push your START button until it’s in the RUN position but without starting the engine.
6. Use the UP/DOWN arrow buttons on the left hand side of your steering wheel to scroll through the EVIC screen until the word "AUDIO" appears on top.
7. From here, you will need to press and hold the LEFT ARROW button on the left hand side of your steering wheel and then press the CRUISE CANCEL button to enter the TAZER JL menu screen.
8. The first option you will see is for the "LIGHT SHOW" but if you continue to hold the LEFT ARROW button down and slowly click the CRUISE CANCEL button, you will be able to scroll through the menu options. Continue to do this until you get to the option, "MARRY?"
9. In order to make changes to the electronic features on your JL Wrangler, you will need to MARRY the TAZER JL to its computer. To do this, you will need to press and holding the LEFT ARROW button down and then click on the CRUISE ON/OFF button to select it. The TAZER JL will take about 15 seconds to download your JL Wrangler's stock settings and you should NOT disturb it during this process.
10. With your TAZER JL married to your JL Wrangler, you should now be able to scroll through several sub-menus using the same button process as before. Press and hold the LEFT ARROW button down and slowly click on the CRUISE CANCEL button to cycle through all the options. For those of you who are wanting to calibrate your speedometer, scroll through until you reach the option "PERF?" Still holding the LEFT ARROW button down, click on the CRUISE ON/OFF button to select it.
11. With tire size selected, click on the CRUISE SET + or CRUISE SET - buttons to raise or lower the tire size being displayed on the EVIC screen.
12. Unlike the previous JK Wrangler which required you to enter in the ACTUAL measurement of your tires, the new JL Wrangler simply requires that you enter in what is written on your sidewall. In our case, we are running a set of 37x13.50R17 Cooper STT Pros and so 37 what should be selected. That being said, the TAZER JL will not give an exact 37 number to choose from and so I selected "37.065" being that it was the closest to it. Click on the CRUISE ON/OFF button to set your tire size.
13. Continuing to press and hold the LEFT ARROW button down, click on the CRUISE CANCEL button once and you should see "GRRATIO" and a number next to it. Being that we have a Rubicon with 4.10 gears, you can see that our EVIC screen is displaying "GrRatio 4.100". If you've changed the gear ratio in your axles, you can change them to what you're now running using the same CRUISE SET + or CRUISE SET - buttons as before. Once done, simply click on the CRUISE ON/OFF button to set them.
14. Continuing to press and hold the LEFT ARROW button down, slowly click on the CRUISE CANCEL button until you reach "TPMS?" If you're wanting to turn your TPMS off or would just like to lower the PSI threshold, select this option by holding the LEFT ARROW button down and clicking on the CRUISE ON/OFF button.
15. The first screen you'll see after selecting this option is "TPMS: YES". If you've installed new tires and without TPMS sensors and would like to disable the warning light, simply click on the CRUISE ON/OFF button once. The word "TPMS NO" should appear and that will indicate that it is now disabled.
16. If you installed new tires or just wish to run what you have at a lower PSI and without causing the TPMS warning light to come on, hold the LEFT ARROW button down and click on the CRUISE CANCEL button once. This will take you to a screen that shows you what the PSI in your front tires are set to. Click on the CRUISE SET + or CRUISE SET - buttons to raise or lower the PSI and then click on the CRUISE ON/OFF button to set it. As you can see, I lowered my PSI to 15.
17. Continuing to hold the LEFT ARROW button down, click on the CRUISE CANCEL button once and you will see the PSI for your rear tires. You can now set them the same way.
Obviously, there are myriad of other options you can play with and all of them can all be accessed and modified in the exact same way. To safely exit the TAZER JL at any time, all you need to do is hold the LEFT ARROW button down and press the CRUISE RESUME button. Doing this will give you a REBOOT countdown and once it's done, you can remove the TAZER JL from the OBDII port.
Now, I should mention that there are a number LIVE options available on the TAZER JL that you might be interested in, includihg a means to turn off the Auto Start/Stop and Traction Control systems. Of course by LIVE, I mean that your TAZER JL will need to remain plugged into the OBDII port in order for these setting to work.
Finally, I should point out that Z Automotive does provide regular updates for the Tazer JL and they can be downloaded using their program utility software. You can download it now by clicking on the following link:
https://zautomotive.com/z-automotive-programming-uti/
So that’s the Tazer JL in a nutshell – a programmer that every JL Wrangler owner really needs to have. Please let me know if you have any questions.
