Raising Seabass

jlbanzet

Active Member
I’m about 1 1/2 years into my build, but I’m going to start this thread from day one and add to it until I’m caught up for anyone interested.

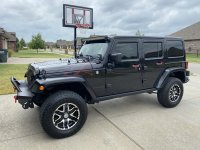
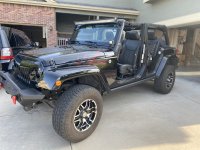
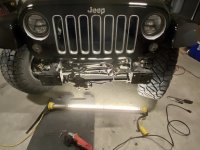
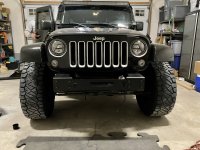
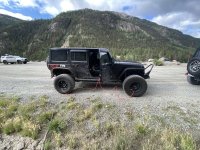
June 2020, I brought home my 2016 JKU Backcounty. 95k miles. Lived in Oklahoma at the time but would be making the move to Colorado the next month. It was time to sell the old Dodge and be better suited for adventures in the mountains. I bought it with 33 Toyo open country tires on a 2.5 puck lift. Still had stock shocks because Oklahoma I guess. Some random front bumper and uga-buga grill.
I figured this would get me by for a good while until I met Bierpower at work. Not only is he a fantastic mechanic, he’s also extremely helpful at showing me how to spend my money. So the Jeep has come a long ways in a short amount of time.
 

Attachments

  • FA03A05E-707A-483C-A780-45633A77C0F8.jpeg
    FA03A05E-707A-483C-A780-45633A77C0F8.jpeg
    212.2 KB · Views: 46
  • 79E02B28-4307-4196-9FF0-86ECF9D2A29B.jpeg
    79E02B28-4307-4196-9FF0-86ECF9D2A29B.jpeg
    219.4 KB · Views: 46

jlbanzet

Active Member
Disclaimer: your will hear Bierpower’s name A LOT. He has done the majority of the work on my rig. I’ve learned a ton by working with him. Also, he just has great tools 😂
That’s said, my first modification to Seabass was a disconnecting sway bar with the manual bypass i got from Bierpower. It was nice to be able to flex a bit, but I still had the stock shocks limiting my travel.
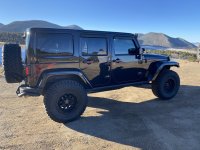
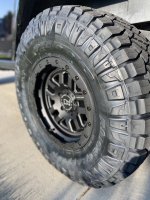
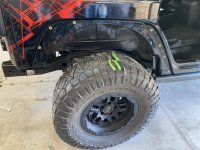
Shortly after I upgraded to 35” ridge grapplers. Also upgraded the rims since I absolutely hated what was on it. Factory tire carrier replaced with Evo Pro Series hinged gate carrier so as not to send a tire bouncing down the highway.
 

Attachments

  • 00090B9C-021B-431C-BA5C-AF5D72A52888.jpeg
    00090B9C-021B-431C-BA5C-AF5D72A52888.jpeg
    249.9 KB · Views: 16
  • 71BD3576-7D3A-47B1-ABCA-EB27A37F7677.jpeg
    71BD3576-7D3A-47B1-ABCA-EB27A37F7677.jpeg
    204.5 KB · Views: 16

jlbanzet

Active Member
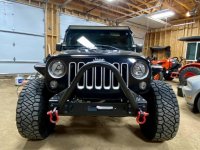
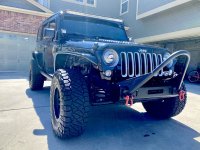
Bumper and armor came next. Plus probably one of my favorite aesthetically pleasing mods, swapping out uga-buga grill for factory correct dragon grille. The silver really stands out, but it’s still so much better than what was on it.
Chopped the front frame cross member for the Evo Quarter Pounder and stinger. Installed Evo radius fender flares. Learned a valuable lesson on what temperatures are too cold to paint at. Fenders we’re all painted up and started the clear coat just for the clear to wrinkle up on me. I was too angry to do it again, so Bierpower stripped them and painted them for me (he was smart enough to wait for warmer weather). Also, if you have a black Jeep, Rustoleum black is basically paint match 😂
 

Attachments

  • 41014B5F-5182-4187-B687-7DC9DD943536.jpeg
    41014B5F-5182-4187-B687-7DC9DD943536.jpeg
    147.3 KB · Views: 20
  • A6142D70-04B1-4803-918A-E442E8A1BE22.jpeg
    A6142D70-04B1-4803-918A-E442E8A1BE22.jpeg
    240.3 KB · Views: 19
  • 3FBD8663-16D9-4E44-A066-A2D9AEECB9E1.jpeg
    3FBD8663-16D9-4E44-A066-A2D9AEECB9E1.jpeg
    203.1 KB · Views: 19
  • 7BC3053F-01CF-40DE-9D8A-1E74B328B94C.jpeg
    7BC3053F-01CF-40DE-9D8A-1E74B328B94C.jpeg
    137.3 KB · Views: 21
  • 12EAA2AD-0D23-40B1-A4C1-85FAF09C3BE7.jpeg
    12EAA2AD-0D23-40B1-A4C1-85FAF09C3BE7.jpeg
    221.1 KB · Views: 20

jlbanzet

Active Member
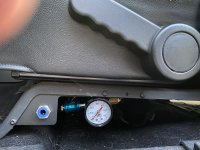
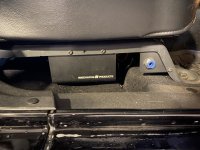
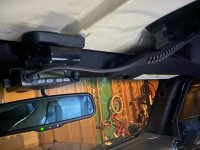
Some basic trail necessities came next. AnyTone 10 Meter Radio and ARB twin Innovative JK 4 tire system. Radio works great for its size except for the small speaker. 4 tire system installs under the passenger seat and tee’s to both sides. Airing up and down is so easy now. Plus it’s fun to turn the compressor on when someone sits in the passenger seat 😂
Also, after installing the fenders, we did away with the rear bumper. That also called for 86ing the stock exhaust. Install Dynomax Super Turbo muffler after running exhaust open for a couple of weeks. 3.6 with no muffler isn’t the most aggressive sound out there if you were curious.
Also did away with the china light bar and pods that came on it.
 

Attachments

  • 7A76622E-4763-4D9C-910B-BAE9AF59D4F5.jpeg
    7A76622E-4763-4D9C-910B-BAE9AF59D4F5.jpeg
    231 KB · Views: 23
  • 64565A8C-0490-4826-9277-B8013F5D5A9F.jpeg
    64565A8C-0490-4826-9277-B8013F5D5A9F.jpeg
    209.1 KB · Views: 19
  • 46F38703-4021-4F70-A0F6-49B660526ED4.jpeg
    46F38703-4021-4F70-A0F6-49B660526ED4.jpeg
    207 KB · Views: 17
  • 2BA26C07-AC34-4E68-A92D-DA2AFD8EA69E.jpeg
    2BA26C07-AC34-4E68-A92D-DA2AFD8EA69E.jpeg
    145.7 KB · Views: 23
  • 20B359A1-7F0B-43A1-928A-1D8F758F66A7.jpeg
    20B359A1-7F0B-43A1-928A-1D8F758F66A7.jpeg
    369.2 KB · Views: 22

jlbanzet

Active Member
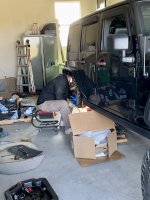
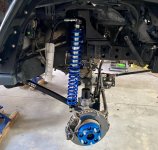
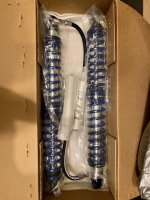
Finally! The next step was my favorite yet. No more puck spacers with factory, worn out shocks neutering my travel. Upgraded to the EVO King coilovers. Man did this change the game for me. Bierpower and I seemed optimistic about the time frame of the install at first, but after a Saturday and Sunday of working until midnight, the sheer joy of having coilovers quickly turned to just happy to be done.
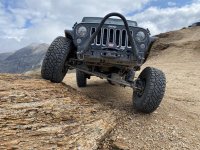
But it was well worth it. The trails became much more enjoyable and the rig much more capable.
 

Attachments

  • B096A123-DFB1-4432-939A-012B8A62E254.jpeg
    B096A123-DFB1-4432-939A-012B8A62E254.jpeg
    436 KB · Views: 36
  • 69F0C88A-E23D-441B-9587-915B652CA97A.jpeg
    69F0C88A-E23D-441B-9587-915B652CA97A.jpeg
    167.3 KB · Views: 32
  • ECAF1F59-EA89-401B-872B-0A466274DDC6.jpeg
    ECAF1F59-EA89-401B-872B-0A466274DDC6.jpeg
    281.9 KB · Views: 31
  • 4F153BA9-FAC4-4694-A55A-193E367B6D70.jpeg
    4F153BA9-FAC4-4694-A55A-193E367B6D70.jpeg
    222.7 KB · Views: 37
  • 596B24A8-BDEC-4911-B7DE-3C76212B0BC7.jpeg
    596B24A8-BDEC-4911-B7DE-3C76212B0BC7.jpeg
    370.1 KB · Views: 33

jlbanzet

Active Member
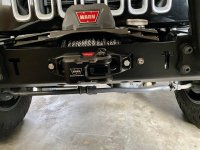
Needed some recovery gear. Went with an Warn EVO 12S.
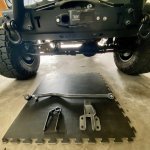
The move up to the coilovers created some death wobble. Picked up a Synergy track bar and sector shaft brace. Also replaced worn out factory stabilizer with a new bilstein. No more death wobble.
 

Attachments

  • 3C40D781-4BD4-441D-B508-D0684EF1801C.jpeg
    3C40D781-4BD4-441D-B508-D0684EF1801C.jpeg
    190.6 KB · Views: 10
  • 02ABEFD4-E20A-427A-ADF1-743C21743F1E.jpeg
    02ABEFD4-E20A-427A-ADF1-743C21743F1E.jpeg
    259.3 KB · Views: 9

jlbanzet

Active Member
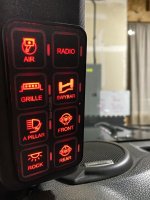
So the wiring job done by the previous owner wasn’t exactly top notch. Random things were just cut out. Some type of horn and interior lights plus random switching under the steering column (most likely a kill switch). Bierpower isn’t one to do any type of job and not make it as quality as possible. So we cleaned up all of that wiring nightmare and I went the extra step and installed a Switch-Pros 9100. Excellent product. Also picked up a pair of KC Flex Era 3 pods for the A-pillar since I trashed the Amazon special lights that came with it.
 

Attachments

  • C41FC937-4022-4EA9-8519-1FC4B5979DD0.jpeg
    C41FC937-4022-4EA9-8519-1FC4B5979DD0.jpeg
    157.3 KB · Views: 11
  • DF65C41F-7D34-4E1D-93EE-EF539C48EDFD.jpeg
    DF65C41F-7D34-4E1D-93EE-EF539C48EDFD.jpeg
    149.5 KB · Views: 11

jlbanzet

Active Member
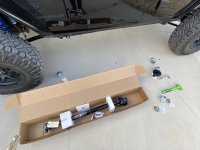
Riding higher on the coilovers needed a new front drive shaft. 1350 Extreme Duty from Adams has worked great. Got it installed just in time for Black Bear, Engineer and Imogene.
 

Attachments

  • F52F8409-E8C4-4D7B-B762-F5420F81ED98.jpeg
    F52F8409-E8C4-4D7B-B762-F5420F81ED98.jpeg
    188.2 KB · Views: 8

jlbanzet

Active Member
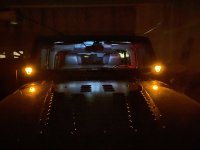
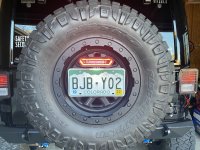
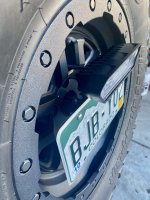
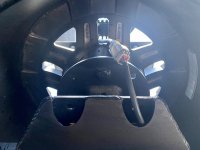
Ran with no third brake light for a while after installing the EVO tire carrier. Picked up the EVO license plate relocate kit and a Rigid chase light. Bierpower helped me mod the plate holder to mount the chase light and also installed a plug for when the spare has to come off. I was really happy with how it turned out.
 

Attachments

  • BEAAB409-B9EB-450F-87CE-F87501884FD4.jpeg
    BEAAB409-B9EB-450F-87CE-F87501884FD4.jpeg
    253.1 KB · Views: 21
  • DAAAB6FF-03CB-4813-AADC-1934FAF0A8BD.jpeg
    DAAAB6FF-03CB-4813-AADC-1934FAF0A8BD.jpeg
    218.2 KB · Views: 21
  • 57BB521B-1F1B-41C4-93F1-BEBD19461E51.jpeg
    57BB521B-1F1B-41C4-93F1-BEBD19461E51.jpeg
    132.3 KB · Views: 21

jlbanzet

Active Member
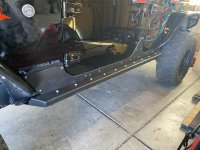
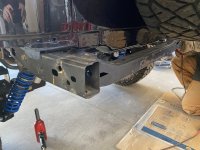
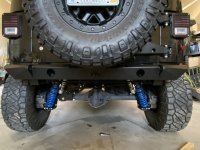
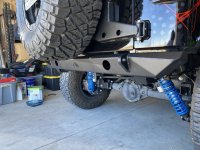
Upgraded the Rubi sliders to the EVO pro series bombers and added the EVO High n’ Tight rear bumper. A heads up when installing the bombers, make sure you don’t have any straps covering up bolt holes while installing. Thought we had extra hardware when we just a missed couple holes. We felt very intelligent after that discovery 🤦🏻‍♂️ .
Anyways. Install was pretty easy on both. Bombers seem plenty sturdy, but haven’t got to test them out yet. High n’ Tight bumper really adds a ton of clearance to the back. Love how they turned out.
 

Attachments

  • 59ED24A9-BC66-4A3D-917C-921525631FFA.jpeg
    59ED24A9-BC66-4A3D-917C-921525631FFA.jpeg
    215.1 KB · Views: 13
  • A91E7F09-F989-455C-99FF-1E91713A95E6.jpeg
    A91E7F09-F989-455C-99FF-1E91713A95E6.jpeg
    216.4 KB · Views: 14
  • 952915F1-C673-44F2-98D0-D8E7BAC42AB8.jpeg
    952915F1-C673-44F2-98D0-D8E7BAC42AB8.jpeg
    161.2 KB · Views: 14
  • 0148E6CA-F531-473F-AAB3-0A37DEF83D3B.jpeg
    0148E6CA-F531-473F-AAB3-0A37DEF83D3B.jpeg
    229.9 KB · Views: 14

jlbanzet

Active Member
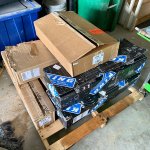
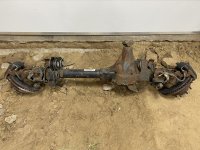
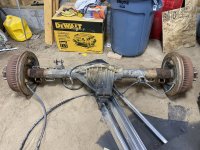
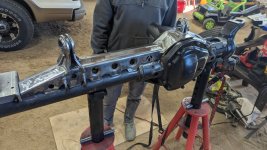
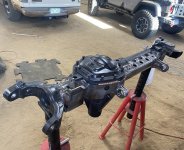
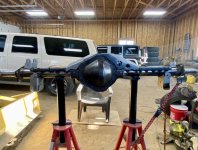
So this is where I’m currently at in the build. I’m happy with how Seabass has turned out to this point. But now that Bierpower is making some pretty big changes, I couldn’t get left behind. So I decided to make the jump to one tons and 40’s. Picked up an 05+ Ford Super Duty front and Chevy 14 bolt rear (Will need disc brake conversion). Will soon start cutting and cleaning these up. Plan is to go 5.38 with ARB lockers. I also finally got a daily driver so I can stop putting the miles on the Jeep and let it sit while we work on it. Big undertaking, but very excited. We’ll see how much work Bierpower actually let’s me do on it. 😂
 

Attachments

  • 638DAD0F-6AB7-4C36-90BC-A163C1939D8E.jpeg
    638DAD0F-6AB7-4C36-90BC-A163C1939D8E.jpeg
    331.3 KB · Views: 14
  • BD083C44-546B-4B31-B8F7-3E4D182B238D.jpeg
    BD083C44-546B-4B31-B8F7-3E4D182B238D.jpeg
    325 KB · Views: 14
Top Bottom