While the factory headlights on a Jeep Renegade aren't terrible, they're far from being as clean and bright white as what you can get with a nice set of LED lights. Fortunately, the Renegade was designed with headlight housings that have removable bulbs and so upgrading them to LED is really pretty simple. The only thing you need is replace the H13 incandescent bulbs with a set of H13 LED bulbs or ones that at least come with adapters to make it work and you're good to go. After doing some research, I found that a company called OPT7 makes a kit that can be made to work on a Renegade with a little tweaking and this write-up will help explain what all you will need to do.
What you will need
• OPT7 FluxBeam LED Headlight Bulbs w/ Clear Arc-Beam Kit - H13 (9008) - 80w 7,000Lm 6K Cool White CREE
• #1 Phillips Precision Screwdriver
• Hand Drill
• 9/64" Drill Bit
• Center Punch
• Dielectric Grease
• Bench Vice
Instructions
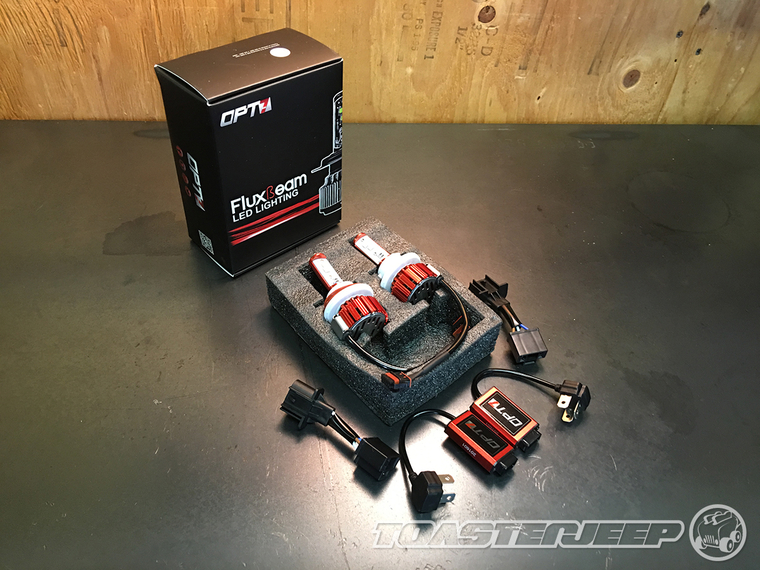
Here's a shot of everything you will get with your new OPT7 FluxBeam LED Headlight Bulbs. As you can see, you will get (2) OPT7 FluxBeam LED Bulbs, (2) OPT7 RedLine Drivers and (2) H13 Adapters.
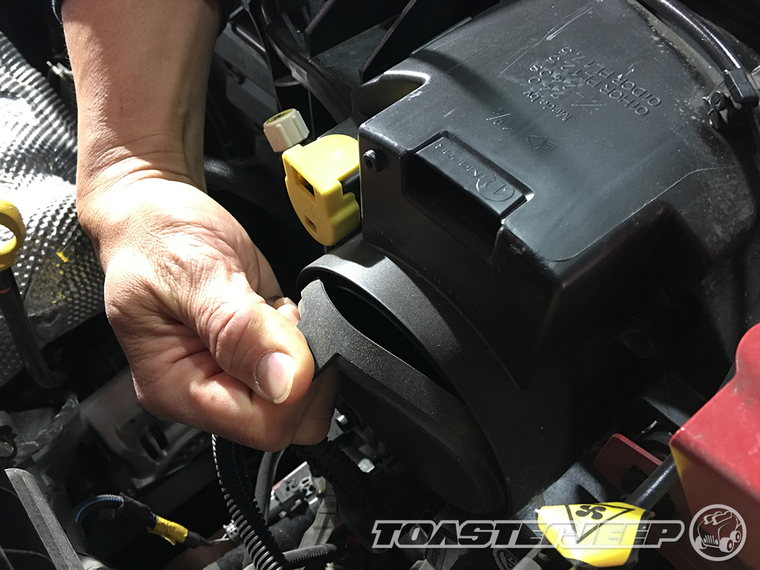
1. Open up the hood on your Renegade and then, starting on the passenger side, reach behind the headlight housing, firmly grab the tab on the rubber cover and pull it off.
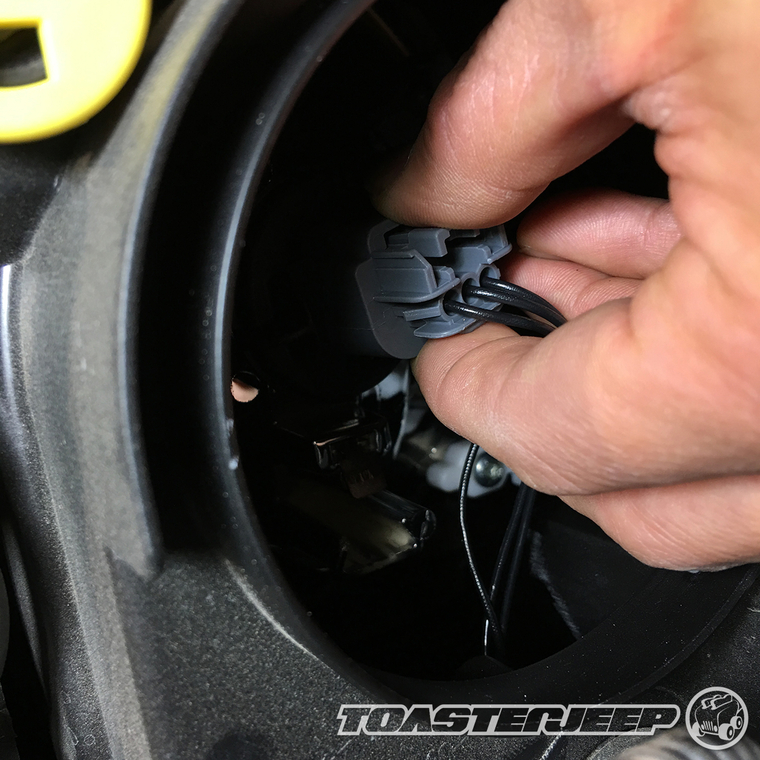
2. Reach inside the headlight housing, firmly grab a hold of the gray plug and then rotate it counter-clockwise until it unlocks from the housing.
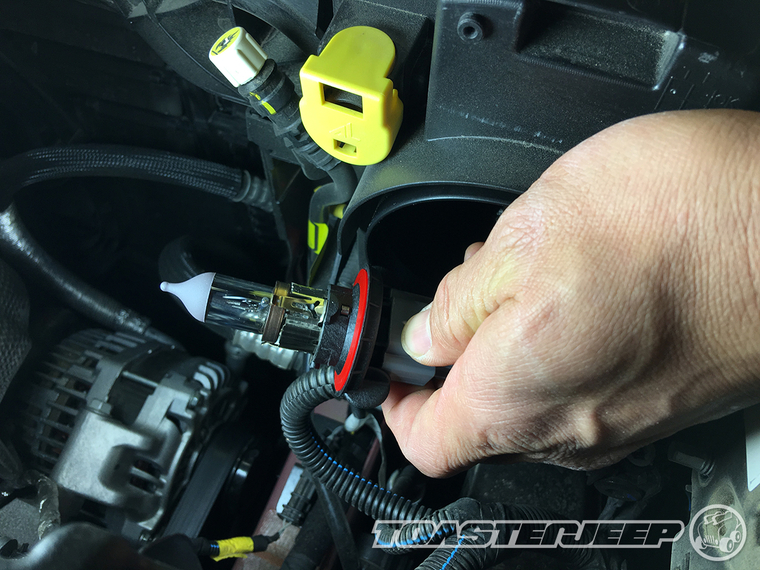
3. Carefully pull the headlight bulb straight back and out of the housing being careful not to touch the bulb with your hands. The oils from your hands can damage the bulb and if you wish to keep it as a spare, you'll want to take care in handling it.
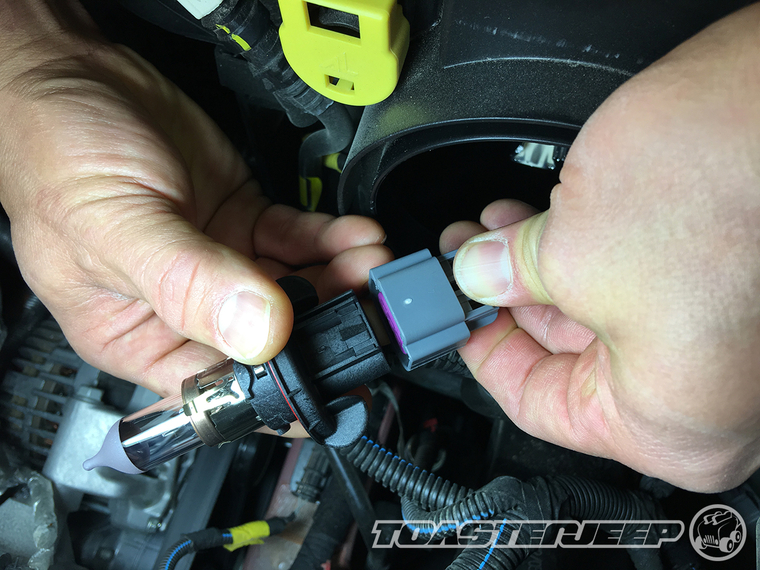
4. Press the release clip on the plug and separate it from the base of the bulb.
5. Using a #1 Phillips precision screwdriver, carefully remove the screw securing the white plastic locking cam to the anodized red LED bulb housing. You'll need to be aware that the screw is set in tight and it will be difficult to remove without stripping the head of the screw. Just take your time and if needed, use a mechanics glove to help give you a better grip on the screwdriver.
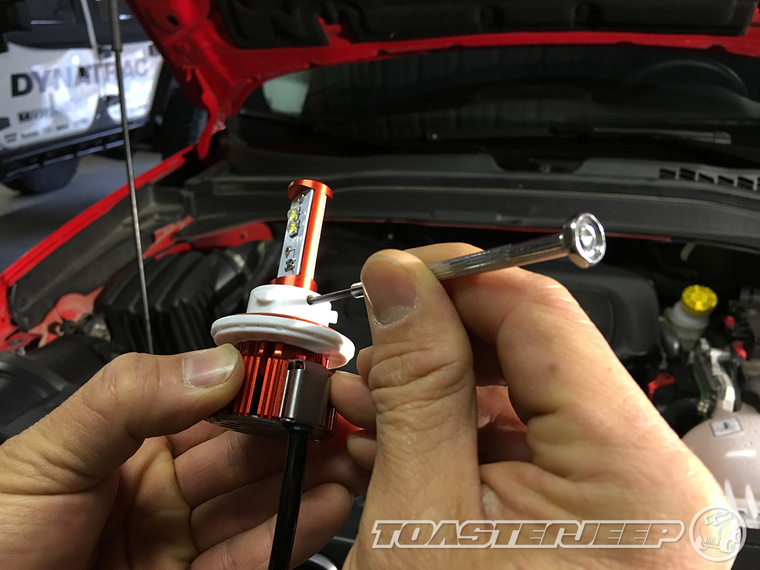
With the white plastic locking cam removed, you can see the point where the set screw secures it in place on the anodized red LED bulb housing.
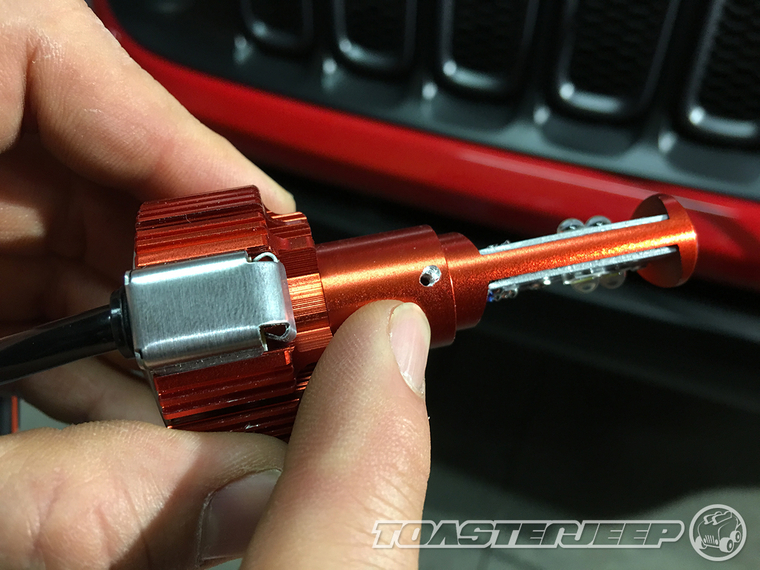
6. Reinstall the white plastic locking cam into your headlight housing and then carefully slide the LED bulb into it making sure that the "R" is facing toward the passenger side of your Jeep the "L" toward the driver side. Rotate the bulb until it's sitting vertical and perpendicular to the ground. Make a note of where it needs to be in relationship to the locking cam so that you can locate where you need to make your new set screw hole.
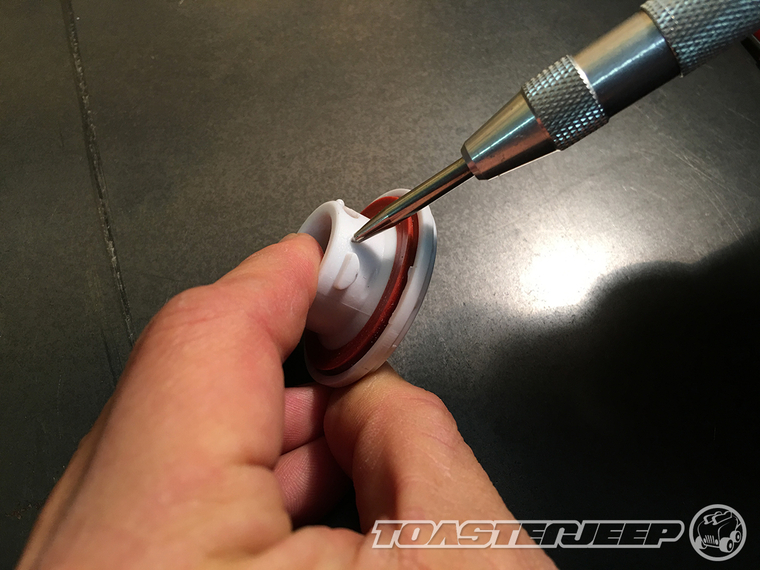
7. Once you've determined where the new set screw hole needs to go, use a center punch to mark the location of where you will need to drill it out. As you can see in the photo below, I found that the new hole needed to be relocated just a little bit away from the original hole and close to one of the cams teeth.
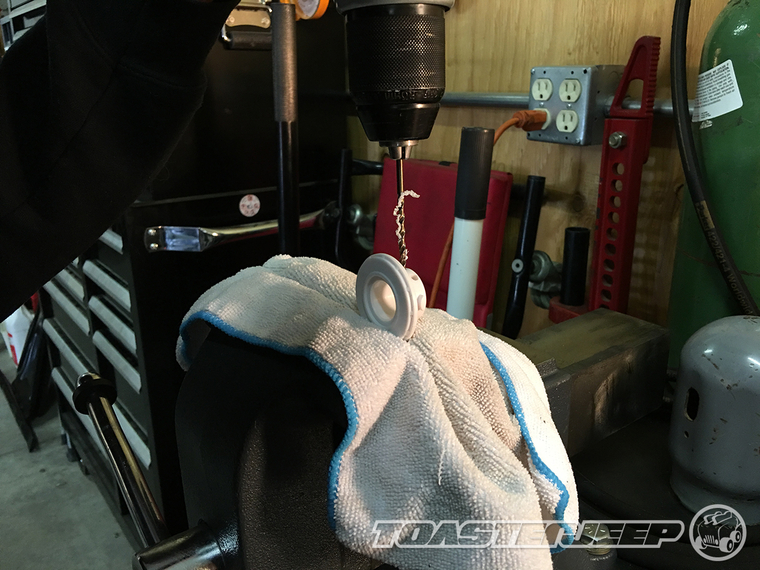
8. Place a rag between the jaws of a bench vice and then gently hold the white plastic locking cam in place. Use a hand drill with a 9/64" drill bit to drill out your new set screw hole.
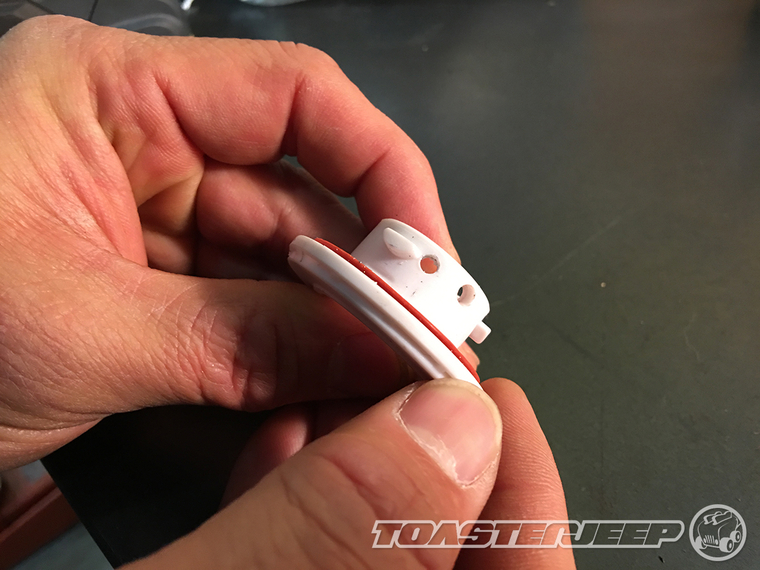
A shot of what it should look like when done.
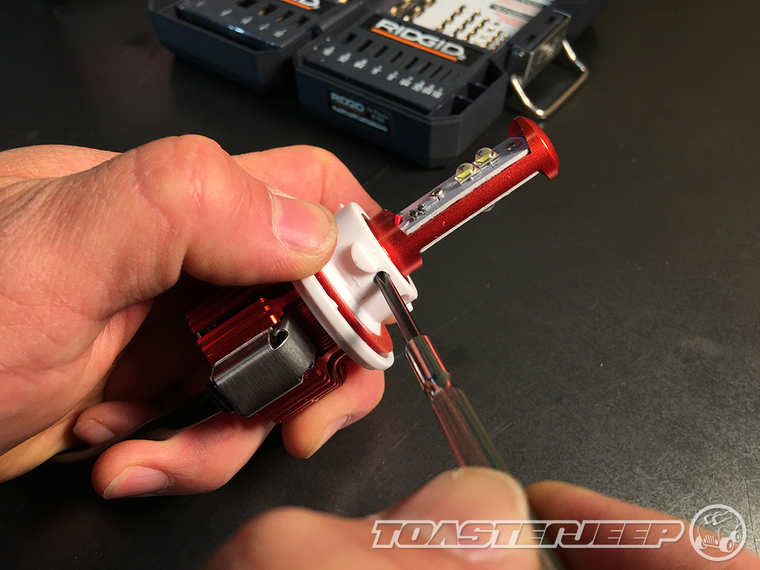
9. Reinstall the white plastic locking cam on to the red anodized LED bulb housing, rotate it until the new hole you made lines up with the threaded hole and then secure it in place with the set screw you removed earlier. You will need a #1 Phillips screwdriver for this job.
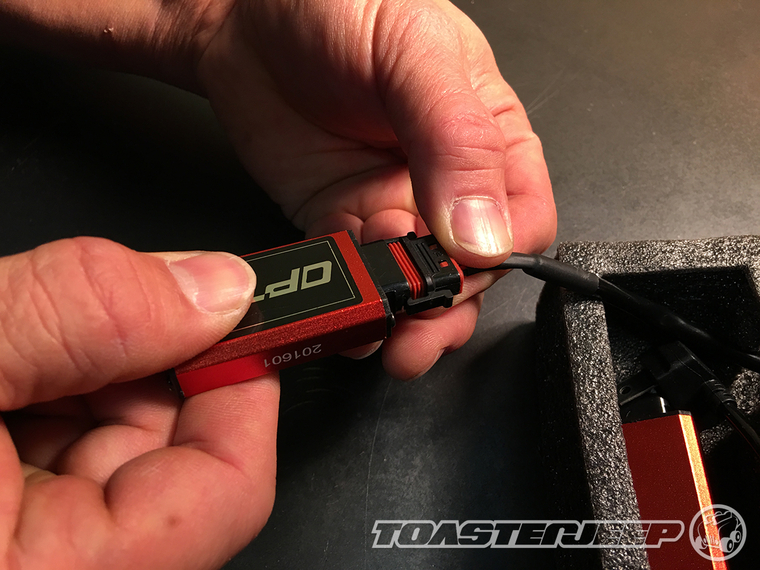
10. Plug the LED bulb into the provided OPT7 RedLine Driver.
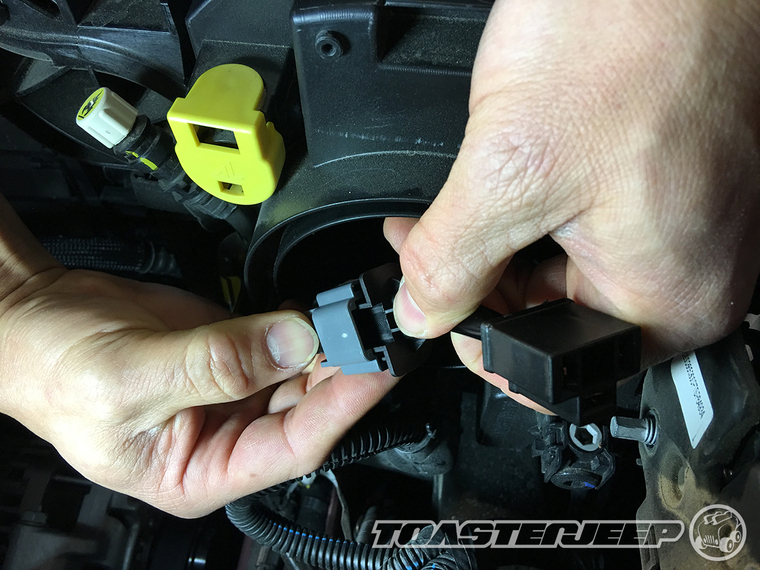
11. Plug the provided H13 pigtail adapter into the factory wiring harness.
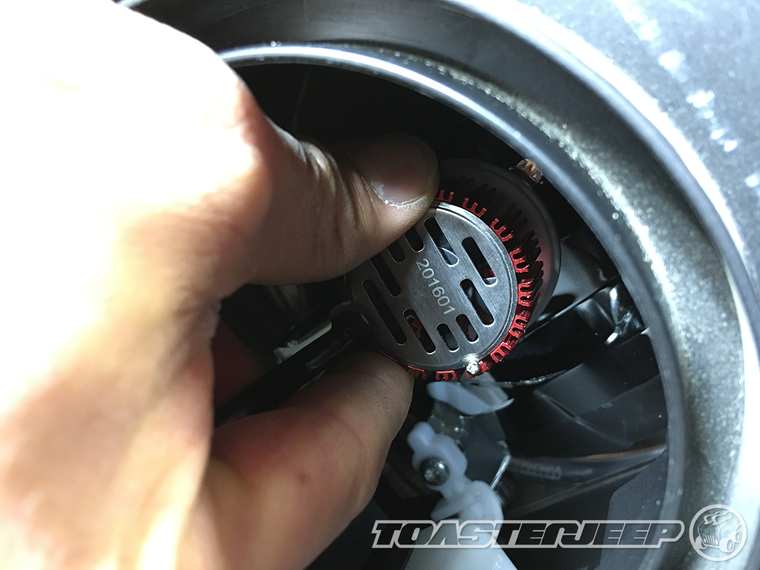
12. Carefully insert the OPT7 LED bulb into the headlight housing and then rotate it clockwise to lock it in place.
13. Apply some dielectric grease to the blades of the adapter plug.
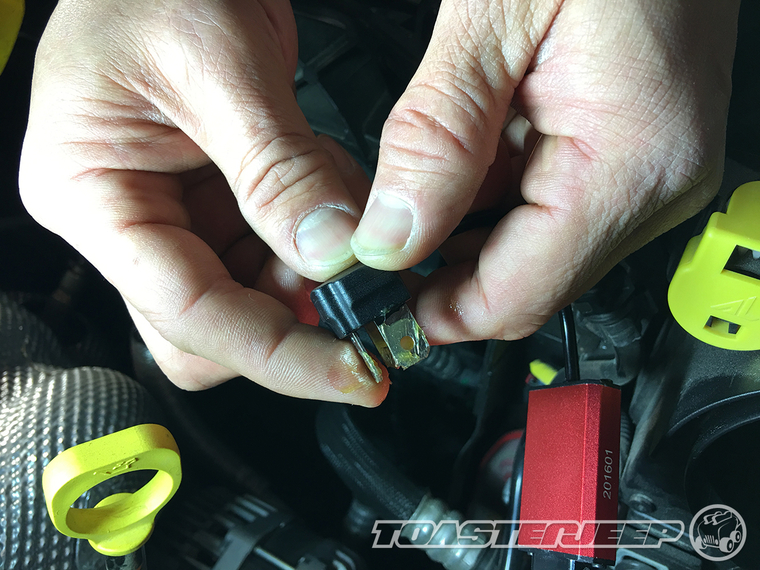
14. Plug in the OPT7 Redline Driver into the H13 pigtail adapter.
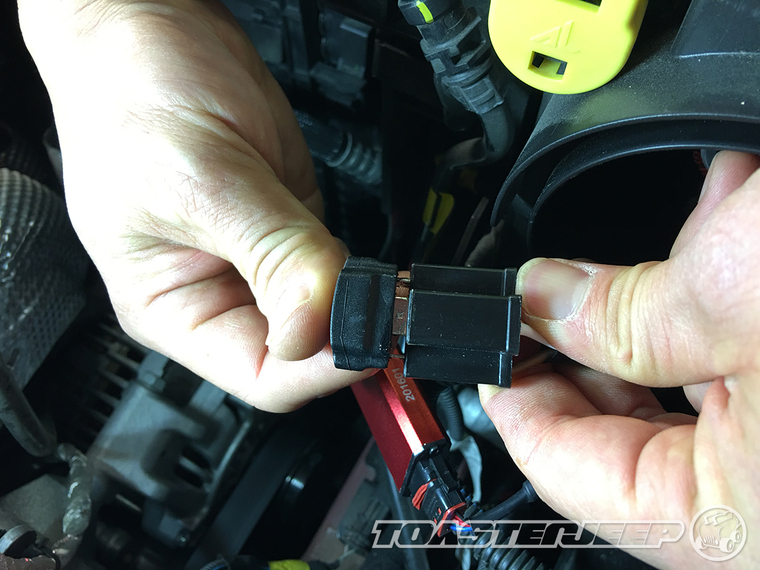
15. Tuck all the wiring and OPT7 Redline Driver into the headlight housing.
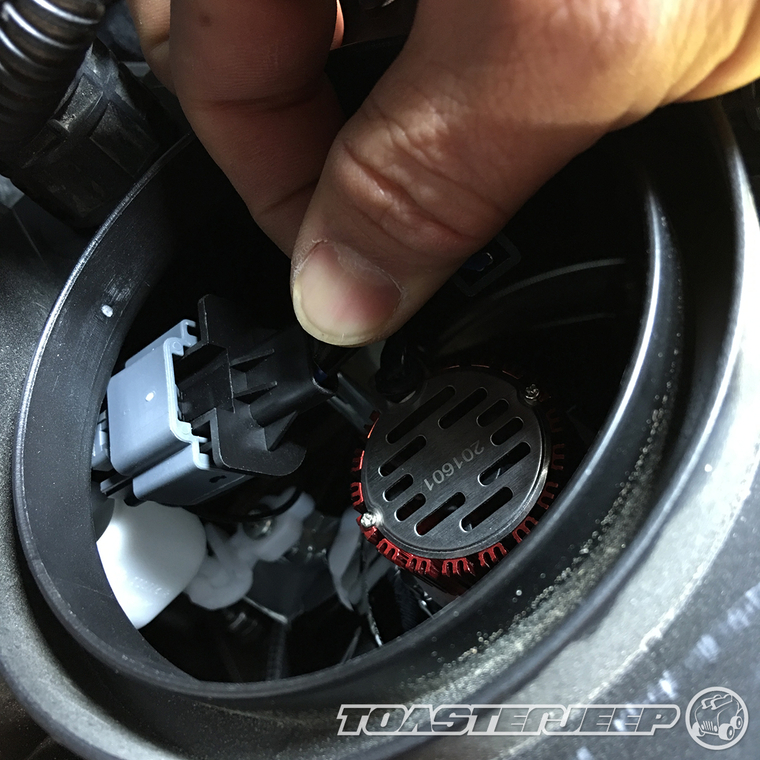
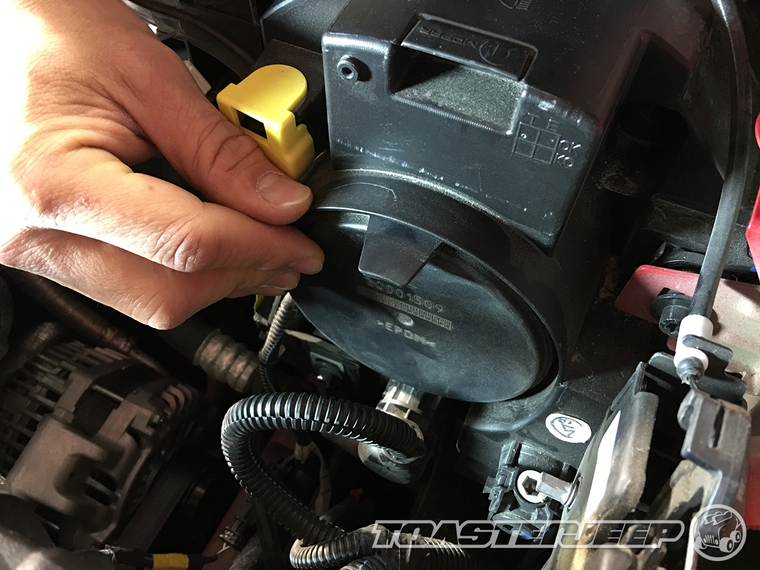
16. Reinstall the rubber cover onto the back of the headlight housing.
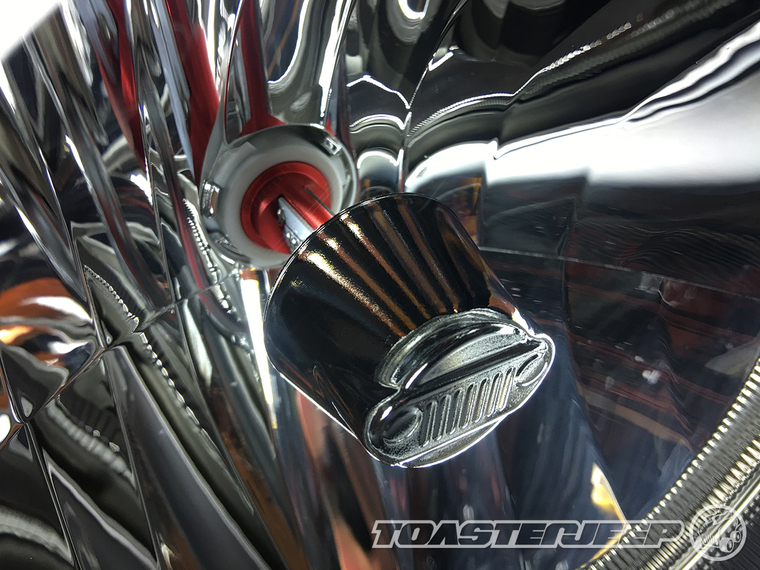
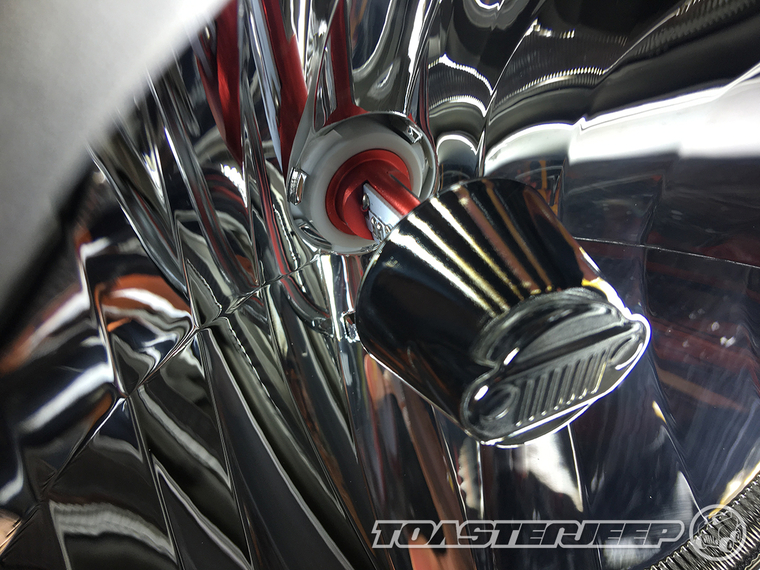
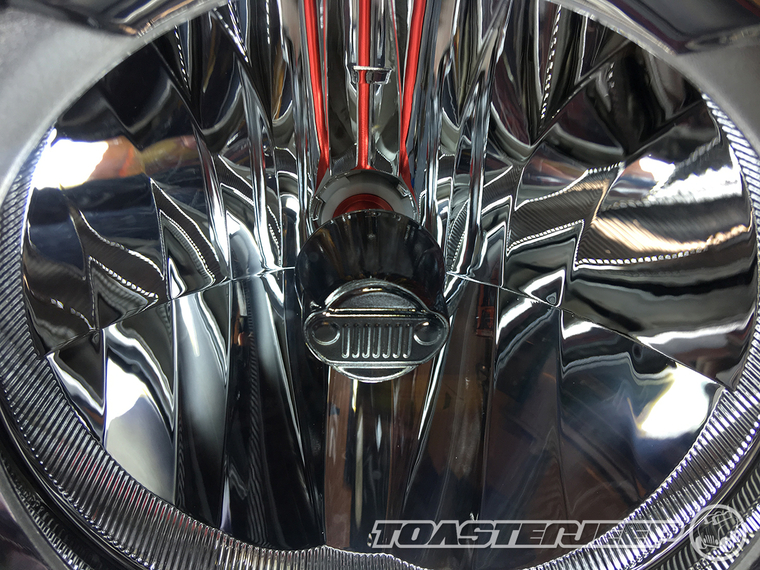
17. Repeat all the same steps on the driver side of your Renegade and you're done. Here's a close up shot of what your new OPT7 LED bulb should look like installed. As you can see, the teeth on the cam are locked in place and the bulb itself is sitting vertically and perpendicular to the ground.
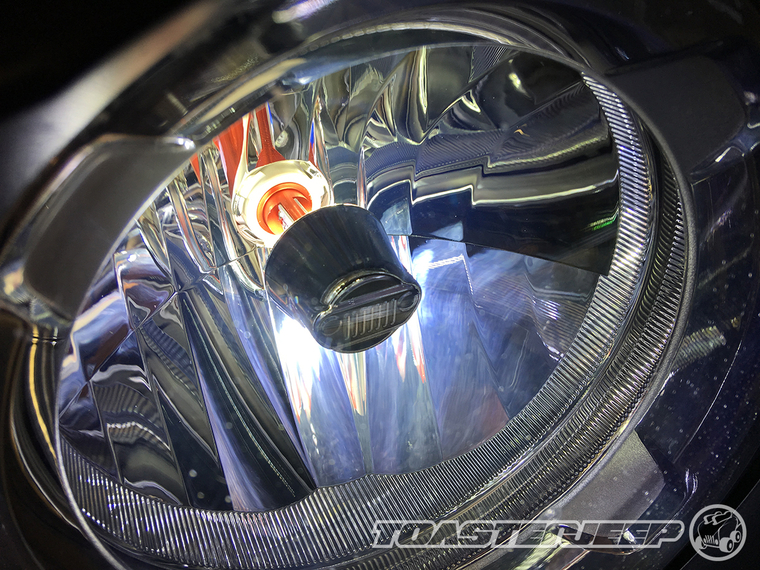
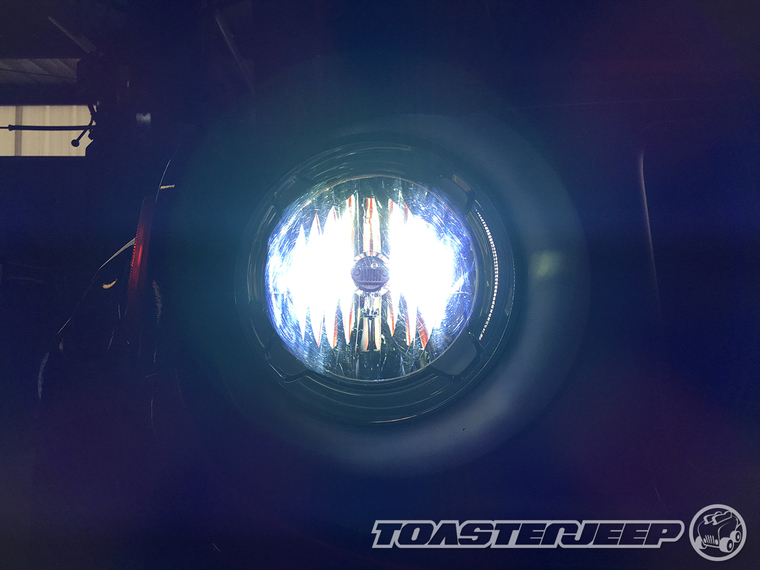
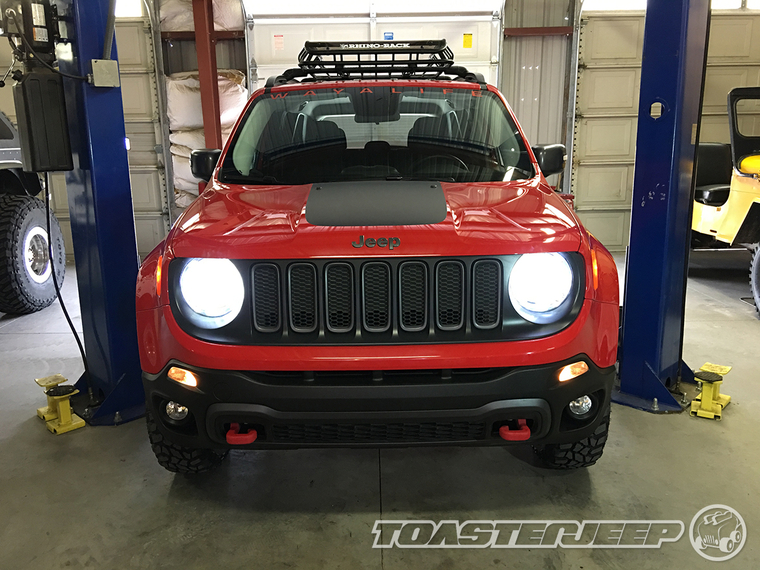
Here are a few shots of what the headlights look like when turned on.
Overall, I'm really happy with the clean white and bright light that I get from these new OPT7 FluxBeam LED Headlight Bulbs and I think you will be too. Certainly, it's an improvement over the factory incandescent bulbs and they look cool too. Of course, I'll have to do some longer term testing to know for sure how good of an investment they really are but for now, I like them.
What you will need
• OPT7 FluxBeam LED Headlight Bulbs w/ Clear Arc-Beam Kit - H13 (9008) - 80w 7,000Lm 6K Cool White CREE
• #1 Phillips Precision Screwdriver
• Hand Drill
• 9/64" Drill Bit
• Center Punch
• Dielectric Grease
• Bench Vice
Instructions
Here's a shot of everything you will get with your new OPT7 FluxBeam LED Headlight Bulbs. As you can see, you will get (2) OPT7 FluxBeam LED Bulbs, (2) OPT7 RedLine Drivers and (2) H13 Adapters.
1. Open up the hood on your Renegade and then, starting on the passenger side, reach behind the headlight housing, firmly grab the tab on the rubber cover and pull it off.
2. Reach inside the headlight housing, firmly grab a hold of the gray plug and then rotate it counter-clockwise until it unlocks from the housing.
3. Carefully pull the headlight bulb straight back and out of the housing being careful not to touch the bulb with your hands. The oils from your hands can damage the bulb and if you wish to keep it as a spare, you'll want to take care in handling it.
4. Press the release clip on the plug and separate it from the base of the bulb.
INSTALLATION NOTES: If you look at the OPT7 LED replacement bulbs carefully, you will see that there is a letter "R" (right) on one side and a letter "L" (left) on the other. This is to help indicate which side of the vehicle the LEDs need to be facing. This will be important to know during installation.
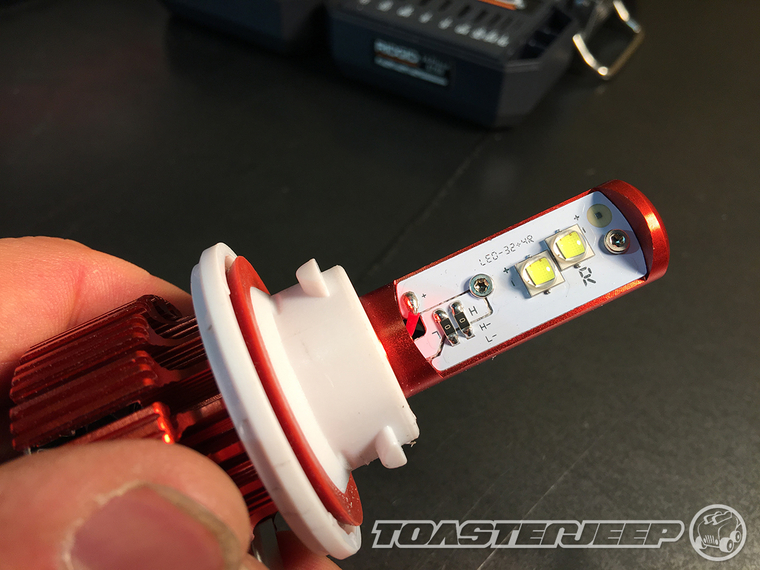
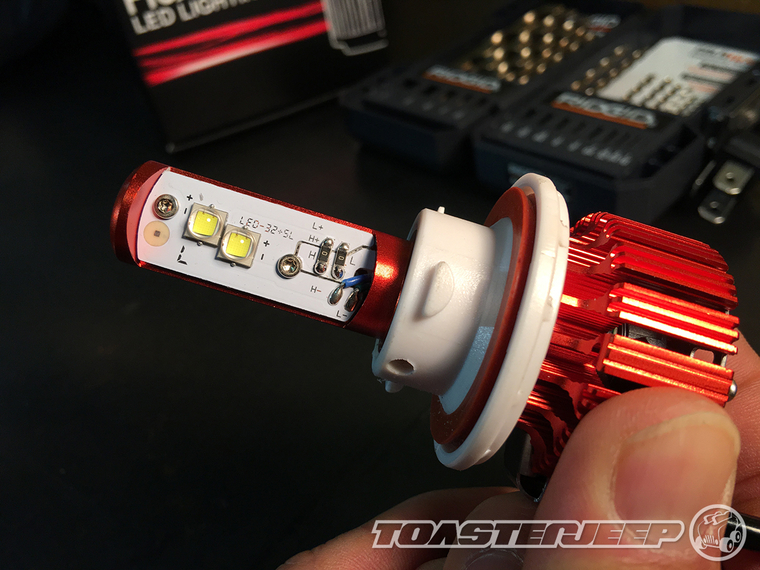
As you can see in this photo, if you were to install your new OPT7 LED bulb into the headlight housing as is, the bulb plane would not be sitting vertical and perpendicular to the ground once locked in place. It would in fact be sitting at about a 45° angle and running the bulb like this will provide you with substandard lighting.
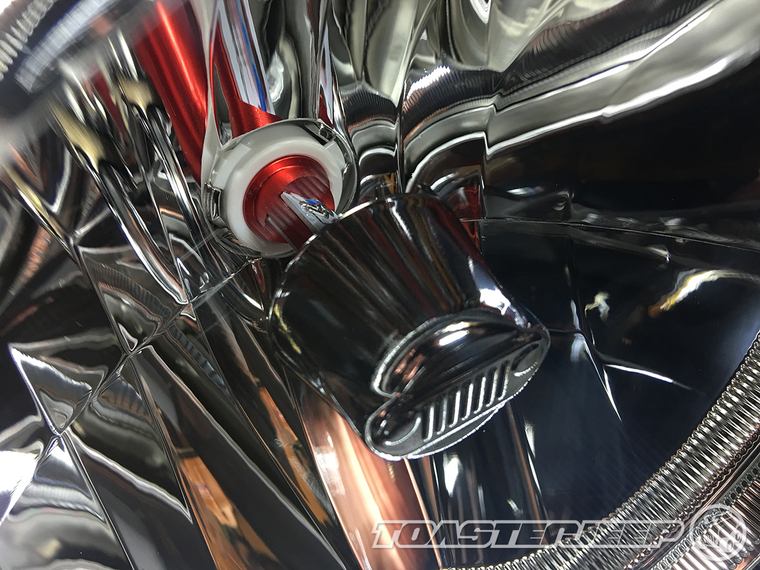
As you can see in this photo, if you were to install your new OPT7 LED bulb into the headlight housing as is, the bulb plane would not be sitting vertical and perpendicular to the ground once locked in place. It would in fact be sitting at about a 45° angle and running the bulb like this will provide you with substandard lighting.
5. Using a #1 Phillips precision screwdriver, carefully remove the screw securing the white plastic locking cam to the anodized red LED bulb housing. You'll need to be aware that the screw is set in tight and it will be difficult to remove without stripping the head of the screw. Just take your time and if needed, use a mechanics glove to help give you a better grip on the screwdriver.
With the white plastic locking cam removed, you can see the point where the set screw secures it in place on the anodized red LED bulb housing.
6. Reinstall the white plastic locking cam into your headlight housing and then carefully slide the LED bulb into it making sure that the "R" is facing toward the passenger side of your Jeep the "L" toward the driver side. Rotate the bulb until it's sitting vertical and perpendicular to the ground. Make a note of where it needs to be in relationship to the locking cam so that you can locate where you need to make your new set screw hole.
7. Once you've determined where the new set screw hole needs to go, use a center punch to mark the location of where you will need to drill it out. As you can see in the photo below, I found that the new hole needed to be relocated just a little bit away from the original hole and close to one of the cams teeth.
8. Place a rag between the jaws of a bench vice and then gently hold the white plastic locking cam in place. Use a hand drill with a 9/64" drill bit to drill out your new set screw hole.
A shot of what it should look like when done.
9. Reinstall the white plastic locking cam on to the red anodized LED bulb housing, rotate it until the new hole you made lines up with the threaded hole and then secure it in place with the set screw you removed earlier. You will need a #1 Phillips screwdriver for this job.
10. Plug the LED bulb into the provided OPT7 RedLine Driver.
11. Plug the provided H13 pigtail adapter into the factory wiring harness.
12. Carefully insert the OPT7 LED bulb into the headlight housing and then rotate it clockwise to lock it in place.
13. Apply some dielectric grease to the blades of the adapter plug.
14. Plug in the OPT7 Redline Driver into the H13 pigtail adapter.
15. Tuck all the wiring and OPT7 Redline Driver into the headlight housing.
16. Reinstall the rubber cover onto the back of the headlight housing.
17. Repeat all the same steps on the driver side of your Renegade and you're done. Here's a close up shot of what your new OPT7 LED bulb should look like installed. As you can see, the teeth on the cam are locked in place and the bulb itself is sitting vertically and perpendicular to the ground.
Here are a few shots of what the headlights look like when turned on.
Overall, I'm really happy with the clean white and bright light that I get from these new OPT7 FluxBeam LED Headlight Bulbs and I think you will be too. Certainly, it's an improvement over the factory incandescent bulbs and they look cool too. Of course, I'll have to do some longer term testing to know for sure how good of an investment they really are but for now, I like them.
