If you're anything like us and plan on using your Jeep Renegade to head out into the wilderness and well into the night, a new Daystar 40" KC LED Light Bar System is an upgrade that I would highly recommend. The LED light bar comes with a combo beam pattern that provides both spot and spread reflectors to give you maximum lighting off road and the Daystar roof mount brackets can be installed in minutes and requires no drilling. That being said, the light bar itself will require you to figure out how to wire it up and being that we didn't want to run it down the windshield or drill a hole in the roof, we decided to get a little creative and this write-up will illustrate what we ultimately ended up doing.
What you will need
• 40" Jeep Renegade LED Light Bar Kit - KJ81000BK
• 5mm Allen Wrench
• 10mm socket
• Small Flathead Screwdriver
• Phillips Screwdriver
• Wire Cutter
• 14 Gauge Red Wire
• 14 Gauge Black Wire
• Solderless Terminals
• Electrical Tape
• Drill
• Small Unibit
• Trim Stick
• Wiring Conduit
• Metal Coat Hanger
Instructions
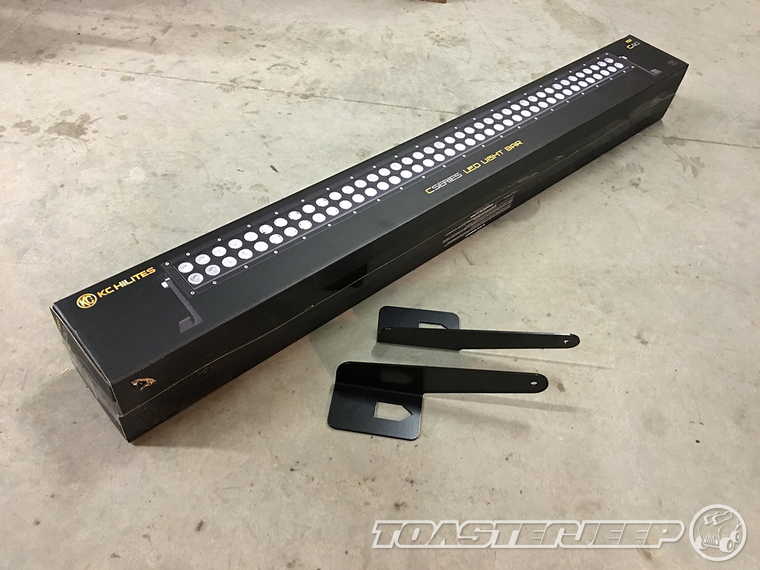
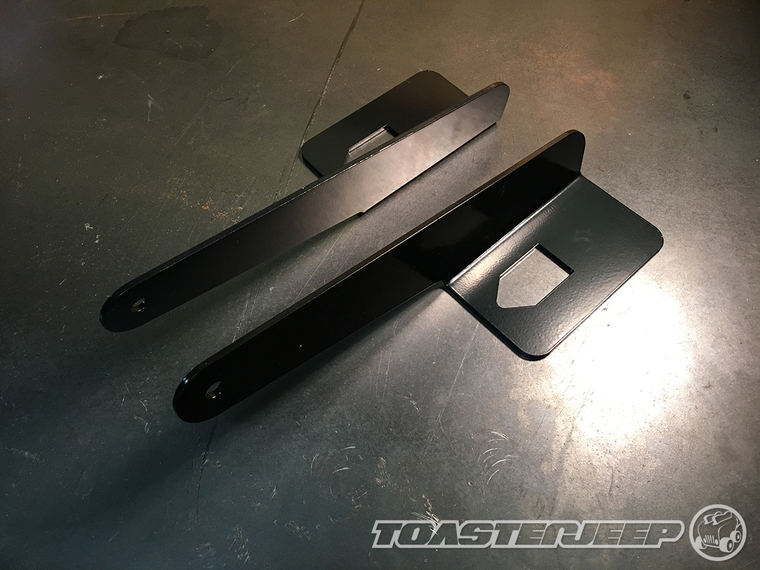
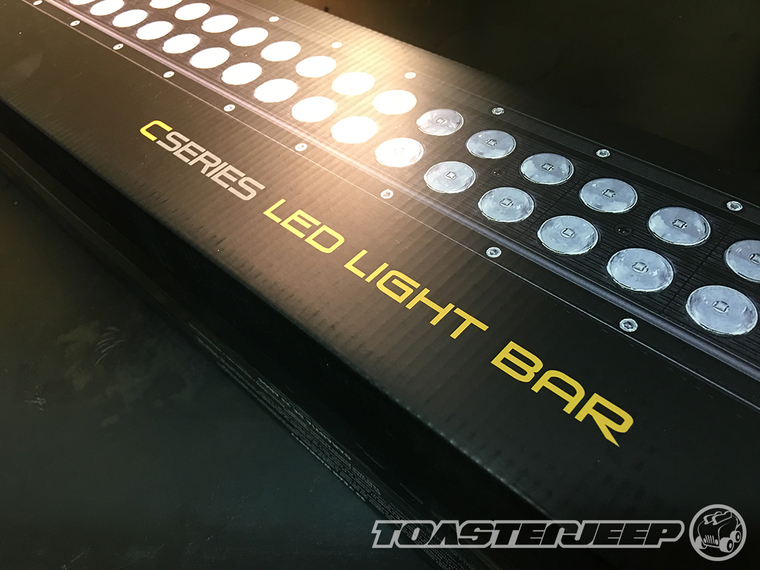
Here's a shot of everything you will get with your new Daystar 40" KC LED Light Bar Kit.
1. Starting on the passenger side of your Renegade, use a small flathead screw driver to carefully remove the 2 forward most bolt covers on top of the roof rack rails as shown.
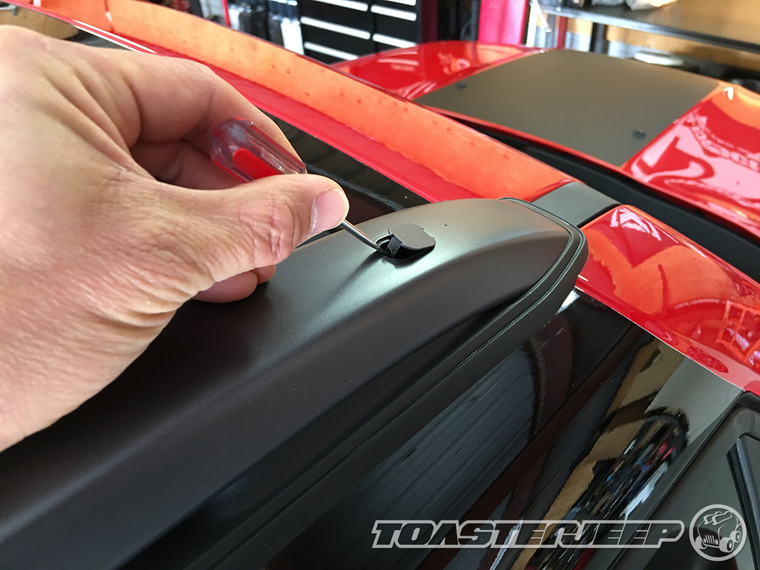
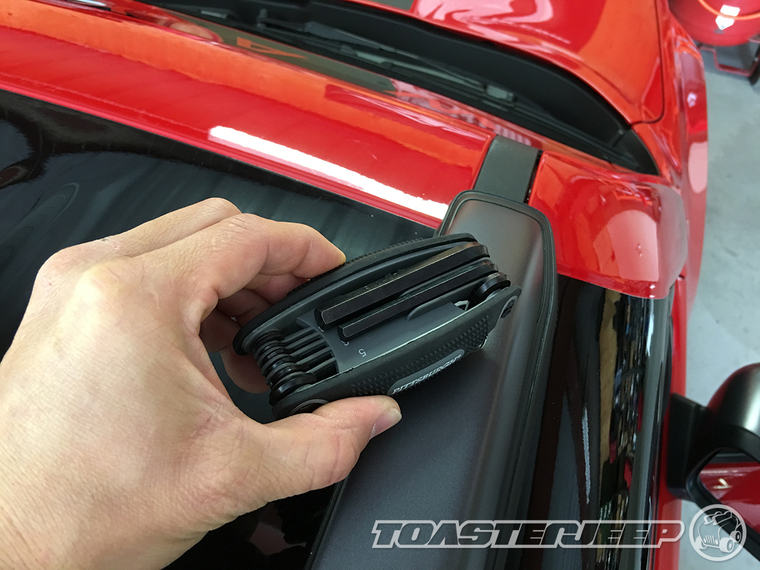
2. Use a 5mm Allen Wrench to loosen the 2 forward most bolts securing the roof rack rails to the top of your Renegade.
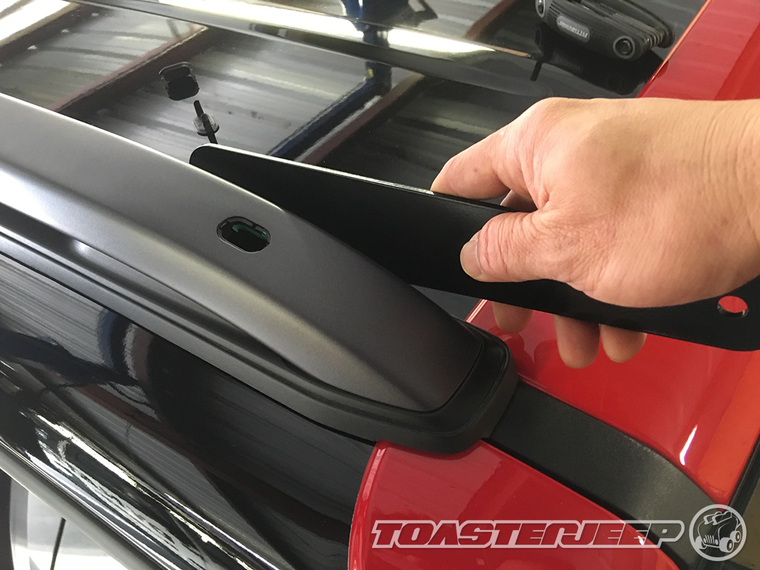
3. Lift up on the roof rack rail and then slide the passenger side Daystar light mount underneath it as shown. The bracket does have a cutout on the base of it and it will need to be aligned with the base of the roof rack rail.
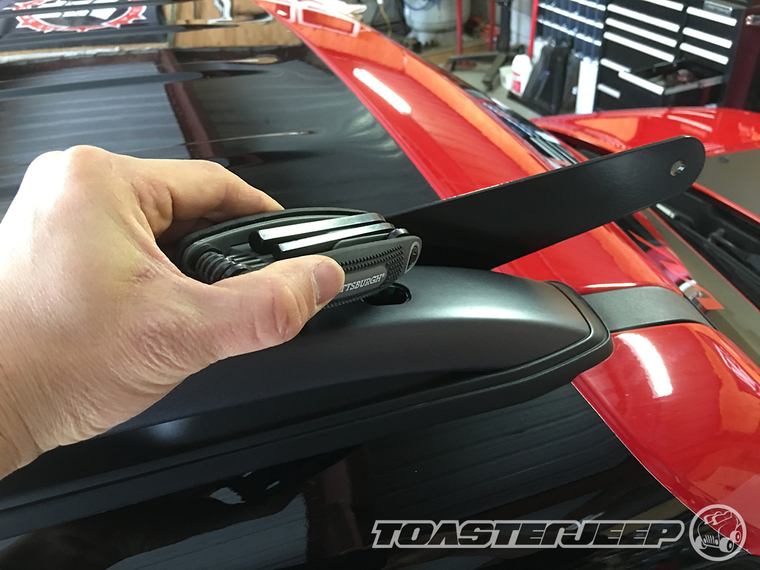
4. Using a 5mm Allen Wrench, secure the roof rack rails to the top of your Renegade by tightening the 2 forward most bolts.
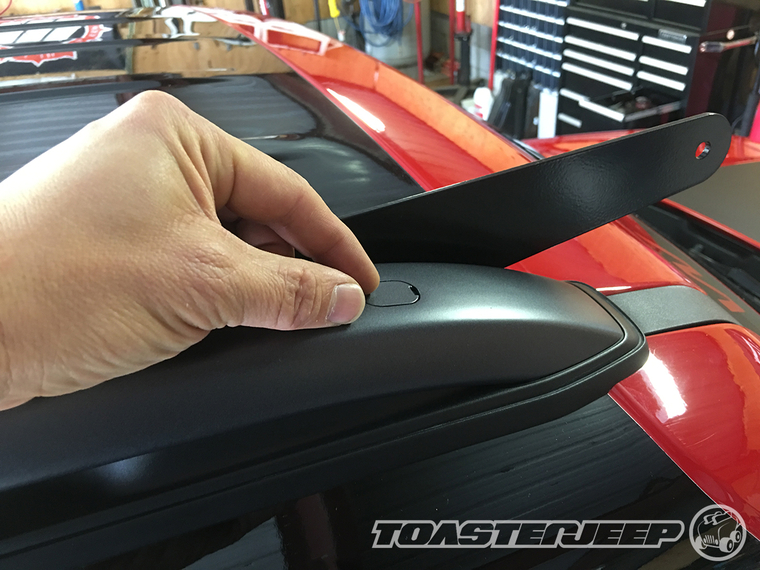
5. Reinstall the 2 forward most bolt covers on top of the roof rack rails as shown.
6. Move over to the driver side of your Renegade and then use a small flathead screw driver to carefully remove all 4 bolt covers on top of the roof rack rails as shown.
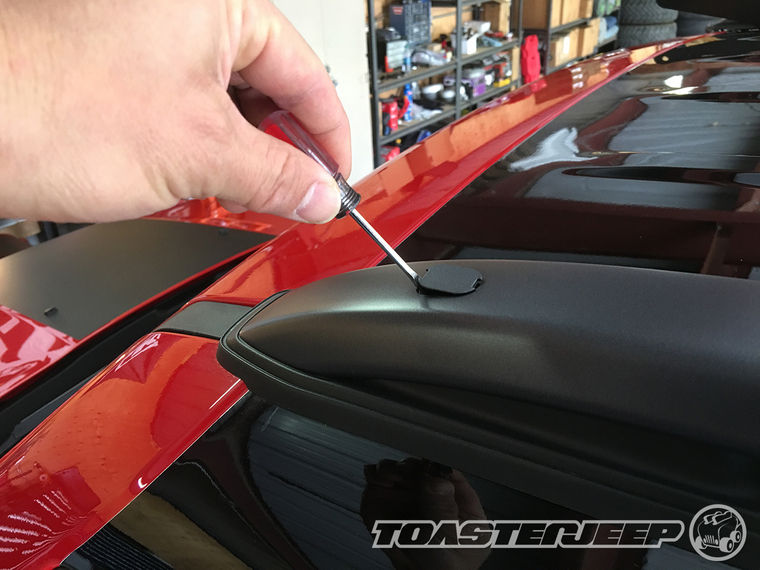
7. Use a 5mm Allen Wrench to loosen all 4 bolts securing the roof rack rails to the top of your Renegade.
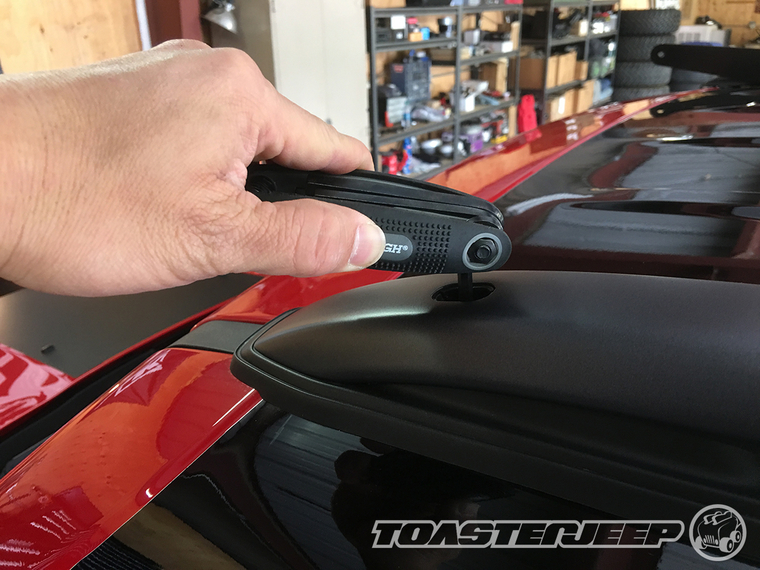
8. Carefully remove the driver side roof rack rail. The rail will be snapped into a plastic retaining clip at the rear end of your Renegade and you will need to carefully pry it out. Set your roof rack rail aside for now.
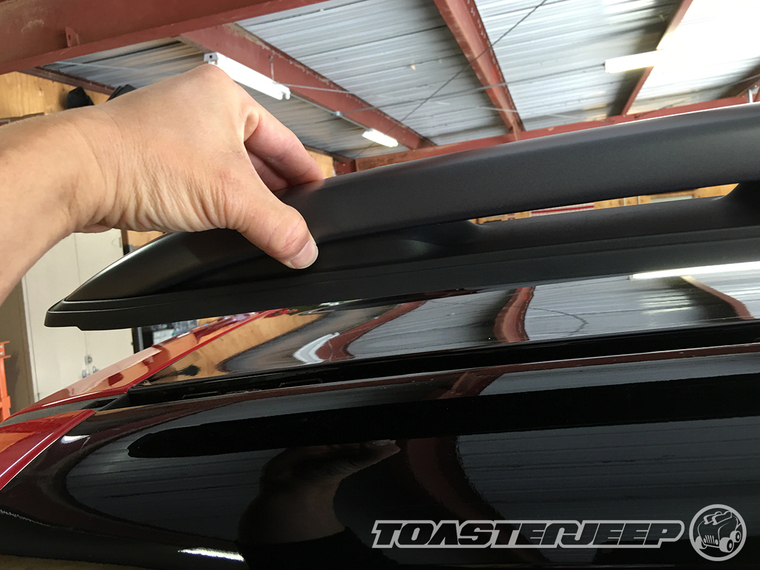
9. Carefully lift up the front of the plastic trim mounted to the top of your Renegade until it comes free of its retaining clip.
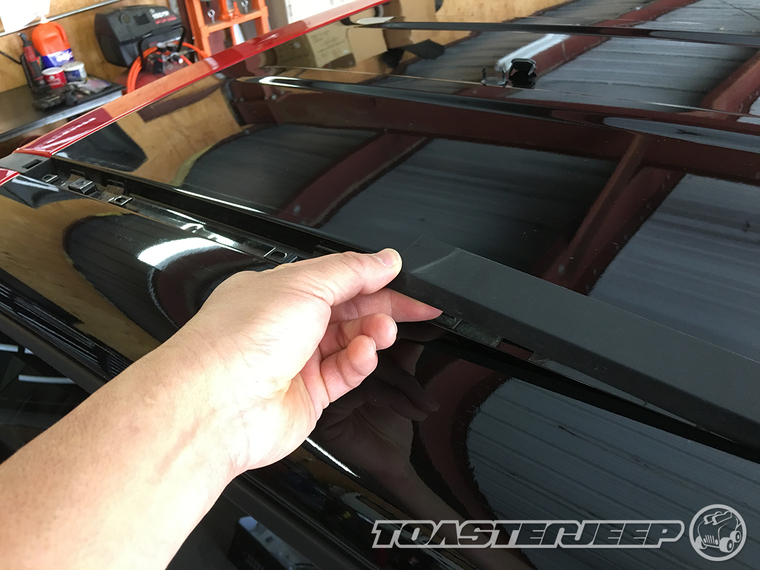
10. Again, carefully lift up the rear of the plastic trim mounted to the top of your Renegade until it comes free of its retaining clip. The middle section of the plastic trim is glued in place so you will not be able to remove it completely.
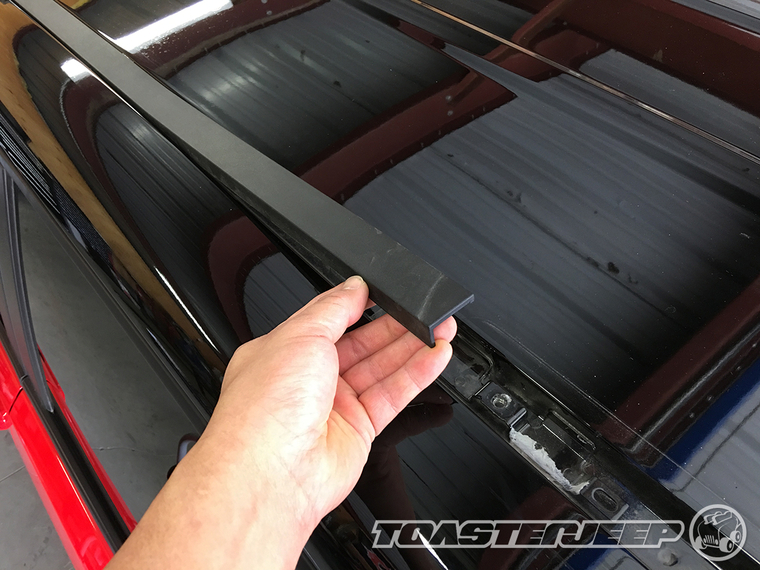
11. Starting from the front, take both of your new red and black wires and slide it underneath the plastic trim.
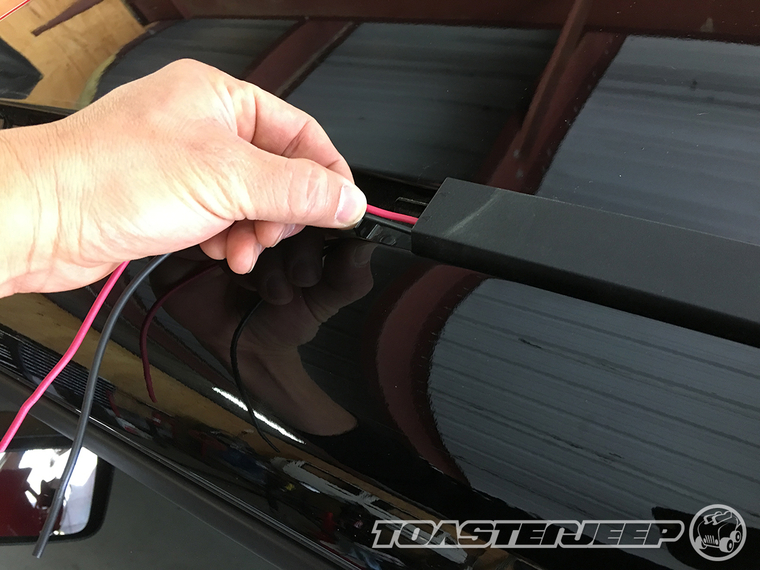
12. Slide both red and black wires underneath the back of plastic trim.
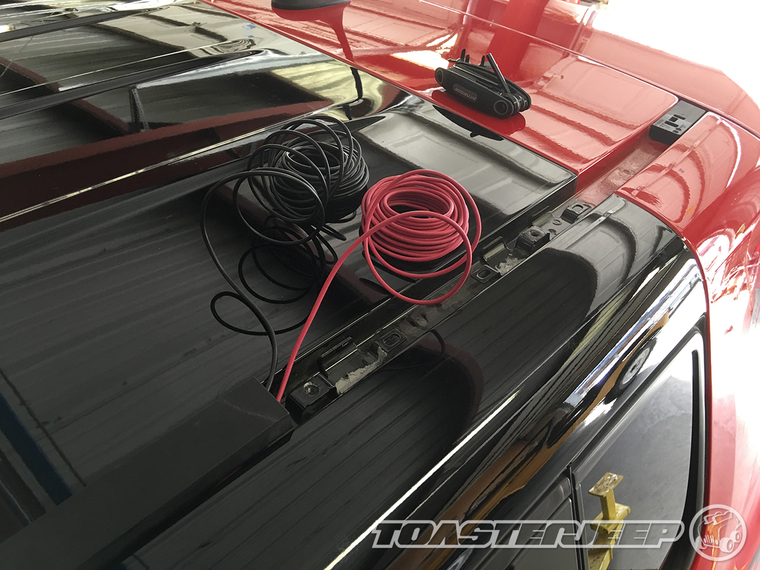
13. Tuck the red and then the black wires in between the plastic trim and roof as shown.
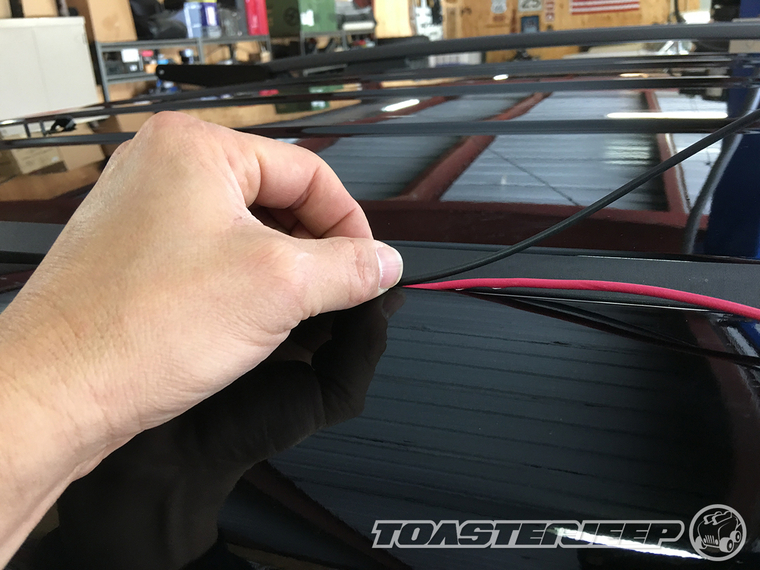
14. Using a small flathead screw driver, carefully embed the wires in place.
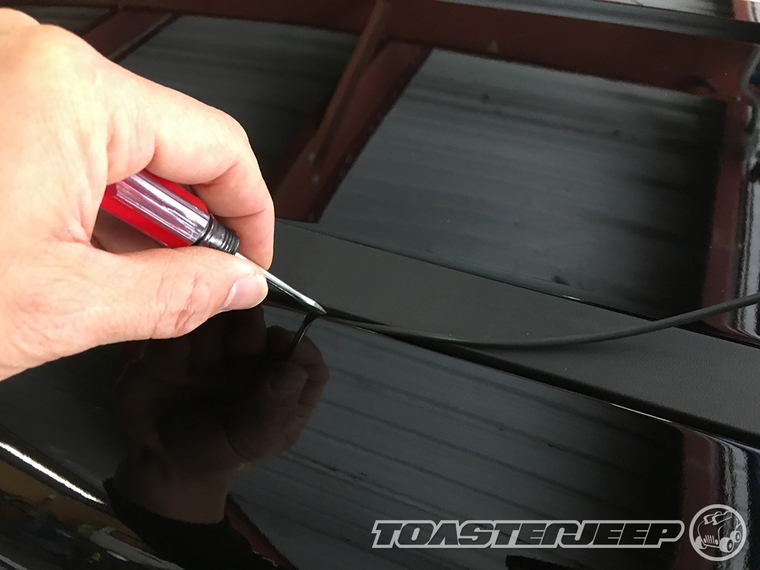
15. Reinstall the front of the plastic trim by pressing down on it until it snaps in place.
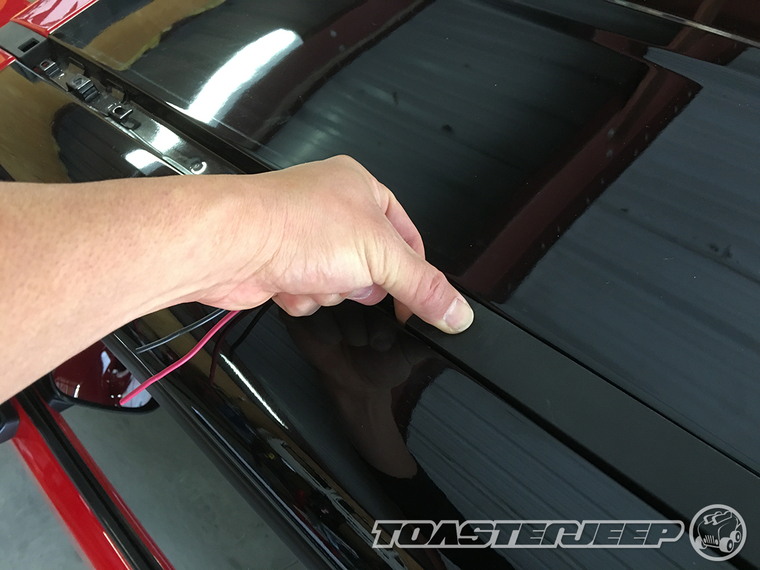
16. Reinstall the rear half of the plastic trim by pressing down on it until it snaps in place.
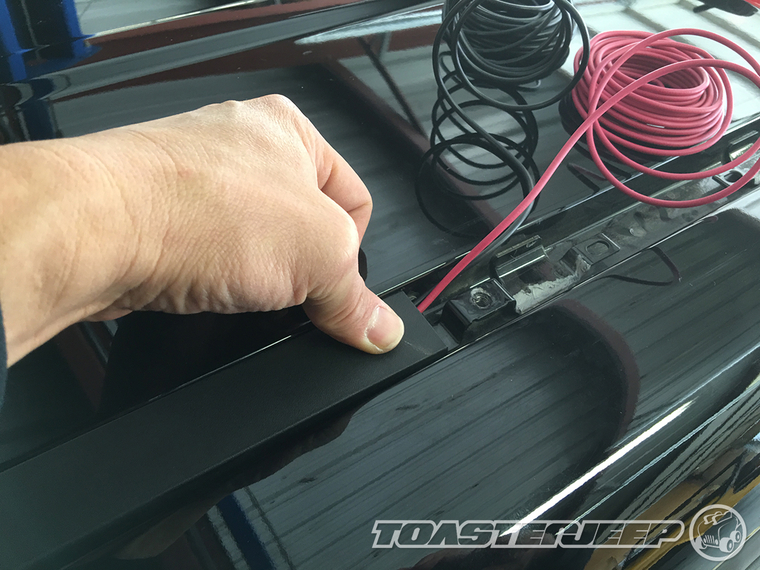
17. The rearmost plastic trim is glued in place and cannot be removed. Use a drill with a small unibit to drill a hole into the back of the trim as shown.
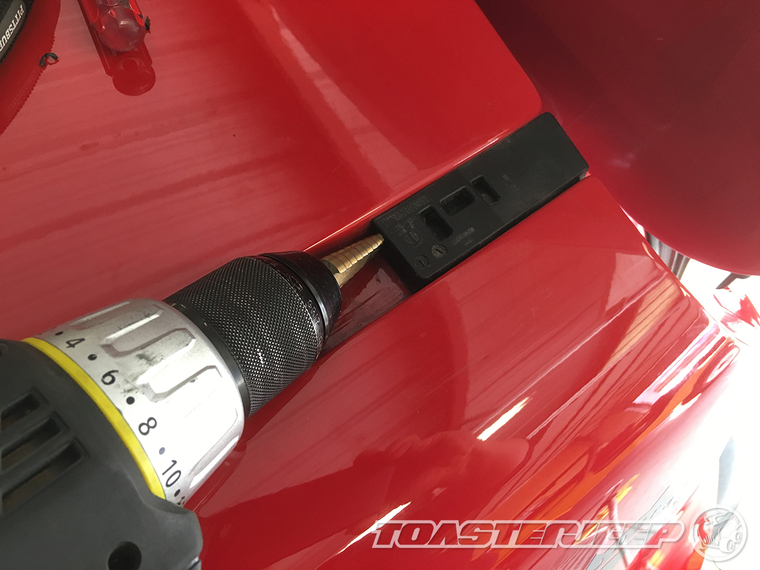
18. Open up your Renegade's rear hatch and then feed both the red and black wires through the hole until they can be pulled out the back as shown.
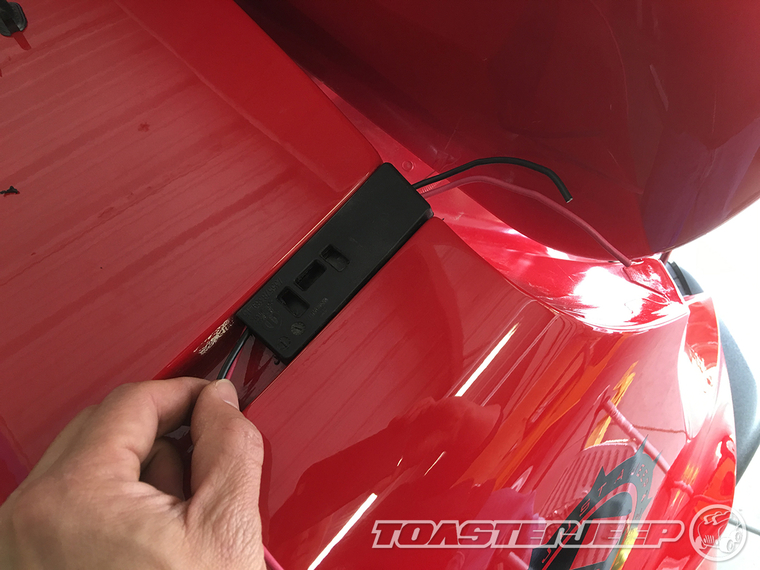
19. Go back to your work bench, open up your KC LED Light Bar box, located one of the larger Allen bolts, insert it into the Daystar driver side light mount and install one of the rubber grommets onto the thread as show.
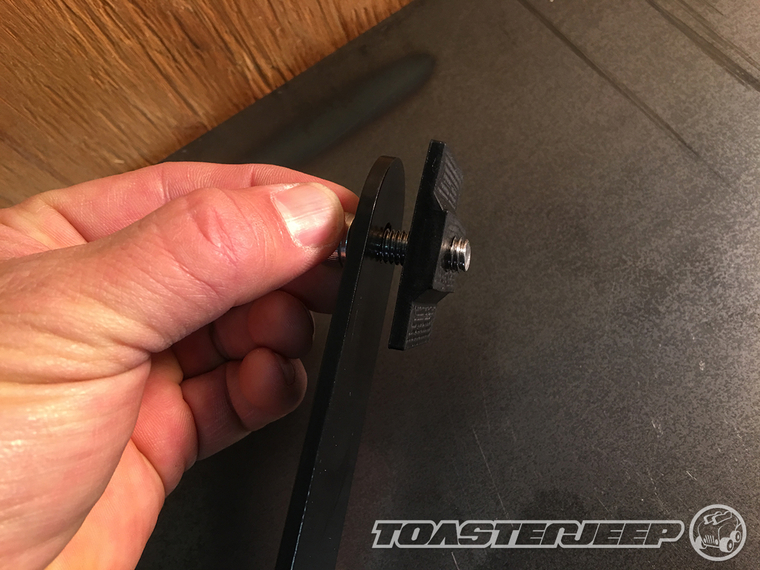
20. Secure the Daystar light bracket to the KC LED Light Bar until it's just snut using the Allen Wrench provided with the kit.
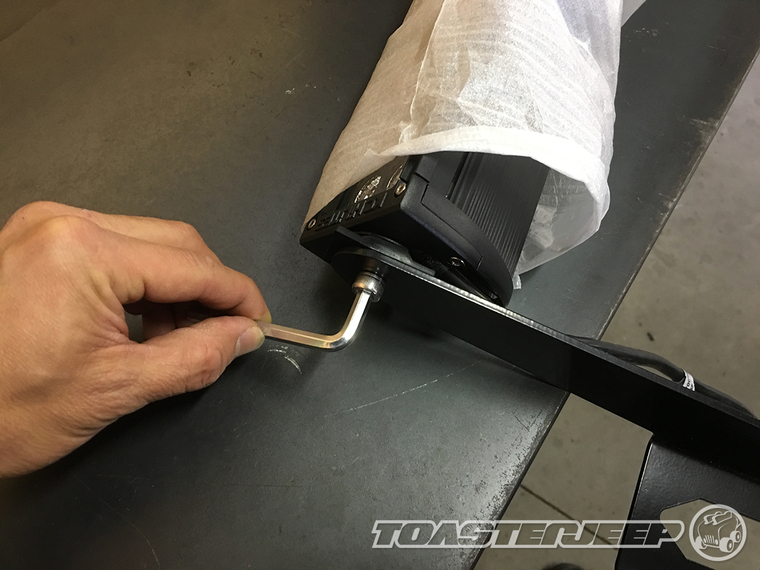
21. The wiring coming out of the KC LED Light Bar is long and the plug on the end of it is quite large and being that we decided to run everything underneath the roof rack rails, we needed to cut the extra length off. To begin this step, use a razor to cut around the outer insulator being careful not to damage the red and black wires inside.
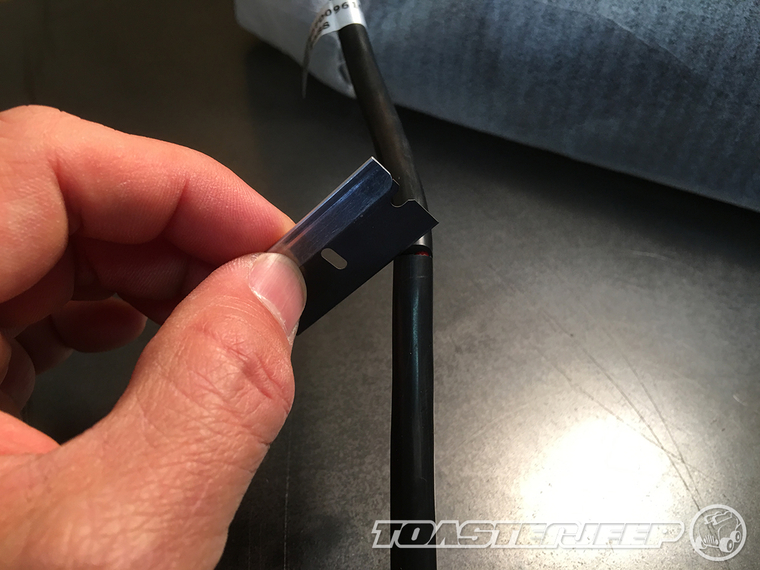
22. Pull the outer insulator apart to expose more of the red and black wires inside.
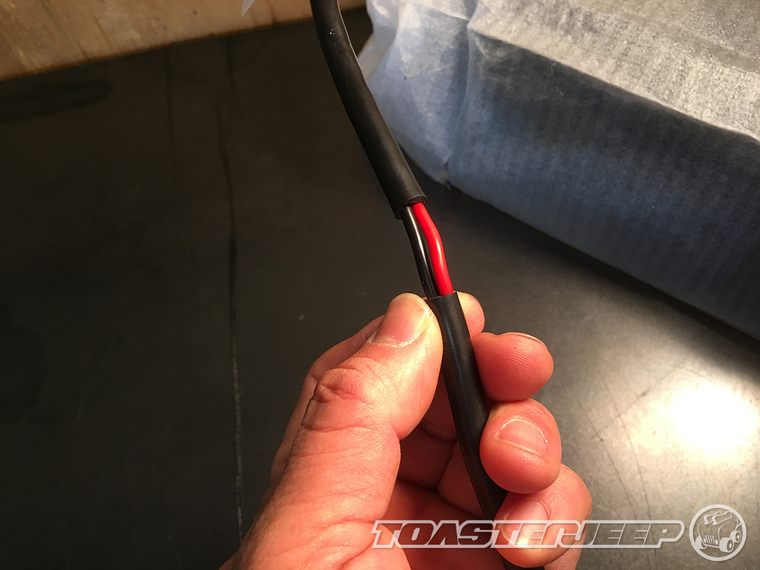
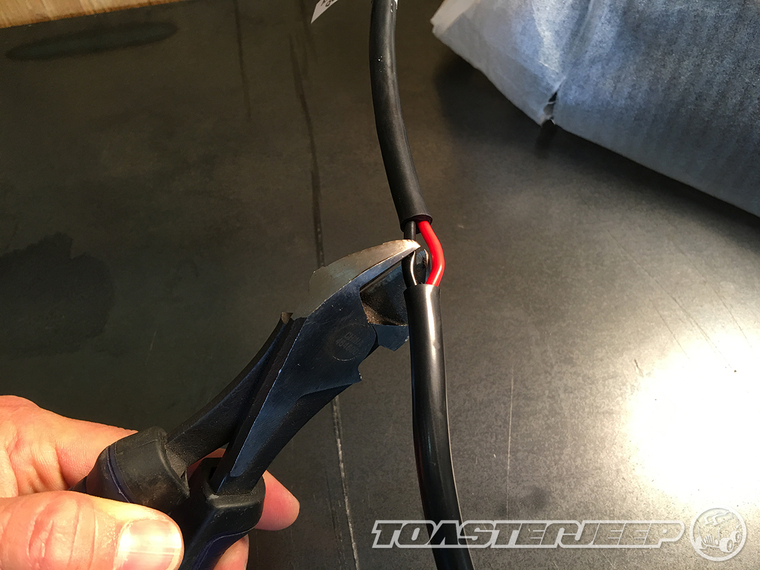
23. Use wire cutters to cut the red and black wires.
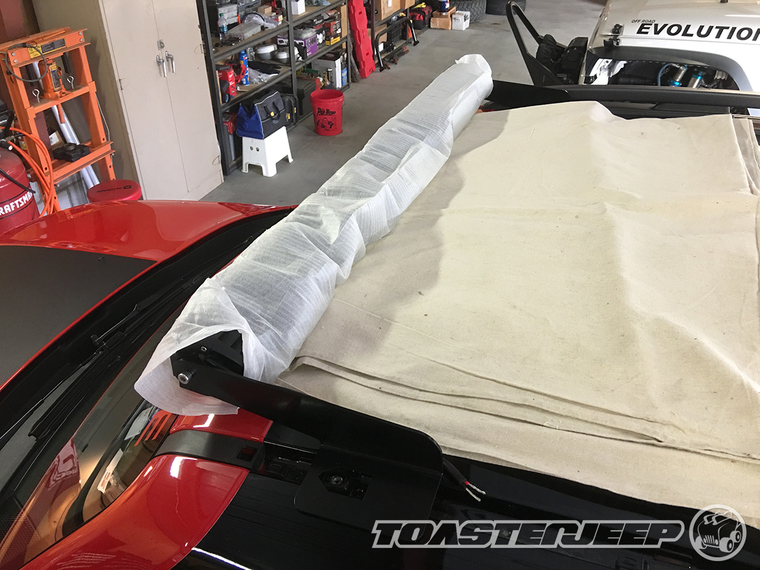
24. Place a fabric tarp or towel on top of your roof and then place the KC LED Light Bar on top of it.
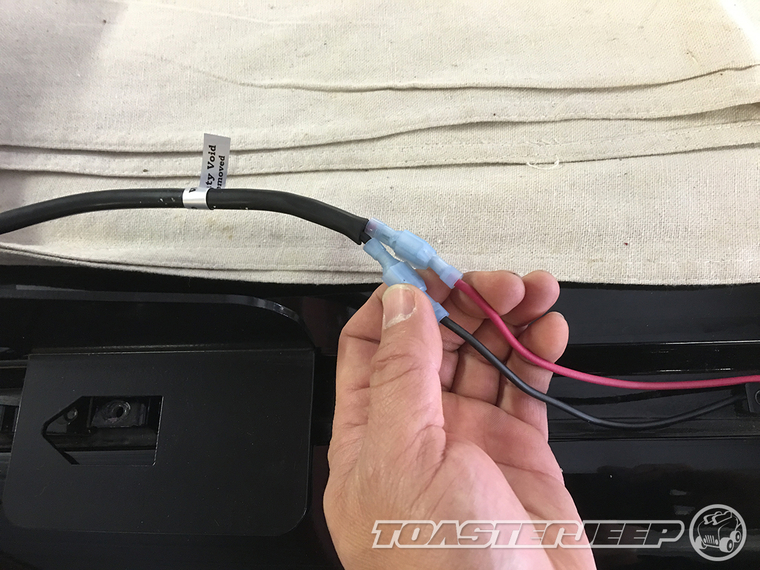
25. Install solderless terminals on to the ends of the KC LED Light Bar red and black wires and on the ends of the wires you ran under the plastic roof trim.
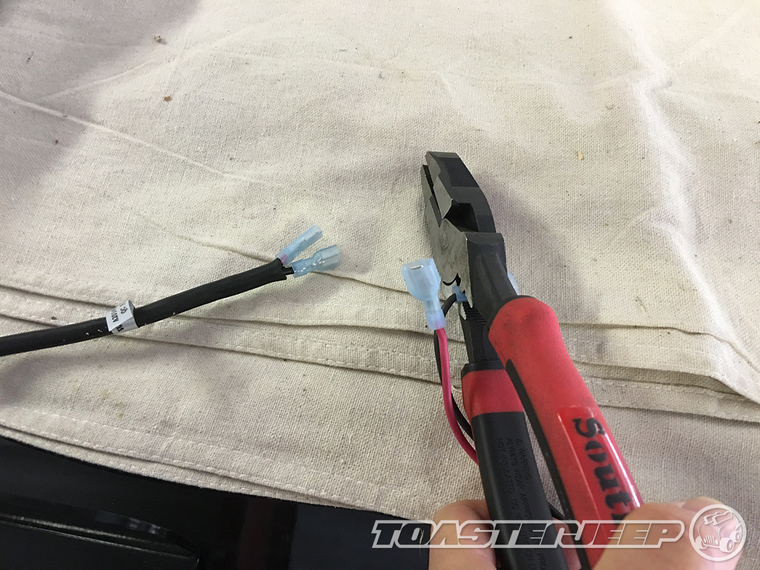
26. Connect the red wires together as well as the black wires together and wrap them in some electrical tape.
27. Reinstall the driver side roof rack rail. You will need to make sure to snap in the rear end of it back into the plastic retaining clip next to the spoiler.
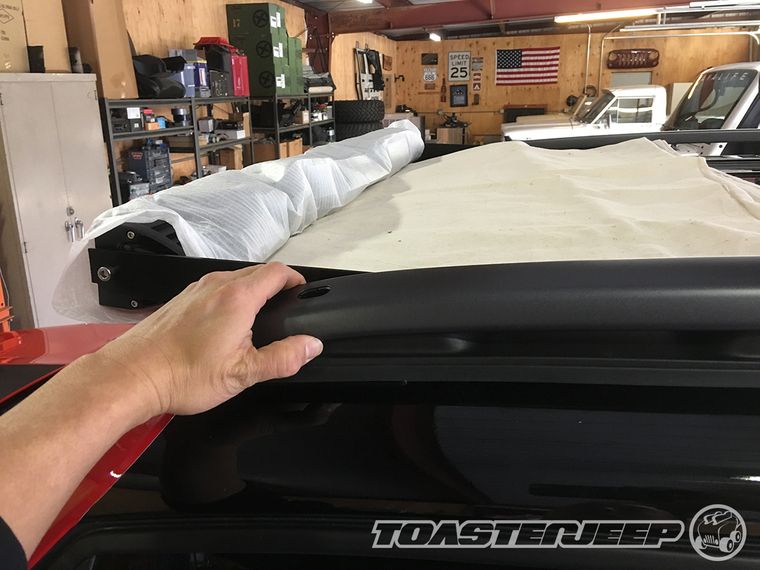
28. Using a 5mm Allen Wrench, secure the roof rack rails to the top of your Renegade by tightening all 4 bolts.
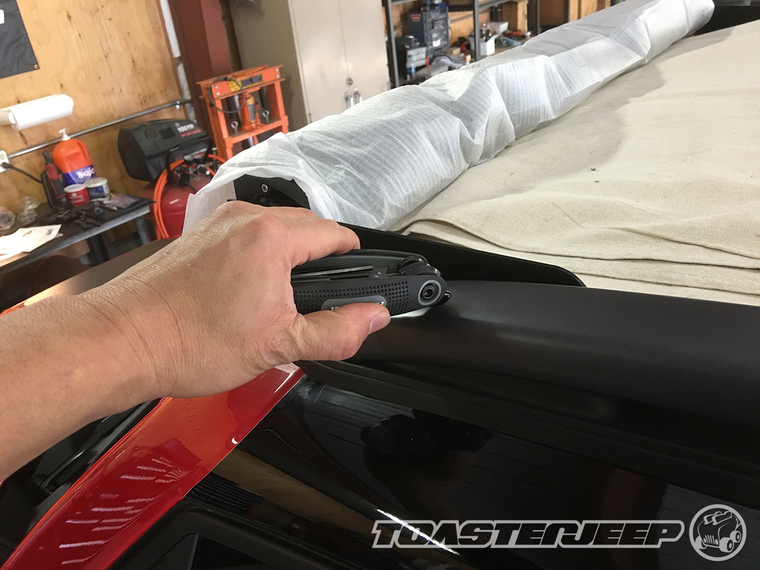
29. Reinstall all 4 bolt covers on top of the roof rack rails as shown and then remove the foam covering.
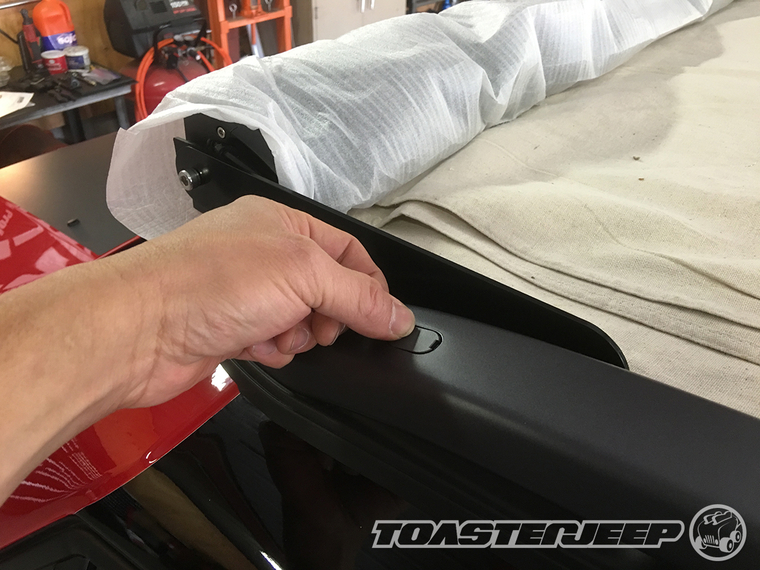
Here's a shot of what the driver side Daystar bracket looks like installed along with the wiring passing under the roof rack rail under the rubber weather seal.
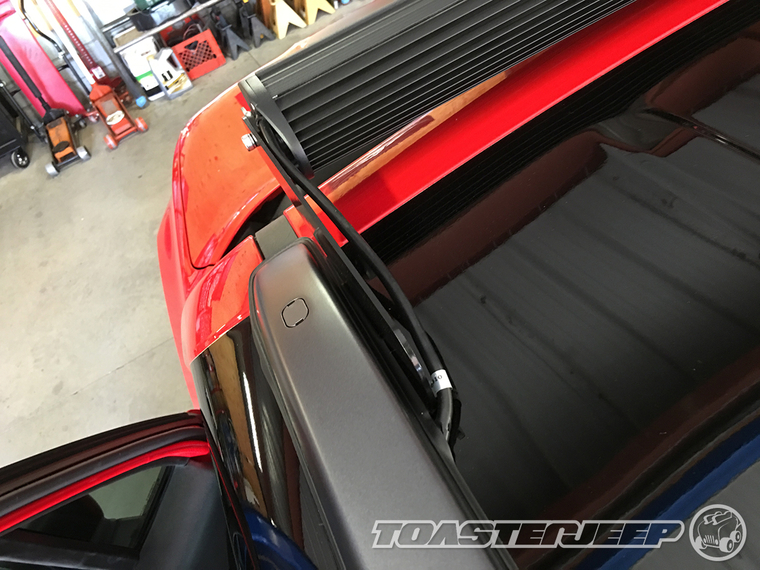
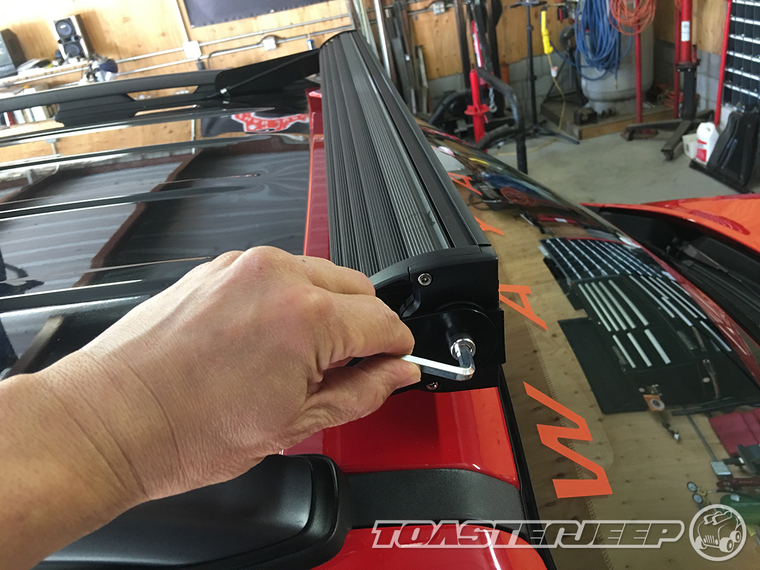
30. Secure the KC LED Light Bar to the passenger side of the Daystar mount using the remaining rubber grommet and large Allen bolt that came with the kit. Adjust the position of the light bar to where you want it to be and then use the Allen Wrench provided with the kit to tighten it in place.
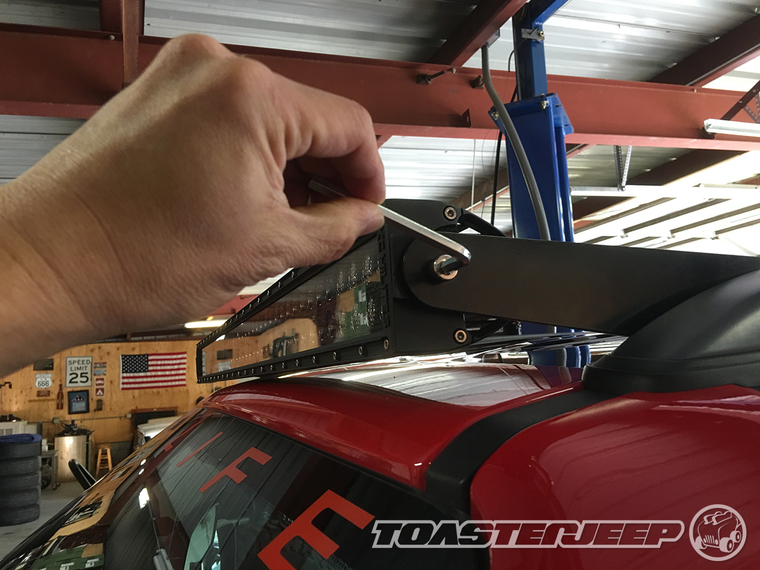
31. Using the Allen Wrench provided with the kit, tighten the driver side bolt as well.
What you will need
• 40" Jeep Renegade LED Light Bar Kit - KJ81000BK
• 5mm Allen Wrench
• 10mm socket
• Small Flathead Screwdriver
• Phillips Screwdriver
• Wire Cutter
• 14 Gauge Red Wire
• 14 Gauge Black Wire
• Solderless Terminals
• Electrical Tape
• Drill
• Small Unibit
• Trim Stick
• Wiring Conduit
• Metal Coat Hanger
Instructions
Here's a shot of everything you will get with your new Daystar 40" KC LED Light Bar Kit.
1. Starting on the passenger side of your Renegade, use a small flathead screw driver to carefully remove the 2 forward most bolt covers on top of the roof rack rails as shown.
2. Use a 5mm Allen Wrench to loosen the 2 forward most bolts securing the roof rack rails to the top of your Renegade.
3. Lift up on the roof rack rail and then slide the passenger side Daystar light mount underneath it as shown. The bracket does have a cutout on the base of it and it will need to be aligned with the base of the roof rack rail.
4. Using a 5mm Allen Wrench, secure the roof rack rails to the top of your Renegade by tightening the 2 forward most bolts.
5. Reinstall the 2 forward most bolt covers on top of the roof rack rails as shown.
6. Move over to the driver side of your Renegade and then use a small flathead screw driver to carefully remove all 4 bolt covers on top of the roof rack rails as shown.
7. Use a 5mm Allen Wrench to loosen all 4 bolts securing the roof rack rails to the top of your Renegade.
8. Carefully remove the driver side roof rack rail. The rail will be snapped into a plastic retaining clip at the rear end of your Renegade and you will need to carefully pry it out. Set your roof rack rail aside for now.
9. Carefully lift up the front of the plastic trim mounted to the top of your Renegade until it comes free of its retaining clip.
10. Again, carefully lift up the rear of the plastic trim mounted to the top of your Renegade until it comes free of its retaining clip. The middle section of the plastic trim is glued in place so you will not be able to remove it completely.
11. Starting from the front, take both of your new red and black wires and slide it underneath the plastic trim.
12. Slide both red and black wires underneath the back of plastic trim.
13. Tuck the red and then the black wires in between the plastic trim and roof as shown.
14. Using a small flathead screw driver, carefully embed the wires in place.
15. Reinstall the front of the plastic trim by pressing down on it until it snaps in place.
16. Reinstall the rear half of the plastic trim by pressing down on it until it snaps in place.
17. The rearmost plastic trim is glued in place and cannot be removed. Use a drill with a small unibit to drill a hole into the back of the trim as shown.
18. Open up your Renegade's rear hatch and then feed both the red and black wires through the hole until they can be pulled out the back as shown.
19. Go back to your work bench, open up your KC LED Light Bar box, located one of the larger Allen bolts, insert it into the Daystar driver side light mount and install one of the rubber grommets onto the thread as show.
20. Secure the Daystar light bracket to the KC LED Light Bar until it's just snut using the Allen Wrench provided with the kit.
21. The wiring coming out of the KC LED Light Bar is long and the plug on the end of it is quite large and being that we decided to run everything underneath the roof rack rails, we needed to cut the extra length off. To begin this step, use a razor to cut around the outer insulator being careful not to damage the red and black wires inside.
22. Pull the outer insulator apart to expose more of the red and black wires inside.
23. Use wire cutters to cut the red and black wires.
24. Place a fabric tarp or towel on top of your roof and then place the KC LED Light Bar on top of it.
25. Install solderless terminals on to the ends of the KC LED Light Bar red and black wires and on the ends of the wires you ran under the plastic roof trim.
26. Connect the red wires together as well as the black wires together and wrap them in some electrical tape.
27. Reinstall the driver side roof rack rail. You will need to make sure to snap in the rear end of it back into the plastic retaining clip next to the spoiler.
28. Using a 5mm Allen Wrench, secure the roof rack rails to the top of your Renegade by tightening all 4 bolts.
29. Reinstall all 4 bolt covers on top of the roof rack rails as shown and then remove the foam covering.
Here's a shot of what the driver side Daystar bracket looks like installed along with the wiring passing under the roof rack rail under the rubber weather seal.
30. Secure the KC LED Light Bar to the passenger side of the Daystar mount using the remaining rubber grommet and large Allen bolt that came with the kit. Adjust the position of the light bar to where you want it to be and then use the Allen Wrench provided with the kit to tighten it in place.
31. Using the Allen Wrench provided with the kit, tighten the driver side bolt as well.
