Contrary to what so many people seem to think, the number one reason why factory Rubicon Dana 44 front axle shafts break is not because they're weak but rather, because they come with c-clips. Over time, movement in the bearing caps can cause the c-clips to work themselves free and once they're gone, there's nothing to keep the caps in place. Once one or more bearing cap is gone, it's just a matter of time before the trunnions tear through the ears of axle shaft yokes. While buying a set of overpriced RCV axle shafts is one solution to this problem, a more affordable and just as effective solution is to pick up a set of chromoly axle shafts with u-joints that have full circle clips much like the kind that AlloyUSA makes. Unlike c-clips, full circle clips will completely surround the u-joint bearing caps and that that will prevent them from working themselves free.
While we do already have a front axle shaft removal and replacement write up, we recently picked up a set of new AlloyUSA front chromoly axle shaft for our 2012 Jeep JK Wrangler Rubicon Unlimited and thought it would be good to post an updated version of it along with the following short step-by-step video.
For those of you who are interested, we got these shafts with a set of their X-Joints as they come complete with full circle clips and you can see a write-up on how to assemble them here: How to Install U-Joints w/ Full Circle Clips onto a Chromoly Front Axle Shaft + VIDEO
What You Will Need
• 12 Point 13mm Box Wrench
• 21mm Wrench
• 19mm Socket
• 36mm Socket
• Torque Wrench
• Breaker Bar
• Floor Jack
• Jack Stand
• Red Loctite
What you will need to do
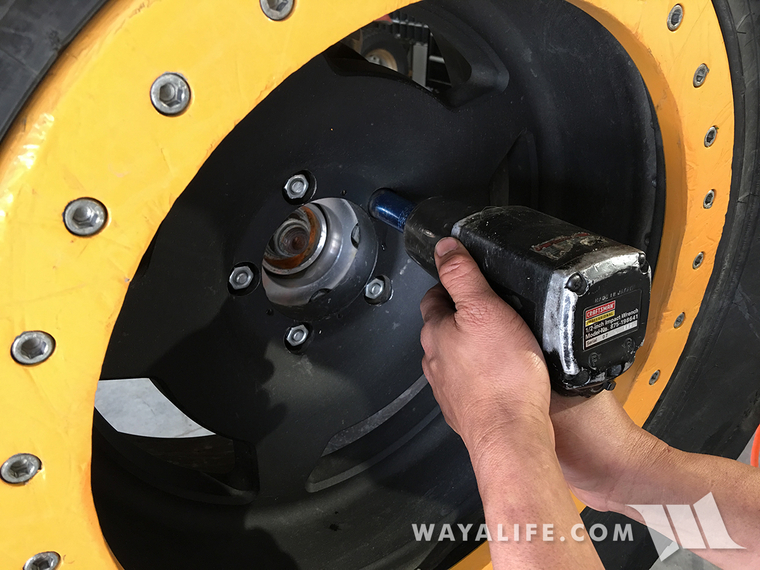
1. Place a floor jack under the base of your front axle's control arm and raise it up until the wheel slightly off the ground. Set your axle back down onto a jack stand for safety and then use a 19mm socket to remove the lug nuts on your wheel.
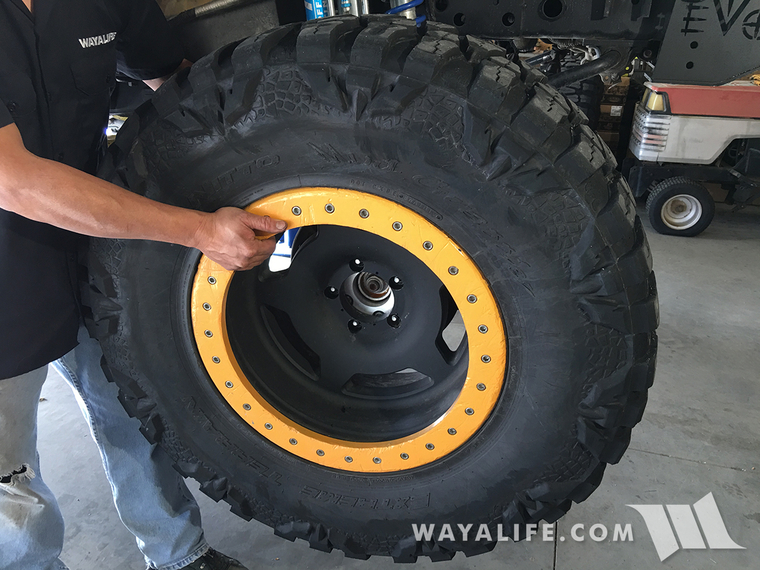
2. Remove the wheel and set it under the frame rail of your Jeep for safety.
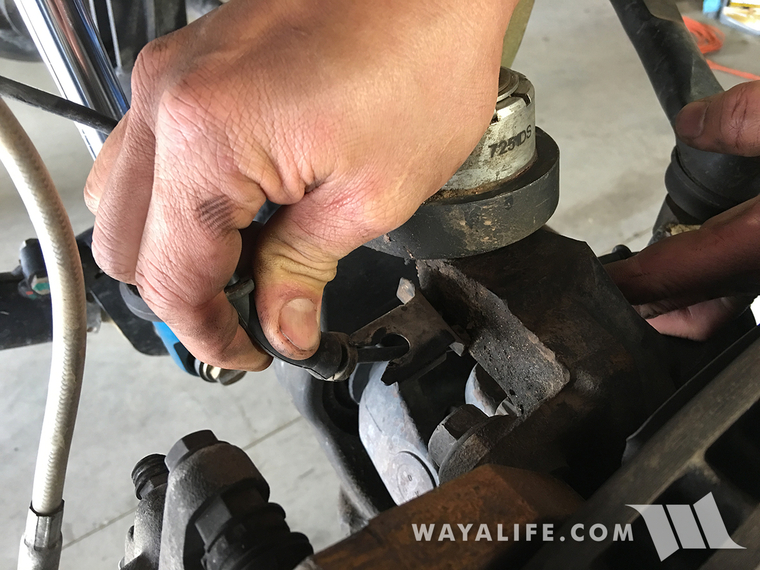
3. Disconnect your speed sensor line from its 2 retaining clips.
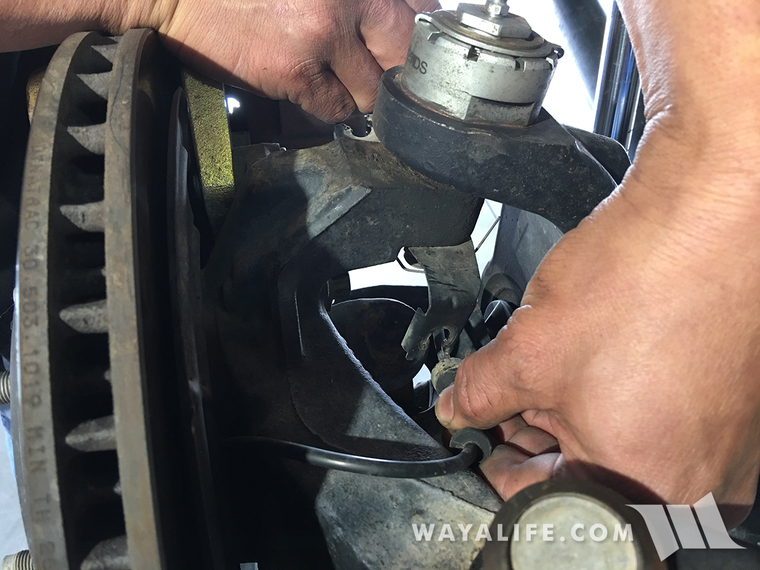
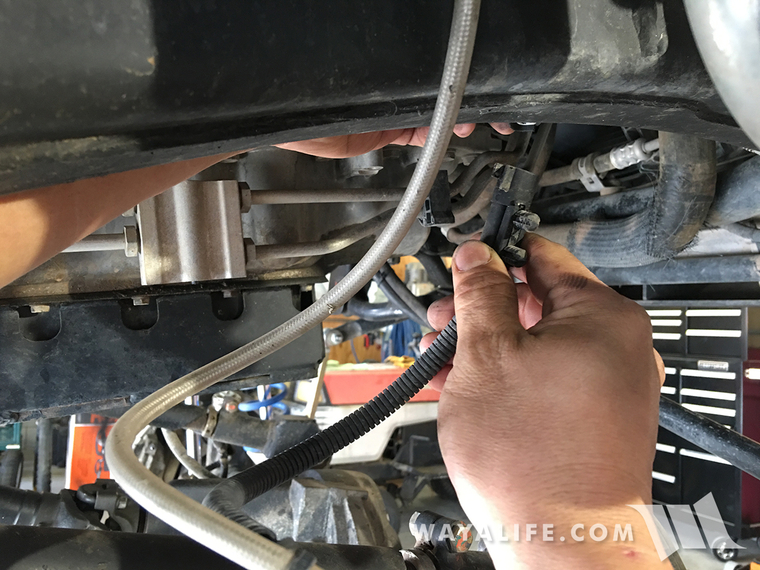
4. Follow the speed sensor cable up to the back of the frame rail and unplug it.
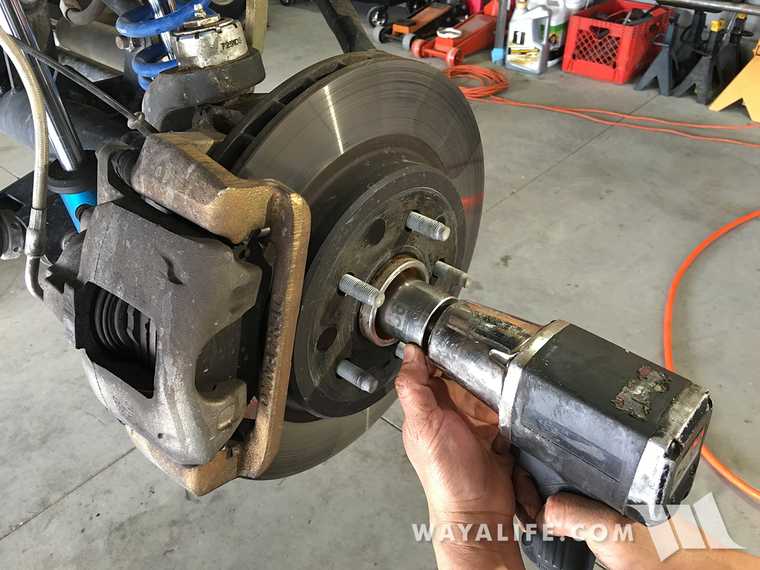
5. Using a 36mm socket, remove the axle hub nut. If you don't have access to an impact wrench, it will help to have someone step on the brakes during this process.
6. Using a 21mm wrench, remove the 2 bolts securing your brake caliper to the knuckle.
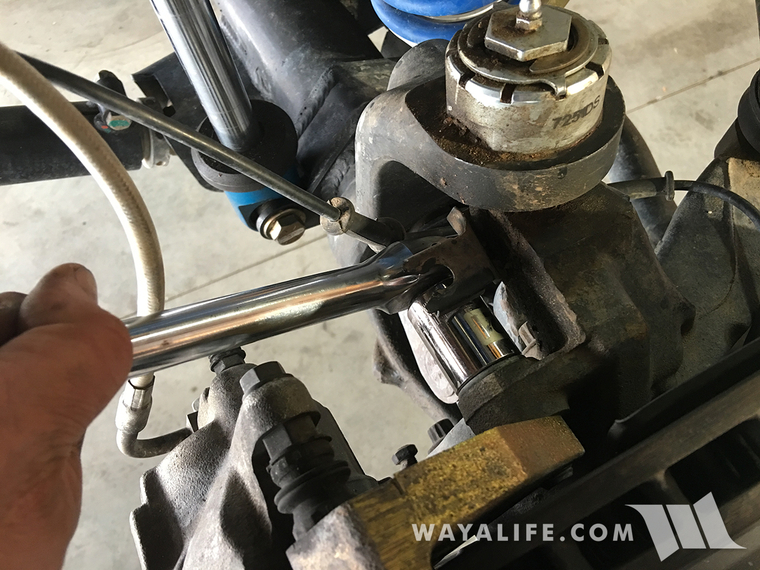
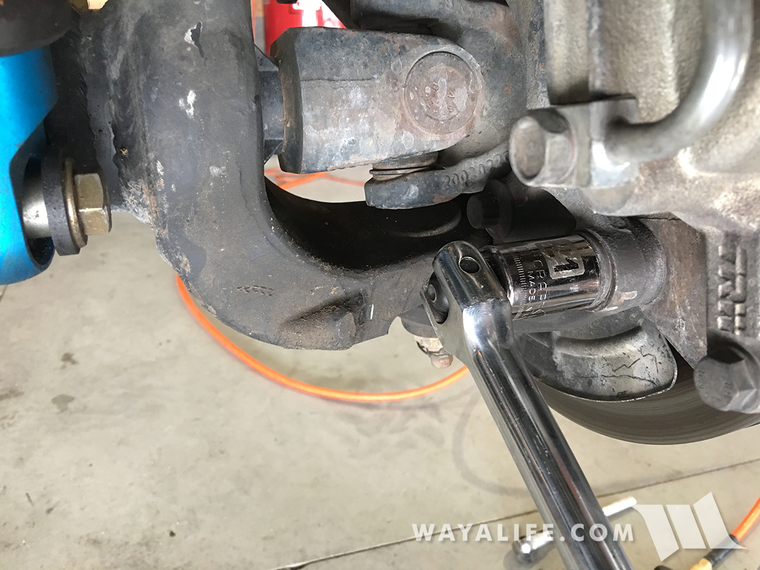
7. Carefully remove the brake caliper and zip tie it onto your lower control arm or frame so that it's out of the way. Do NOT allow the caliper to hang from the brake line.
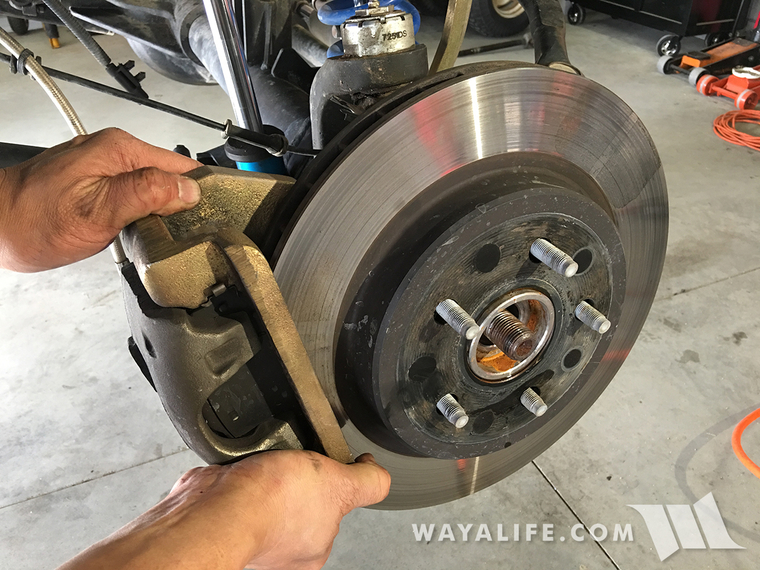
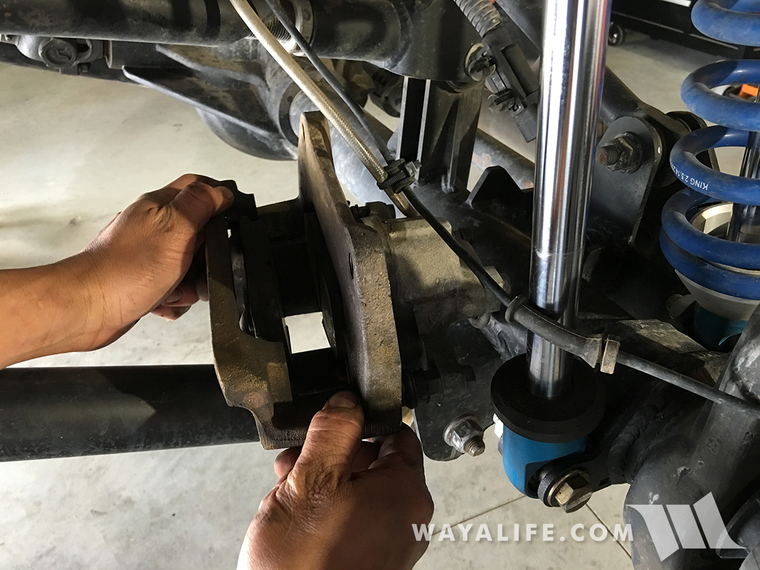
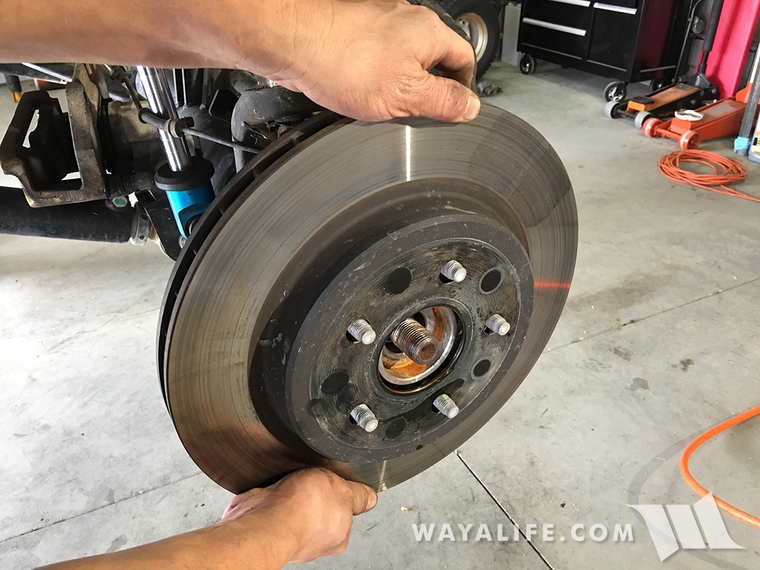
8. Remove the rotor and carefully set it aside.
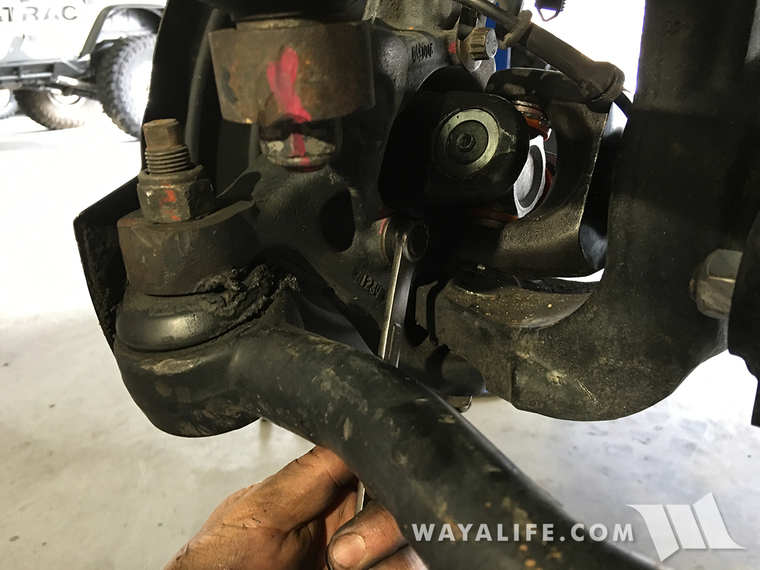
9. Using a 12 point 13mm wrench, remove the 3 bolts (2 above and 1 below) securing the hub/wheel bearing to the knuckle.
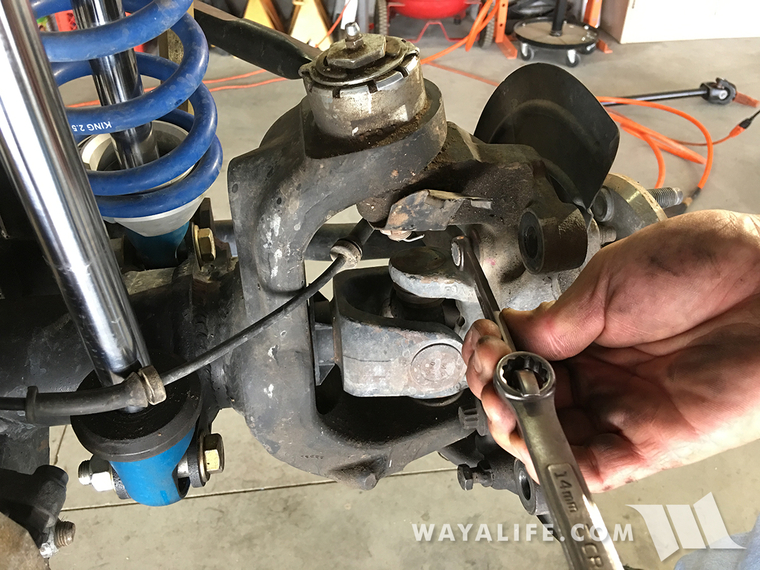
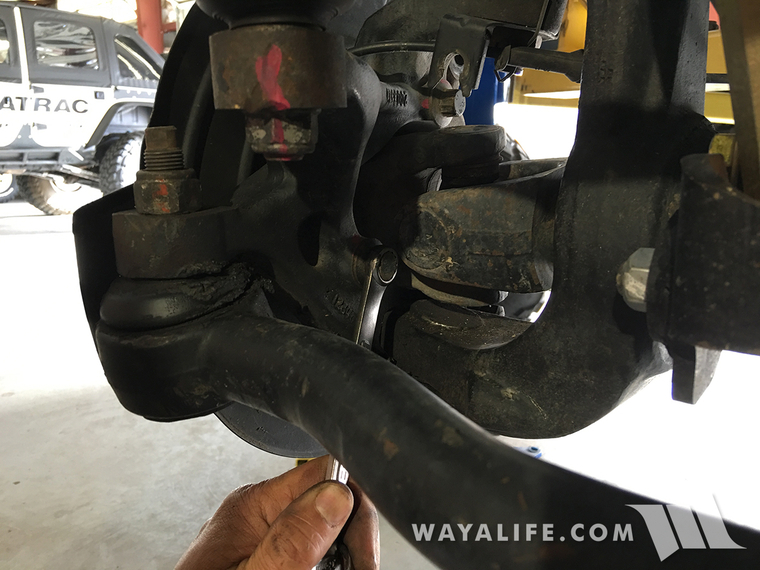
10. Remove the unit bearing and dust shield and set them out of the way.
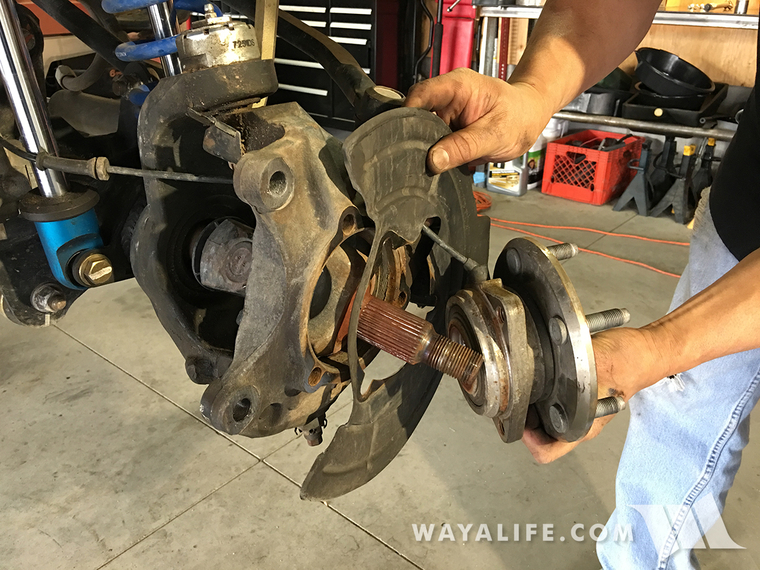
11. Remove your factory axle shaft.
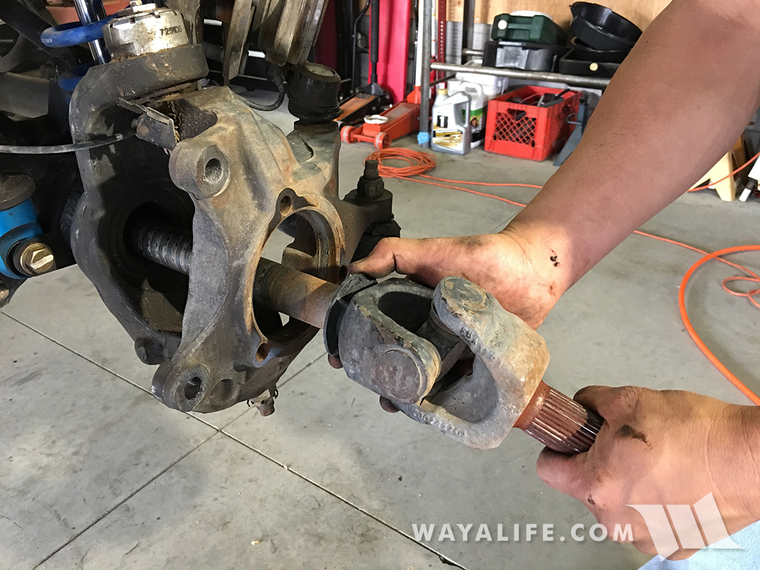
12. If it didn't come out with your axle shaft, you will need to look inside your axle tube and phish out the plastic shaft guide as it will prevent you from reinstalling your old shaft or installing a new one. This guide is not needed and can be discarded.
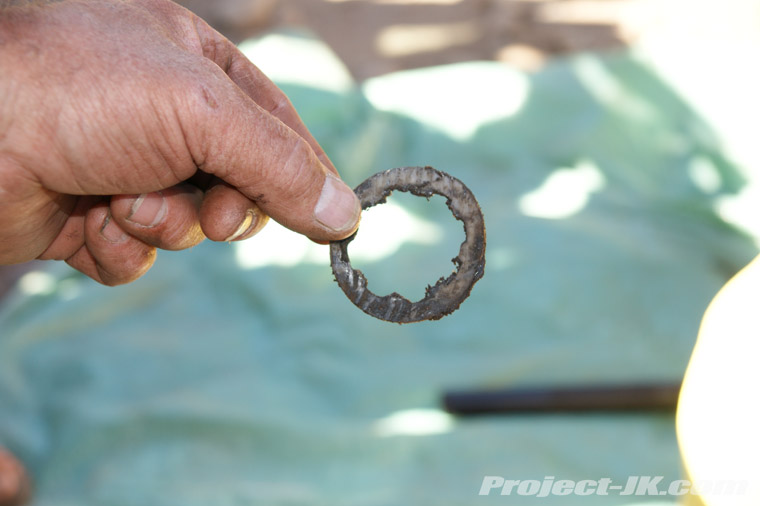
13. Carefully slide in your new axle shaft. You will need to tilt up the end of it to get the splines to engage into the locker.
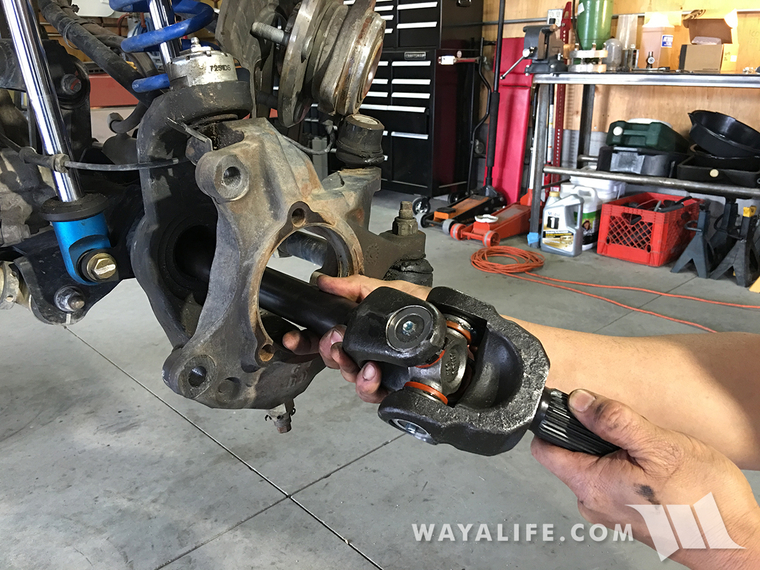
14. Reinstall the dust shield and unit bearing.
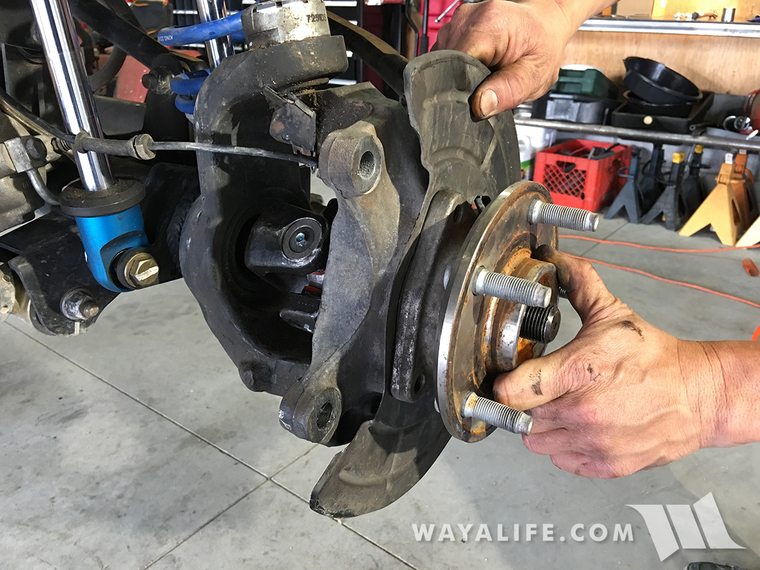
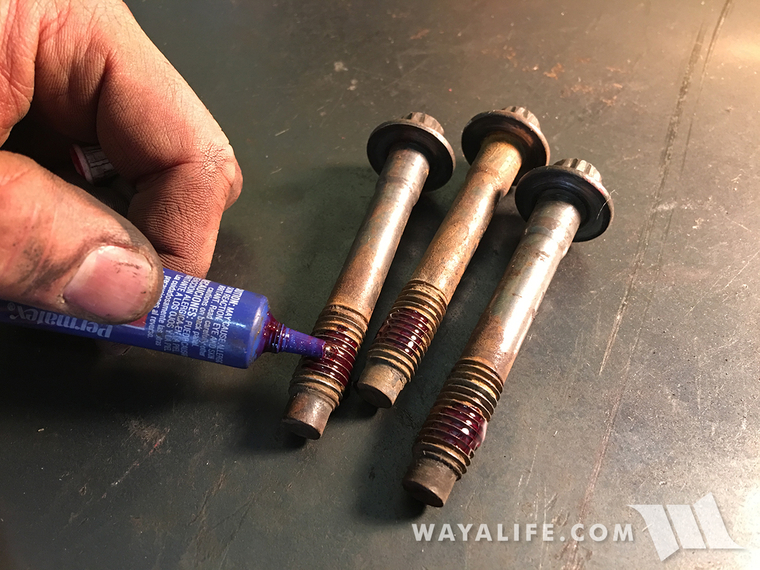
15. Apply some red Loctite onto the threads of the unit bearing bolts.
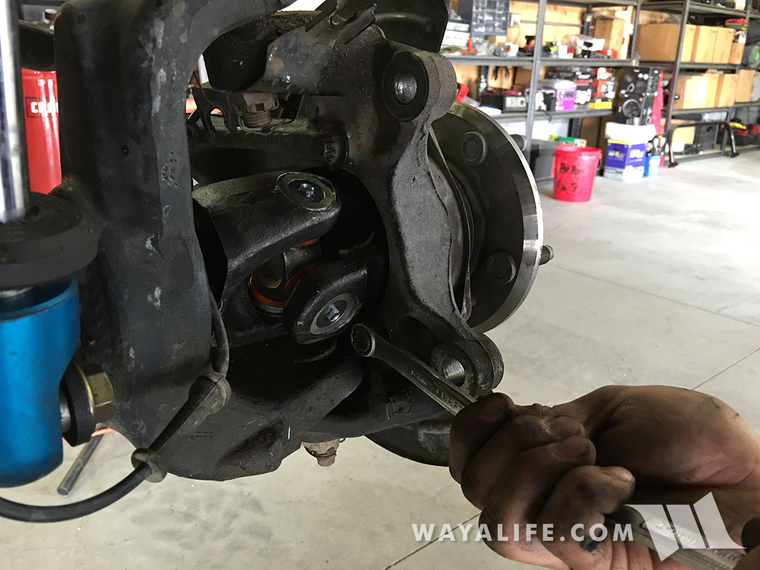
16. Secure the unit bearing onto the steering knuckle with the bolts and tighten the bolts to 75 ft. lbs. of torque.
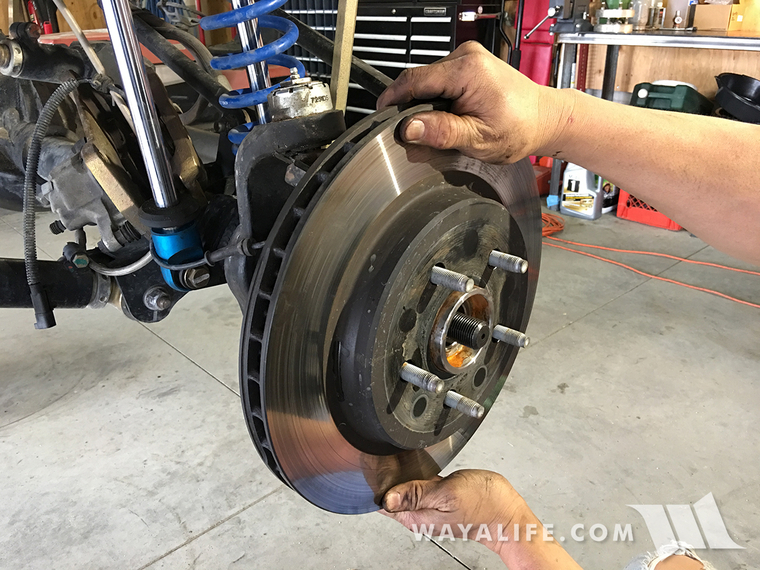
17. Reinstall your rotor onto the wheel studs.
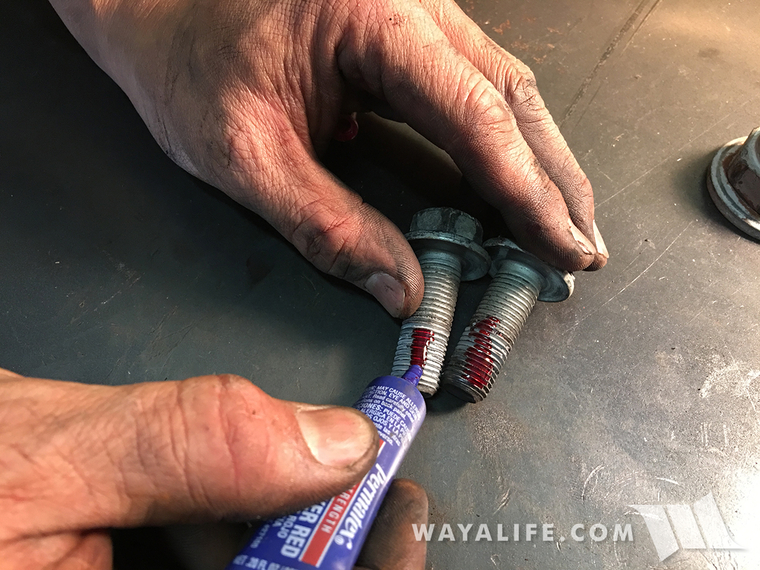
18. Apply some red Loctite to the threads of your caliper bolts.
19. Reinstall your brake caliper onto the rotor.
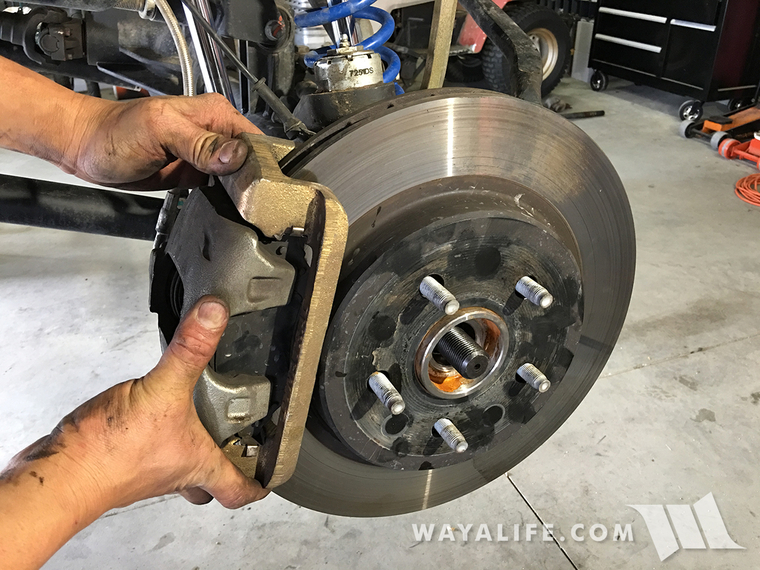
20. Secure the brake caliper to the steering knuckle with the bolts and tighten them to 120 ft. lbs. of torque.
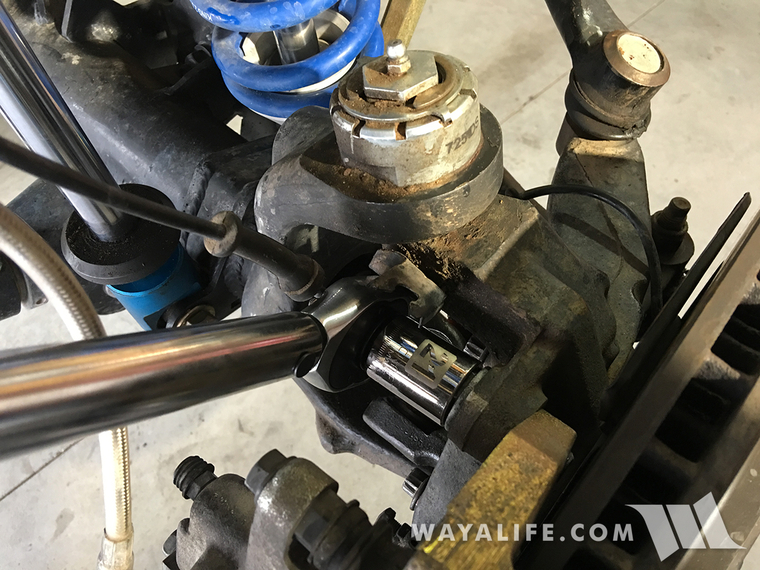
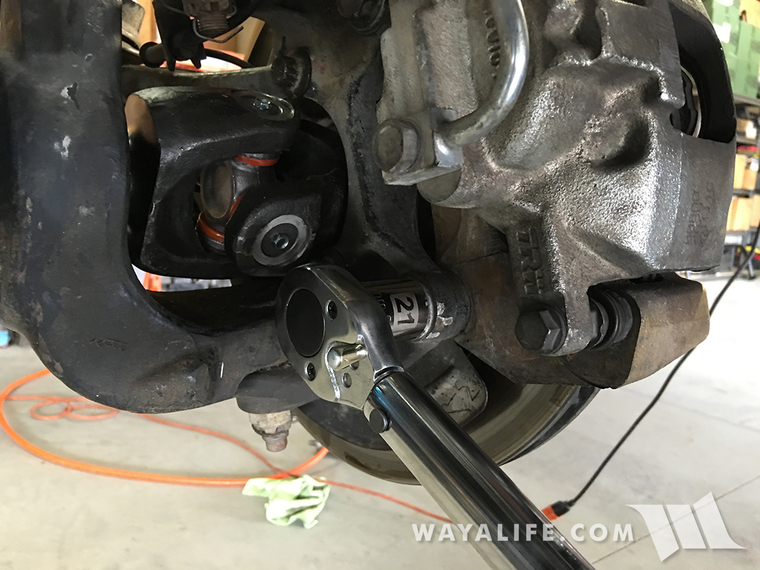
21. Reinstall your speed sensor lines into the retaining clips.
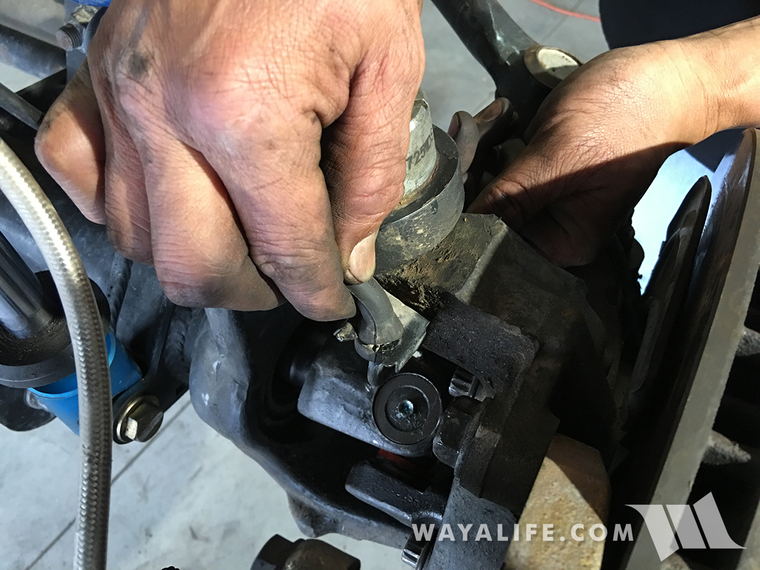
22. Plug your speed sensor line back into the wiring harness at the frame.

23. Apply some red Loctite to the threads of your axle hub nut.
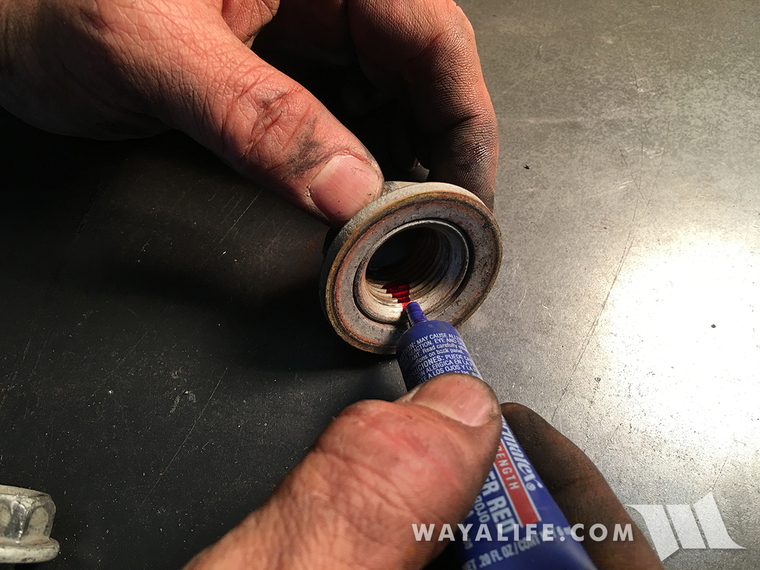
24. Secure your axle shaft in place using the hub nut and tighten it to 100 ft. lbs. of torque. It will help to have a friend apply pressure on the brake pedal when doing this.
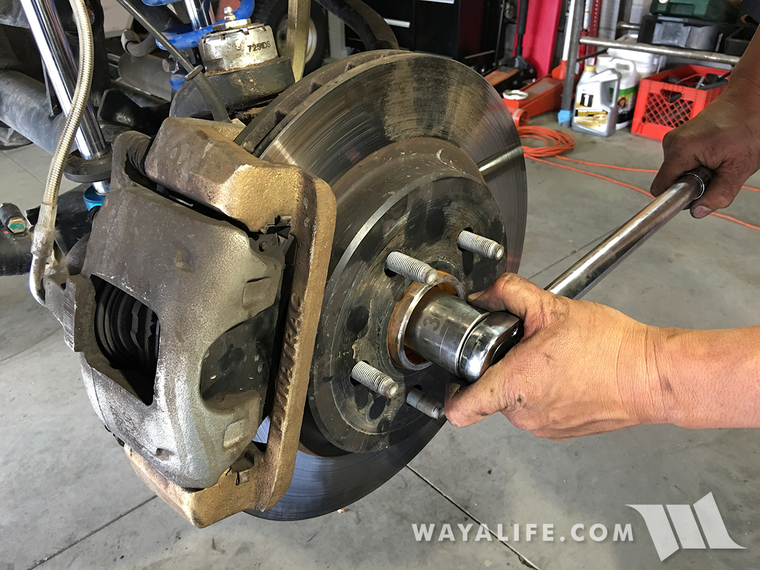
Repeat on the other side and that's it! You now have a set of brand new chromoly axle shafts and ones that should last you quite a long time.
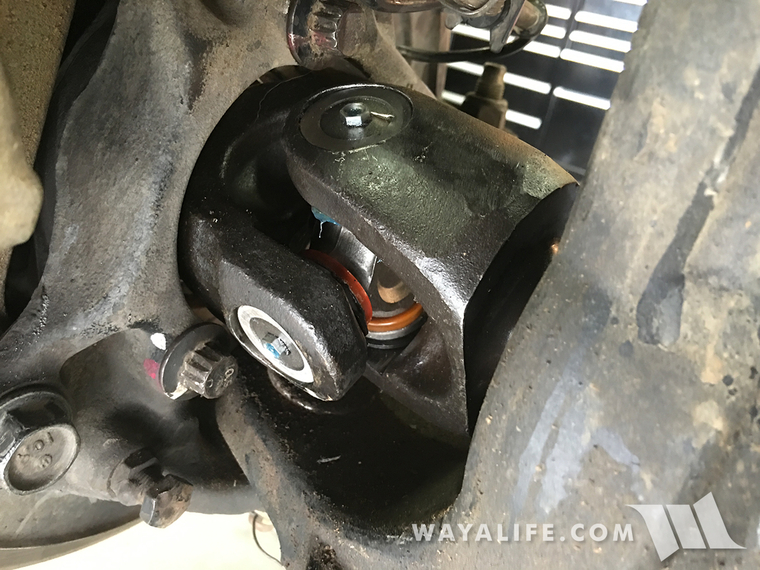
I hope this write-up has been helpful to you. Please let me know if you have any questions.
While we do already have a front axle shaft removal and replacement write up, we recently picked up a set of new AlloyUSA front chromoly axle shaft for our 2012 Jeep JK Wrangler Rubicon Unlimited and thought it would be good to post an updated version of it along with the following short step-by-step video.
For those of you who are interested, we got these shafts with a set of their X-Joints as they come complete with full circle clips and you can see a write-up on how to assemble them here: How to Install U-Joints w/ Full Circle Clips onto a Chromoly Front Axle Shaft + VIDEO
What You Will Need
• 12 Point 13mm Box Wrench
• 21mm Wrench
• 19mm Socket
• 36mm Socket
• Torque Wrench
• Breaker Bar
• Floor Jack
• Jack Stand
• Red Loctite
What you will need to do
1. Place a floor jack under the base of your front axle's control arm and raise it up until the wheel slightly off the ground. Set your axle back down onto a jack stand for safety and then use a 19mm socket to remove the lug nuts on your wheel.
2. Remove the wheel and set it under the frame rail of your Jeep for safety.
3. Disconnect your speed sensor line from its 2 retaining clips.
4. Follow the speed sensor cable up to the back of the frame rail and unplug it.
5. Using a 36mm socket, remove the axle hub nut. If you don't have access to an impact wrench, it will help to have someone step on the brakes during this process.
6. Using a 21mm wrench, remove the 2 bolts securing your brake caliper to the knuckle.
7. Carefully remove the brake caliper and zip tie it onto your lower control arm or frame so that it's out of the way. Do NOT allow the caliper to hang from the brake line.
8. Remove the rotor and carefully set it aside.
9. Using a 12 point 13mm wrench, remove the 3 bolts (2 above and 1 below) securing the hub/wheel bearing to the knuckle.
10. Remove the unit bearing and dust shield and set them out of the way.
11. Remove your factory axle shaft.
12. If it didn't come out with your axle shaft, you will need to look inside your axle tube and phish out the plastic shaft guide as it will prevent you from reinstalling your old shaft or installing a new one. This guide is not needed and can be discarded.
13. Carefully slide in your new axle shaft. You will need to tilt up the end of it to get the splines to engage into the locker.
14. Reinstall the dust shield and unit bearing.
15. Apply some red Loctite onto the threads of the unit bearing bolts.
16. Secure the unit bearing onto the steering knuckle with the bolts and tighten the bolts to 75 ft. lbs. of torque.
17. Reinstall your rotor onto the wheel studs.
18. Apply some red Loctite to the threads of your caliper bolts.
19. Reinstall your brake caliper onto the rotor.
20. Secure the brake caliper to the steering knuckle with the bolts and tighten them to 120 ft. lbs. of torque.
21. Reinstall your speed sensor lines into the retaining clips.
22. Plug your speed sensor line back into the wiring harness at the frame.
23. Apply some red Loctite to the threads of your axle hub nut.
24. Secure your axle shaft in place using the hub nut and tighten it to 100 ft. lbs. of torque. It will help to have a friend apply pressure on the brake pedal when doing this.
Repeat on the other side and that's it! You now have a set of brand new chromoly axle shafts and ones that should last you quite a long time.
I hope this write-up has been helpful to you. Please let me know if you have any questions.
