WJCO
Meme King
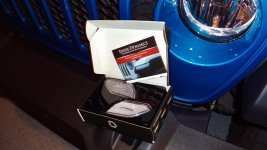
Since the JL Wrangler was released, there's one thing cosmetically that's driven me nuts. It's that amber colored side marker on the front fenders. And of course, the JT Gladiator has it as well. A company called Diode Dynamics has come out with a clean option to exchange it for a clear one that cleans up the look a lot, IMO. I've been eyeing these for awhile and finally decided to buy some. I confirmed with the manufacturer that these will work with either a Jeep JL Wrangler or a Jeep JT Gladiator. The marker illumination and turn signal will still illuminate the amber color, but when the LED is not illuminated, it will look clear and clean. And Made In The USA.
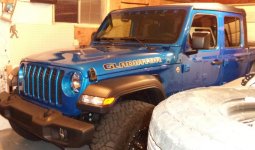
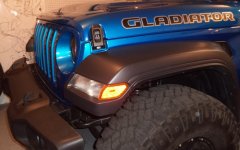
Here's what the OEM amber one looks like:
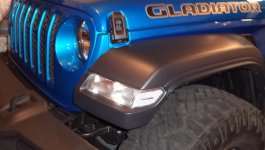
And here's the new clear one after install:
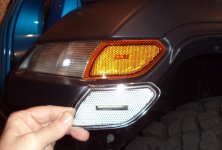
Here's a comparison of the two side by side:
Of course before installing these, one should check with their local city, county, and state vehicle lighting laws to make sure this can be done legally.
What's needed:
Diode Dynamics LED Sidemarkers (note that they make 3 colors/shades):
https://www.amazon.com/Sidemarkers-...5feb18fb8400a68565386&creativeASIN=B07Q47XKCV
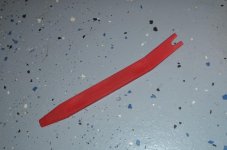
A trim push pin removal tool:
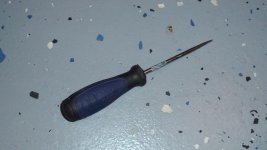
A mechanic's pick:
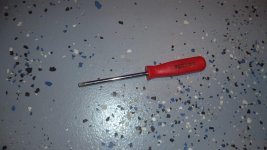
A T30 torx DRIVER (A T30 socket may be too large to fit in the tight space):
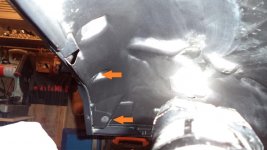
Note that the picture below reference the driver's side. First remove two plastic push pins holding the inner wheel well liner in place. After removing them, you can fold the liner up out of the way to access the area.
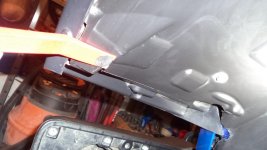
Use a mechanic's pick to disconnect the side marker wiring harness.
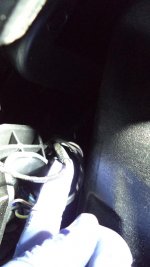
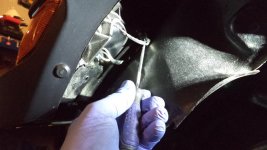
Then use the T30 torx driver to remove the bolt on the left (the most outboard one). It is very tight and I could not fit a socket in this area. I had to use a thin T30 driver. I put a red X over the bolt that should not be removed.
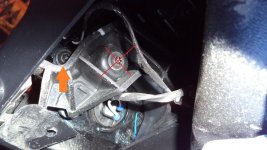
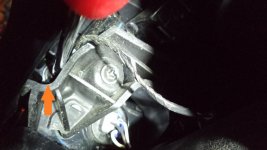
The side marker should come right out and here's a better view of the bolt that was taken out.
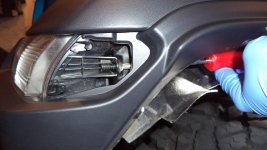
Then from here, the install of the new marker light is the reverse of the removal. I used some color coordinated dots here to show that tabs that must be meshed together in order to get the new light to fit properly. I found this step the easiest by routing the wiring harness back in first, then STARTING the bolt into the new LED marker, and then pushing the plastic tabs together. Then I tightened up the bolt fully.
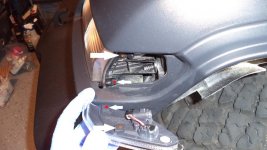
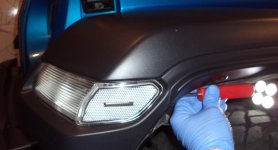
Reconnect the wiring harness and re-fasten the inner wheel well liner:
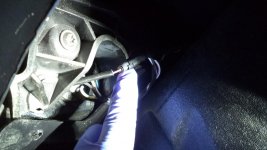
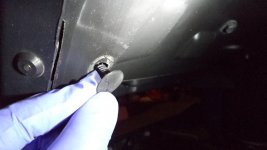
Ensure that parking lights and turn signals work correctly. That's it. Took me about ten minutes per side.
Here's what the OEM amber one looks like:


And here's the new clear one after install:

Here's a comparison of the two side by side:

Of course before installing these, one should check with their local city, county, and state vehicle lighting laws to make sure this can be done legally.
What's needed:
Diode Dynamics LED Sidemarkers (note that they make 3 colors/shades):
https://www.amazon.com/Sidemarkers-...5feb18fb8400a68565386&creativeASIN=B07Q47XKCV

A trim push pin removal tool:

A mechanic's pick:

A T30 torx DRIVER (A T30 socket may be too large to fit in the tight space):

Note that the picture below reference the driver's side. First remove two plastic push pins holding the inner wheel well liner in place. After removing them, you can fold the liner up out of the way to access the area.


Use a mechanic's pick to disconnect the side marker wiring harness.


Then use the T30 torx driver to remove the bolt on the left (the most outboard one). It is very tight and I could not fit a socket in this area. I had to use a thin T30 driver. I put a red X over the bolt that should not be removed.


The side marker should come right out and here's a better view of the bolt that was taken out.

Then from here, the install of the new marker light is the reverse of the removal. I used some color coordinated dots here to show that tabs that must be meshed together in order to get the new light to fit properly. I found this step the easiest by routing the wiring harness back in first, then STARTING the bolt into the new LED marker, and then pushing the plastic tabs together. Then I tightened up the bolt fully.


Reconnect the wiring harness and re-fasten the inner wheel well liner:


Ensure that parking lights and turn signals work correctly. That's it. Took me about ten minutes per side.
Last edited:
