cozdude
Guy with a Red 2-Door
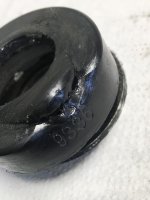
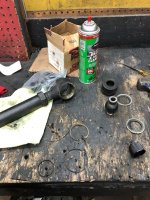
So if your like me and make the mistake of not properly greasing your Johnny joints, then smack a deer, they may eventually blow out. For this write up I made sure I did my best to document everything you will need to get the job done and provide pics as well.
You will need:
-Currie JJ rebuild kit #CE-9110RK (2.5” rebuild kit)
You will need 1 for each joint you need to rebuild.
-shop press ( or Currie jj rebuild tool)
-21mm socket
-21mm wrench
-snap ring pliers
-brass hammer (or any hammer will do)
-brake clean and rags (lots of them)
-torque wrench
1.Start off by safely lifting the vehicle by the frame so that the axle is at full droop.
2. I removed my tires for ease of moving the axle around
3. Use the 21mm socket and remove the trackbar from the axle
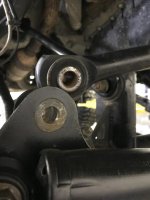
4. Once removed take your 21mm socket and wrench to remove the bolts holding your control arm in. (I suggest doing one arm at a time
5. Clean up the area around the joint a little bit. Here you can see one end of the arm where the rubber blew out
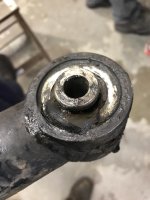
6. Take your snap ring pliers and remove the snap ring from the joint
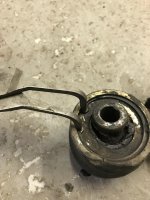
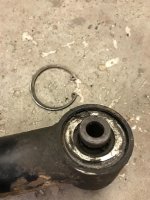
7. Flip the arm over and take the brass hammer and beat the ball socket, washers and bushing out of the joint end. (They came out easily with little to no effort.)
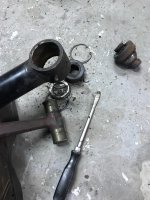
8. Do steps 6 and 7 again on the other side of the arm
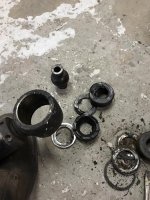
9. Take both of the ball sockets and the arm and use the brake clean and the rags to clean up all the old grease and any other crap in the arm the best you can
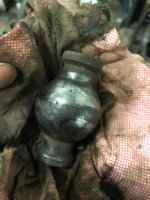
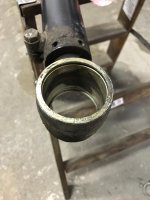
10. Now that the arm and joint are all cleaned up you can now get your new part out of the box and prep for install
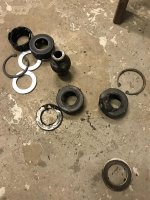
11. Go and place the new washer in the bottom side of the joint
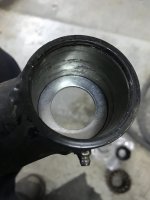
12. For this step I used a shop press but the tool from Currie will work as well.
Take the two new bushings, ball socket, and the other washer and stack them on the end like so
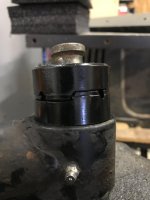
The bushings only go together one way so if they are not flush together like so you have them on wrong
13. With a socket about the same size as the washer slowly press the bushings into the arm
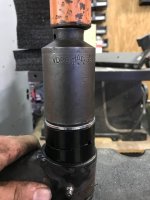
14. Once the bushing and everything is pressed in, take a slightly smaller socket so they you can press the bushingand washer in more so that you can install the snap ring.
15. Your new joint should look like so
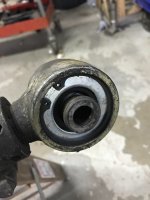
16. Once both ends are done loosely reinstall the arm, grease the joints, and repeat these steps for the other arm.
17. Reinstall the wheels and lower the jeep to the ground. Torque wheels to 95 ft/lbs
18. Reinstall trackbar
19. Torque all control arm bolts and trackbar bolt to 120ft/lbs
And there you have it! Sorry I didn’t take as many pics as I could have. Was in a semi rush to get them done.
You will need:
-Currie JJ rebuild kit #CE-9110RK (2.5” rebuild kit)
You will need 1 for each joint you need to rebuild.
-shop press ( or Currie jj rebuild tool)
-21mm socket
-21mm wrench
-snap ring pliers
-brass hammer (or any hammer will do)
-brake clean and rags (lots of them)
-torque wrench
1.Start off by safely lifting the vehicle by the frame so that the axle is at full droop.
2. I removed my tires for ease of moving the axle around
3. Use the 21mm socket and remove the trackbar from the axle

4. Once removed take your 21mm socket and wrench to remove the bolts holding your control arm in. (I suggest doing one arm at a time
5. Clean up the area around the joint a little bit. Here you can see one end of the arm where the rubber blew out

6. Take your snap ring pliers and remove the snap ring from the joint


7. Flip the arm over and take the brass hammer and beat the ball socket, washers and bushing out of the joint end. (They came out easily with little to no effort.)

8. Do steps 6 and 7 again on the other side of the arm

9. Take both of the ball sockets and the arm and use the brake clean and the rags to clean up all the old grease and any other crap in the arm the best you can


10. Now that the arm and joint are all cleaned up you can now get your new part out of the box and prep for install

11. Go and place the new washer in the bottom side of the joint

12. For this step I used a shop press but the tool from Currie will work as well.
Take the two new bushings, ball socket, and the other washer and stack them on the end like so

The bushings only go together one way so if they are not flush together like so you have them on wrong
13. With a socket about the same size as the washer slowly press the bushings into the arm

14. Once the bushing and everything is pressed in, take a slightly smaller socket so they you can press the bushingand washer in more so that you can install the snap ring.
15. Your new joint should look like so

16. Once both ends are done loosely reinstall the arm, grease the joints, and repeat these steps for the other arm.
17. Reinstall the wheels and lower the jeep to the ground. Torque wheels to 95 ft/lbs
18. Reinstall trackbar
19. Torque all control arm bolts and trackbar bolt to 120ft/lbs
And there you have it! Sorry I didn’t take as many pics as I could have. Was in a semi rush to get them done.

