You are using an out of date browser. It may not display this or other websites correctly.
You should upgrade or use an alternative browser.
You should upgrade or use an alternative browser.
ACC BAR : The NEW & Improved WAYALIFE CB BAR
- Thread starter wayoflife
- Start date
Awesome! Glad to hear you like your new ACC BARJust installed this bar today. I am not sure of the original, but this thing is a beast of engineering design!
Well done!
Adam
PS I'll post some pictures later this week with some gotchas ... best to learn from my mistakes, heck, I make a lot of them.
")
Eager to see your pics
Kruncher
Member
Had to run off to work, project is unfinished, wifey is less than happy.
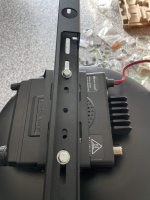
I used your CB bar to hang a Midland 50w GRMS radio. The middle length bolts worked well mounting the Midland radio mounting frame to the CB bar. Only issue I had, your bolts were just a little bigger than the mounting slots / holes in the Midland radio bracket. So to use your bolts, I drilled out 2 of the slots with a 1/4" drill bit (takes a little bit of effort, because the size of the 1/4" drill bit is just barely bigger than the Midland mounting slots. Anyone doing this will need to clamp the mounting bracket down very well, while drilling out the slots.
You may have this in the instructions, but I found if you have the locking nut on the underside of the radio mounting bracket, you can mount the radio with the bracket loose. Then when you have the radio actually hanging on the CB bar, you can then tighten down the bracket bolts, holding the locking nut with your finger, allowing you to put the radio exactly where you want it.
The radio sits almost too close to the Freedom Top locking "arms" (whatever those handles are called that secures the tops to the vehicle).
Here are a couple pictures:
Adam
PS More pictures later when I get home this weekend. Shopping for a vehicle Ham radio tomorrow in San Diego. Yut!
Attachments

I appreciate you posting this up. I may need to change those bolts to 10mm from the 1/4" that they are now. All radios are made in China now and I'm pretty sure that's the size they're made for.I used your CB bar to hang a Midland 50w GRMS radio. The middle length bolts worked well mounting the Midland radio mounting frame to the CB bar. Only issue I had, your bolts were just a little bigger than the mounting slots / holes in the Midland radio bracket. So to use your bolts, I drilled out 2 of the slots with a 1/4" drill bit (takes a little bit of effort, because the size of the 1/4" drill bit is just barely bigger than the Midland mounting slots. Anyone doing this will need to clamp the mounting bracket down very well, while drilling out the slots.
You may have this in the instructions, but I found if you have the locking nut on the underside of the radio mounting bracket, you can mount the radio with the bracket loose. Then when you have the radio actually hanging on the CB bar, you can then tighten down the bracket bolts, holding the locking nut with your finger, allowing you to put the radio exactly where you want it.
It's as close as I could get and still make it work and mainly to get the bar sitting as high up as possible.The radio sits almost too close to the Freedom Top locking "arms" (whatever those handles are called that secures the tops to the vehicle).
So, I am working on an optional T-bar that extends from the ACC BAR to the roll bar and it is in part, for this very purpose. I hope to get it out soon.I may need to add a separate external speaker, since the speaker is pointing away from people in the Jeep and it's mostly covered by the mounting bracket!
;-)
Adam
Kruncher
Member
Real cool fitment IMO. It's about as far out of the way as possible, yet still able to operate the Freedom Tops ...I appreciate you posting this up. I may need to change those bolts to 10mm from the 1/4" that they are now. All radios are made in China now and I'm pretty sure that's the size they're made for.
It's as close as I could get and still make it work and mainly to get the bar sitting as high up as possible.
An external speaker has always been on my to do list; better half says my hearing sucks, so I always planned on hanging a speaker behind my head.
Cheers, Adam
PS for those using the Midland radio, forgot to mention to attach the bracket backwards. The Midland radio mounting bracket is designed to mount on the bottom of the radio; this bracket has slots that allows the radio to tilt "up" a little for ease of seeing the faceplate. When you "hang" the radio, the bracket goes on top of the radio (vice bottom). To tilt the radio "down," just flip the bracket. Apparently I like quotes ... lol just play around with it a little and it'll make perfect sense.
External speakers really make a world of difference, especially when running doorless and topless. I'll try to get the T-bar done as soon as I can.Real cool fitment IMO. It's about as far out of the way as possible, yet still able to operate the Freedom Tops ...
An external speaker has always been on my to do list; better half says my hearing sucks, so I always planned on hanging a speaker behind my head.
Cheers, Adam
PS for those using the Midland radio, forgot to mention to attach the bracket backwards. The Midland radio mounting bracket is designed to mount on the bottom of the radio; this bracket has slots that allows the radio to tilt "up" a little for ease of seeing the faceplate. When you "hang" the radio, the bracket goes on top of the radio (vice bottom). To tilt the radio "down," just flip the bracket. Apparently I like quotes ... lol just play around with it a little and it'll make perfect sense.
DZRTJP
Active Member
Absolutely agree on the external speaker. I've always run them with my CB's. Placement & angle of the external speaker is important also. But it's a bit different for each person's ears. I need them even more nowadays with my permanent tinnitus. But I have to position the speaker differently from what I used to.External speakers really make a world of difference, especially when running doorless and topless. I'll try to get the T-bar done as soon as I can.
anozirajoe
New member
Eddie, I neglected to thank you for the super fast shipping and receipt of my ACC Bar.
The fit into my JK was flawless using the JL brackets. The design is well thought out, and thanks for providing a great product for all of us…!!!
The fit into my JK was flawless using the JL brackets. The design is well thought out, and thanks for providing a great product for all of us…!!!
Last edited:
kevman65
Hooked
First, NO I haven't taken any damned pictures.
Now, this bar is PERFECT for mounting a Garmin 57 W dash cam and I used items from 67 Designs to do so.
Used a 2 hole base plate (got their hardware kit and it works perfectly) a medium arm (7.** inches) and a Garmin specific 20mm x 8mm ball. Yes, there are probably cheaper options, I like their stuff.
The base will straddle and mount in two of the slots in the ACC bar, the long power cord will fit through the slot and can be routed through bar, down inside the A pillar trim, under dash, up inside center console to exit wherever you want to power the cam.
I have the arm pushed all the way up against passenger visor and camera tucked behind passenger side of rear view mirror. The whole thing can easily be swung out of the way to use visor and then swung back in place. It's all out of line of sight. Didn't realize the screen shuts off after 1 minute of idle time, but it's still recording.
I'll get around to pictures when I'm damned good and ready, quityerbitchin and get off my lawn ya damned kidz.
I'm sorry I didn't see this till now. Happy to hear you got your package quickly, that it installed flawlessly and that you like itEddie, I neglected to thank you for the super fast shipping and receipt of my ACC Bar.
The fit into my JK was flawless using the JL brackets. The design is well thought out, and thanks for providing a great product for all of us…!!!

Would love to see picsFirst, NO I haven't taken any damned pictures.
Now, this bar is PERFECT for mounting a Garmin 57 W dash cam and I used items from 67 Designs to do so.
Used a 2 hole base plate (got their hardware kit and it works perfectly) a medium arm (7.** inches) and a Garmin specific 20mm x 8mm ball. Yes, there are probably cheaper options, I like their stuff.
The base will straddle and mount in two of the slots in the ACC bar, the long power cord will fit through the slot and can be routed through bar, down inside the A pillar trim, under dash, up inside center console to exit wherever you want to power the cam.
I have the arm pushed all the way up against passenger visor and camera tucked behind passenger side of rear view mirror. The whole thing can easily be swung out of the way to use visor and then swung back in place. It's all out of line of sight. Didn't realize the screen shuts off after 1 minute of idle time, but it's still recording.
I'll get around to pictures when I'm damned good and ready, quityerbitchin and get off my lawn ya damned kidz.
kevman65
Hooked
Here you go.Would love to see pics
*Addendum* Tool list for everything below; 10mm socket, ratchet extension, ratchet, stiff trim tool.
Image of dash cam in driving position, from passenger seat. Gives a good look at all the mounting pieces except for the final 20mm x 8mm ball to cam.

Here you see the power cord coming out of the bar and where I tucked it under the sport bar trim.

Obviously you can't see the power cord here, but I removed passenger grab handle/A pillar trim and tucked the power cord behind the existing factory wire harness.

Popped the side cover off at the end of dash and tucked the power cord in and held it behind the trim piece as I reinstalled. At this point I also popped the trim piece that covers door electrical connection and slid the power cord down into the lower trim piece that runs next to door and carpet.

You do NOT have to completely remove the trim piece running next to door, but you DO need it loose from the split at the B pillar up to where it turns up to trim piece covering door connections. There is an opening for a main wire harness about halfway back of the seat, I brought the power cord out there and under seat, across and up to a power distribution (triple lighter outlet) I have between passenger seat and console.

View in driving position from drivers seat. I was too close and focused on the cam to show what it actually looks like if I were driving.

Stowed position for when not driving, or for lowering passenger visor.

Last edited:
kevman65
Hooked
And to answer the incoming questions about the other gadget holders you can see.
The mounting point, Vector full width bar for JL/JT.
Left to right;
Radar detector magnetic mount from 67 Designs.
GPS mount from 67 Designs ( had 2 Garmins when I bought the JT and no I don't have the 8" stereo head unit)
Phone mount from 67 Designs.
I don't want to hang anything on the windshield, these things crack easy enough without adding extra weight/strain on the inside.
Awesome! Glad to hear itInstalled mine on myJK. Haven't mounted anything on it yet. but, fitment was good!!
LOL - awesome!After surfing the Google Machine for a decent Ham, CB, and GMRS radio mount for my JT, I ended up right back here and bought the ACC Bar.