After picking up our used 1997 Jeep Cherokee or, "XJ" as most people like to call them, we wanted to give it a modest lift and run bigger tires as soon as we could. Of course, we didn't want to spend a more than we needed to on a lift kit and if at all possible, we didn't want to go any taller than we had to as well. With this in mind, we decided to get a Rancho RS66000 2.5" lift as we found to be very budget friendly, just the right height and it came very complete. The only thing we did differently was to skip the add-a-leafs that come with the kit and opted for the optional 2.5" leaf springs you could get separately. Also, knowing that we would be running big tires for such a small amount of lift, we also picked up a set of aftermarket bump stop extensions front and rear as well as a set of Bushwacker Flat Fenders to help mitigate rubbing at a full stuff. While the Rancho lift kit does come with good instructions, this write-up should help fill in a few blanks and see how we decided to address a few things.
What you will need
• Rancho RS66000 (Chrysler 8.25 rear axle) or RS66001 (Dana 35 rear axle)
• Rancho RS7000 MT Shocks (or shocks of your choice)
• 13, 14, 15, 17, 18, 19, 21mm Sockets & Wrenches
• 9/16, 3/4" Sockets & Wrenches
• Ratchet
• 3" & 6" Ratchet Extension
• Torx T-40, T-55 Bits
• Torque Wrench
• 3 lb. Hammer
• Floor Jack (2 would make this job easier)
• 4 - Jack Stands
• White Lithium Grease
• PB Blaster
• Drill
• Unibit or Appropriate Size Bit (as needed)
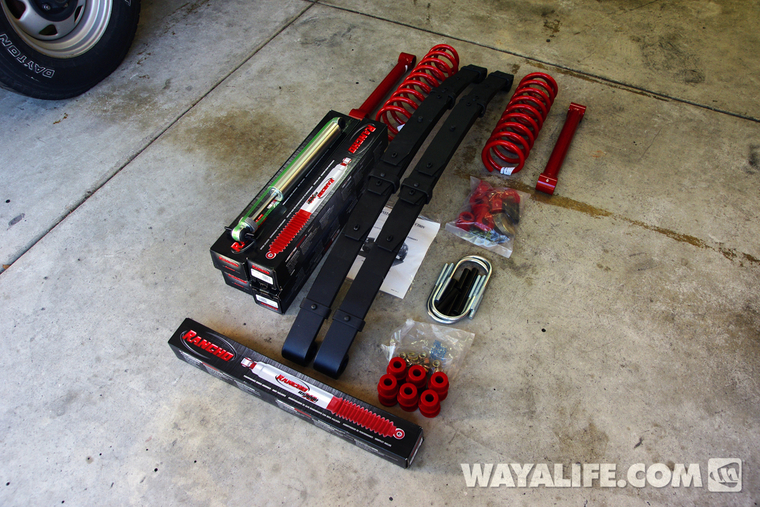
Here's a shot of what all we got with our Rancho RS66000 kit plus the optional 2.5" leaf springs. You will also see that we picked up a set of Rancho RS7000 MT Shocks and a Rancho RS5000 Steering Stabilizer to complete the kit.
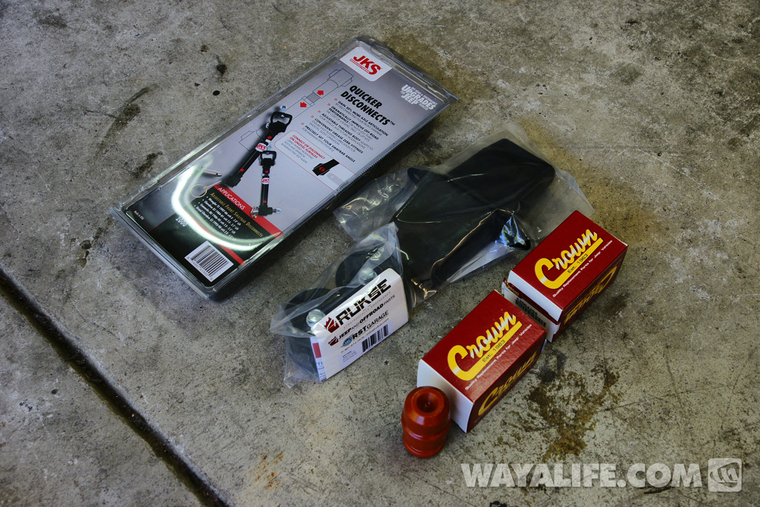
Additional parts we got include a pair of JKS Quicker Disconnects, replacement Crown bump stops to replace the crumbling ones we had on and front and rear Ruske bump stop extensions.
Front Instructions
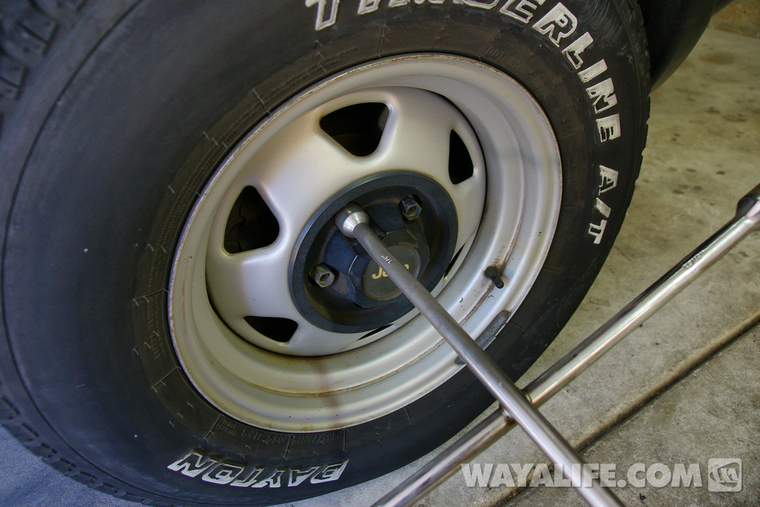
1. Park your Jeep on a level surface, set the parking brake and chock the rear wheels. Then use a 3/4" socket or lug wrench to just loosen the lug nuts on your front wheels.
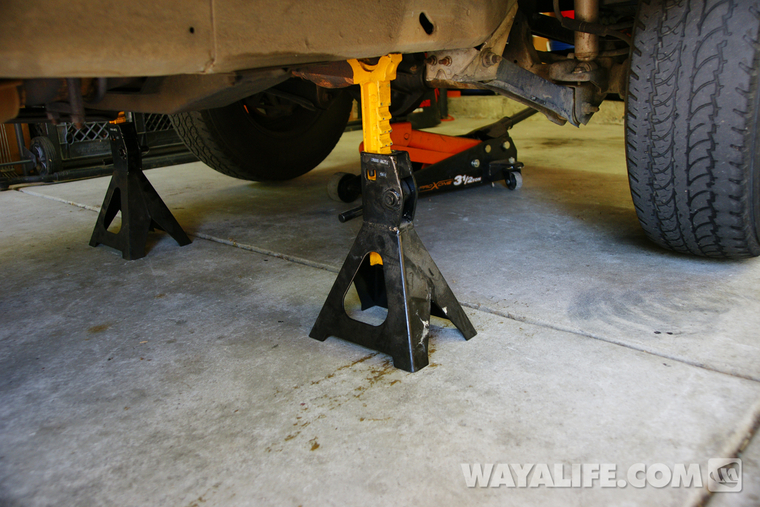
2. Use a floor jack to raise the front of your Jeep from the axle and then set it back down on jack stands placed under the frame rails near the front lower control arm mounts.
3. With the front axle still supported by your floor jack, use a 3/4" socket or lug wrench to remove the lug nuts on your front wheels. Pull the wheels off and set them aside.
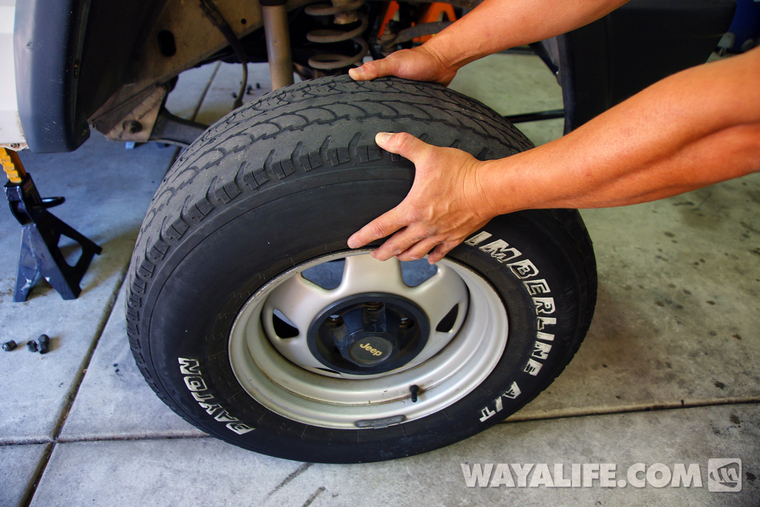
4. Using a 15mm wrench, remove the nut securing your front sway bar links to the sway bar arm.
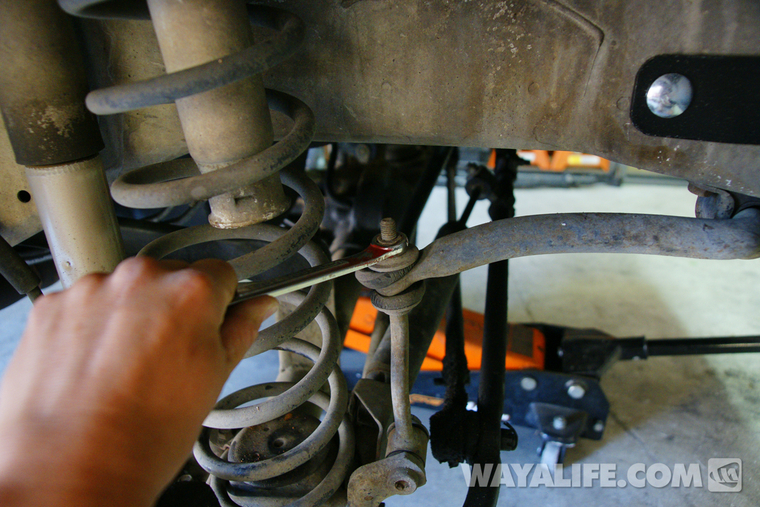
5. Using a Torx T-55 bit and an 18mm wrench, remove the bolt and nut securing your sway bar link to the axle. If you bought new sway bar links, you can discard your factory ones.
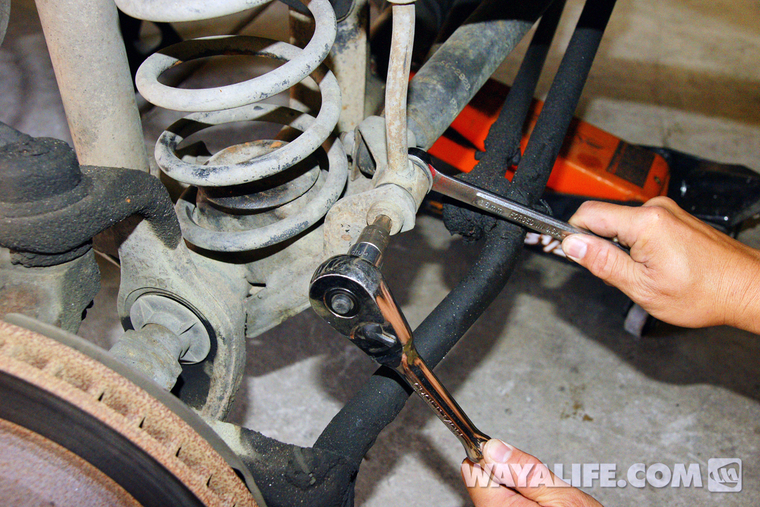
6. Using a 13mm socket and wrench, remove the two bolts securing your front shocks to the axle.
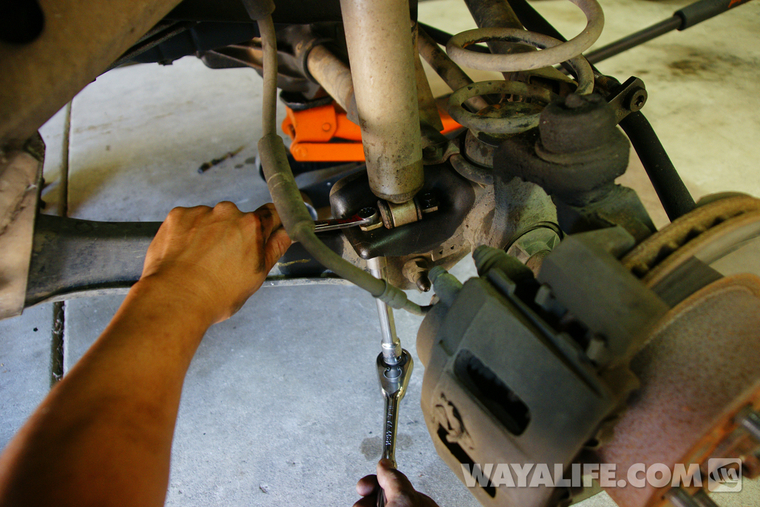
7. Open your hood and remove the nuts securing your front shocks to the fender using a 14mm wrench.
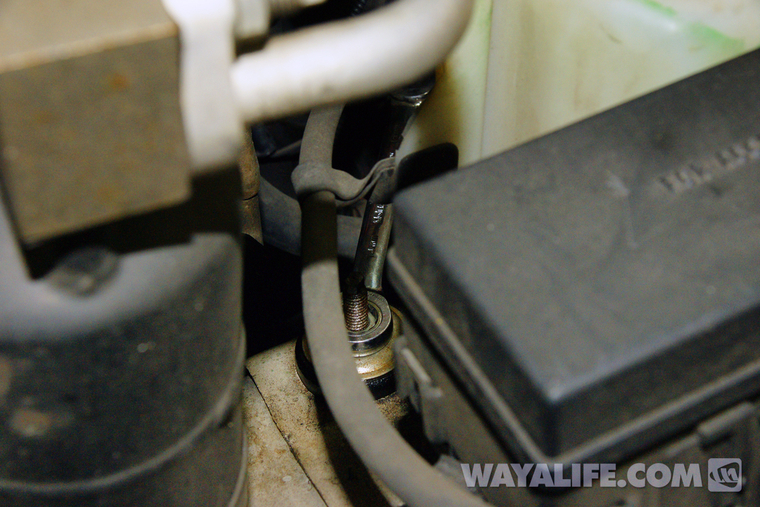
8. Using a Torx T-40 bit, remove the bolt securing your front brake hard lines to the frame of your Jeep.
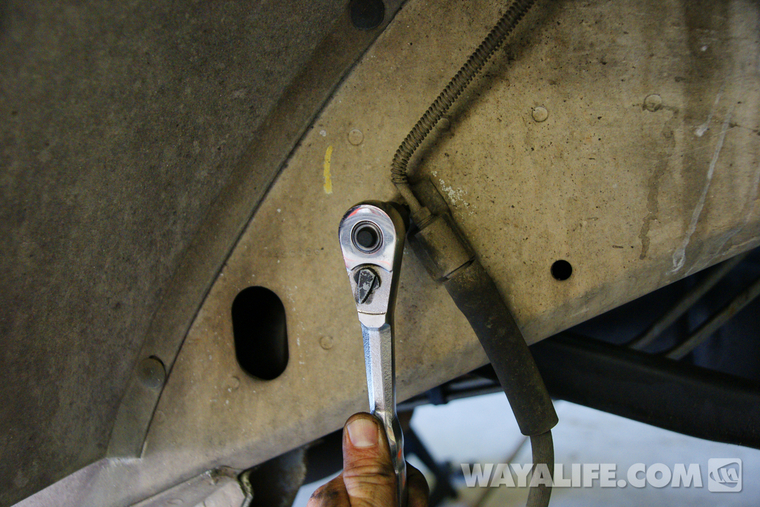
9. Using a 15mm socket, remove the track bar bolt from the axle.
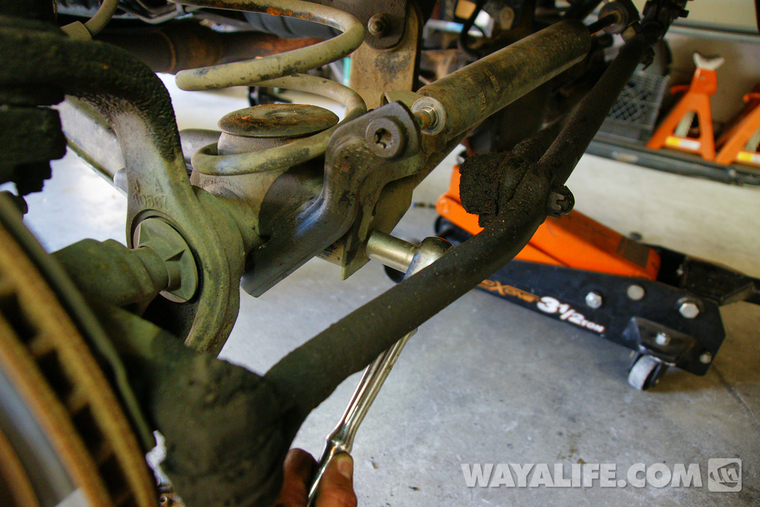
10. Using an 18mm wrench, remove the nut securing your steering stabilizer to the mounting stud on the drag link.
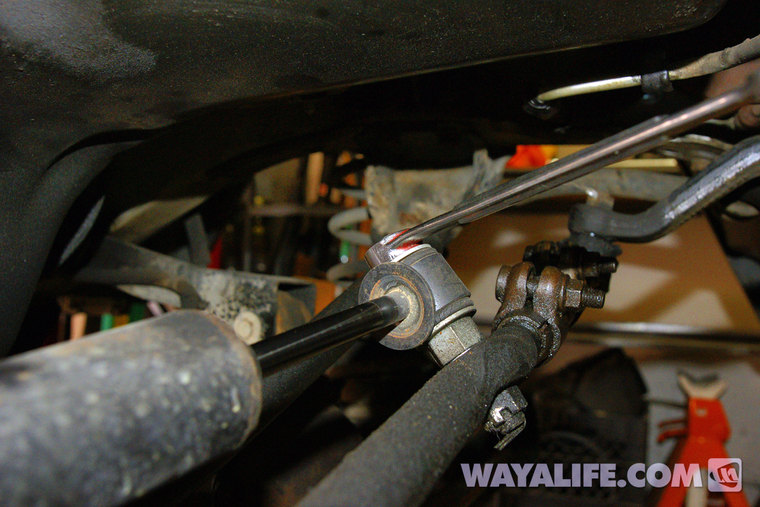
11. Using an 18mm socket and wrench, remove the nut and bold securing the steering stabilizer to the axle.
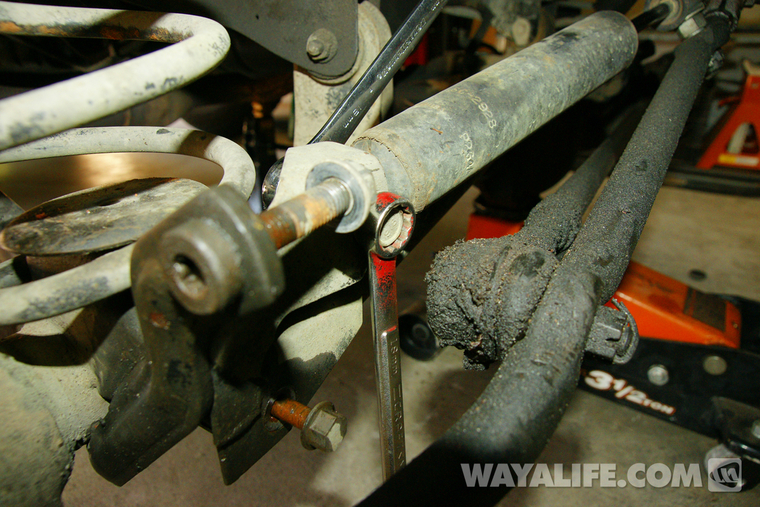
12. Use a pair of needle nose pliers to remove the cotter pit from the tie-rod end stud as shown.
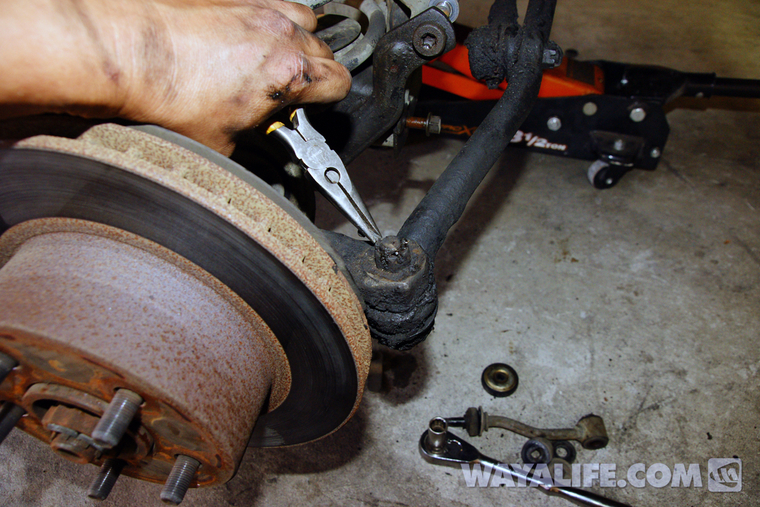
11. Use a 19mm socket to remove the nut securing the tie-rod end to the knuckle.
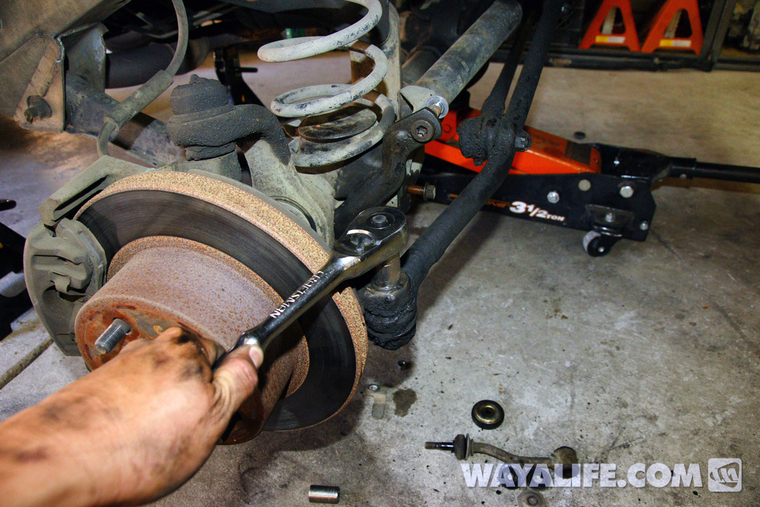
12. Using a 3 lb. hammer, strike the end of your knuckle solidly as shown in this photo until the tie-rod end comes free.
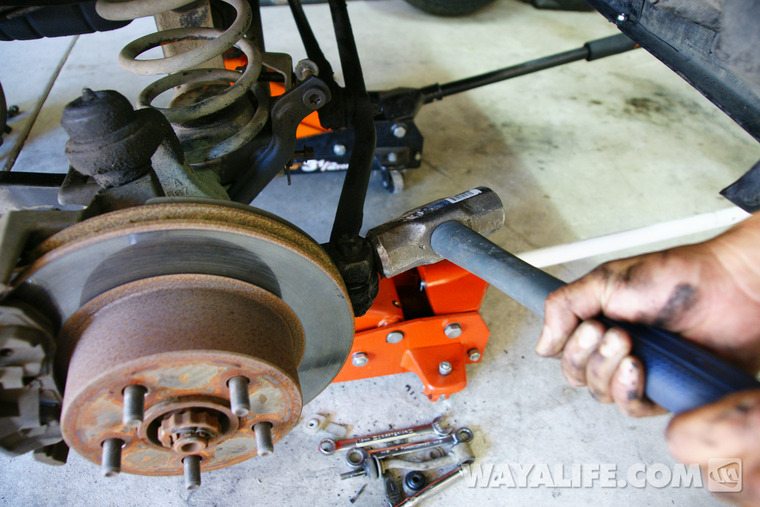
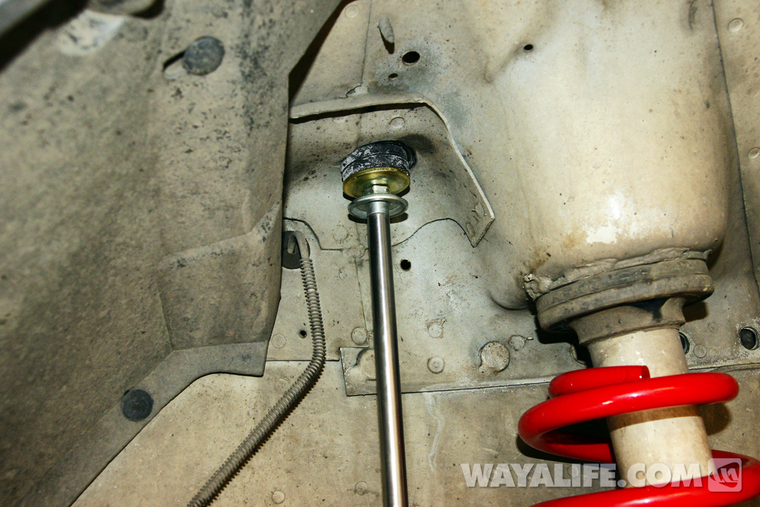
13. Use a 13mm wrench to remove the bolt securing the coil retainer on to the axle.
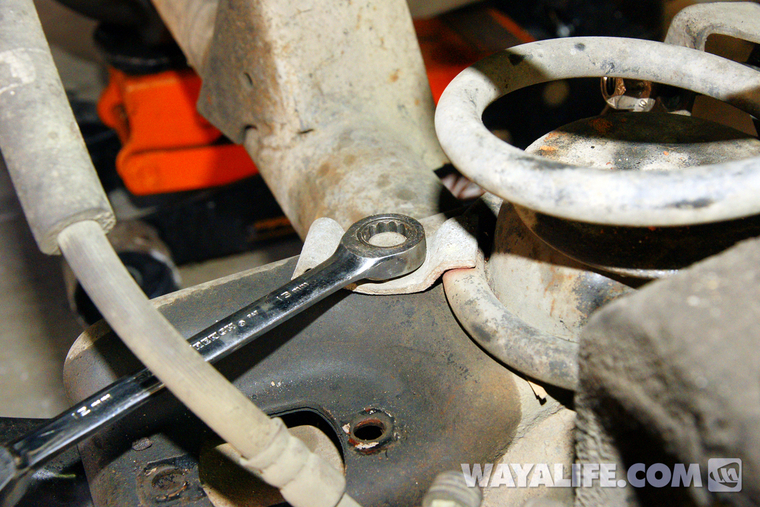
14. Use a 21mm socket and wrench to remove the bolt and nut securing your passenger side front lower control arm to the axle mount.
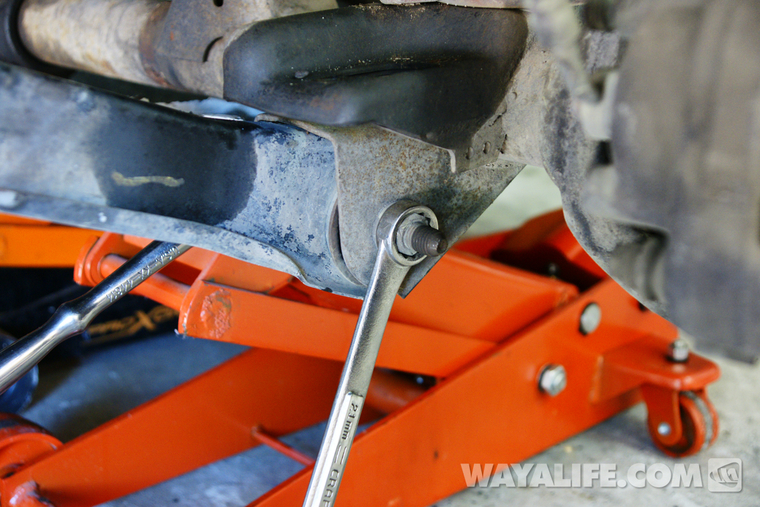
15. Use a 21mm socket and wrench to remove the bolt and nut securing your passenger side front lower control arm to the frame mount.
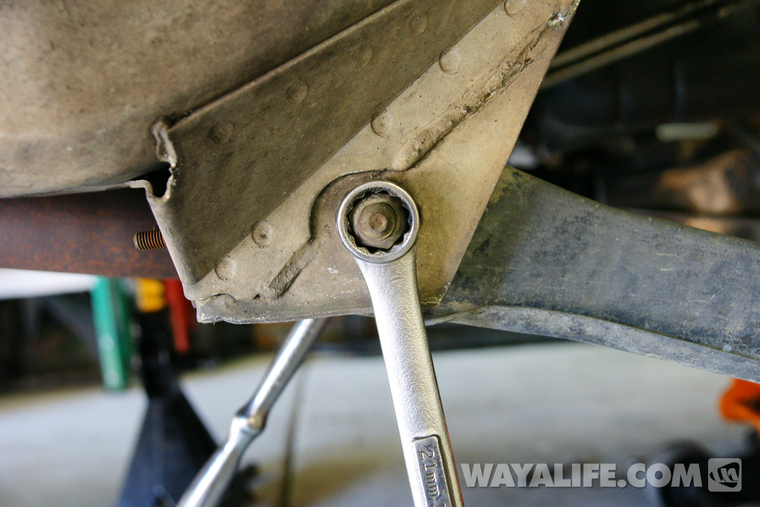
16. Slowly lower your floor jack so that the front axle drops down from your Jeep and then remove the passenger side coil as shown.
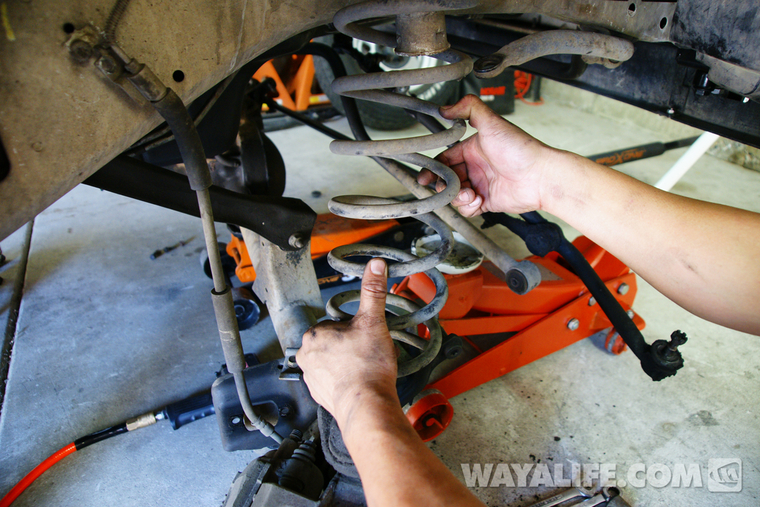
17. If you are adding bump stop extensions, follow the instructions provided to determine what size drill bit you will need to install them on your axle. Use that bit to drill a hole on top of the lower spring perch as shown.
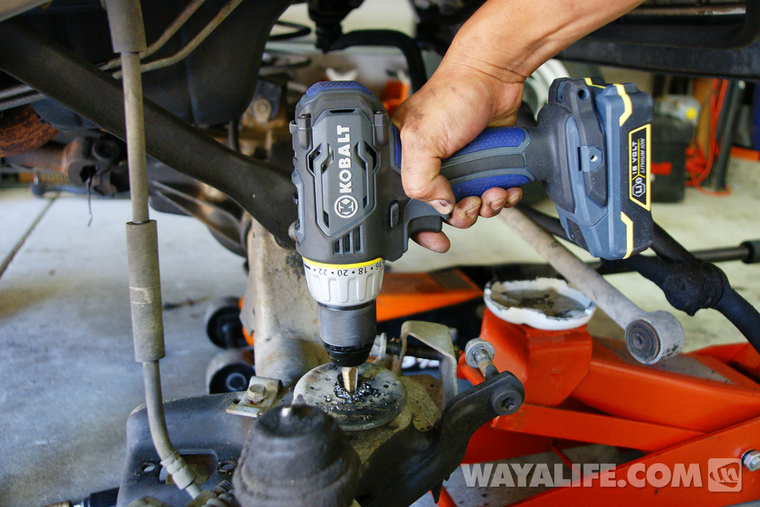
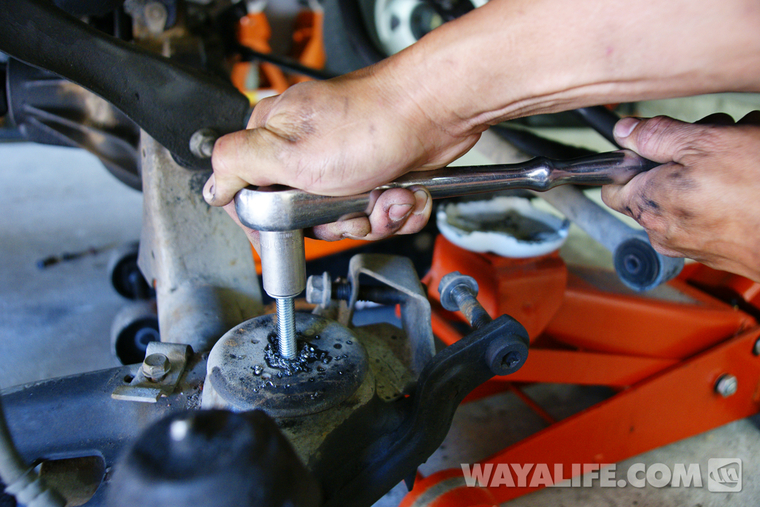
18. Using the self-tapping bolt provided and some cutting oil, tap the hole you just drilled. Remove the bolt and leave it out once you are done.
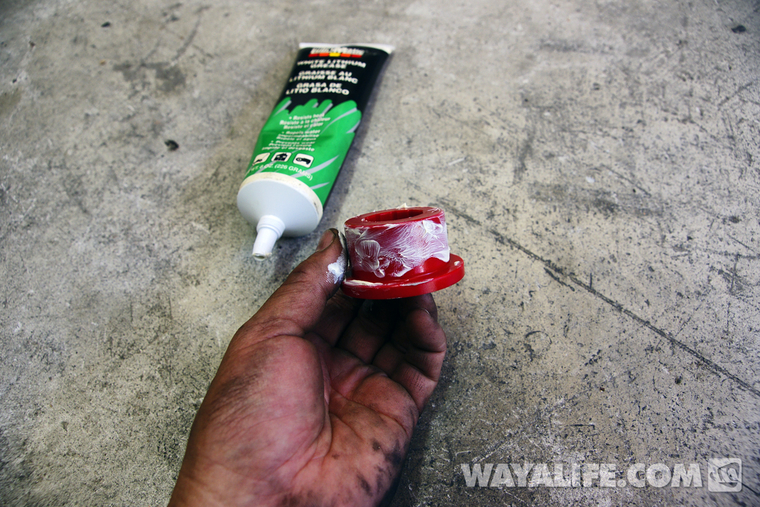
19. Gather the control arm bushings and liberally apply white lithium grease on them.
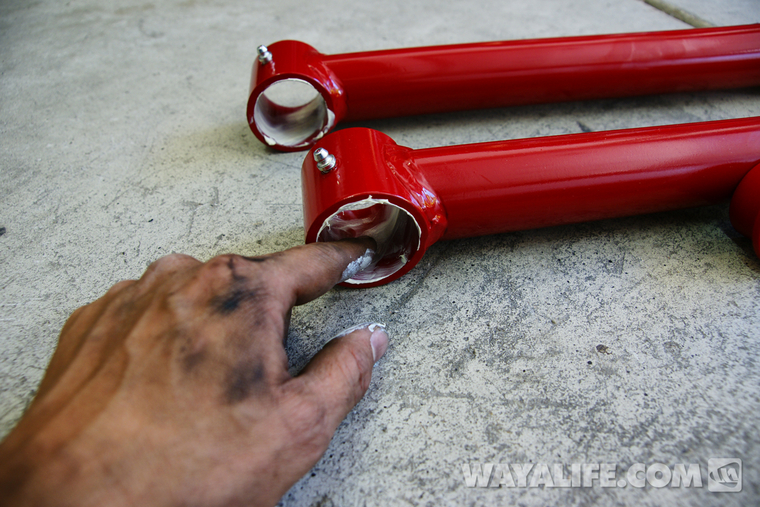
20. Liberally apply white lithium grease to the inside collar of the control arm joints as shown.
21. Install the bushing into the control arms by pressing the 2 halves in as shown and then install the zerk nipples provided.
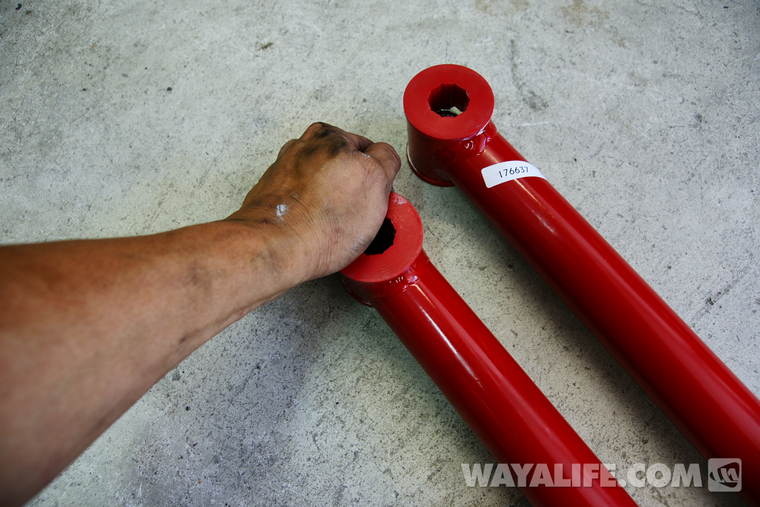
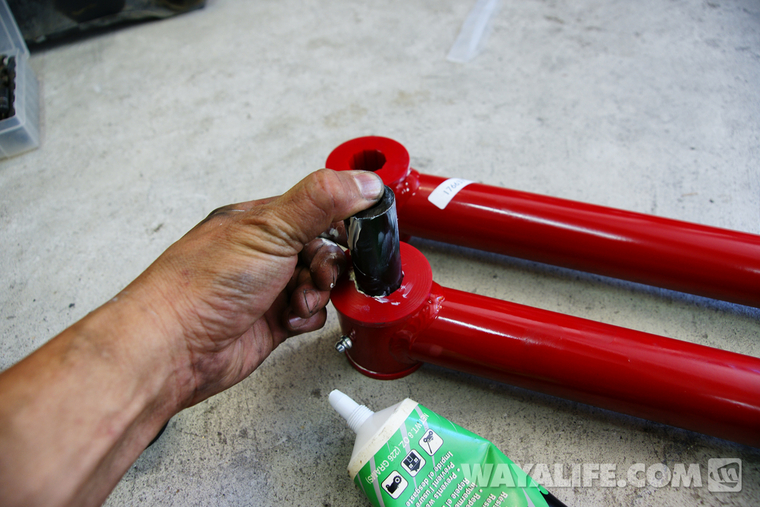
22. Apply a liberal amount of white lithium grease inside the bushing hole and on the crush sleeve. Then, install the crush sleeve into the bushing by pushing it in as shown.
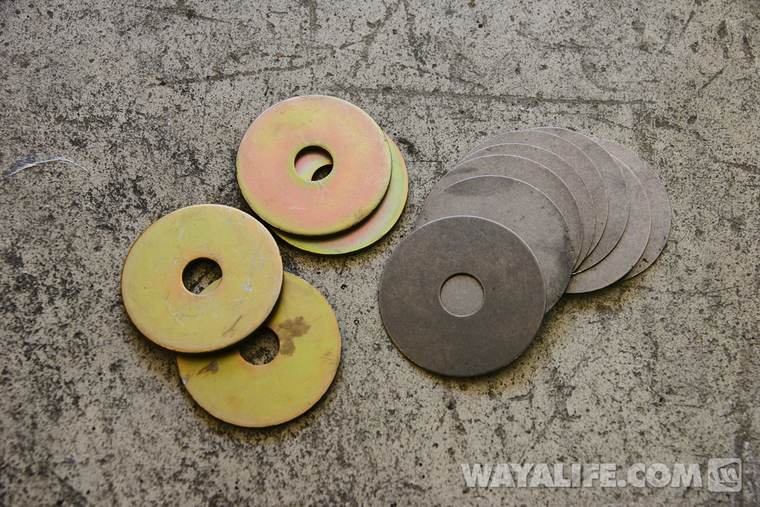
23. You will need to sort through and determine what bushing spacers you will need for your install. Early model XJ's will require 2 thin spacers and later models will require 2 thick spacers. Apply a light coating of white lithium grease to the spacers you will be using.
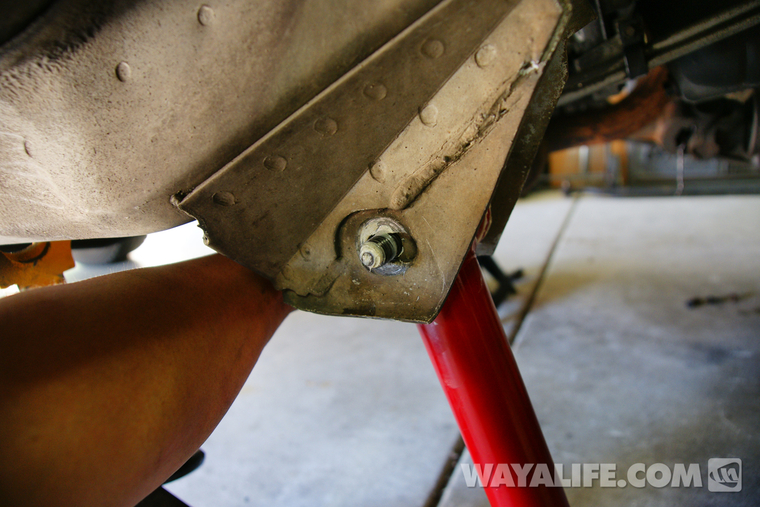
24. Slide the lower control arm up into the frame side mount with the spacers and secure it in place by inserting the factory bolt through the mounting hole as shown. If significant effort is required to get the control arm in, remove one or more of the spacers so that it just slides right in. Secure it in place with the factory nut.
25. Slide the lower control arm up into the axle side mount and secure it in place by inserting the factory bolt and nut. Use a 21mm socket and wrench to tighten both the axle and frame side bolts and nuts to 125 ft. lbs. of torque.
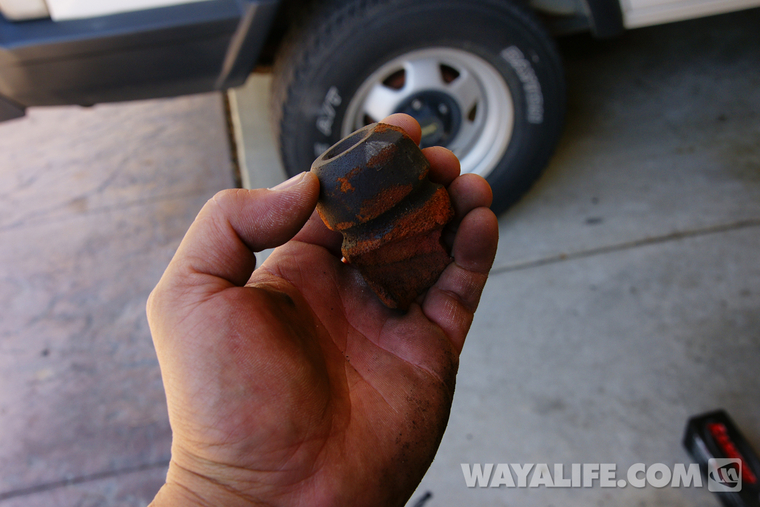
26. As mentioned earlier, the factory jounce stops had totally crumbled away and were just sitting on the axle inside of the coils. I made sure to replace them with new stops before proceeding.
27. While holding the front bump stop extension inside your new Rancho coil, work the coil up the jounce stop tower and then slip the bottom of it onto the spring perch on the axle as shown. You may find it necessary to lower your floor jack as low as it can go to get the coil in.
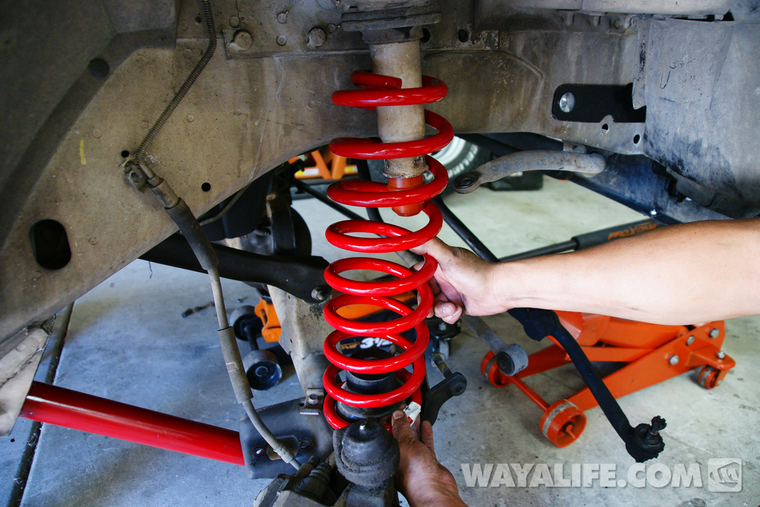
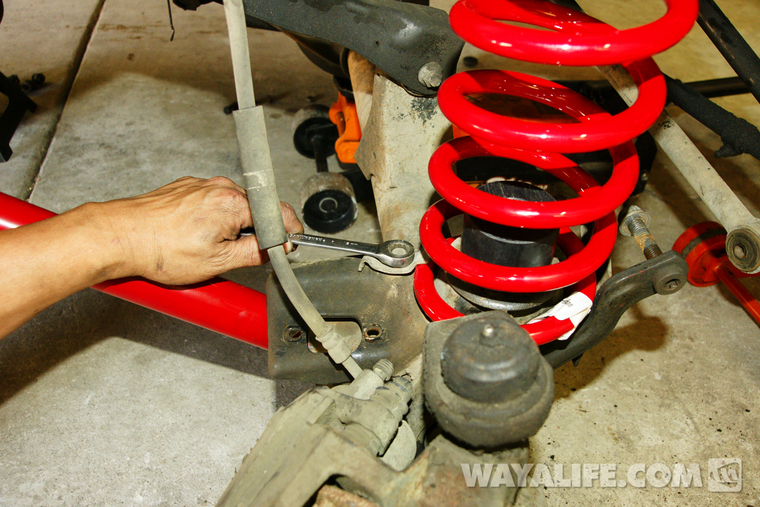
28. Rotate the coil until the bottom is indexed into the spring perch on the axle. Then, use a 13mm wrench to reinstall the factory coil retainer.
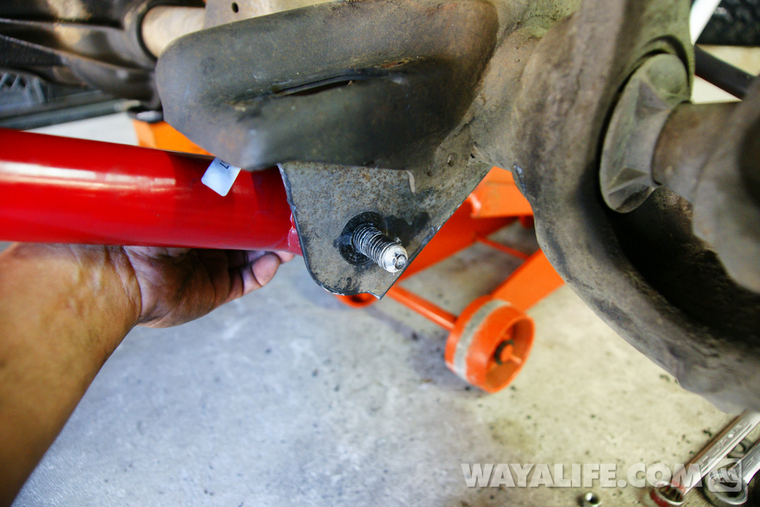
29. Insert the mounting bolt into the bump stop extension and then slip in a ratchet with 3" extension and appropriate sized socket through the coil to tighten the bolt and secure the bump stop to your axle.
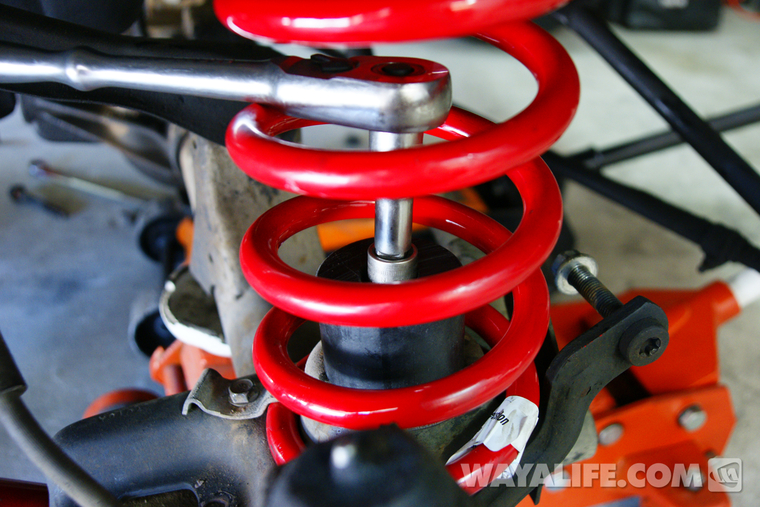
30. Repeat steps 14-29 on the driver side of your Jeep.
31. Use your floor jack to raise your axle up until you can reinstall the bolts securing your brake hard lines onto the frame. You will need a Torx T-40 bit for this job.
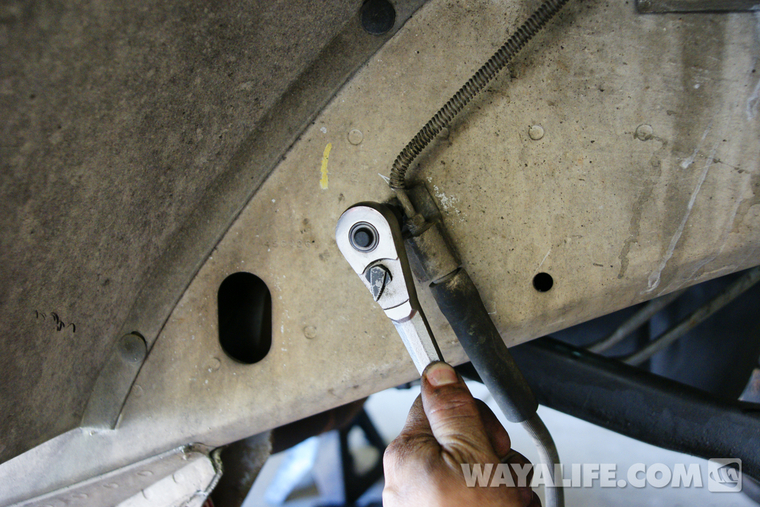
32. Using a 19mm socket, reinstall your tie-rod onto the steering knuckle and tighten the castle nut to 65-70 ft. lbs. of torque. If needed, tighten the castle nut a bit more as needed to allow you to reinstall the cotter pin.
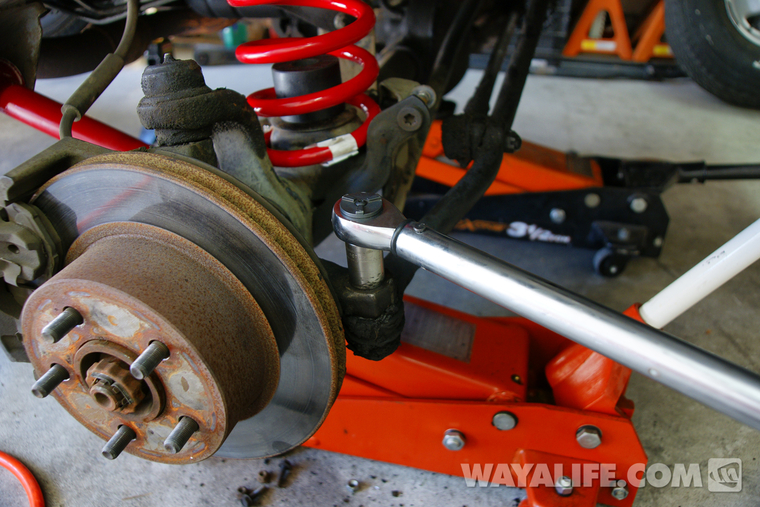
33. The photo below shows what the bushings and hardware top of your front shocks should look like once installed.
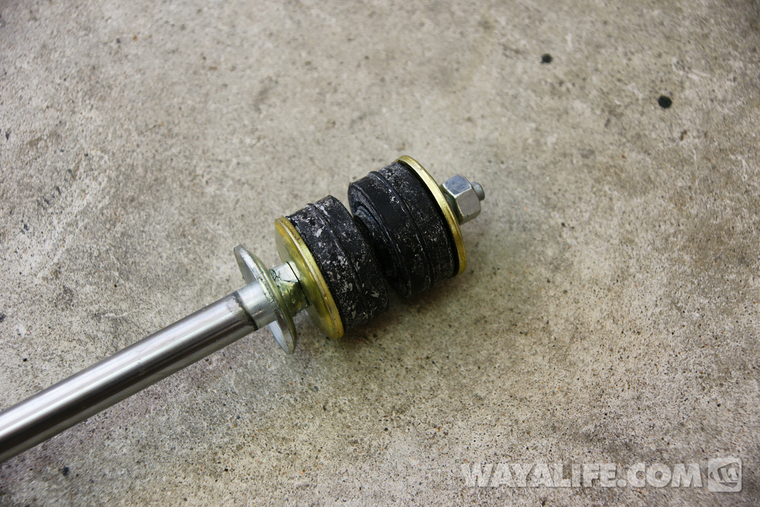
34. With just the bottom washer and lower bushing installed on top of your front shock, push the stud up through the mounting hole on your fender while locating the bottom of the shock on top of the axle mount. If you bought gas charged monotube shocks like the new Rancho RS7000 MT, you may find it easier to install if you lower your axle a bit.
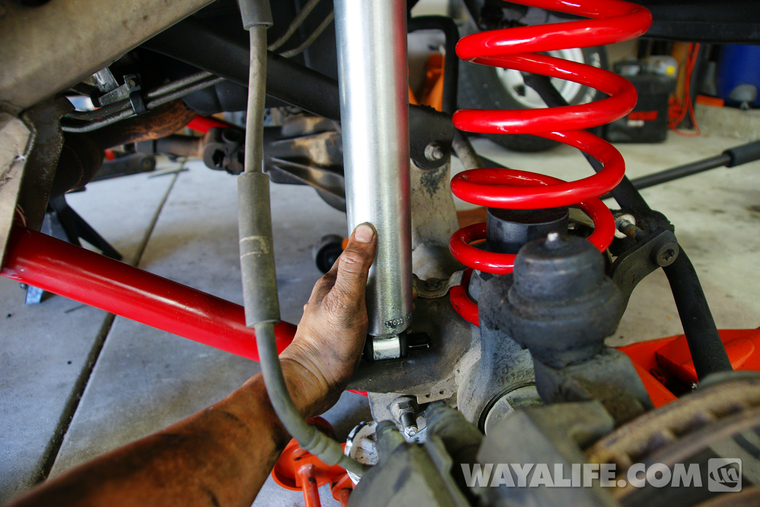
35. Secure the shock to your axle using the factory bolts and nuts. Tighten them to 45 ft. lbs. of torque. You will need a 13mm socket and wrench for this job.
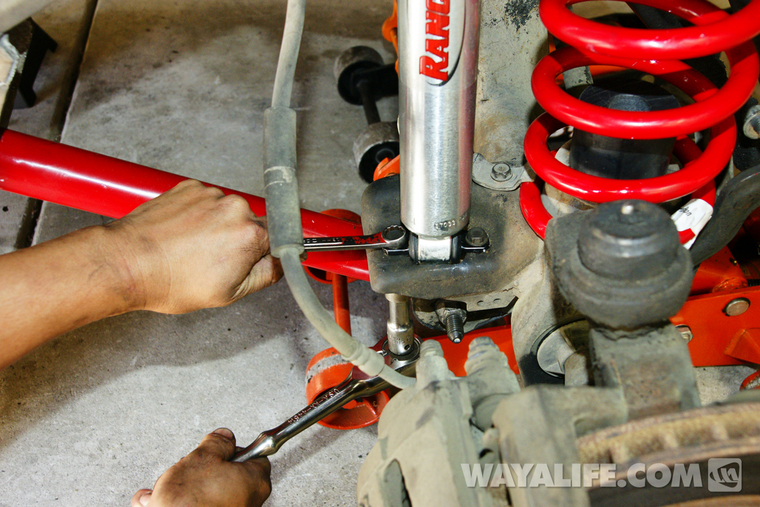
36. Install the bushing, washer and nut on top of the upper shock stud and then use a 14mm wrench to secure it in place. Tighten the nut to 17 ft. lbs. of torque or until the rubber bushings just starts to bulge.
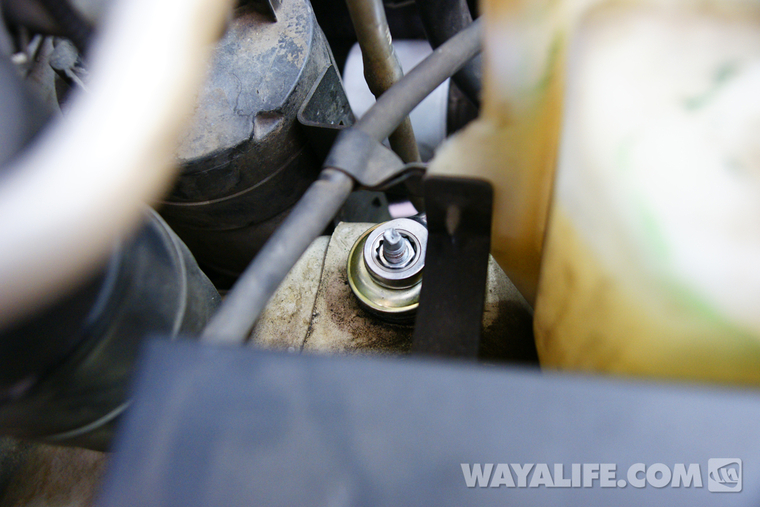
37. Reinstall the track bar onto the axle mount using the factory bolt and nut. Use a 15mm socket to tighten them to 62 ft. lbs. of torque.
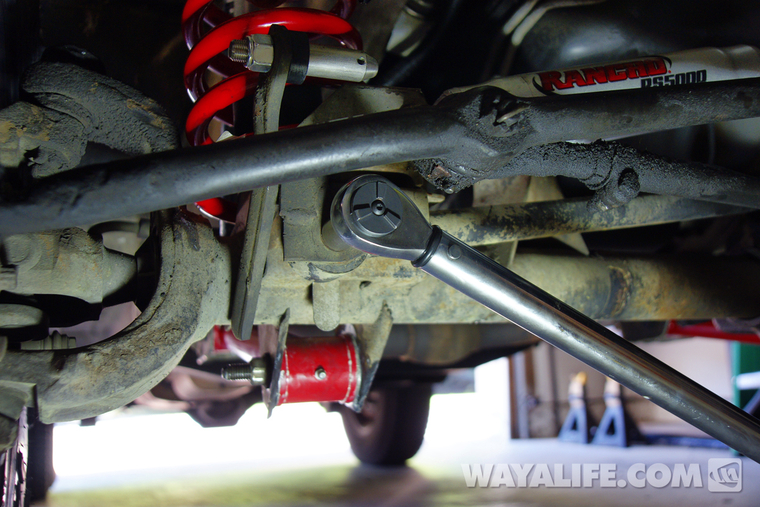
38. Install your new Rancho RS5000 steering stabilizer or old stabilizer onto the draglink mounting stud and secure it in place using the factory hardware. You will need an 18mm to tighten the nut to 35 ft. lbs. of torque.
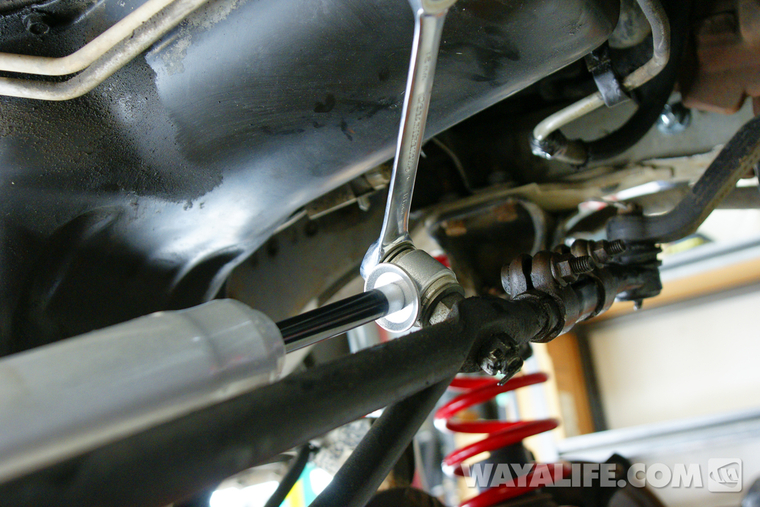
39. Using an 18mm socket and wrench, secure your steering stabilizer to the axle mount using the factory bolt and nut. You will need an 18mm socket and wrench to tighten them to 55 ft. lbs. of torque.
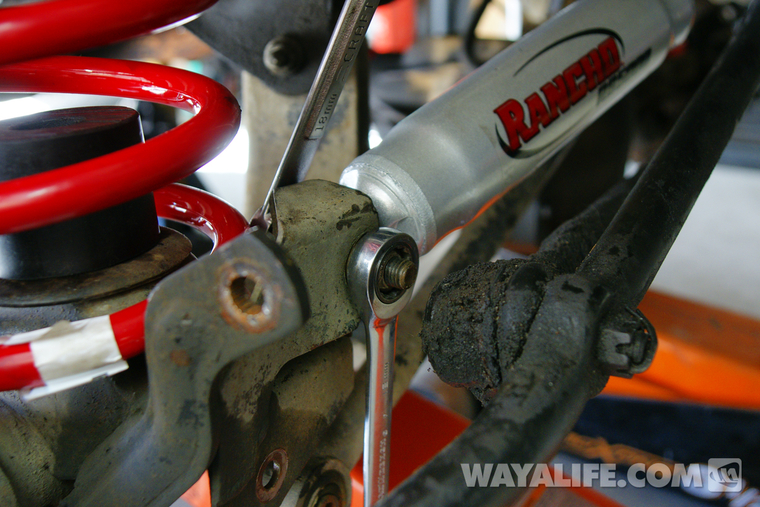
40. Reinstall your wheels and use a 3/4" socket or lug wrench to tighten the lug nuts to 95 ft. lbs. of torque. Then, use your floor jack to raise up your Jeep enough to remove the jack stands and lower your Jeep back down to the ground.

If you purchased a set of JKS Quicker Disconnect Sway Bar Links, click on this link for instructions on how to install them.
JKS Quicker Disconnect Link Installation Write-Up
Otherwise, follow the instructions that came with the sway bar link kit you purchased before continuing onto the rear installation of this lift kit.
What you will need
• Rancho RS66000 (Chrysler 8.25 rear axle) or RS66001 (Dana 35 rear axle)
• Rancho RS7000 MT Shocks (or shocks of your choice)
• 13, 14, 15, 17, 18, 19, 21mm Sockets & Wrenches
• 9/16, 3/4" Sockets & Wrenches
• Ratchet
• 3" & 6" Ratchet Extension
• Torx T-40, T-55 Bits
• Torque Wrench
• 3 lb. Hammer
• Floor Jack (2 would make this job easier)
• 4 - Jack Stands
• White Lithium Grease
• PB Blaster
• Drill
• Unibit or Appropriate Size Bit (as needed)
Here's a shot of what all we got with our Rancho RS66000 kit plus the optional 2.5" leaf springs. You will also see that we picked up a set of Rancho RS7000 MT Shocks and a Rancho RS5000 Steering Stabilizer to complete the kit.
Additional parts we got include a pair of JKS Quicker Disconnects, replacement Crown bump stops to replace the crumbling ones we had on and front and rear Ruske bump stop extensions.
Front Instructions
1. Park your Jeep on a level surface, set the parking brake and chock the rear wheels. Then use a 3/4" socket or lug wrench to just loosen the lug nuts on your front wheels.
2. Use a floor jack to raise the front of your Jeep from the axle and then set it back down on jack stands placed under the frame rails near the front lower control arm mounts.
3. With the front axle still supported by your floor jack, use a 3/4" socket or lug wrench to remove the lug nuts on your front wheels. Pull the wheels off and set them aside.
4. Using a 15mm wrench, remove the nut securing your front sway bar links to the sway bar arm.
5. Using a Torx T-55 bit and an 18mm wrench, remove the bolt and nut securing your sway bar link to the axle. If you bought new sway bar links, you can discard your factory ones.
6. Using a 13mm socket and wrench, remove the two bolts securing your front shocks to the axle.
7. Open your hood and remove the nuts securing your front shocks to the fender using a 14mm wrench.
8. Using a Torx T-40 bit, remove the bolt securing your front brake hard lines to the frame of your Jeep.
9. Using a 15mm socket, remove the track bar bolt from the axle.
10. Using an 18mm wrench, remove the nut securing your steering stabilizer to the mounting stud on the drag link.
11. Using an 18mm socket and wrench, remove the nut and bold securing the steering stabilizer to the axle.
12. Use a pair of needle nose pliers to remove the cotter pit from the tie-rod end stud as shown.
11. Use a 19mm socket to remove the nut securing the tie-rod end to the knuckle.
12. Using a 3 lb. hammer, strike the end of your knuckle solidly as shown in this photo until the tie-rod end comes free.
13. Use a 13mm wrench to remove the bolt securing the coil retainer on to the axle.
14. Use a 21mm socket and wrench to remove the bolt and nut securing your passenger side front lower control arm to the axle mount.
15. Use a 21mm socket and wrench to remove the bolt and nut securing your passenger side front lower control arm to the frame mount.
16. Slowly lower your floor jack so that the front axle drops down from your Jeep and then remove the passenger side coil as shown.
17. If you are adding bump stop extensions, follow the instructions provided to determine what size drill bit you will need to install them on your axle. Use that bit to drill a hole on top of the lower spring perch as shown.
18. Using the self-tapping bolt provided and some cutting oil, tap the hole you just drilled. Remove the bolt and leave it out once you are done.
19. Gather the control arm bushings and liberally apply white lithium grease on them.
20. Liberally apply white lithium grease to the inside collar of the control arm joints as shown.
21. Install the bushing into the control arms by pressing the 2 halves in as shown and then install the zerk nipples provided.
22. Apply a liberal amount of white lithium grease inside the bushing hole and on the crush sleeve. Then, install the crush sleeve into the bushing by pushing it in as shown.
23. You will need to sort through and determine what bushing spacers you will need for your install. Early model XJ's will require 2 thin spacers and later models will require 2 thick spacers. Apply a light coating of white lithium grease to the spacers you will be using.
24. Slide the lower control arm up into the frame side mount with the spacers and secure it in place by inserting the factory bolt through the mounting hole as shown. If significant effort is required to get the control arm in, remove one or more of the spacers so that it just slides right in. Secure it in place with the factory nut.
25. Slide the lower control arm up into the axle side mount and secure it in place by inserting the factory bolt and nut. Use a 21mm socket and wrench to tighten both the axle and frame side bolts and nuts to 125 ft. lbs. of torque.
26. As mentioned earlier, the factory jounce stops had totally crumbled away and were just sitting on the axle inside of the coils. I made sure to replace them with new stops before proceeding.
27. While holding the front bump stop extension inside your new Rancho coil, work the coil up the jounce stop tower and then slip the bottom of it onto the spring perch on the axle as shown. You may find it necessary to lower your floor jack as low as it can go to get the coil in.
28. Rotate the coil until the bottom is indexed into the spring perch on the axle. Then, use a 13mm wrench to reinstall the factory coil retainer.
29. Insert the mounting bolt into the bump stop extension and then slip in a ratchet with 3" extension and appropriate sized socket through the coil to tighten the bolt and secure the bump stop to your axle.
30. Repeat steps 14-29 on the driver side of your Jeep.
31. Use your floor jack to raise your axle up until you can reinstall the bolts securing your brake hard lines onto the frame. You will need a Torx T-40 bit for this job.
32. Using a 19mm socket, reinstall your tie-rod onto the steering knuckle and tighten the castle nut to 65-70 ft. lbs. of torque. If needed, tighten the castle nut a bit more as needed to allow you to reinstall the cotter pin.
33. The photo below shows what the bushings and hardware top of your front shocks should look like once installed.
34. With just the bottom washer and lower bushing installed on top of your front shock, push the stud up through the mounting hole on your fender while locating the bottom of the shock on top of the axle mount. If you bought gas charged monotube shocks like the new Rancho RS7000 MT, you may find it easier to install if you lower your axle a bit.
35. Secure the shock to your axle using the factory bolts and nuts. Tighten them to 45 ft. lbs. of torque. You will need a 13mm socket and wrench for this job.
36. Install the bushing, washer and nut on top of the upper shock stud and then use a 14mm wrench to secure it in place. Tighten the nut to 17 ft. lbs. of torque or until the rubber bushings just starts to bulge.
37. Reinstall the track bar onto the axle mount using the factory bolt and nut. Use a 15mm socket to tighten them to 62 ft. lbs. of torque.
38. Install your new Rancho RS5000 steering stabilizer or old stabilizer onto the draglink mounting stud and secure it in place using the factory hardware. You will need an 18mm to tighten the nut to 35 ft. lbs. of torque.
39. Using an 18mm socket and wrench, secure your steering stabilizer to the axle mount using the factory bolt and nut. You will need an 18mm socket and wrench to tighten them to 55 ft. lbs. of torque.
40. Reinstall your wheels and use a 3/4" socket or lug wrench to tighten the lug nuts to 95 ft. lbs. of torque. Then, use your floor jack to raise up your Jeep enough to remove the jack stands and lower your Jeep back down to the ground.
If you purchased a set of JKS Quicker Disconnect Sway Bar Links, click on this link for instructions on how to install them.
JKS Quicker Disconnect Link Installation Write-Up
Otherwise, follow the instructions that came with the sway bar link kit you purchased before continuing onto the rear installation of this lift kit.
