As amazingly capable as the Jeep Renegade is and especially so with the Trailhawk version of it, there is one thing that it really should have come with from the factory and keeps it from being a more worthy off road vehicle - ROCK SLIDERS! Without them, it doesn't take much to damage the plastic rocker trim, pinch seam and even the doors when you're playing on the rocks. Fortunately, Daystar recognized the need for rocker protection on a Renegade and came out with an awesome set that wraps all the way around the pinch seam, all the way to the front and rear of it and it even has an internal structure that presses firmly against the body to help distribute the load caused by a hard hit. Another nice feature of the Daystar Rock Sliders is the addition of a tube extending out from it to help protect your doors, act as a pivot point, can be used to Hi-Lift from and to a degree, act as a step. Of course, not only will these rock sliders do a great job of protecting your Renegade, they'll also make it look awesome. In this write-up, you get to see step by step instructions on how to install them.
What you will need
• Daystar Jeep Renegade Rock Sliders - KJ50012BK
• 7/16" Socket & Wrench
• 19mm Socket
• 5mm Allen Wrench
• Ratchet
• Torque Wrench
• Grinder w/Cutoff Wheel
• Hand Drill (90° air drill is recommended)
• Unibit or 1/4" Metal Drill Bit
• 3/16" Metal Drill Bit
• Cutting Oil
• Center Punch
• Floor Jack
• (2) Jack Stands
• 2/16" Pop Rivet Gun (Pneumatic air pop rivet gun is recommended)
• Flat Razor
• Short Wood Pencil
• Safety Glasses
• 2x4 Wood
• Scissors
• Ruler
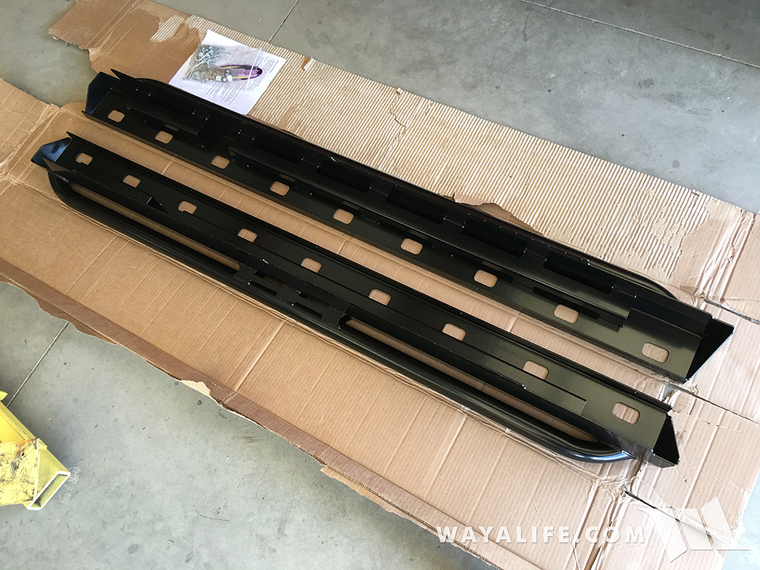
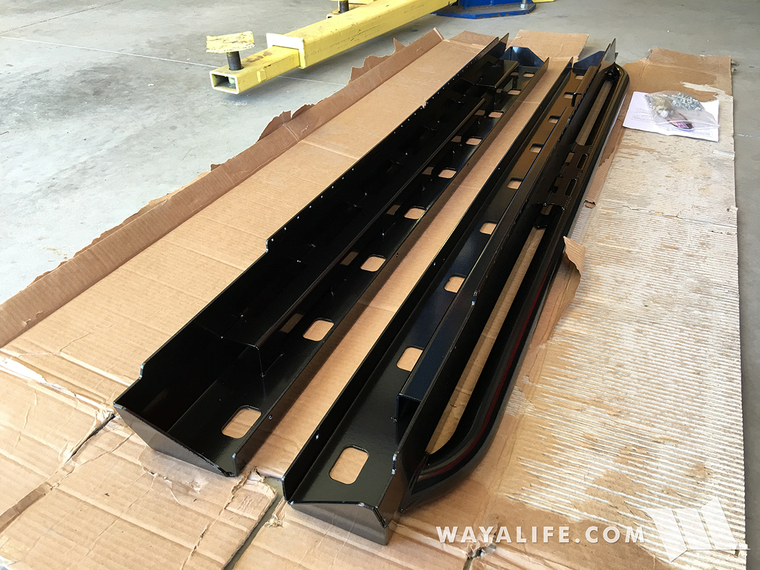
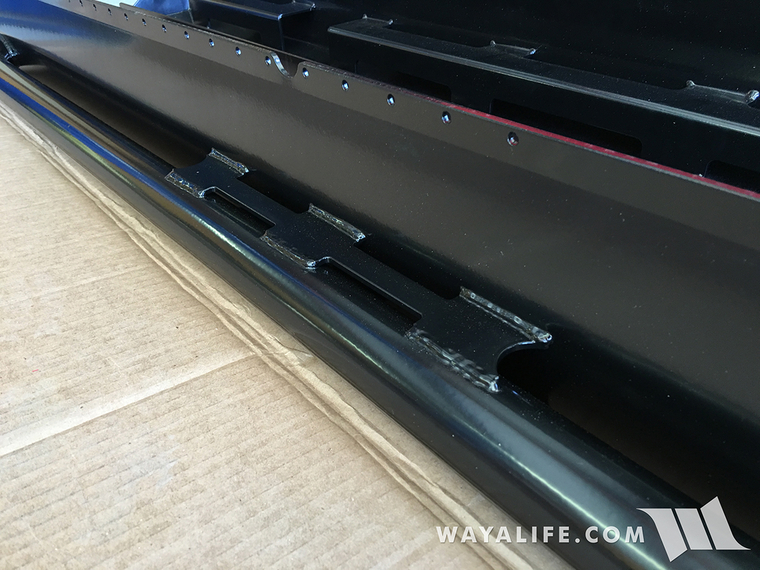
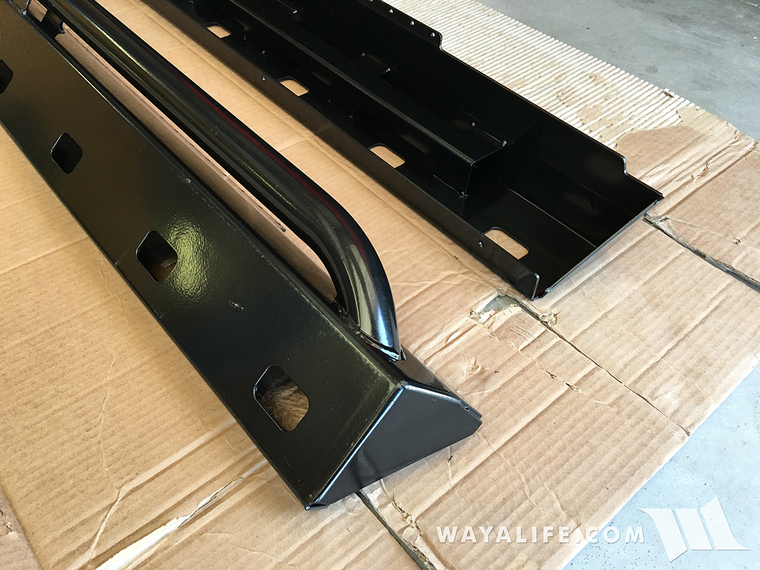
A few shots of what the Daystar Jeep Renegade Rock Sliders look like right out of the box. As you can see, they come powder coated black, are incredibly stout and are designed to wrap around the pinch seam and have blocks within them to help distribute the load caused by hits.
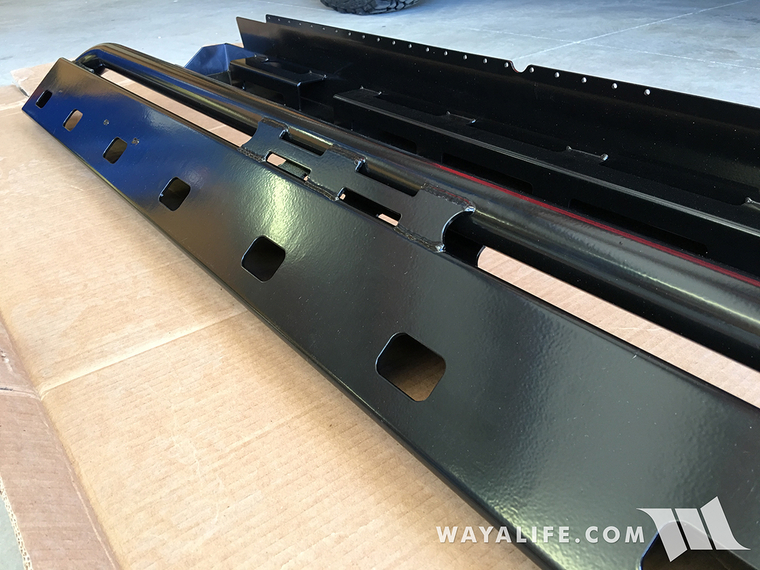
This is what the bottom of them look like.
Instructions
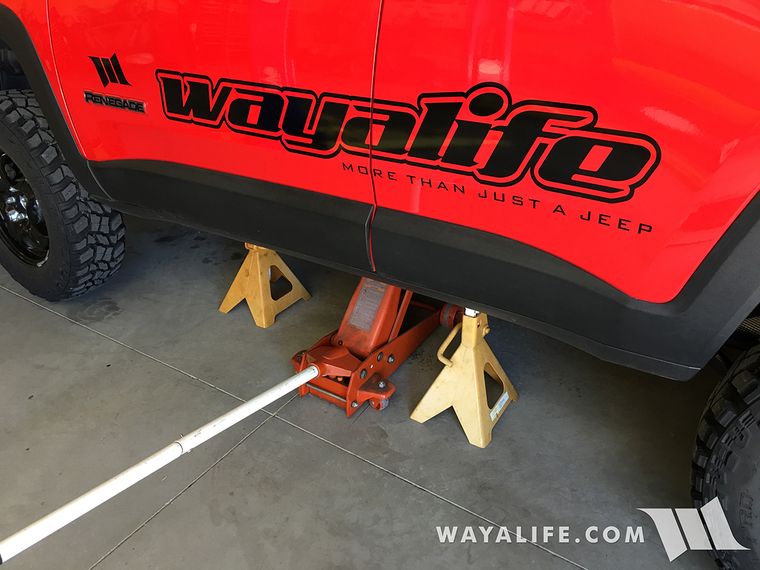
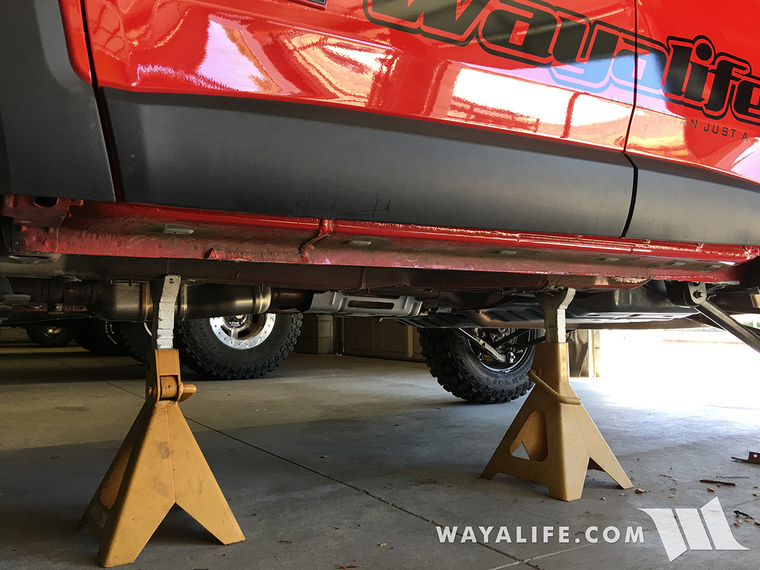
1. Place a floor jack under the driver side frame rail of your Renegade, lift it up and then set it back down on 2 jack stands as shown.
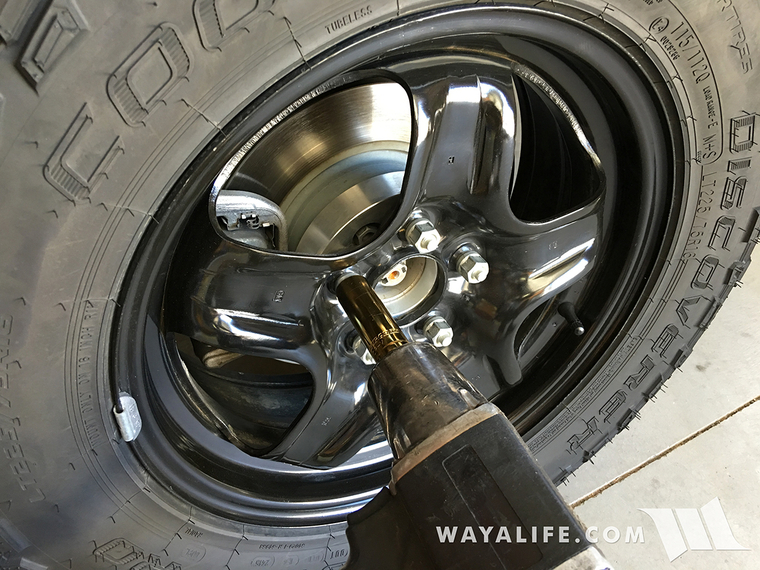
2. Using 19mm socket, remove both driver side wheels and set them aside.
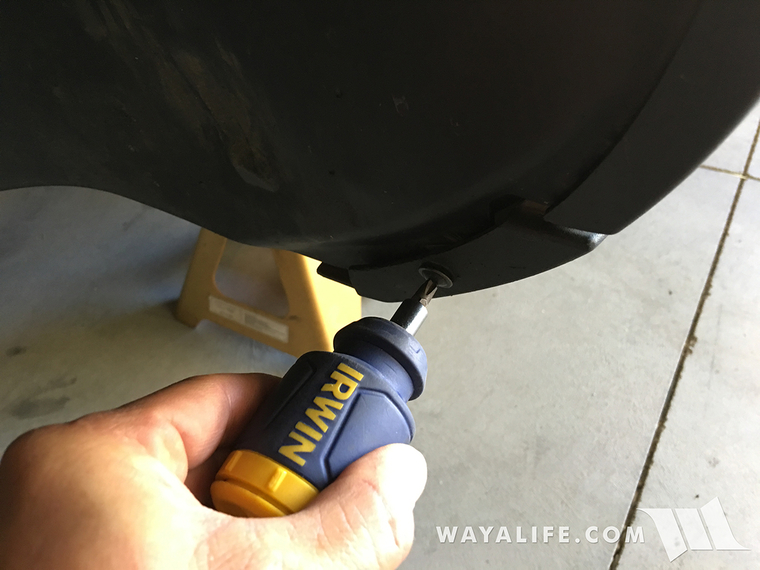
3. Using a phillips screwdriver, remove the screw securing the forward end of the plastic rocker trim to the inner fender liner and body.
4. Again, using a phillips screwdriver, remove the screw securing the rear end of the plastic rocker trim to the inner fender liner and body.
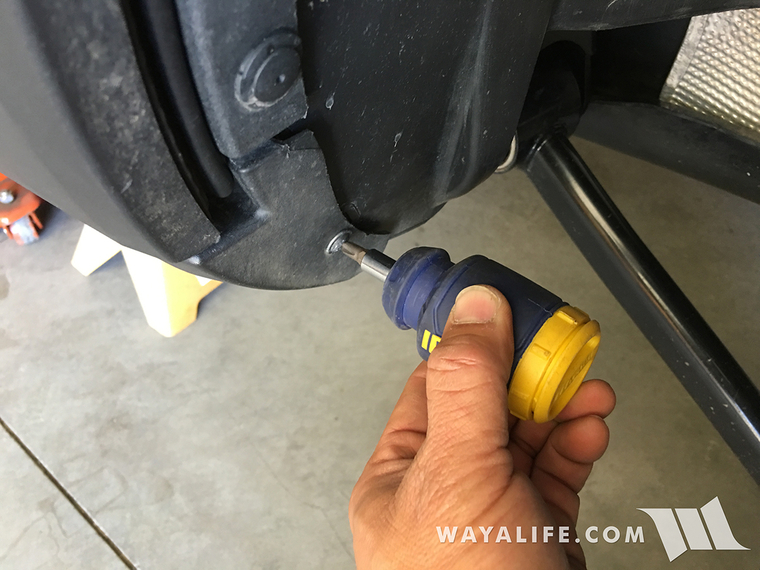
5. Located on the bottom of your Renegade's plastic rocker trim, you will find 6 plastic fasteners securing it to brackets extending from the pinch seam. Use a flathead screw driver to lower the fastener locking pins as shown.
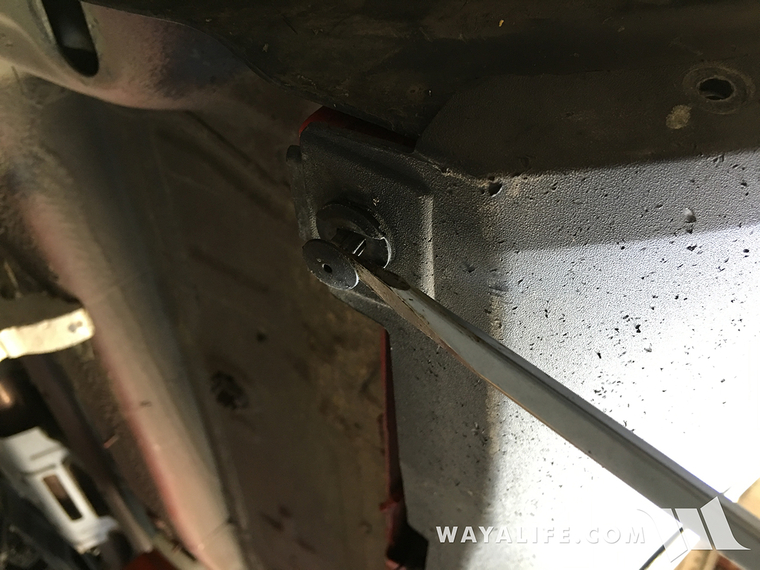
6. Use a flathead screw driver or trim pry tool to remove the fasteners from the plastic rocker trim.
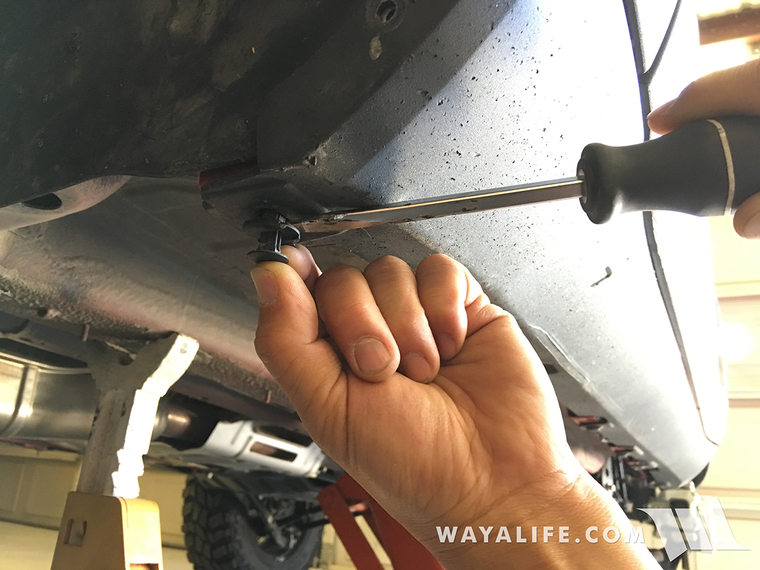
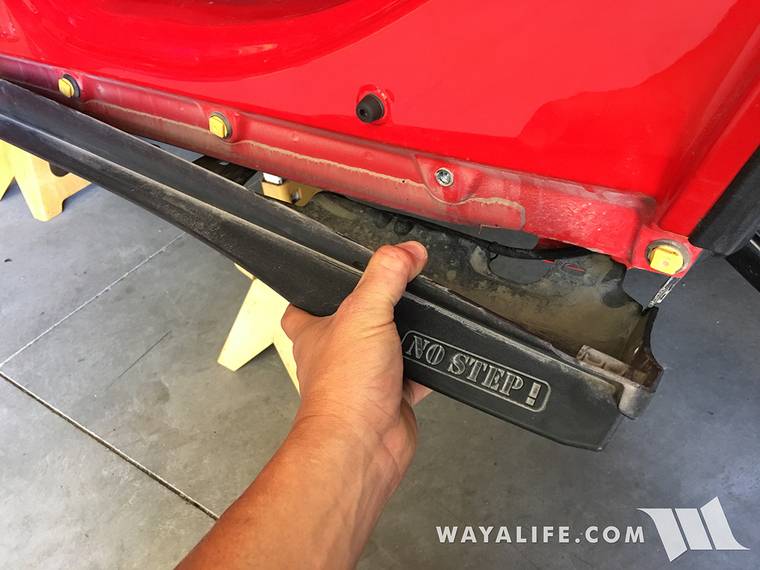
7. There is one bolt securing the plastic rocker trim to body of your Renegade and it is located next to the "NO STEP" warning label that is embossed into it. You will need to open up the rear door to access it and you will need a 5mm allen wrench to remove it.
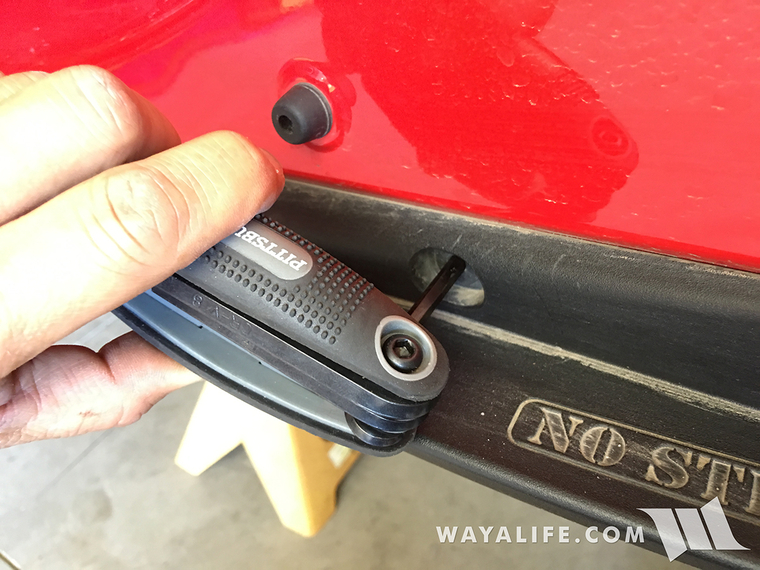
8. Pull the plastic rocker trim down and away from your Renegade's body to separate it from the plastic mounting tabs.
9. There is one additional tab securing the plastic rocker trim to the body of your Renegade and it is hidden behind the plastic fender trim. In order to get to it, you will need to pull the fender trim away from the body.
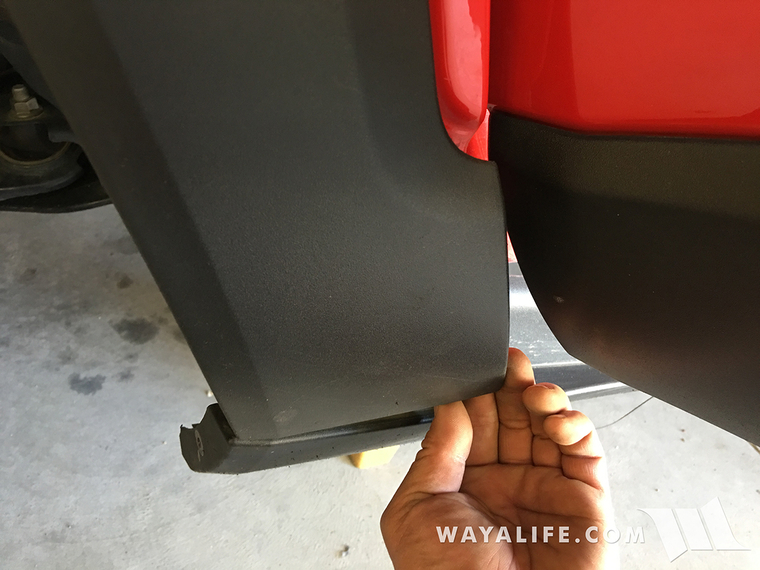
This photo is looking from the front of the trim and in it, you can see a yellow and a white square mounting tabs. The white tab is what is holding your rocker trim in place.
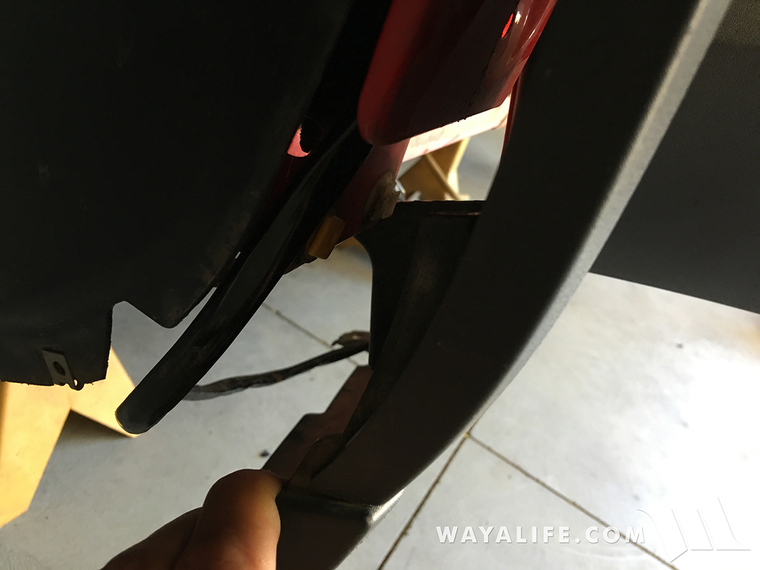
10. With the plastic rocker trim freed from all the plastic mounting tabs, there will be one more plastic tongue connecting it to the fender trim. You will need to wriggle it free of the slot it's in to completely remove the rocker trim.
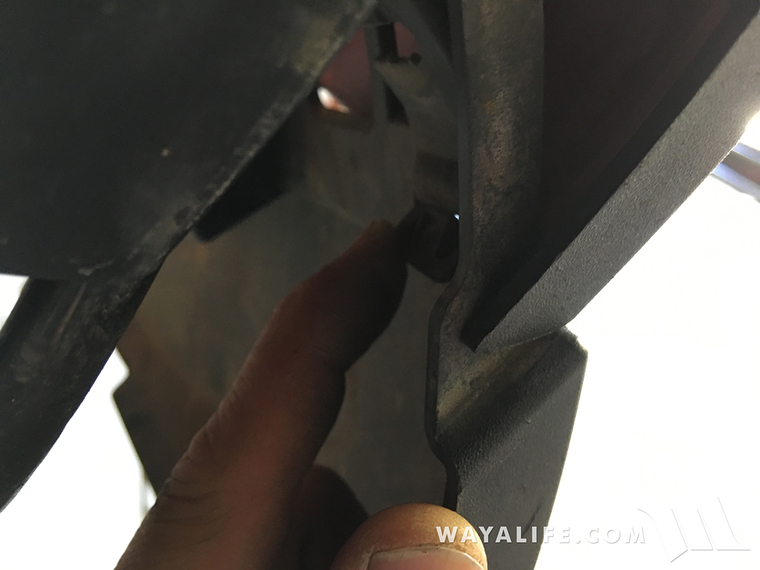
11. If you ended up breaking a couple of the white plastic mounting tabs during the process of separating the fender trim from the body of your Renegade, the Daystar kit does come with a handful of replacement tabs.
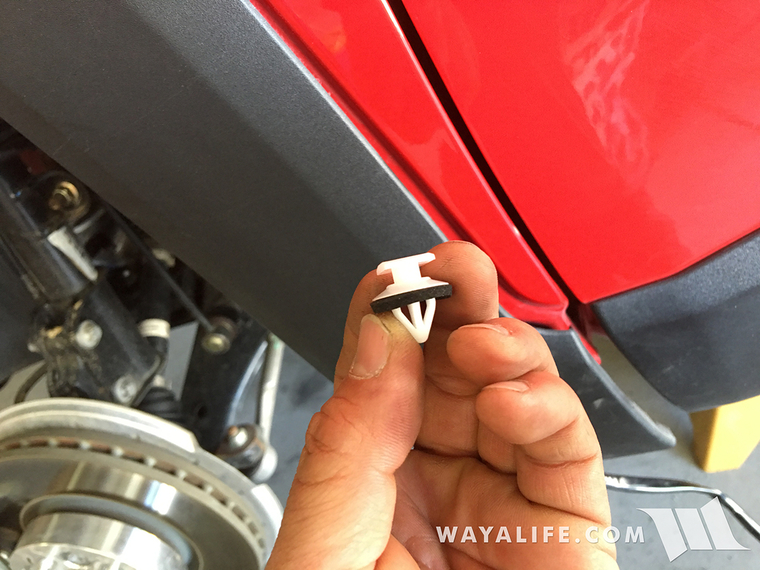
To install them, simply slide the square side into the mounting slots on the fender trim as shown and then push the barbed end into the respective hole on the body until it clicks into place.
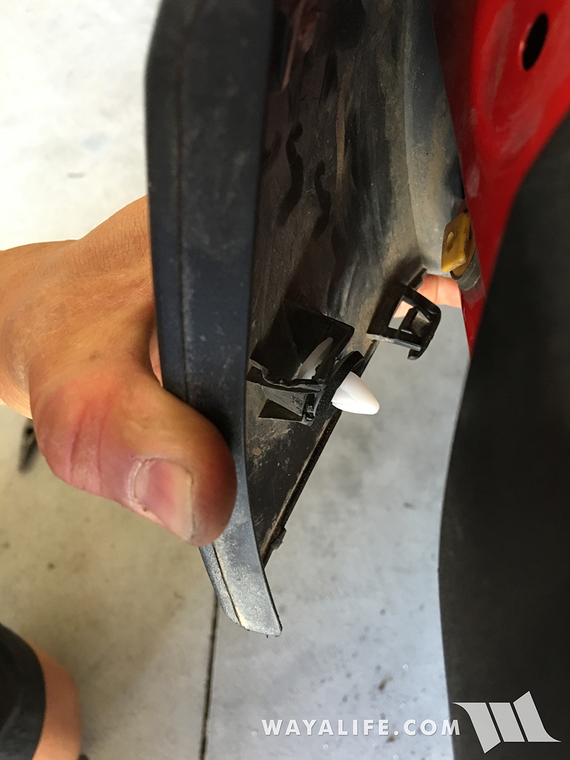
12. Climb under your Renegade and then, using a flat razor, clean up any high spots in the assembly glue located on the pinch seam and rocker. As you can see in this image, I used a gasket scraper for this job.
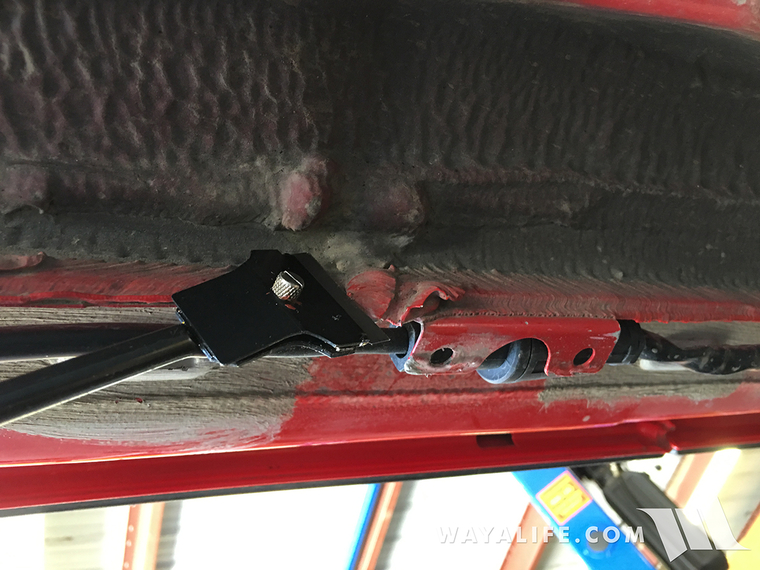
It is important to clean the excessive glue and create a flush surface in order for proper installation of the Daystar Rock Sliders.
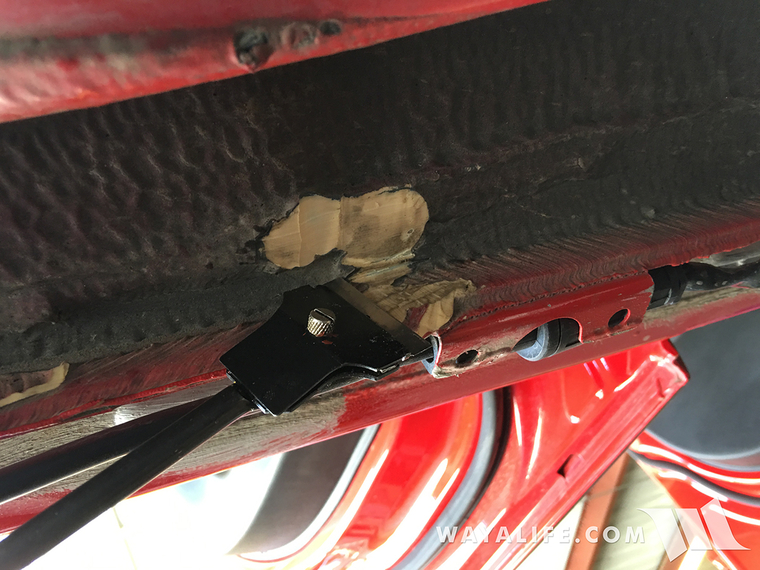
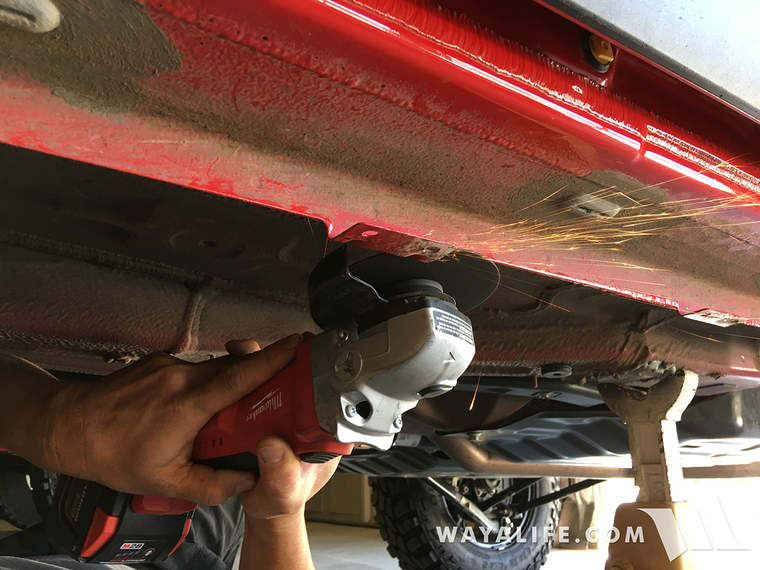
13. Using a die grinder with a cutoff wheel, cut off the 6 rocker trim mounts from the pinch seam as shown.
Here's what your pinch seam should look like once all the mounts have been removed.
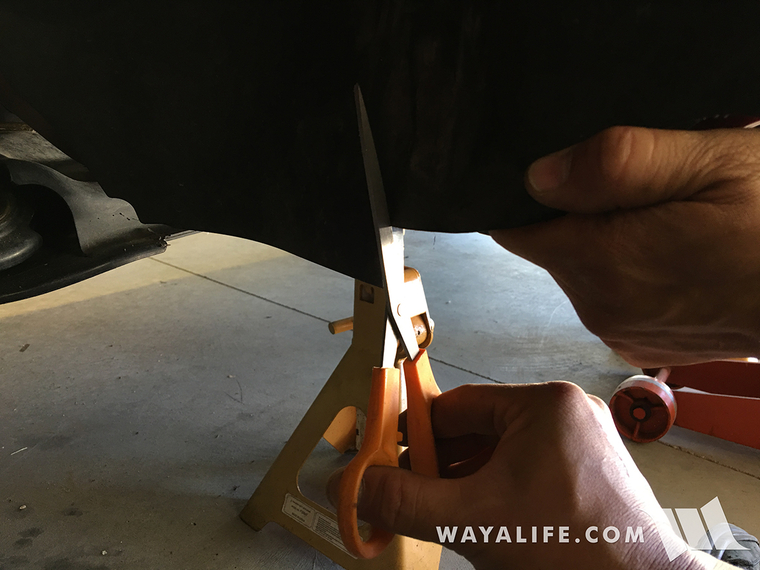
14. Using a pair of scissors, cut off about an inch off the bottom of the plastic fender liner as shown.
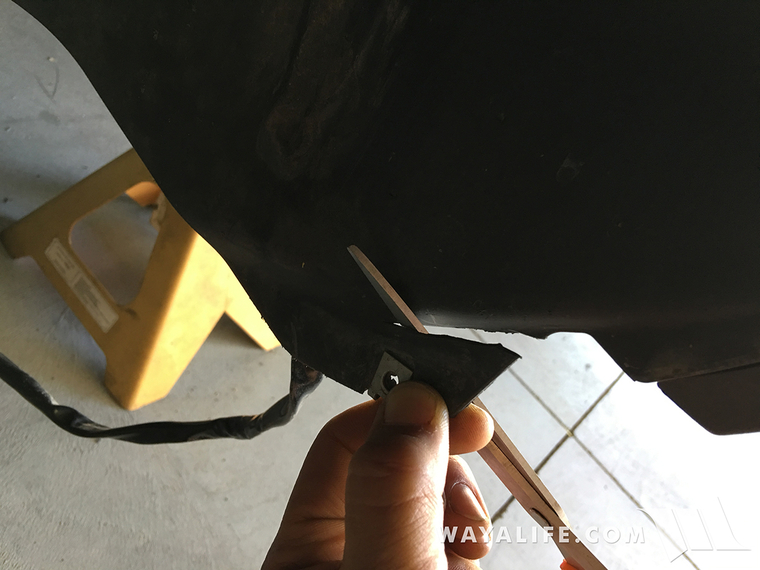
You just need to cut to just past the rectangular pinch seam dimple. Once everything is installed, the remaining fender liner will tuck behind the forward end of the Daystar Rock Slider.
15. Open both driver side doors. Place a small piece of 2x4 on top of a floor jack and then position the driver side Daystar Rock Slider on top of it as shown.
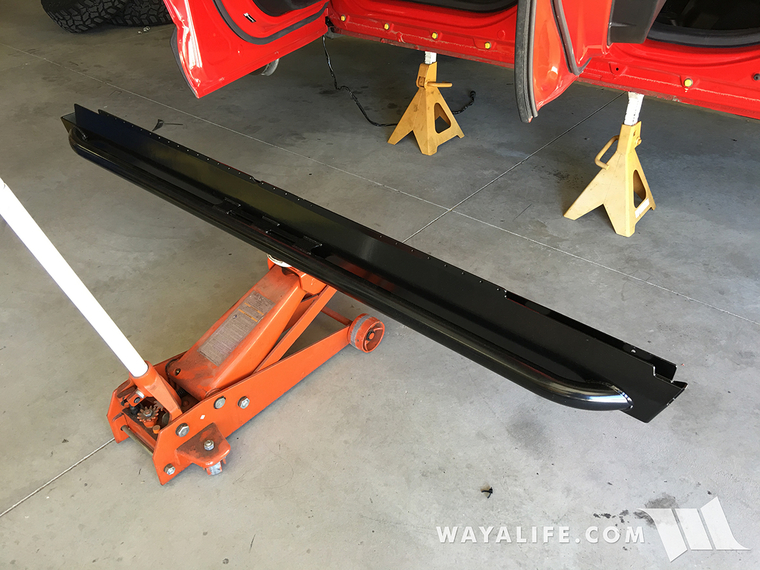
16. Carefully raise the Daystar Rock Slider up until it's sitting flush up against the body of your Renegade. You need to make sure that the pinch seam is sitting inside the Daystar Rock Slider and that the circular cutout on the upper edge is positioned around the round dimple on the body of your Renegade as shown.
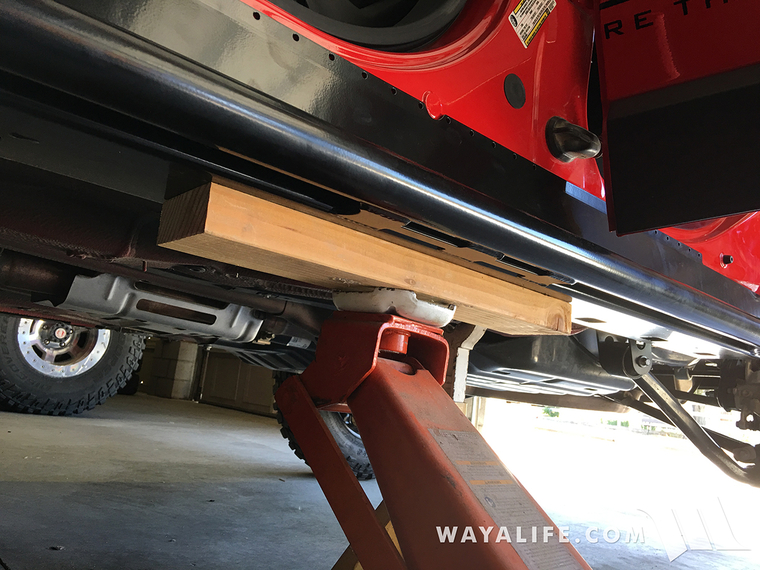
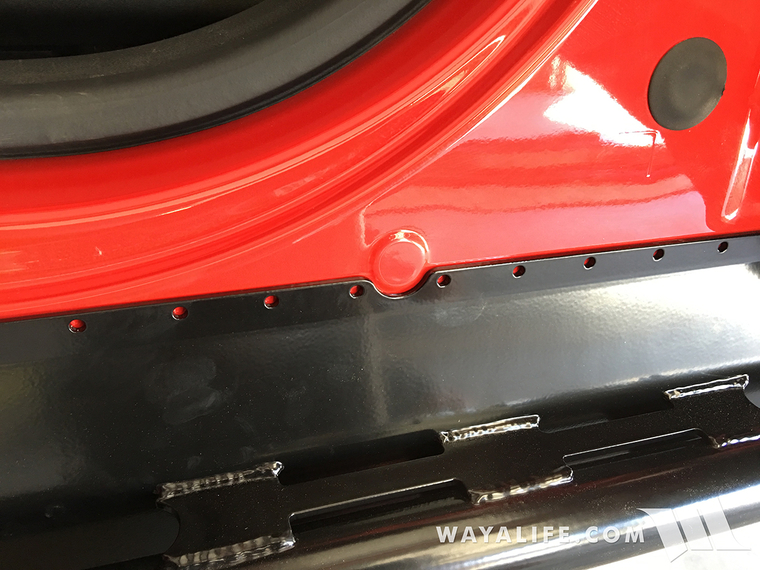
Here is a closer shot of how the circular cutout on the upper edge of the Daystar Rock Slider should be positioned around the round dimple on the body of your Renegade.
17. If it didn't go in on its own, tuck in the front fender liner between the Daystar Rock Slider and pinch seam as shown.
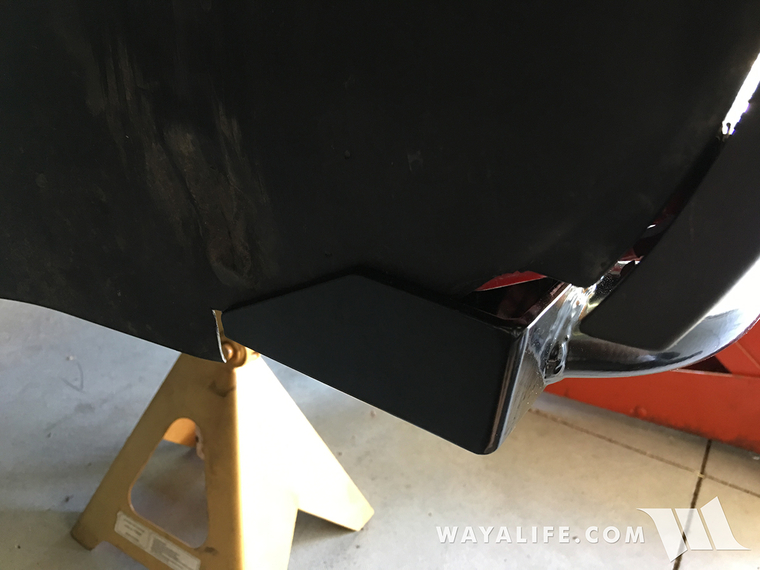
18. Again, if it didn't go in on its own, tuck in the rear fender liner between the Daystar Rock Slider and pinch seam as shown.
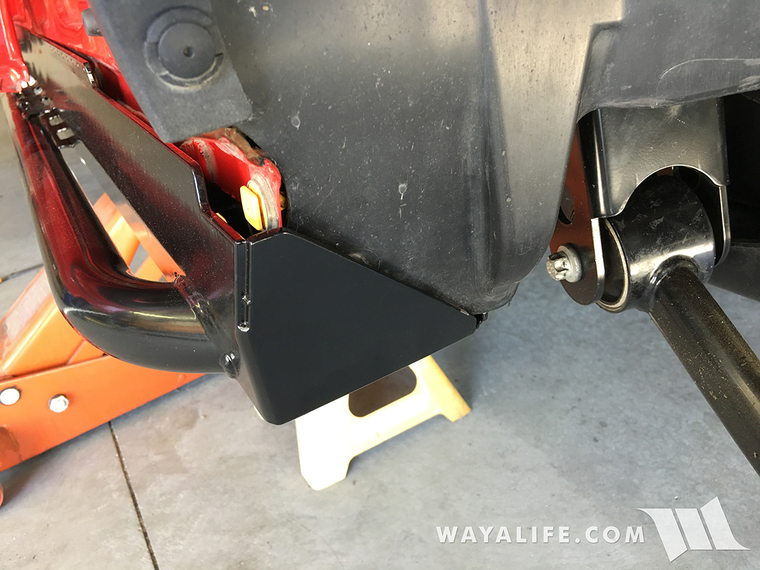
19. Using the Daystar Rock Slider as a template, mark the location of where you will need to drill holes on the inner lip of the pinch seam as shown. Being that space is really tight toward the rear of the Renegade, I ended up taking a wood pencil and breaking off the end of it so that I had something small enough to make a mark with.
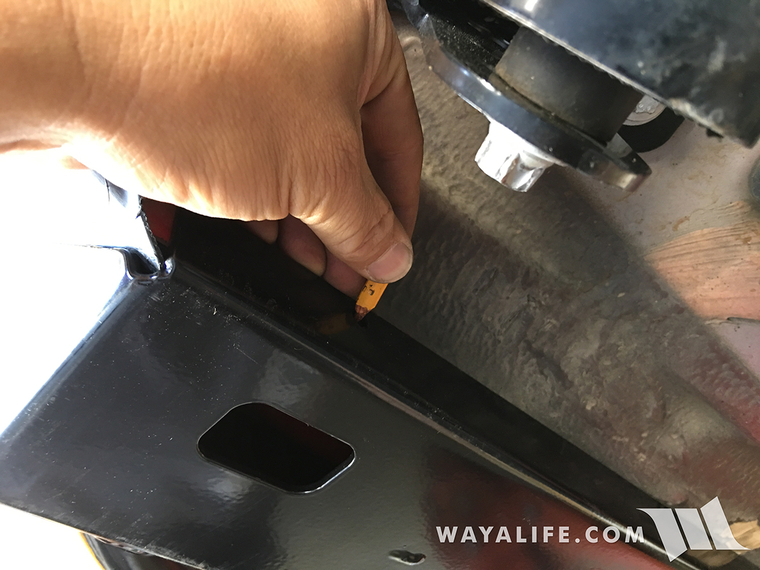
20. With all 5 holes marked off, carefully lower and remove the Daystar Rock Slider out from under your Renegade. Then, use a ruler to measure and help you to determine where to recreate the marks on the outward facing lip of the pinch seam.
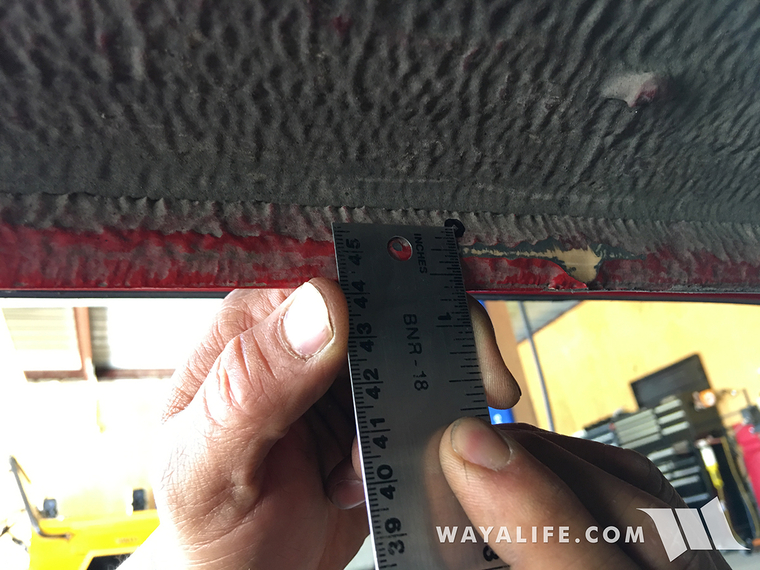
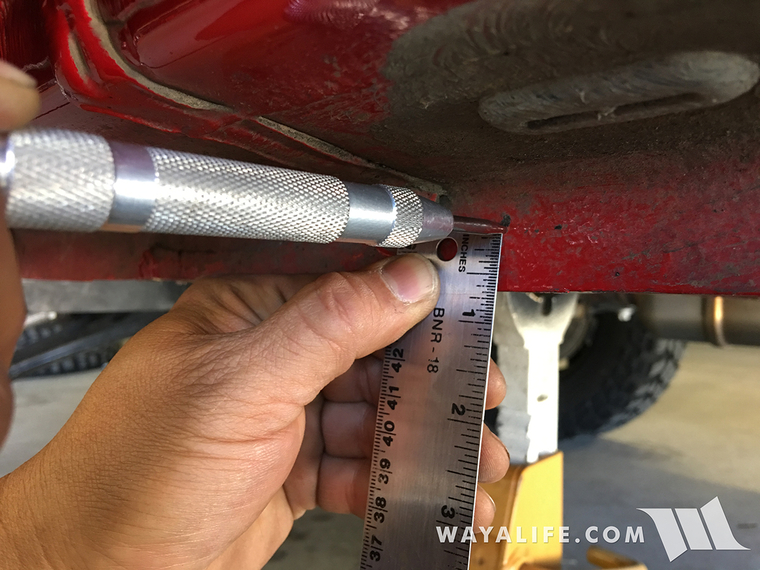
21. Use a center punch to locate the new point on the outward facing lip of the pinch seam.
22. Drilling through the pinch seam can be tough and for a job like this, I prefer to use a unibit or step as you can really lean into the drill and without fear of breaking the drill bit. If you choose to use one, use some tape to mark off the depth needed to achieve a 1/4" hole.
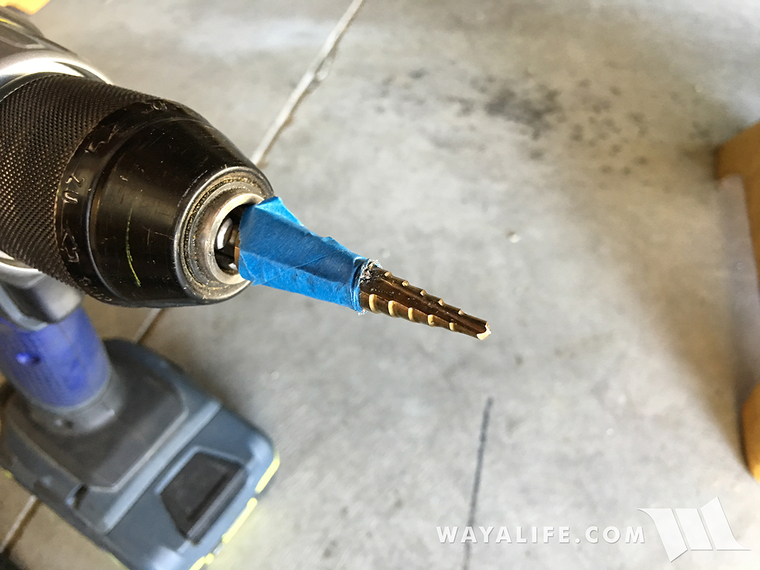
23. Add a drop of cutting oil to the tip of your unibit or drill bit and then proceed to drill out the holes you marked off.
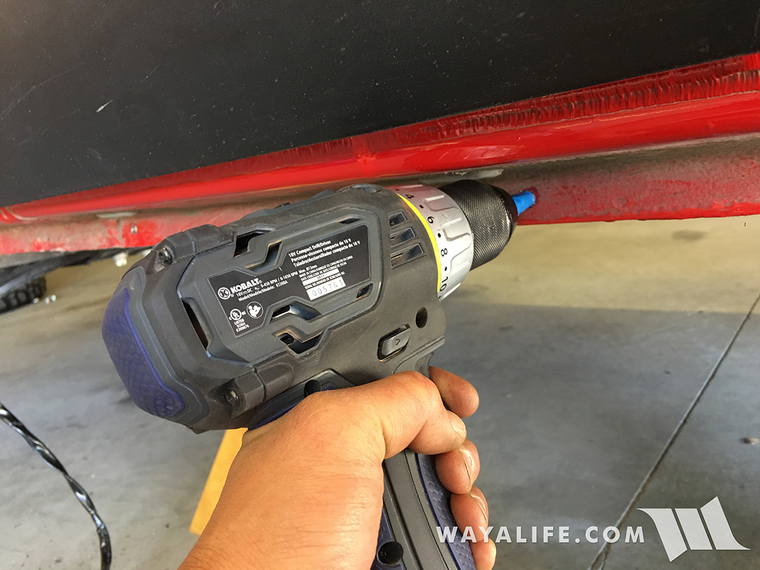
24. Carefully roll your floor jack holding your Daystar Rock Slider under your Renegade, raise it up and position it back to where it was up against the body.
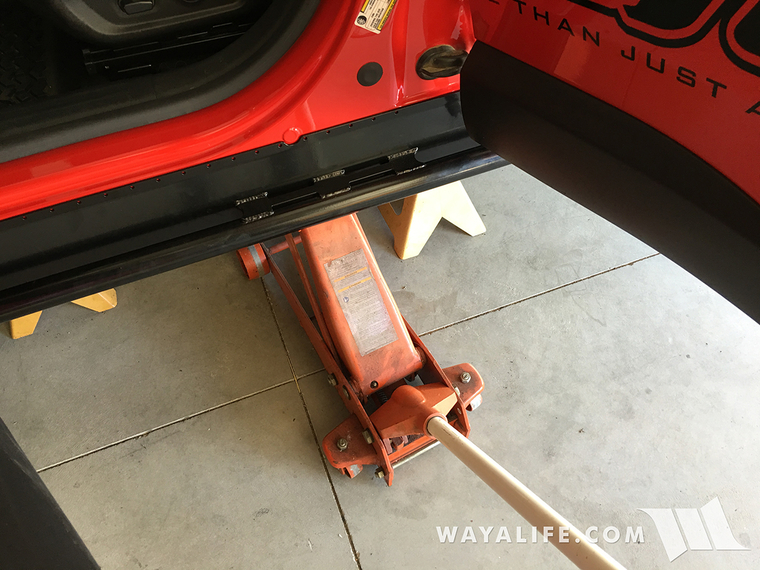
25. Using the bolts, lock nuts and washers provided with the kit, loosely secure the Daystar Rock Slider to the pinch seam on your Renegade.
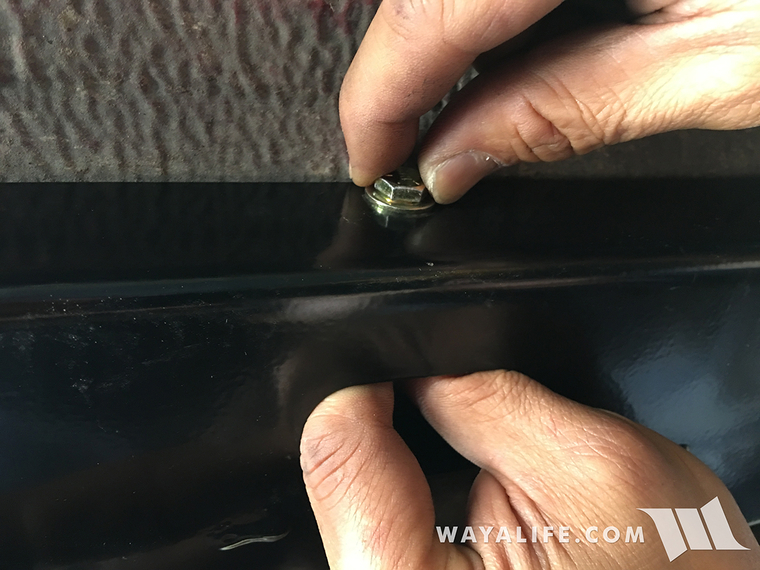
26. With the Daystar Rock Slider being held up by the pinch seam, reposition your floor jack so that it's now lifting up from the edge. This will help to ensure the face of the Daystar Rock Slider is pressing firmly against the body of your Renegade.
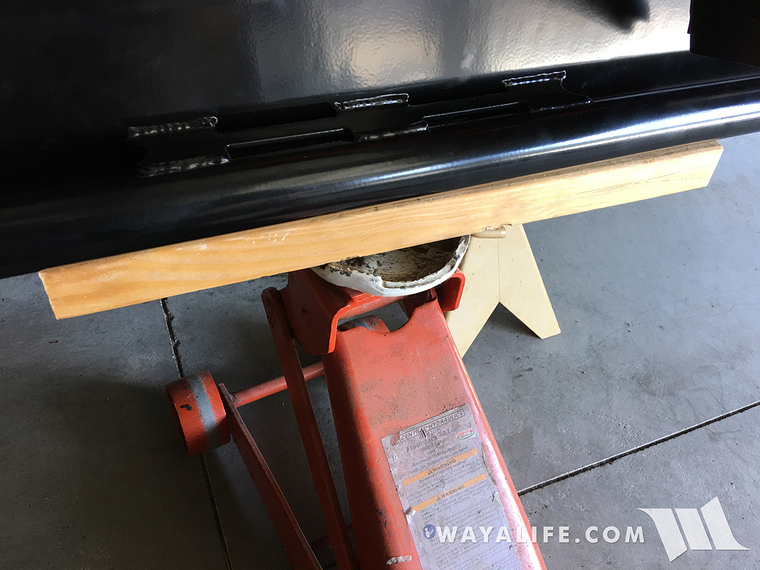
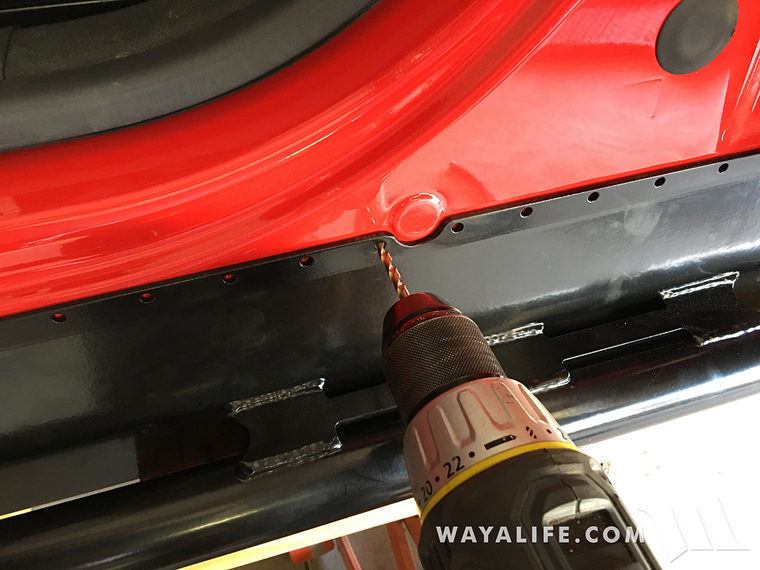
27. Using the Daystar Rock Slider as a guide, drill 3/16" holes into the body of your Renegade. If you do not have a 90° air drill, you will not be able to drill out the 3 holes closest to the front door or the 2 holes closest to the rear door.
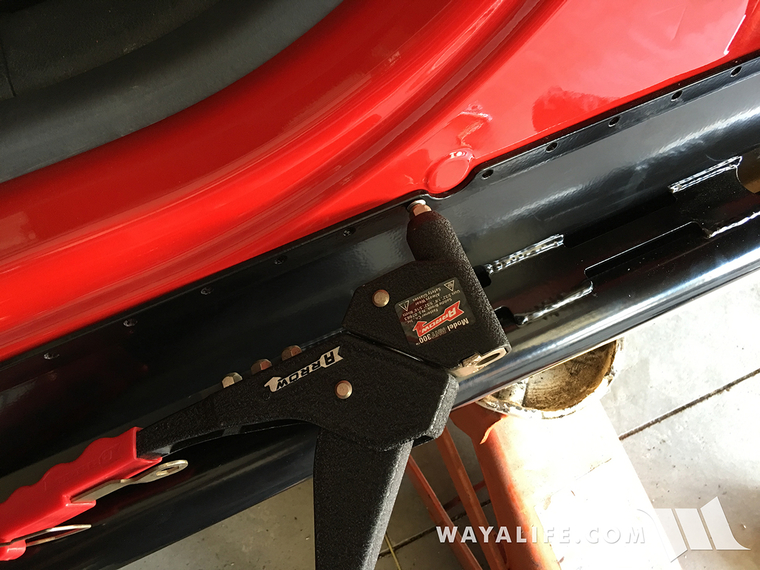
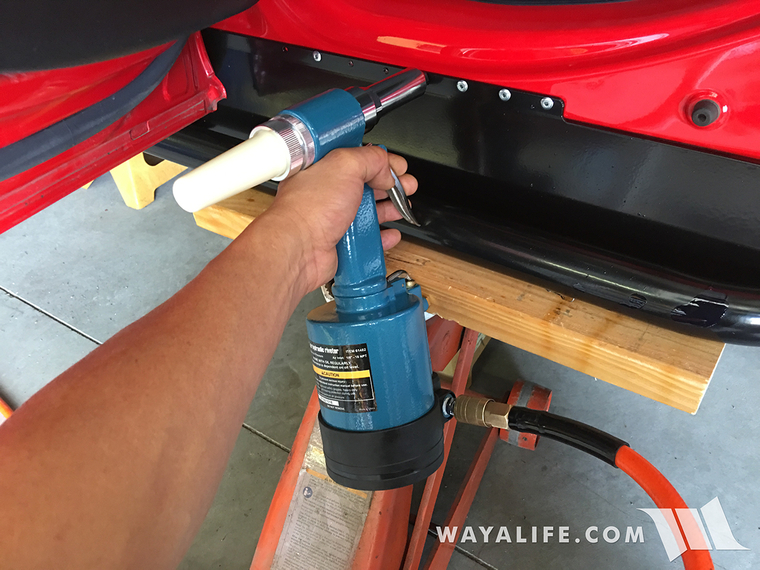
28. With all the holes drilled out and the surrounding area cleaned of metal bits, secure the Daystar Rock Slider to the body of your Renegade using the 3/16" pop rivets provided with the kit. You will need a pop rivet gun for this job.
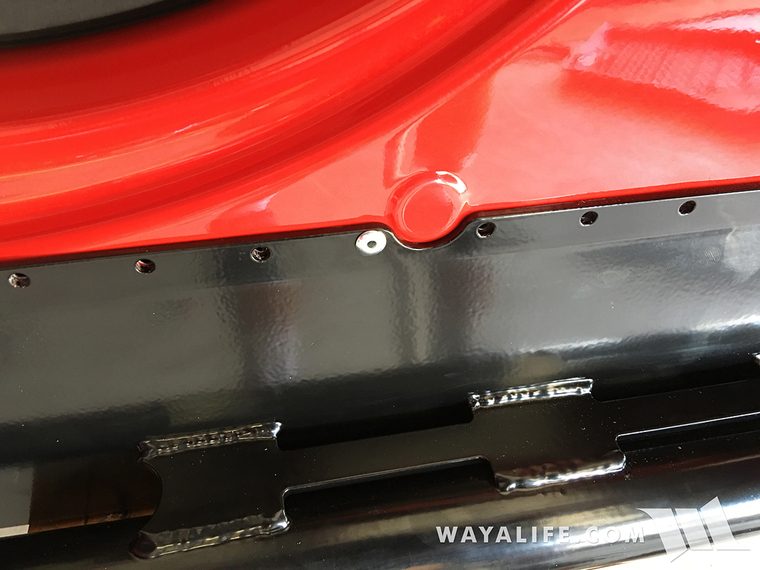
Here's what the rivet looks like installed.
There are a total of 30 rivets you will need to install on both sides of your Renegade and it can be a tough job to do all of them by hand. I would highly recommend you use a pneumatic air actuated rivet gun for this job and you can purchase one from Harbor Freight for about $40.
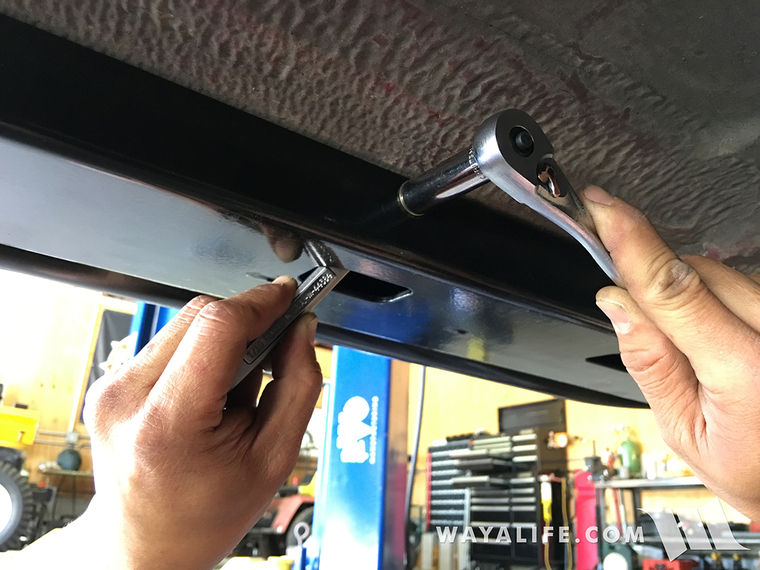
29. Climb back under your Renegade and then, using a 7/16" socket and wrench, secure the Daystar Rock Slider to the pinch seam by tightening up the bolts and nuts you had loosely installed earlier.
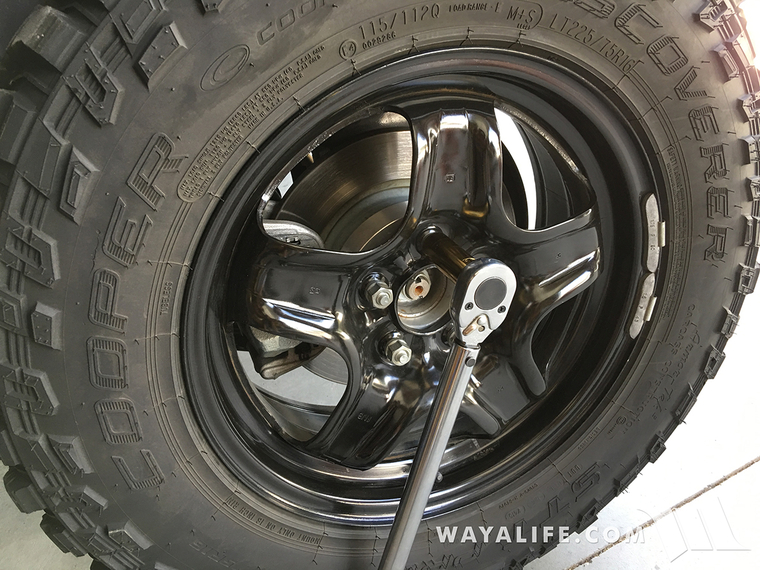
30. Reinstall your wheels, tighten up your lug bolts to 95 ft. lbs. of torque, remove the jack stands from under your Renegade and lower it back onto the ground.
Repeat all 30 steps on the passenger side and your Renegade will be ready to take on some rocks! Assuming you have all the right tools, are familiar with how to use them and have some experience working on a Jeep, you can expect this project to take about 4-5 hours to install. A pneumatic air rivet gun will help out tremendously as will a right angle air drill. Definitely take your time, measure twice and drill once and you'll get a factory like install. Please let me know if you have any questions.
What you will need
• Daystar Jeep Renegade Rock Sliders - KJ50012BK
• 7/16" Socket & Wrench
• 19mm Socket
• 5mm Allen Wrench
• Ratchet
• Torque Wrench
• Grinder w/Cutoff Wheel
• Hand Drill (90° air drill is recommended)
• Unibit or 1/4" Metal Drill Bit
• 3/16" Metal Drill Bit
• Cutting Oil
• Center Punch
• Floor Jack
• (2) Jack Stands
• 2/16" Pop Rivet Gun (Pneumatic air pop rivet gun is recommended)
• Flat Razor
• Short Wood Pencil
• Safety Glasses
• 2x4 Wood
• Scissors
• Ruler
A few shots of what the Daystar Jeep Renegade Rock Sliders look like right out of the box. As you can see, they come powder coated black, are incredibly stout and are designed to wrap around the pinch seam and have blocks within them to help distribute the load caused by hits.
This is what the bottom of them look like.
Instructions
1. Place a floor jack under the driver side frame rail of your Renegade, lift it up and then set it back down on 2 jack stands as shown.
2. Using 19mm socket, remove both driver side wheels and set them aside.
3. Using a phillips screwdriver, remove the screw securing the forward end of the plastic rocker trim to the inner fender liner and body.
4. Again, using a phillips screwdriver, remove the screw securing the rear end of the plastic rocker trim to the inner fender liner and body.
5. Located on the bottom of your Renegade's plastic rocker trim, you will find 6 plastic fasteners securing it to brackets extending from the pinch seam. Use a flathead screw driver to lower the fastener locking pins as shown.
6. Use a flathead screw driver or trim pry tool to remove the fasteners from the plastic rocker trim.
7. There is one bolt securing the plastic rocker trim to body of your Renegade and it is located next to the "NO STEP" warning label that is embossed into it. You will need to open up the rear door to access it and you will need a 5mm allen wrench to remove it.
8. Pull the plastic rocker trim down and away from your Renegade's body to separate it from the plastic mounting tabs.
9. There is one additional tab securing the plastic rocker trim to the body of your Renegade and it is hidden behind the plastic fender trim. In order to get to it, you will need to pull the fender trim away from the body.
This photo is looking from the front of the trim and in it, you can see a yellow and a white square mounting tabs. The white tab is what is holding your rocker trim in place.
10. With the plastic rocker trim freed from all the plastic mounting tabs, there will be one more plastic tongue connecting it to the fender trim. You will need to wriggle it free of the slot it's in to completely remove the rocker trim.
11. If you ended up breaking a couple of the white plastic mounting tabs during the process of separating the fender trim from the body of your Renegade, the Daystar kit does come with a handful of replacement tabs.
To install them, simply slide the square side into the mounting slots on the fender trim as shown and then push the barbed end into the respective hole on the body until it clicks into place.
12. Climb under your Renegade and then, using a flat razor, clean up any high spots in the assembly glue located on the pinch seam and rocker. As you can see in this image, I used a gasket scraper for this job.
It is important to clean the excessive glue and create a flush surface in order for proper installation of the Daystar Rock Sliders.
13. Using a die grinder with a cutoff wheel, cut off the 6 rocker trim mounts from the pinch seam as shown.
Here's what your pinch seam should look like once all the mounts have been removed.
14. Using a pair of scissors, cut off about an inch off the bottom of the plastic fender liner as shown.
You just need to cut to just past the rectangular pinch seam dimple. Once everything is installed, the remaining fender liner will tuck behind the forward end of the Daystar Rock Slider.
15. Open both driver side doors. Place a small piece of 2x4 on top of a floor jack and then position the driver side Daystar Rock Slider on top of it as shown.
16. Carefully raise the Daystar Rock Slider up until it's sitting flush up against the body of your Renegade. You need to make sure that the pinch seam is sitting inside the Daystar Rock Slider and that the circular cutout on the upper edge is positioned around the round dimple on the body of your Renegade as shown.
Here is a closer shot of how the circular cutout on the upper edge of the Daystar Rock Slider should be positioned around the round dimple on the body of your Renegade.
17. If it didn't go in on its own, tuck in the front fender liner between the Daystar Rock Slider and pinch seam as shown.
18. Again, if it didn't go in on its own, tuck in the rear fender liner between the Daystar Rock Slider and pinch seam as shown.
19. Using the Daystar Rock Slider as a template, mark the location of where you will need to drill holes on the inner lip of the pinch seam as shown. Being that space is really tight toward the rear of the Renegade, I ended up taking a wood pencil and breaking off the end of it so that I had something small enough to make a mark with.
20. With all 5 holes marked off, carefully lower and remove the Daystar Rock Slider out from under your Renegade. Then, use a ruler to measure and help you to determine where to recreate the marks on the outward facing lip of the pinch seam.
21. Use a center punch to locate the new point on the outward facing lip of the pinch seam.
22. Drilling through the pinch seam can be tough and for a job like this, I prefer to use a unibit or step as you can really lean into the drill and without fear of breaking the drill bit. If you choose to use one, use some tape to mark off the depth needed to achieve a 1/4" hole.
23. Add a drop of cutting oil to the tip of your unibit or drill bit and then proceed to drill out the holes you marked off.
24. Carefully roll your floor jack holding your Daystar Rock Slider under your Renegade, raise it up and position it back to where it was up against the body.
25. Using the bolts, lock nuts and washers provided with the kit, loosely secure the Daystar Rock Slider to the pinch seam on your Renegade.
26. With the Daystar Rock Slider being held up by the pinch seam, reposition your floor jack so that it's now lifting up from the edge. This will help to ensure the face of the Daystar Rock Slider is pressing firmly against the body of your Renegade.
27. Using the Daystar Rock Slider as a guide, drill 3/16" holes into the body of your Renegade. If you do not have a 90° air drill, you will not be able to drill out the 3 holes closest to the front door or the 2 holes closest to the rear door.
28. With all the holes drilled out and the surrounding area cleaned of metal bits, secure the Daystar Rock Slider to the body of your Renegade using the 3/16" pop rivets provided with the kit. You will need a pop rivet gun for this job.
Here's what the rivet looks like installed.
There are a total of 30 rivets you will need to install on both sides of your Renegade and it can be a tough job to do all of them by hand. I would highly recommend you use a pneumatic air actuated rivet gun for this job and you can purchase one from Harbor Freight for about $40.
29. Climb back under your Renegade and then, using a 7/16" socket and wrench, secure the Daystar Rock Slider to the pinch seam by tightening up the bolts and nuts you had loosely installed earlier.
30. Reinstall your wheels, tighten up your lug bolts to 95 ft. lbs. of torque, remove the jack stands from under your Renegade and lower it back onto the ground.
Repeat all 30 steps on the passenger side and your Renegade will be ready to take on some rocks! Assuming you have all the right tools, are familiar with how to use them and have some experience working on a Jeep, you can expect this project to take about 4-5 hours to install. A pneumatic air rivet gun will help out tremendously as will a right angle air drill. Definitely take your time, measure twice and drill once and you'll get a factory like install. Please let me know if you have any questions.
