You are using an out of date browser. It may not display this or other websites correctly.
You should upgrade or use an alternative browser.
You should upgrade or use an alternative browser.
What was done to your rig this week?
- Thread starter 10frank9
- Start date


Andy5160
Hooked
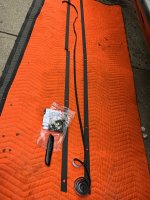
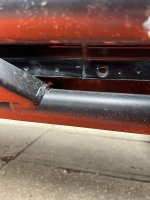
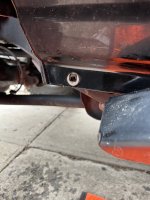
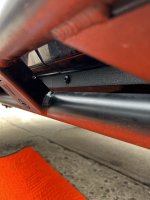
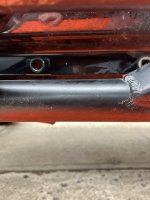
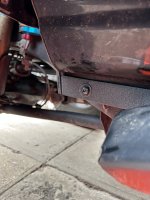
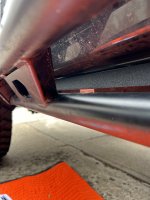
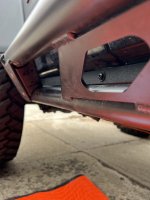
Not that it was necessary at all more like cosmetic upgrade. After removing factory rubicon sliders and installing EVO once the seem did not look as clean as I wanted it to look so I decided to go with Hammerhead trim kit which I think gives a more finished look. it us pricy for what it does,oh well.
Some before and after pictures.
Some before and after pictures.
Attachments
-
 CEC6BE91-2562-4FB7-9C10-1924E3679550.jpeg246.9 KB · Views: 22
 -
 9BF2790B-AEA3-45F3-B578-BAD775EDA8D1.jpeg140.7 KB · Views: 22
 -
 B8566F4D-A99A-4326-ACF9-9EFCF93ACB76.jpeg151.6 KB · Views: 22
 -
 E6945991-33B3-44AC-BCBF-292CCA545E22.jpeg113.1 KB · Views: 23
 -
 D0F8B997-14C6-45BA-B2ED-4826268ABCC1.jpeg144.9 KB · Views: 24
 -
 A050FB76-9FA3-442E-BF9B-C09658F94307.jpeg151.5 KB · Views: 25
 -
 B3E34A4A-B62C-48F1-8856-61137BCDEFBE.jpeg138.8 KB · Views: 24
 -
 86BC42BF-842D-45C1-88E2-E58EA14D70D1.jpeg175.6 KB · Views: 23
 -
 2E8E944B-2846-4C60-8419-BD29FF7A7811.jpeg113.8 KB · Views: 23
Last edited:
WJCO
Meme King
Looks good. Do they make a gladiator version? How much?Not that it was necessary at all more like cosmetic upgrade. After removing factory rubicon sliders and installing EVO once the seem did not look as clean as I wanted it to look so I decided to go with Hammerhead trim kit which I think gives a more finished look. it us pricy for what it dies, oh well.
Some before and after pictures.
Kenny-g
Caught the Bug
That’s the RR Venator bumper, right? How you like it? I had a line on a stupid good deal for one but the dude backed out on me

onlyone
Active Member
No it’s the Arcus bumper. It’s very simple, and follows the lines of the JL/JT quite well. It’s also really easy to install. I’ve not been the biggest fan of RR but they hit this one out of the park.That’s the RR Venator bumper, right? How you like it? I had a line on a stupid good deal for one but the dude backed out on me

jeeeep
Hooked
Bluey could use a set of LOD rock rails and an AEV 2.5" JLU DualSport RT similar to what I have in my garage waiting to be sold ....View attachment 373326
bought a Tuscadero Willys Sport for the wifey.
Edit: here’s the details - 2.0T, hard top, manual windows and locks (thus the Sport aspect of it). Really love and hate it cause it’s what I want Bluey to be (more or less) but it’s fuckin’ pink lmao she absolutely loves it though so I’m stoked about it too. Now I’m dying to lift Bluey, but a front bumper on it, and get KM2s (or steal hers lmao)
")
jeeeep
Hooked
installed knock-off factory steel bumper (you get what you pay for), mopar winch plate and Warn 10S.
1. Dear Warn, thank you for making shooting myself in the nuts sound better than dealing with that fucking key lock lol
after about 30 minutes my brain started working, put some RU-Gylde on the end of the rope and twisted the helper wire around a socket extension for leverage, took less than a minute to get it in place.
2. mopar winch plate is thick, bolted it all up to make sure it was level then had to remove the bumper and front winch plate mounts to get the winch in. It's a tight fit! getting the inner 18mm nuts on the hook bolts and tightened was a PIA
not too worried about the winch getting stolen, it's in tight and too much shit to take off to get to it.
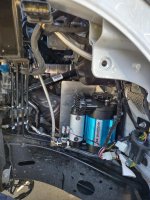
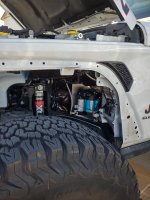
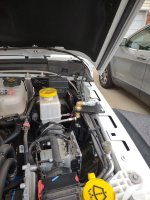
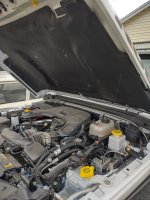
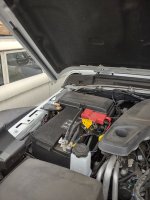
Added on-board-air. I used pretty much the same system that WayAlife used on their Gladiator. I used the ARB compressor and the WayAlife ACM. I really liked the idea of mounting the compressor under the hood. For the air chuck placement, I made a couple of brackets that mount to the fenders under the hood and put an air chuck on both sides to make things a little easier.
Attachments
-AINOKEA-
Hooked
What license plate mount did you use? I like that way better than my fold up thing I have now.Replaced LOD Destroyer bumper with the EVO Quarter Pounder. Really like the LOD bumper but was looking to get more air to the radiator. Really happy with how it turned out. Can't believe how much more clearance the EVO bumper has.
Before:
View attachment 373196
After:
View attachment 373197
Awesome!Added on-board-air. I used pretty much the same system that WayAlife used on their Gladiator. I used the ARB compressor and the WayAlife ACM. I really liked the idea of mounting the compressor under the hood. For the air chuck placement, I made a couple of brackets that mount to the fenders under the hood and put an air chuck on both sides to make things a little easier.
Mile High JK
Member
What license plate mount did you use? I like that way better than my fold up thing I have now.
Lol. I just have it sandwiched between the fairlead and the bumper. I couldn't find a mount for it that I liked. We'll see how it holds up...

TrailHunter
Hooked
Steering was feeling a bit loose... (and I'm OCD with steering)..... so I swapped in new Drag Link Rod Ends & Tie Rod Ends. Feels much better.


WJCO
Meme King
Looking goodFront axle seals, c gussets, ball joints, shocks, drag link flip kit. It took over a week with waiting for parts but it's done now.
View attachment 373817View attachment 373816View attachment 373815View attachment 373814View attachment 373813View attachment 373812

