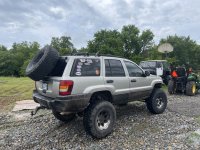
What was done to your rig this week?

OverlanderJK

Resident Smartass
Yea this is really discouraging. Getting a little pissed off at this whole thing. Looking around at the work that was done ( High clearance long arm install) I have already found front lower control arm bolt missing (axle side. 250 mile drive home could have gone really bad). Day before yesterday a CEL pops up P2098 catalyst fuel trim (Cat had to be modified during install). This pinion angle and being left with 1/2" of travel on rear bumps.
Who did the work?
 

wjtstudios

Hooked
Yea this is really discouraging. Getting a little pissed off at this whole thing. Looking around at the work that was done ( High clearance long arm install) I have already found front lower control arm bolt missing (axle side. 250 mile drive home could have gone really bad). Day before yesterday a CEL pops up P2098 catalyst fuel trim (Cat had to be modified during install). This pinion angle and being left with 1/2" of travel on rear bumps.
Yeah, that’s all no good. Was there any drive line vibrations when you brought it gone?
 

Ahre

New member
gun rack

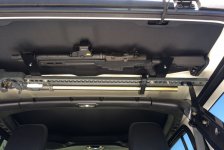
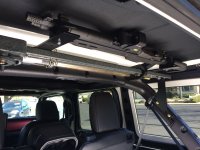
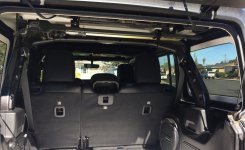
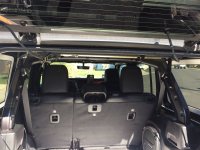
I just installed an overhead gun rack. It's perfect for the hunting season and pretty happy how it fits. I'm an avid fan of reviews https://sandburrgunranch.com/vehicle-gun-racks/. Anyone here also has a gun rack installed?
I keep my rifle racked up close to the ceiling above the cargo area on a couple brackets mounted to my Hi-Lift Standard Bar with wing nuts and carriage bolts. The rubber clamps for holding the rifle are bolted to the two Brackets. The rifle is virtually impossible to see from outside the Jeep, even with the tail gate wide open. The last picture is standing behind the Jeep at eye level... Take care DonJohn, -Paul
 

Attachments

  • HiLiftGunRack1.jpg
    HiLiftGunRack1.jpg
    154.3 KB · Views: 27
  • HiLiftGunRack2.jpg
    HiLiftGunRack2.jpg
    191.6 KB · Views: 27
  • HiLiftGunRack6.jpg
    HiLiftGunRack6.jpg
    154.3 KB · Views: 27
  • HiLiftGunRack7.jpg
    HiLiftGunRack7.jpg
    203.3 KB · Views: 25
Last edited:

Seahawkfan

Hooked
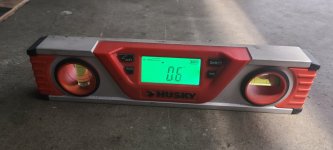
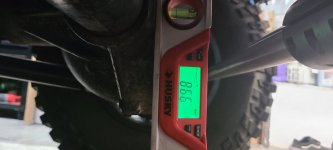
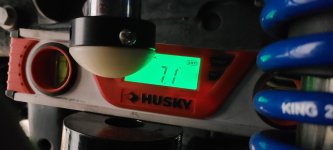
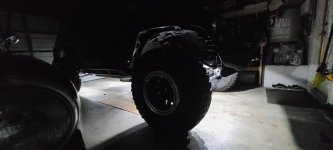
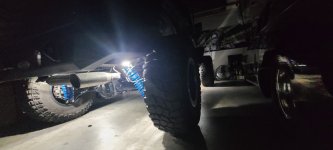
Ran across my digital torpedo today so I thought I would ask again. And ask some of you smart guys how do I read this. First picture is .06 is garage floor. Second is 86.6 hanging vertical on the round flat spot on the axle. Third picture 7.1 is on top of bump extension on the spring perch. (not sure if good location)
20210709_203142.jpg
20210709_203217.jpg
20210709_203908.jpg
 

Seahawkfan

Hooked
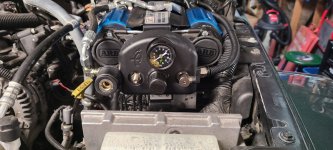
Installed the Air Up/Down system the other day and finally got around to testing it out today.
First had to repair the passenger side section of line that got into the exhaust manifold. I got lazy on install and didn't double check it.
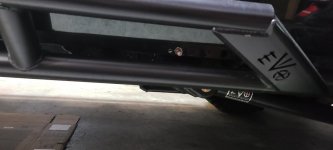
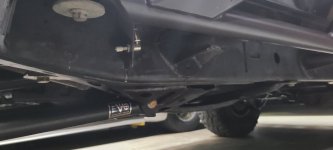
Pretty simple install. All pre-cut lines just figure out which go where. I laid it in the driveway and loosely put it together, then pulled it under the Jeep.
Route it and secure it all. Then find a safe and easy to get to location for the shrader valves, Drill four 5/16 holes.
Then tested.
Hook your whips to each tire. Had a little trouble getting the quick connect fittings to seal up on both the shraders and the valve stems. Can't just spin the end of the fitting you have to spin the the hose with it. I think I'm still a little concerned about being able to hear if they are not on properly while on the side of the highway or trail head.
Being that all the air is being released through the valve stems with valves still in airing down from 28psi to 12 psi still took about 10 minutes.
I forgot to time it.
Air up from 12 psi to 28 psi took 10 minutes. One plus was the extra valve stem on the Machetes gave me a place to check them as they were filling. They pretty much filled equally. Maybe 1/2 psi difference while checking.
20210709_204437.jpg

20210709_204357.jpg
20210709_204348.jpg
 

Jsouder53

Hooked
Installed the Air Up/Down system the other day and finally got around to testing it out today.
First had to repair the passenger side section of line that got into the exhaust manifold. I got lazy on install and didn't double check it.
Pretty simple install. All pre-cut lines just figure out which go where. I laid it in the driveway and loosely put it together, then pulled it under the Jeep.
Route it and secure it all. Then find a safe and easy to get to location for the shrader valves, Drill four 5/16 holes.
Then tested.
Hook your whips to each tire. Had a little trouble getting the quick connect fittings to seal up on both the shraders and the valve stems. Can't just spin the end of the fitting you have to spin the the hose with it. I think I'm still a little concerned about being able to hear if they are not on properly while on the side of the highway or trail head.
Being that all the air is being released through the valve stems with valves still in airing down from 28psi to 12 psi still took about 10 minutes.
I forgot to time it.
Air up from 12 psi to 28 psi took 10 minutes. One plus was the extra valve stem on the Machetes gave me a place to check them as they were filling. They pretty much filled equally. Maybe 1/2 psi difference while checking.
View attachment 364924

View attachment 364925
View attachment 364926

nice upgrade! I bet that’s convenient!
 

USMMA11NC

Caught the Bug
Ran across my digital torpedo today so I thought I would ask again. And ask some of you smart guys how do I read this. First picture is .06 is garage floor. Second is 86.6 hanging vertical on the round flat spot on the axle. Third picture 7.1 is on top of bump extension on the spring perch. (not sure if good location)
View attachment 364921
View attachment 364922
View attachment 364923
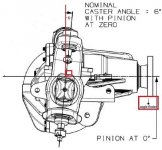
So assuming the slope of the garage floor (0.6) is in the same direction fore/aft on your axle then the reading off your bump stop shows that you’re sitting at roughly 6.5deg castor which yields a -0.5deg pinion angle (Assuming x axis is 0).
IIRC the recommended castor angle should be approx 4.5-5 deg castor (your indicator should read between 5.1-5.7deg).
 

Attachments

  • 66E86EB6-298C-4FF5-A048-CD315C69DA53.jpeg
    66E86EB6-298C-4FF5-A048-CD315C69DA53.jpeg
    49 KB · Views: 5

WJCO

Meme King
Ran across my digital torpedo today so I thought I would ask again. And ask some of you smart guys how do I read this. First picture is .06 is garage floor. Second is 86.6 hanging vertical on the round flat spot on the axle. Third picture 7.1 is on top of bump extension on the spring perch. (not sure if good location)
View attachment 364921
View attachment 364922
View attachment 364923
I don't think the bump stop pad sits at the same angle as the imaginary ball joint line. The ball joint line is where the caster angle is.
 

USMMA11NC

Caught the Bug
I don't think the bump stop pad sits at the same angle as the imaginary ball joint line. The ball joint line is where the caster angle is.
Good catch. You’re right, the measurement needs to be running fore-aft on the ball joints.
 

Seahawkfan

Hooked
So assuming the slope of the garage floor (0.6) is in the same direction fore/aft on your axle then the reading off your bump stop shows that you’re sitting at roughly 6.5deg castor which yields a -0.5deg pinion angle (Assuming x axis is 0).
IIRC the recommended castor angle should be approx 4.5-5 deg castor (your indicator should read between 5.1-5.7deg).
I don't think the bump stop pad sits at the same angle as the imaginary ball joint line. The ball joint line is where the caster angle is.
Would I be correct in saying 90-86.6 = 3.4 caster? If so how I would figure in the .06 garage floor?
 

WJCO

Meme King
Would I be correct in saying 90-86.6 = 3.4 caster? If so how I would figure in the .06 garage floor?
If you can get the angle finder on your upper Ball joint, get a reading there, and then that number minus your floor angle is your caster. Is your axle OEM or is it a prorock?
 

Seahawkfan

Hooked
If you can get the angle finder on your upper Ball joint, get a reading there, and then that number minus your floor angle is your caster. Is your axle OEM or is it a prorock?
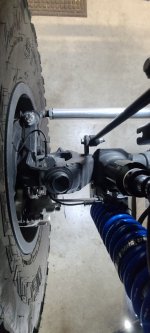
I think I would have to take a tire off to get a better look. But check this out, This looking down from top center of tire. I was able to hold that torpedo level on top of the ball but it didn't seem all that accurate being it angles side to side and front to back. But it was reading 10.9 ish 20210711_231859.jpg
 

MericaMade

Active Member
I think I would have to take a tire off to get a better look. But check this out, This looking down from top center of tire. I was able to hold that torpedo level on top of the ball but it didn't seem all that accurate being it angles side to side and front to back. But it was reading 10.9 ish View attachment 365030
There is app called Clinometer you can get for your phone. Set in on the garage floor near tire or under ball joint and zero it out, then set it on the ball joint to give you the proper number. I have found that if you don’t measure parallel with the frame and point the angle finder outside the line of the frame you get a false reading.
 
Top Bottom