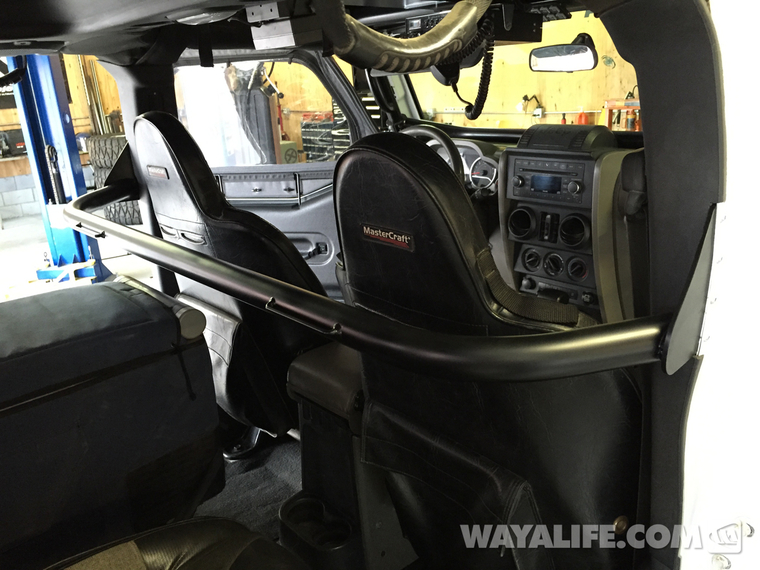
I couldn't tell you why we hadn't done this sooner as it was always something we had planed to do but, over the weekend, I finally got around to installing a Rock Hard 4x4 Parts front harness bar to go with the MasterCraft Baja RS seats that we've had in Moby for a very long time now. Of course, this allowed me to do a clean install of a MasterCraft Safety 5-point harness and that will help secure us in place as we bomb through the desert. For those of you who are interested in installing one in your Jeep JK Wrangler, this write-up will show you just how easy it is to do.
What you will need
• Rock Hard JK Front Harness Bar (RH-1030-SFHP)
• 7/16" Wrench
• 5/32" Allen Wrench
• Torx T-45 Bit
• Ratchet
• Drill
• Unibit or 5/16" Drill Bit
• Utility Knife or Dremel with Cutoff Wheel
• Center Punch
• Sharpie Marker
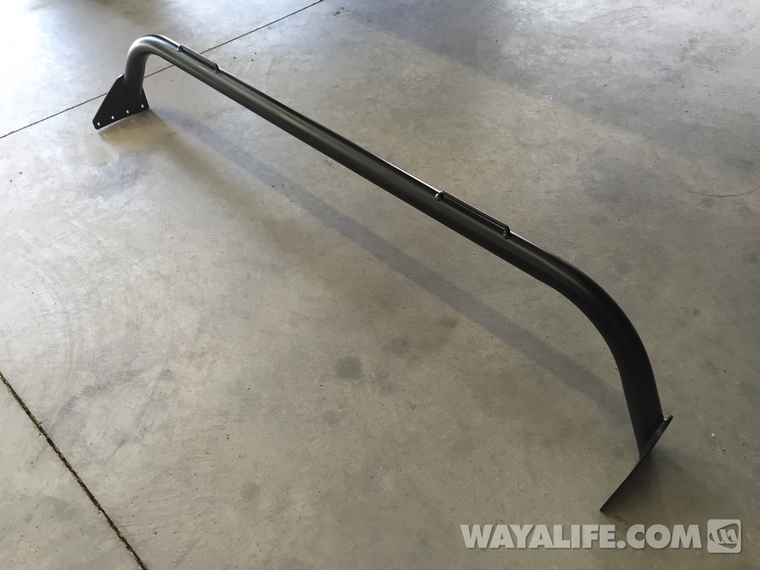
Shot of what the harness bar looked like after I painted it and got it ready to install.
Instructions
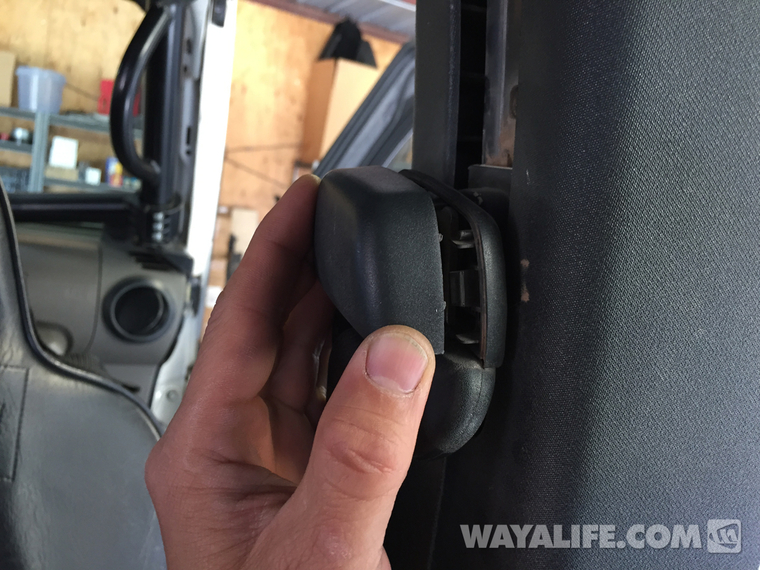
1. Begin the installation by removing the covers on your Jeeps front seat belt shoulder mounts. These are just snapped in place and just need to be pried off.
2. Using a Torx T-45 bit, remove the bolt securing your seat belt shoulder harness to the adjustable mounts on the B-Pillar.

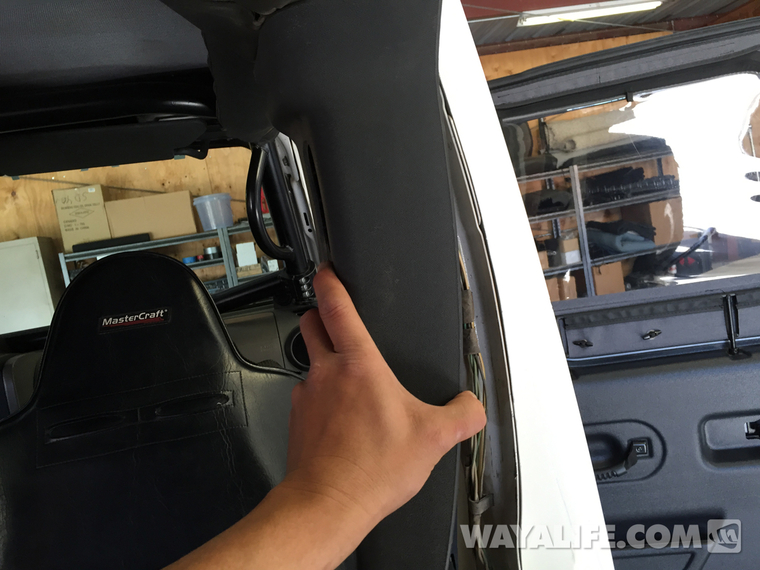
3. The interior B-Pillar trim is held in place by a series of push tabs. Carefully pry it off from the bottom up to remove it from the B-Pillar.
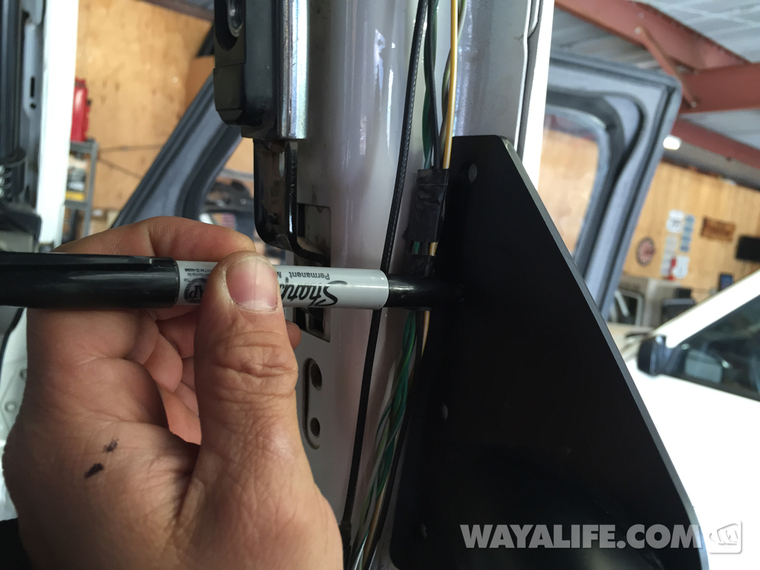
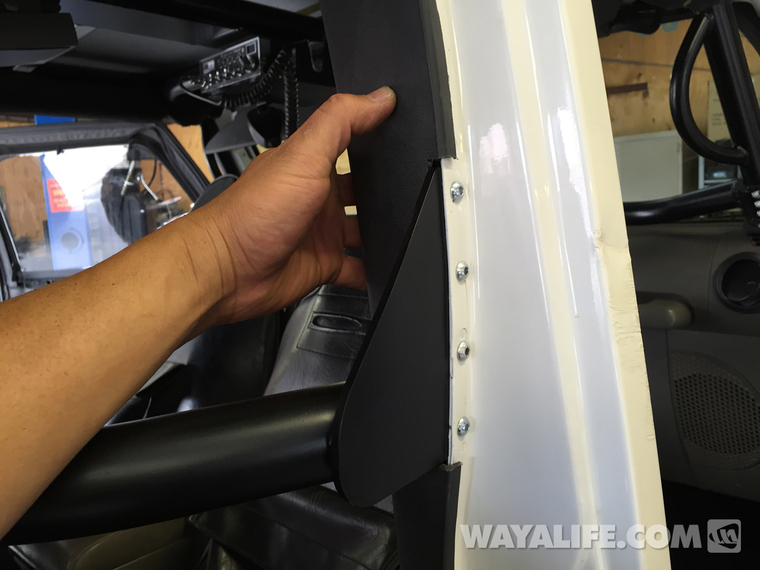
4. With the help of a friend, carefully place your new Rock Hard front harness bar onto the back of your B-pillars with the tapered flanges pointing up. You will find that the curved feature of the B-Pillar matches up with your harness bar and will prevent it from sliding down any further. Once it's at this point, use the harness bar as a template and mark the mounting holes with a Sharpie Marker as shown.
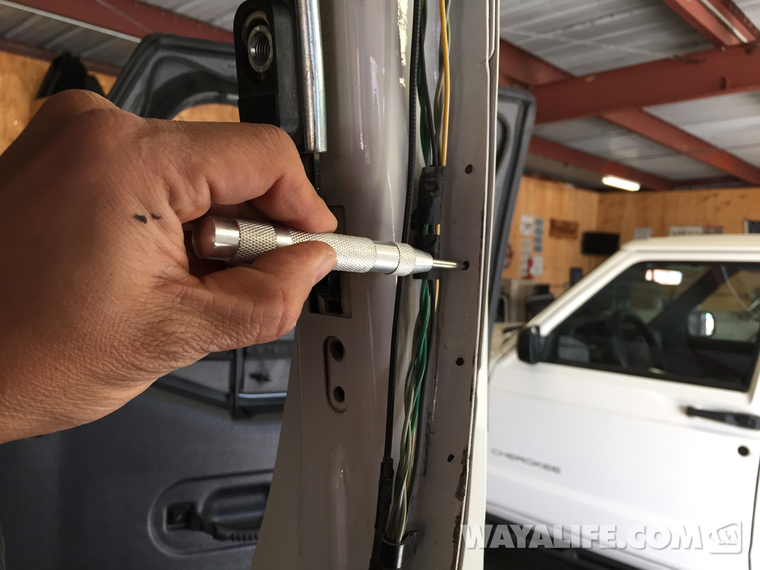
5. Remove the harness bar and then use a center punch to locate the center of all the holes you will need to drill.
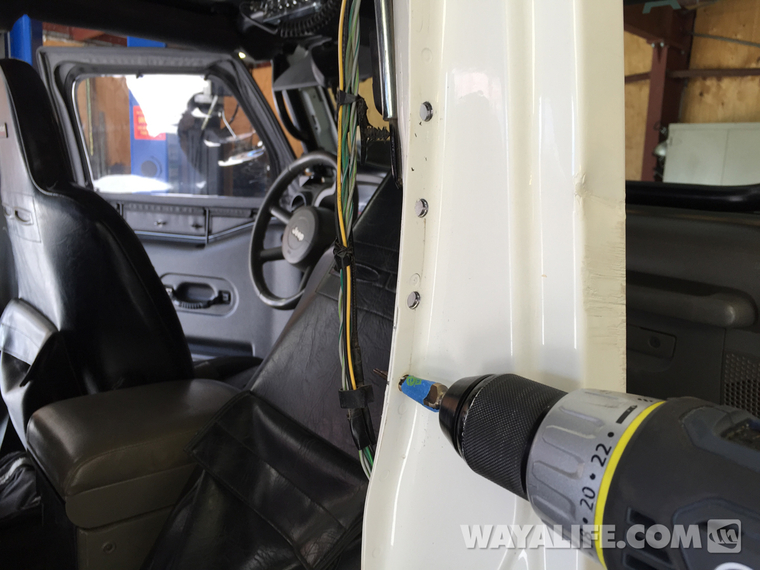
6. Using a Unibit or 5/16" drill bit, drill holes through the pinch seam of your B-pillar as shown.
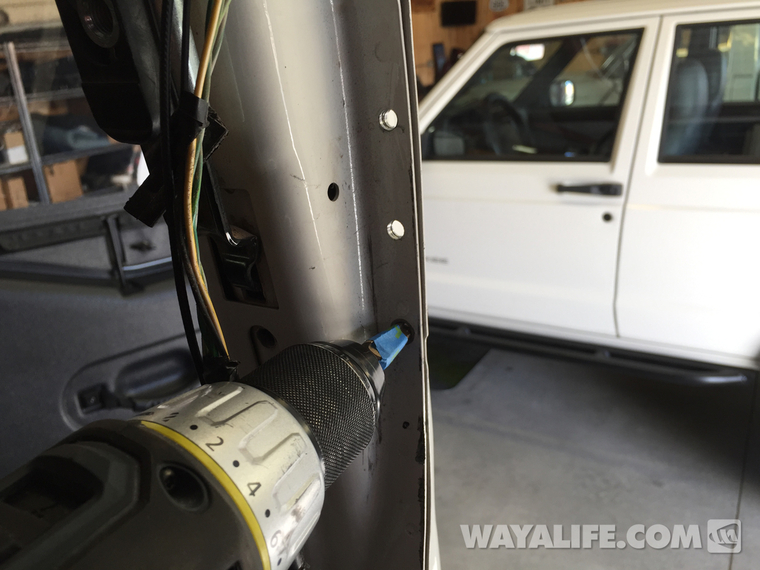
7. If you are using a Unibit, make sure you only drill as far as you need to and then come back from the opposite side to finish and clean things up.
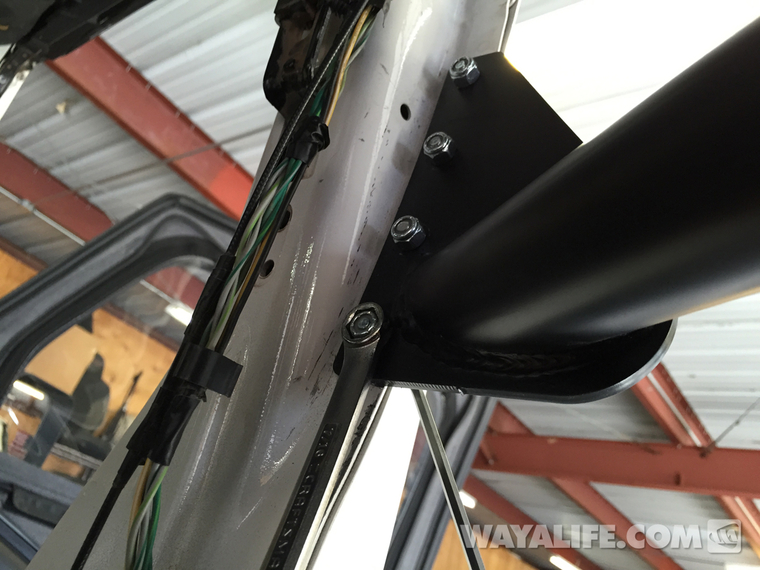
8. With the help of a friend, hold your harness bar back on the B-pillar and loosely secure both sides in place with one of the bolts and nylock nuts provided with the kit. This will help make it easier to get the other bolts and nuts installed.
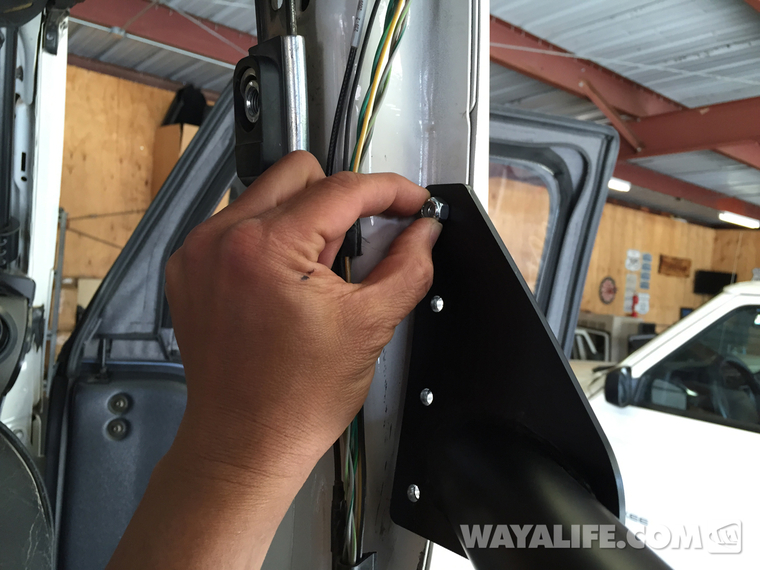
9. Using a 7/16" wrench and a 5/32" allen wrench, tighten all the bolts and nuts to secure the harness bar to your B-pillar.
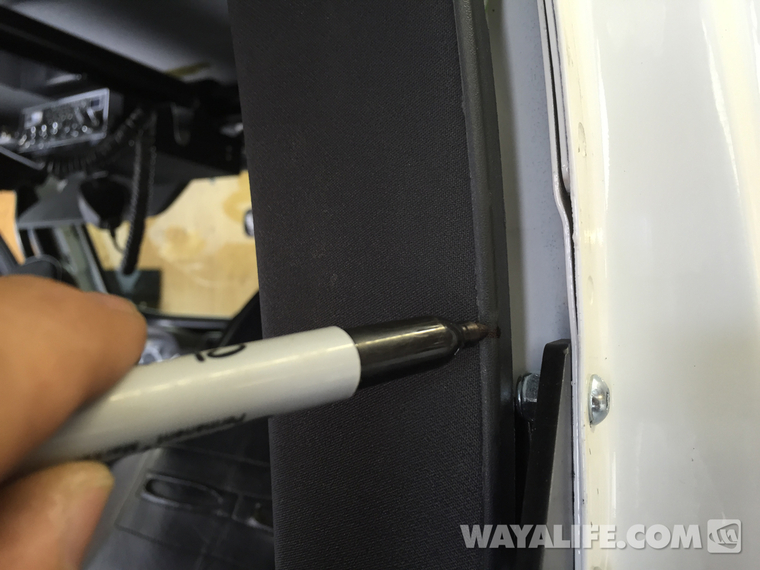
10. Hold up the interior trip up to the B-pillar where it would normally go and then, using a Sharpie, mark the points where the harness bar mount meets up to the top and bottom of it.
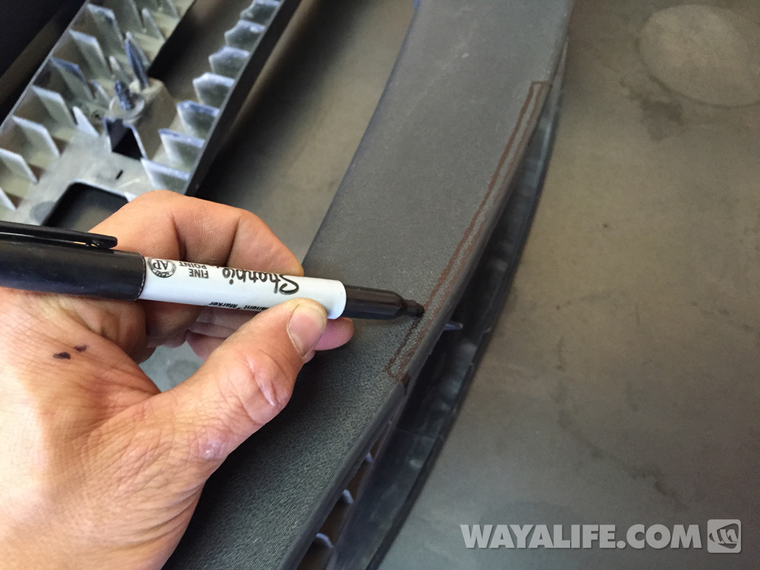
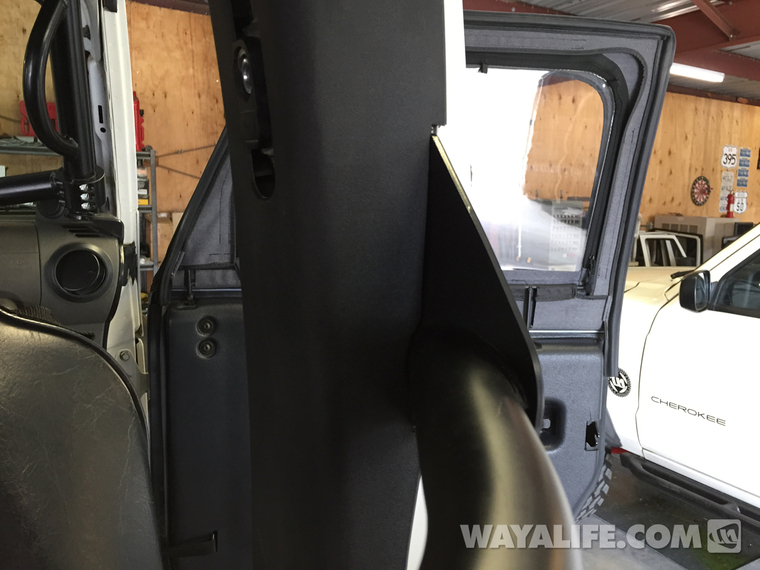
11. Using a Sharpie, draw a line about 3/8" parallel to the edge of trim as shown. You will need to also take into account where the tube is and draw a line for the curvature of it. Then, use a utility knife or Dremel with a cutoff wheel to cut out the plastic trim. Do a test fit and cut more as needed. Use sand paper to clean up the edges.
12. With the plastic trim cut, reinstall it on to your B-pillar by firmly pushing it back in place.
Here's a shot of how clean and factory you can make it look if you just take your time.
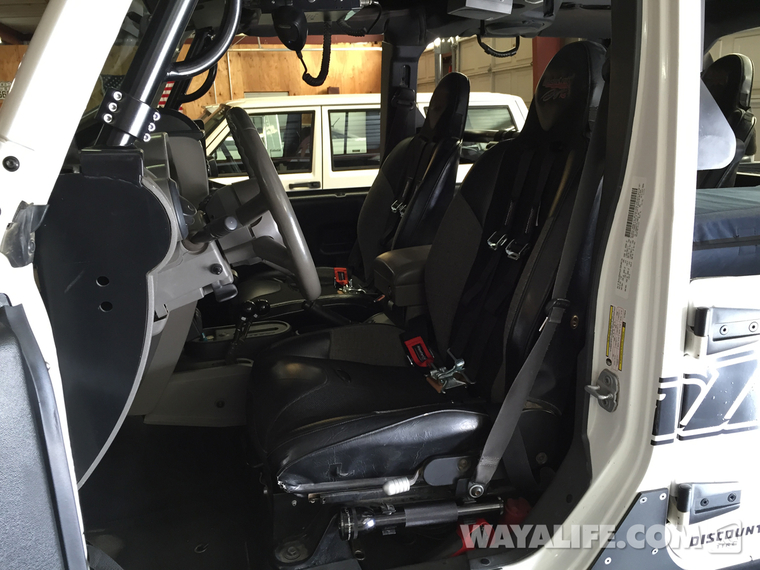
That's it, you now have a Rock Hard front harness bar installed on your 4-Door Jeep JK Wrangler Unlimited.
Here's a shot of what it looks like with a set of MasterCraft harnesses installed.
What you will need
• Rock Hard JK Front Harness Bar (RH-1030-SFHP)
• 7/16" Wrench
• 5/32" Allen Wrench
• Torx T-45 Bit
• Ratchet
• Drill
• Unibit or 5/16" Drill Bit
• Utility Knife or Dremel with Cutoff Wheel
• Center Punch
• Sharpie Marker
Shot of what the harness bar looked like after I painted it and got it ready to install.
Instructions
1. Begin the installation by removing the covers on your Jeeps front seat belt shoulder mounts. These are just snapped in place and just need to be pried off.
2. Using a Torx T-45 bit, remove the bolt securing your seat belt shoulder harness to the adjustable mounts on the B-Pillar.
3. The interior B-Pillar trim is held in place by a series of push tabs. Carefully pry it off from the bottom up to remove it from the B-Pillar.
4. With the help of a friend, carefully place your new Rock Hard front harness bar onto the back of your B-pillars with the tapered flanges pointing up. You will find that the curved feature of the B-Pillar matches up with your harness bar and will prevent it from sliding down any further. Once it's at this point, use the harness bar as a template and mark the mounting holes with a Sharpie Marker as shown.
5. Remove the harness bar and then use a center punch to locate the center of all the holes you will need to drill.
6. Using a Unibit or 5/16" drill bit, drill holes through the pinch seam of your B-pillar as shown.
7. If you are using a Unibit, make sure you only drill as far as you need to and then come back from the opposite side to finish and clean things up.
8. With the help of a friend, hold your harness bar back on the B-pillar and loosely secure both sides in place with one of the bolts and nylock nuts provided with the kit. This will help make it easier to get the other bolts and nuts installed.
9. Using a 7/16" wrench and a 5/32" allen wrench, tighten all the bolts and nuts to secure the harness bar to your B-pillar.
10. Hold up the interior trip up to the B-pillar where it would normally go and then, using a Sharpie, mark the points where the harness bar mount meets up to the top and bottom of it.
11. Using a Sharpie, draw a line about 3/8" parallel to the edge of trim as shown. You will need to also take into account where the tube is and draw a line for the curvature of it. Then, use a utility knife or Dremel with a cutoff wheel to cut out the plastic trim. Do a test fit and cut more as needed. Use sand paper to clean up the edges.
12. With the plastic trim cut, reinstall it on to your B-pillar by firmly pushing it back in place.
Here's a shot of how clean and factory you can make it look if you just take your time.
That's it, you now have a Rock Hard front harness bar installed on your 4-Door Jeep JK Wrangler Unlimited.
Here's a shot of what it looks like with a set of MasterCraft harnesses installed.


