MonkeyLeo13's JKU Build

MonkeyLeo13

New member
Hey, I had my own blog and I tend to post about my jeep build progress and other things in general with my life (job, family, photography, etc...). Last spring I decided to write my last chapter on the blog due to the time commitment it required and I would rather create a family photo book which is better than writing about it . The problem is that I love to keep up to date and document my progress with my Jeep project so I can check online sometimes and I know we, jeepers can be real obsessive about jeep stuff. I know this Wayalife’s build forum/thread is a great place for me to create my build log. It’s a nice way to share my thoughts and experiences on this build along the way.

I plan to post here on from the beginning to present and catch up. Sort of like transfer my old blog’s post related to jeep here.

Hey, if you want to know a little bit about me/jeep story, you can find my “wave” thread here.

Oh I haven’t named my jeep yet.


Here’s my original jeep specs:
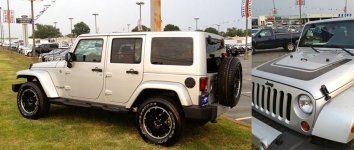
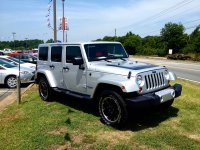
  • 2012 Silver Sahara JKU: Attitude edition
  • 5 Spd automatic
  • 3.73 Gear

Checking-Out-New-Jeep-Unlimited-Wrangler-2012-Attitude-Edition.jpg
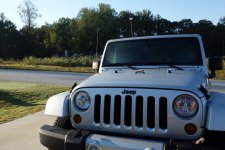
Check-out-on-July-4-Dealers-Closed.jpg

-----------------Updated below: 2017-07-27 ------------------------

Here’s my plan with Jeep:
Blue = installed

STAGE1

2014
  • Lift 2.5 (TF BB)
  • Spidertrax 1.75″ wheel spacers
  • quick disconnect sway bars
  • EVO Front axle gussets
  • 35×12.50×18 Toyo Open Country MT tires
  • AEV ProCal Module
  • EVO Protek Skid System

2015
  • Roll Cage Bolt-on: RockHard
  • RK Front Lower Control Arm

2016
  • EVO parts: D-ring mounts and Rockskins

2017
  • EVO parts: Quarter Pounder front bumper with stinger, rear bumper Fasica, No Limit On-demand, Rock Sliders swaybar endlinks, Rockskins Corners Rear
  • ARB Twin Air Compressor (not fully installed yet)
  • Genright Tire Carrier (not completed yet)
  • Rigid D-SS flood lights
  • Switch-Pros
  • Winch (cheap means I pray more)

STAGE2

2021?
  • 37in Nitto/Toyo Tires
  • Front axle: Prorock XD60, ARB locker, 8 bolt pattern
  • Rear axle: Prorock 60 or 80, ARB locker, 8 bolt pattern
  • 17in Beadlock wheels
  • Suspension system: undecided yet
  • Warn Winch if cheap winch die on me


That’s all I know and I know there is always something I need to get somewhere down the road. Oh yea I would like to get softtop and half doors but no idea when it’s right time to get one.
 
Last edited:
July 2012: A few days later after purchased JKU

or a few weeks later, I ripped off the decal graphic on the hood and it does look a lot better. At first I tried several cleaners that I can't recall, too much work to remove sticker until I actually used orange goo remover, it's works very well!

DSC00145.jpg
 
Jan 2014

I went to "baby" off road a few times without disconnect sway bars in past. It not always fun and I knew that i need to disconnect when I go off road.

I tried to install TeraFlex quick disconnect swaybar (without bars) before but I discovered it did not work with a “stock” bar. So I knew the only way to get it to work was to buy a lift kit from Teraflex (I learned later it not work that way), which I planned to purchase sometime this summer (2014) but now maybe sooner, depending on finances of course. So instead, when my friends and I were at Tray Mountain, GA, I used a wrench/socket to disconnect and wire tie it. I have to say, big difference and there was more flexibility with my jeep than before. Oh yea it was more enjoyment and a better experience than before.

DSC04219.jpg
 
May 2014

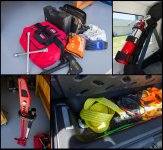
Well I have been off roading a few times to get more experience so I can see what I need to get first, one step at a time. As you can see, I already got some stuff to prepare for off road but there is always something I forget to bring some items.

equip-supplies.jpg
 
June 2014

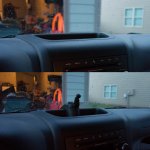
I was surprised that I got a package that came earlier than expected and was just in time for my off road trip tomorrow (June 14, 2014). It is a camera-mobile mount for the jeep’s dashboard. But I just realized that I need to buy an “arm” mount that will hook up to a universal ball mount then I can have the camera and iPhone mounted on the dash at the same time! Well I can wait to get an “arm” mount later.

DSC04866.jpg

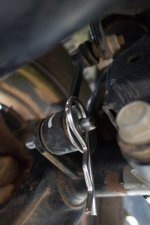
Just the other day I realized that I am able to make the Teraflex quick disconnect parts work without links, I only need to remove the stock link sleeve and the rubber that holds it inside. When I learned that it’s not possible to remove the sleeve or I might break the link I knew it was not worth it and I’d have to wait until my budget permits me to get the lift kit so I’ll be able to use that quick disconnect parts for lift kit. I can’t stand to go on an off road trip and it takes me like 15 min to try to disconnect it, it just get pain in the butt.

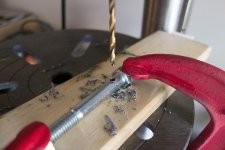
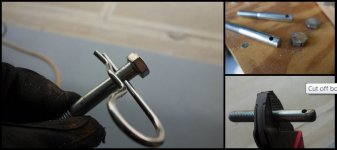
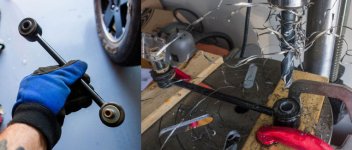
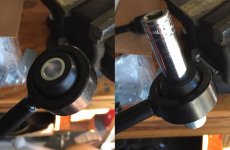
That’s when I knew what I had to do asap to create my own quick disconnect for sway bar links. So I got two new bolts from home depot (I just realized I forgot to get nylon insert lock nuts so I had to go back to Home depot to get it later that day), drilled it small at first then drilled it a little bit bigger to allow the pin to fit in (I used pin from Teraflex quick disconnect parts for now). So I used a grinder to cut off the bolt head and smooth it out. I put red thread around it and put the nut back on and then I put small amount of lubricate on it and that’s it. I doubt it will last long but I hope to the get lift kit in time before the next trip!

DSC04870.jpg
custompins.jpg
DSC04881.jpg

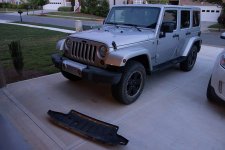
Now I’m ready to go on an off road trip tomorrow with Eric and he is bringing his friend along who’s never experienced off roading before. Oh yea I plan to cut off the end of front bumper but I didn’t have time to do that so instead, I removed the skid plate for now. Means I am able to hook up my gopro hero camera under my front bumper!

DSC04883.jpg
 
July 2014

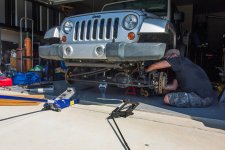
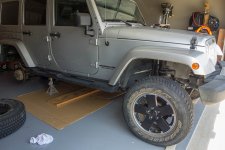
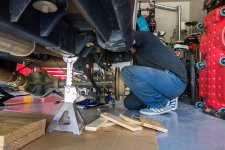
I really enjoyed working all day on my jeep to install the Teraflex 2.5″ boost budget lift kit with my friend, Eric who’s helping me with this. I’m very happy with how it looks and I can’t wait to get new tires when the time and money is right. It was a very good experience and I loved it! Working on front was supposed to be longer than rear but no, We ran into a little bit of a problem with track bar’s new bracket but we got it resolved. Man, it took us all day to get it done and I’m very glad that Eric was able to help me out on that day!

DSC05055.jpg
DSC05062.jpg
DSC05068.jpg

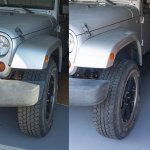
We also installed 1.75in wheel spacer from Spidertrax. It prevents the suspension from rubbing the side walls of the tires when lifting the vehicle. Well my tires are not 35in tires yet but I want to get ready when I get them, hopefully soon. Mostly companies recommend to clear the wheel backspace by 4.5in while my stock wheels is 6.25in backspacing. Maybe 80% of people installed 1.5in wheel spacers on their stock wheels which means 4.75in backspacing. I don’t quite understand. It’s like they get a slight wheel rub and to compensate they need to set their steering stop. Unless they plan to change their wheels (4.0in backspacing) with their 1.5in wheel spacers means 3.5in backspacing which is good if you go for 37in tires or higher. Well I think 1.75 is way to go and I know I will change wheels (3.5in backspacing) in the future when I’ll go for 37in which I won’t need wheel spacers for by then.

You can see before and after photos, you can notice the different on front bumper to show tires more out and see the height different between tire and flare:

DSC05100.jpg
DSC05098.jpg

I realized that I’m running out of time and decided to not do the front bumper mod (cut off the edges). Also I tried to reuse that old sway bar link from rear for front with quick disconnect kit I have, I tried to drill down the link’s sleeve. Turned out I need a bigger drill bit. I’ll probably wait until the middle of Aug or later.

Right now, I know exactly what kind of tires I want which are Nitto Trail Grappler, no question ask about it but for size, I’m not sure yet. It’s just that 35×12.50 is pretty wide and it is not recommended for my jeep’s stock wheel width and it costs more than one that is acceptable for stock wheel’s width which is 295/70R18. Well 35×12.50 has more tread depth. A lot of people have done that with no problem and some people called it the poor man’s beadlock because it’s good for off road when you air down the tires. Of course they said they have to install wheel spacers then it will be fine. I’d rather get 35×12.50 then I will be happy so that means I really need to be patient and keep my eye on the best deal like when I can get one tire for free.
 
Aug 2014

newtires.jpg

I got the really really really best deal on new tires for the Jeep so I couldn’t pass it up. Unfortunately I will not install them until maybe the end of September because I have a lot of things going on. Also I plan to weld gussets on the front axle’s C-inner but I’m still not sure yet if I should do it or take it to some place. But I haven’t had any luck finding a shop that will weld for me. It seems like it costs too much and its almost as if they don’t really know what it supposed to do. Wait and see.
 
Nov 2014

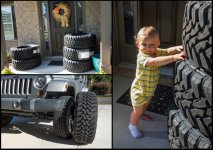
At last, installed new tires for my jeep

installed-tires.jpg

I got AEV ProCal Module that helped me to reprogram my jeep to the correct tire size but I’m still having trouble to set TPMS (tire pressure monitoring system) correctly so I decide to deal with it later.

Oh yea I can’t put a new tire on my tire carrier due to it being too wide so I need to buy an adapter which should cost 30-50 buck. Hopefully I’ll suck up to my wife and get it next week.

It looks awesome and it’s kind of fun to ride in. But not so cool about MPG but what can you expect? Well I probably down about 2 mpg right now so I’m not really complaining anyway.
 
Early Dec 2014

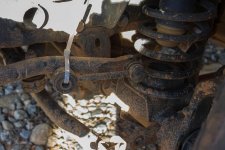
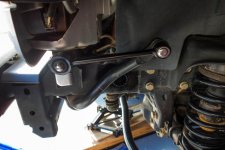
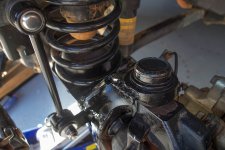
I got a good deal on sway bar links that I able to remove sleeve easy which is what I needed to help with the quick disconnect kit that I already have. As you can see in the picture (last July 27) I tried to use the old links for the rear, but I failed to remove the whole sleeve (it not shows result on picture). I needed a lathe to do the job but I don’t have one. My dad does but he’s in PA. Nah. When the time was right (and I waited for the best deal) I finally got it about a week ago. I replaced it last Wednesday. I realized that I needed to grind some areas on the frame that would allow the sway bar to go all the way up. Today I did it right after I finished with C gussets for the front axle.

old-bar.jpg

new-bar.jpg

DSC05525-489x326.jpg

Well, I tried to get quotes from several auto shops on how much it would cost for them to weld C gusset on my jeep’s front axle (D30). None of them responded back to me except one but it’s in Atlanta and the cost was 400 dollars. No way, not in my budget. So that’s why I was determined to go for it and weld it on my own. Only I wished I could get a little bit better and power with the welder like a Hobart 210 instead of Hobart 140 (I didn't have gas tank either). I can master it with from thinner to 3/16 thick but Hobart 140 can go for ¼ which is the max but it can be done real good by a skilled welder, which I’m not.

It was harder and the only plug I had in the garage was a reset, which I hate and that’s why I used a cord with a power surge. Of course power surge has reset too so I could reach it easy to reset the power surge again and again. Pretty annoying.

DSC05529.jpg

You know I learned that someone from this forum, knows several people that would do the job for good price, but it just a little bit too late and I was just determined to do it on my own. Honestly, it’s not really pretty but looks it like it will hold pretty well (I really hope so!). I’m proud of myself because I was not afraid to do it and really enjoyed it but at same time, it’s probably the more stupid of decisions that I ever made. Eh.

Well I'm continuing to practice my welding skill as I will get gas tank and install power plug that not include reset for love of god!

Oh one more thing, I lost some of my allocated time for this project over the weekend. So I spent some quality family time and went shopping with my wife and son. I finally worked most of the day on Sunday. However, I discovered that I needed to change the wire size so I had to go to several stores to find the right one. Once I replaced it then I realized I needed welder contact tip that comes in a different size. Dooh! Again, I went to several stores to find it. Not great productivity. So that’s why I had to take the day off today or I couldn’t drive the jeep anywhere.
 
Late Dec 2014

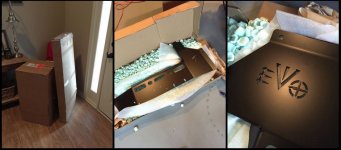
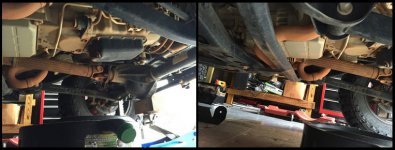
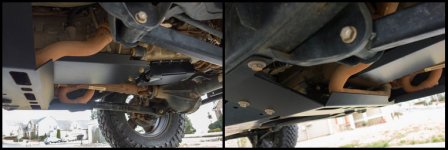
At last I installed EVO skid protection and stock automatic transmission skid bar was a little bit bender. Glad I replaced it with a better skid protection system from EVO. I’m happy and I can’t hardly wait to go off road on Jan 3. I mean I haven’t tested the new tires off road yet!

skid-package.jpg

Before Installing EVO ProTeK Skid System:

before-skid.jpg

After Installed:

after-skid.jpg
 
Feb 2015

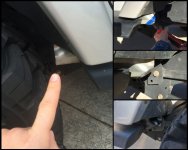
Well when my parents were in town last December, my dad helped me with my jeep project on last Dec 30-31. First we focused on pinch seams that needed to be trimmed . Because when the rear tires travel up , it can hit the pinch seams in the back. You can see the picture so you will know what I’m talking about. I thought we could just cut it out but my dad said to just bend it. In the end we did bend it, grind it, paint it, and call it a day. I know I will cut it a little bit more later in the future when I get 37in tires.

pinch.jpg

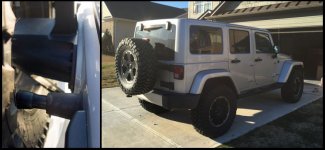
I just finally bought an adapter for tire carrier that would allow my big tires to fit but I haven’t come up with a solution regarding the gap I have between tire carrier bump stop and the tire. I thought about a rubber stopper but it seems like it’s hard to find the size I need and my dad came up with the idea to use pvc pipe and I thought it was a good idea to use it with a table leg rubber cap to fit. Its worked and I painted it with no problem. It has held pretty well so far!

tire-carrier.jpg

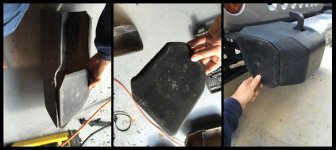
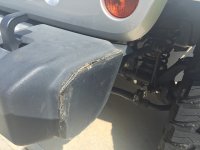
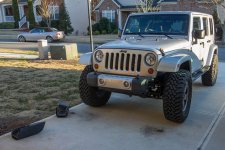
Now for the front bumper, each side is pretty much plastic and very little bit sheet metal so I actually just cut it off. Two reasons, well three:
  • easier to access to disconnect/connect swaybar links
  • a little bit more clearance to go off road
  • looks cool (I would love to get EVO front bumper with Stinger but it’s not on top of my list right now)

DSC05612.jpg

Then we tried to figure out which area of left over bumper to cut out that would cover up the side of the front bumper. We found it then I tried plastic welder but I discovered it’s was like putty! It did not really work well with such a cold day. So we went to autozone to buy black plastic glue which was designed for cars’ parts.

front-bumper.jpg

It’s seemed to work. A few weeks later, I tried to grind the plastic corner to smooth it out and it started to fall apart a little bit as I predicted. I figured what the hell so I used an adhesive glue that I had which is good for all around weather and it’s seemed to work better than I expected . Only thing left to do is to paint it but I think I will wait until it’s warmer weather.

Funny, my wife didn’t notice it at all. I told my parents to not mention it. My dad said she probably will not notice at all, same thing when my dad shaved off his beard. Yet my mom never noticed it at all. Yep. Until last Jan 18, I finally told her and her reaction was surprised as she thought it was real good looking. Too funny.
 
Ok looks like I'm catching up and now I'm trying to remember what happened in the last few months.

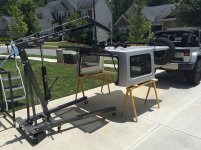
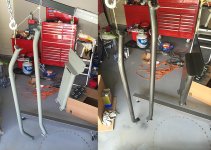
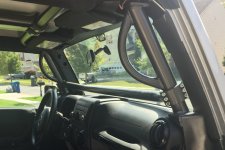
Last June, I was supposed to build some kind of hoist that would temporary attach to my shop crane but I just didn't have time so I tried my best to make a temporary-temporary and it was not smart. But it was a success and helped remove the jeep's hard top. I mean as soon as I had a time slot available (my wife works abt 10 hrs a day and I have ft job plus freelance, plus kid and two crazy wiener dogs) I had to grab time to work on my jeep project! So I painted (rattle can) Rockhard roll cage, using primer then paint candy dark gray which came out real nice. Then I installed it. PITA was when I tried to make it thread by the frame door side.

IMG_5499.jpg

IMG_5490.JPG

IMG_5488.JPG

IMG_5517.JPG
Not good pic, I will post better pic later.​

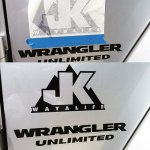
Last July, my jeep seemed not quite perfect with the steering and it felt flighty which bothered me. At same time, I thought maybe steering stabilizer was shot but I knew it's not really solve "flighty" issue. I decided to loosen it and remove it. It would not push or pull back to center then I thought it was no good (I realized later it was fine as I'm learning it's not the same as regular shocks). I was supposed to go to Autozone and buy OEM so I would know the difference but no... I ordered rancho steering stabilizer with high clearance kit. When I got it and test with shock, that's when I knew my OEM was fine so I thought I should take it back but it has high clearance kit for steering stabilizer so I figured why not. I installed it. Now I regret it because I could have homemade it and save some bucks! Oh yea, finally put WAL stickers on when I finally serious washed my jeep since almost a year!

IMG_5939.JPGIMG_5944.JPG

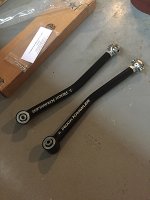
A few weeks ago, I decided to bite the bullet and ordered RK front LCA (I almost order cheap one: Rough Country but their joints don't look great compare to other). Well I got good deal from Northridge4x4. At first I removed the first LCA on left side then second on right side... my instinct told me that I needed to look "write it up" somewhere here but I have no patience and figured I can quick fix if something went wrong. I did put stopper on tires but it made no difference because once I removed the second lca, uh-oh. The front axle started rotating as it pulled the driveshaft down. So I quickly used a tie down strap to pull it from the frame to bottom of the axle. Anyway it's installed and it did reduce the "flighty" feel so I checked caster and it's about 5 degrees now. Not sure if I should go further a little to make it 6 degrees? I'm not complaining right now because it is less flight and I don't feel any vibration from the driveshaft. Unless the driveshaft is making noise (not vibration)? Then I have to ask someone else to check it out for me by listen to it.

IMG_6120.JPG

So my next step is to install a winch (wishful is warn but probably Nogo. I mean Engo) and maybe EVO front bumper with stinger but I have to wait and it depends on if the freelance money comes in to fund it. Well If I can’t do anything until Oct by then I probably itch to cut the fenders then. Because my friend told me he notice there’s rubbing while wheeling at U-warrie park. Maybe I’ll working on cargo project if i have some scrap metal leftover.
 
Last edited:
Cool build-up of your jeep. I like the way you improvise with the parts you have on hand. I'm right there with you as far as modifying stuff to make it work. I dig the bolt you used as a quick link. And the rear spare tire bump extension, I love it! Rock on brother!!
 
Cool build-up of your jeep. I like the way you improvise with the parts you have on hand. I'm right there with you as far as modifying stuff to make it work. I dig the bolt you used as a quick link. And the rear spare tire bump extension, I love it! Rock on brother!!

Thanks man! :thumb:
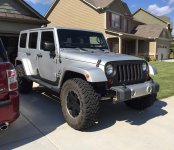
 
Guess that glue hold, didn't last longer. That why I didn't want to buy plastic welder and focus to buy EVO stinger bumper. :icon_crazy: Oh I rather not to install winch on stock bumper either, means i have to chop it up. Blah.

IMG_6281.JPG
 
2016

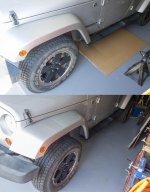
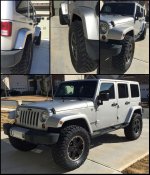
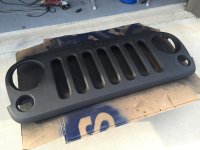
Pretty slow progress on my jeep last year (2016), added EVO rock skins, EVO rear d-ring mounts, and paint plastic dip on grille which I like it. I was hoping to sell my motorcycle but I didn't have any luck.

1.jpg

2.jpg

3.jpg
 
Top Bottom