OhNoTheJiggies
New member
So I haven't done one of these before, but took lots of pictures  hoto: and hopefully this can help someone out a little.
I bought this kit off amazon for $27 because when my kids would fall asleep in the back seat, their heads would hang forward, and this seems to help. Plus when adults sit back there, it will make it a little more comfy for them too.
So this is on my 13 JKUR 10a, I'm pretty sure its the same for all 11 and up JKUs. Probably very similar if not the same for the 07-10 too.
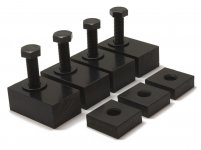
What you will need...
-Recline kit from ama-zon or elsewhere
-Breaker bar
-Ratchet
-18mm socket
-19mm socket
-Channel locks/vise grips
-Torque wrench(56 Ft. Lbs.)
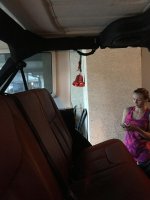
Before(took the picture with the camera up against the hard top so that it was in the same place for before and after.)
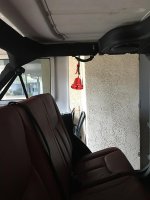
After
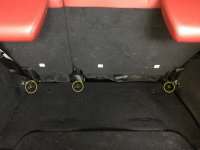
Step 1:
Loosen the 3 18mm bolts/nuts(middle one is a bolt, two outside ones are nuts) several turns. I backed mine off almost all the way.
Step 2:
Using an 18mm socket and a breaker bar, break the torque on the 4 bolts that attach the legs of the seat to the tub. Then use a ratchet to remove them the rest of the way.
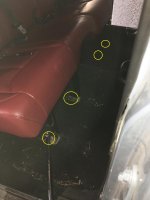
Bolts removed from drivers side
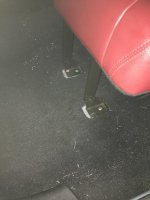
Step 3:
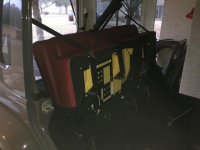
Once the 4 front leg bolts are removed, lift up the seat bottoms and you can use a bungee or ratchet strap to hold the seat bottom up while you work on the next part.
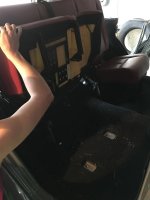
I used the seat belts and just pulled them over each outside leg and locked them back.
Step 4:
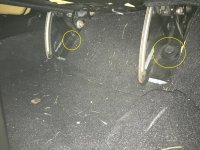
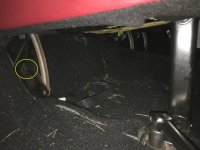
Loosen and remove the 3 bolts that attach the seat to where the tub slants up toward the cargo compartment.
Drivers side
Passenger side
Step 5:
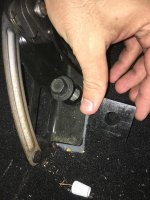
Starting with the bolts that you removed in step 4, pull on each leg up and toward the front of the jeep. While doing this, slide the slimmer, square spacers between the leg and the tub. These square spacers can go in any way, as they are drilled right in the middle.
Said spacer next to the place it goes(almost blends with carpet lol)
Spacer slid between leg and tub
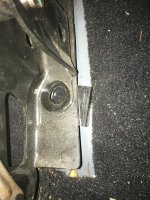
Spacer and bolt before torquing down
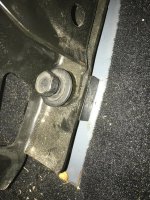
Step 6:
Torque down the 3 bolts on the underside on the seat to 56 ft. lbs.. I felt that I wouldn't have enough room to torque the bolts if I put the seat down first, so I did this first. You might be able to torque everything down at the end, but I didn't.
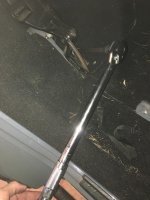
Step 7:
Remove you ratchet strap or seat belts and lay the seat bottom down. The legs swing forward and back, so line them up and place a rectangular spacer under each leg. The spacers should be oriented to keep as much of the leg surface contacting the spacer. The new bolts are 19mm heads.
Seat down(picture was taken after installing bolts, but you get the picture :bleh: )
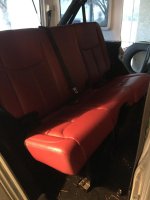
Spacers in place with new bolts and washers
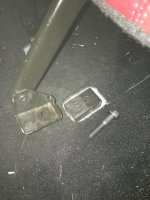
Seat leg in place and bolt about to be tightened
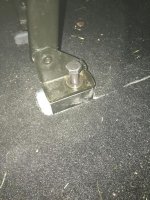
Step 8:
Torque down all 4 (19mm) front leg bolts and the 3 (18mm) behind the seat in the cargo compartment to 56 ft. lbs. This is where I used the channel locks. When torquing the bolts down, the legs had a tendency to twist, so I grabbed them and held them in place with a pair of channel locks while getting the 56 ft. lbs. You can see a little bit of twist on the leg at the bottom of this picture, too.
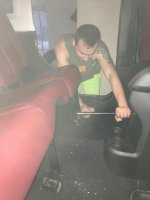
Step 9:
Clean up tools and you're done!
Have a :beer:
I bought this kit off amazon for $27 because when my kids would fall asleep in the back seat, their heads would hang forward, and this seems to help. Plus when adults sit back there, it will make it a little more comfy for them too.
So this is on my 13 JKUR 10a, I'm pretty sure its the same for all 11 and up JKUs. Probably very similar if not the same for the 07-10 too.

What you will need...
-Recline kit from ama-zon or elsewhere
-Breaker bar
-Ratchet
-18mm socket
-19mm socket
-Channel locks/vise grips
-Torque wrench(56 Ft. Lbs.)
Before(took the picture with the camera up against the hard top so that it was in the same place for before and after.)

After

Step 1:
Loosen the 3 18mm bolts/nuts(middle one is a bolt, two outside ones are nuts) several turns. I backed mine off almost all the way.

Step 2:
Using an 18mm socket and a breaker bar, break the torque on the 4 bolts that attach the legs of the seat to the tub. Then use a ratchet to remove them the rest of the way.

Bolts removed from drivers side

Step 3:
Once the 4 front leg bolts are removed, lift up the seat bottoms and you can use a bungee or ratchet strap to hold the seat bottom up while you work on the next part.

I used the seat belts and just pulled them over each outside leg and locked them back.

Step 4:
Loosen and remove the 3 bolts that attach the seat to where the tub slants up toward the cargo compartment.
Drivers side

Passenger side

Step 5:
Starting with the bolts that you removed in step 4, pull on each leg up and toward the front of the jeep. While doing this, slide the slimmer, square spacers between the leg and the tub. These square spacers can go in any way, as they are drilled right in the middle.
Said spacer next to the place it goes(almost blends with carpet lol)

Spacer slid between leg and tub

Spacer and bolt before torquing down

Step 6:
Torque down the 3 bolts on the underside on the seat to 56 ft. lbs.. I felt that I wouldn't have enough room to torque the bolts if I put the seat down first, so I did this first. You might be able to torque everything down at the end, but I didn't.

Step 7:
Remove you ratchet strap or seat belts and lay the seat bottom down. The legs swing forward and back, so line them up and place a rectangular spacer under each leg. The spacers should be oriented to keep as much of the leg surface contacting the spacer. The new bolts are 19mm heads.
Seat down(picture was taken after installing bolts, but you get the picture :bleh: )

Spacers in place with new bolts and washers

Seat leg in place and bolt about to be tightened

Step 8:
Torque down all 4 (19mm) front leg bolts and the 3 (18mm) behind the seat in the cargo compartment to 56 ft. lbs. This is where I used the channel locks. When torquing the bolts down, the legs had a tendency to twist, so I grabbed them and held them in place with a pair of channel locks while getting the 56 ft. lbs. You can see a little bit of twist on the leg at the bottom of this picture, too.

Step 9:
Clean up tools and you're done!
Have a :beer:
Last edited:
