It's time to get started!

Time for an update. Since post #47 I re-sprayed the cut fenders with bed liner, I broke some of the clips and bought some off of amazon. The front passenger side fender only had Amazon fender clips and flew away on the highway, thankfully it didn't hit anybody, I turned around to pick it up but it had already been mangled. I purchased Crawler Conceptz steel fenders front and rear and got them painted to match the body, I also installed the inner fenders. My next upgrade after that was the Magnaflow axle drop exhaust. Fast forward to post #48. Next up I bought the Evo 1/4 pounder. Forward to post #55 and prior to the wheeling I had ordered the winch, and as the post said I tore The rear drive shaft boot. There was a squeal after the wheeling from the rear driver side wheel and I was thinking it may have been something between the router and the dust guard so I disassembled that, turned out I had bent the flange of the axle shaft. So I ordered ten factory chromoly axle shafts for the front and rear axle, so far I have only replaced the one that was bent. I have contacted trail jeeps and got a quote for a PR44, pro steer ball joints and Revolution gears and overhaul kits, I will probably order it next month on the 4th. Right now I am back home for the holidays and went to a local spot where I could get twisted up, so I took some pictures.

View attachment 179301

View attachment 179302

View attachment 179303

View attachment 179304

View attachment 179305

View attachment 179306

View attachment 179307

How much did it cost to have your fenders color matched?
 
How much did it cost to have your fenders color matched?

I didn't shop around and was limited on options, I will also say that the crawler conceptz fenders are in really rough shape out of the box. $1300. If you were to bed line them or rattle can them flat black you probably wouldn't notice the roughness.

Edit: the shop had to spray 1mm of primer to be able to sand it down enough to get the surface to look even
 
Last edited:
So if I'm under staying this right. You paid $1300 for both the fenders and paint?

No, that was just for materials/labor for painting. They charged me for 13 hrs labor at $90/hr + materials. The fenders themselves were $1200 for front and rear.
 
No, that was just for materials/labor for painting. They charged me for 13 hrs labor at $90/hr + materials. The fenders themselves were $1200 for front and rear.

Fahkkkkkkk. Looks good but I would be heartbroken when they get trail pin striping at that cost. Yikes.
 
Fahkkkkkkk. Looks good but I would be heartbroken when they get trail pin striping at that cost. Yikes.

If they are getting pin striped so is the $35000 vehicle they are on so it really doesn't hurt anymore than it already did
 
Pro Rock 44 Housing, gears and PSC Hydro-assist are ordered, Wes over at Trail Jeeps is great and answered all of my questions. Can't wait to see a palette of stuff at my front door!
 
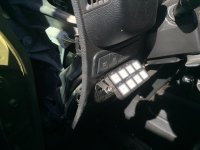
Got around to installing my Switch Pro this morning, install went smooth and easy. I will say that the instructions are very easy to follow and not confusing at all! I even rerouted my winch wiring.

ImageUploadedByWAYALIFE1454267971.861663.jpg

As you can see the mosfet unit takes up very little space

ImageUploadedByWAYALIFE1454267991.503651.jpg

I routed the wires that go into the cab with the big wiring harness that goes along the top of the firewall

ImageUploadedByWAYALIFE1454268003.274587.jpg

I went into the cab where the washer fluid line for the rear window goes through

ImageUploadedByWAYALIFE1454268018.517324.jpg

Rolled up the extra wire behind the speaker grill

ImageUploadedByWAYALIFE1454268031.640257.jpg

Mounted the panel right under the stock Rubi switches.

Now all I need is accessories! I'm thinking of getting the lux rock lights, reverse lights, some rigid cubes for the pillars, and some OBA
 
Last edited:
Steer Smarts Yeti Tie Rod

just received my steer smarts yeti tie rod, this thing is massive. i think it will hold upto to PSC kit.

IMG_2780.jpg

IMG_2781.jpg

IMG_2784.jpg

IMG_2785.jpg

IMG_2786.jpg

Parts are starting to accumulate again!

IMG_2787.jpg
 
That Yeti steering looks beefy as hell. Looks like it should hold up, and is much cheaper than the Currie stuff.
 
Received my JE Reel 1350 rear drive shaft today

ImageUploadedByWAYALIFE1455838511.097238.jpg

ImageUploadedByWAYALIFE1455838523.614663.jpg

Adding it to my parts pile

ImageUploadedByWAYALIFE1455838567.356336.jpg

I also received my new unit bearings, I figured since I was replacing the housing and ball joints I would go ahead and get new bearings as well!
 
Pr 44

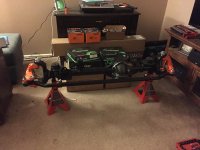
I finally received my PR44 from Trail Jeeps!! can't wait to get it installed!
My living room is starting to fell cramped!

IMG_2808.jpg

i will probably post this question on another relevant thread, but what is everybody using for bumpstops on the PR44? i had bought some 4" synergy bumpstops to install when the axle was going to be installed but the bolt is too small for the threaded hole on the PR44.
 
I finally received my PR44 from Trail Jeeps!! can't wait to get it installed!
My living room is starting to fell cramped!

View attachment 189841

i will probably post this question on another relevant thread, but what is everybody using for bumpstops on the PR44? i had bought some 4" synergy bumpstops to install when the axle was going to be installed but the bolt is too small for the threaded hole on the PR44.

I went to a bolt supply place and found the right size and length.
 
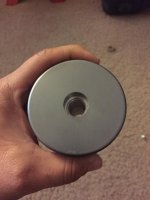
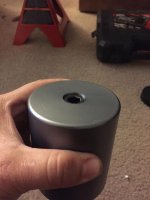
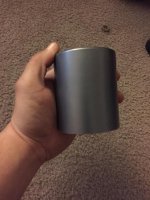
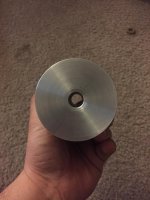
So I got my bump stop issue resolve. I took the 4" aluminum synergy bump stops to a friends machine shop and shortened them to 3.5" and bore out the hole for a .5" bolt and bore out the top to have the cap head counter sunk. Then I went to the hardware store and found the bolts. Total cost $1 and some home made salsa!

ImageUploadedByWAYALIFE1456442724.937699.jpg

ImageUploadedByWAYALIFE1456442749.780866.jpg

ImageUploadedByWAYALIFE1456442766.222452.jpg

ImageUploadedByWAYALIFE1456442788.417381.jpg

ImageUploadedByWAYALIFE1456442849.831020.jpg

I went to a bolt supply place and found the right size and length.
 
Top Bottom