Majik
Member
So I got sidetracked with a little mini-project today that seems to work so well that I figured I should post it for everyone to explore on their own if desired...
I tossed around the idea of a dual-battery setup for my 2012 for a long time. Obviously a very attractive option and having a backup battery is ideal. But the dual-battery setups out there are pricey (around $500 just for the bracket!) and require quite an extensive slice and dice of the entire plastic battery/fusebox area. So... for now, I just wanted to be able to install a much larger battery with a bigger reserve capacity.
The stock battery tray is actually quite a bit bigger than the battery, but the EVAP purge solenoid (that funny valve-looking thing between the battery and the fuse box) is in the way of any 'bigger battery' mod. So, I decided to move it! Which ended up being way, way simpler than you'd think!!
I apologize in advance for not yet finishing the pics, but I wanted to get some up here for all to see. If anyone can take a pick of the solenoid in its factory location and add it to the thread, please do! I somehow forgot the starting pic
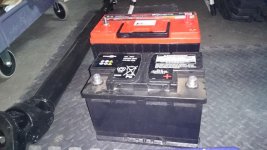
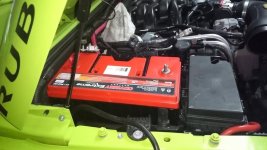
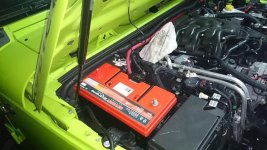
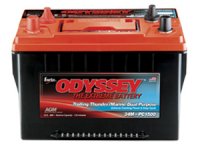
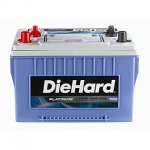
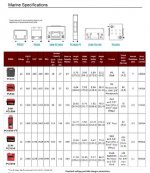
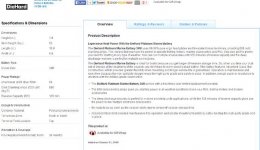
From the measurements I've taken, this will allow a commercial GROUP 31 size battery to fit! I have personally chosen a Odyssey 31M-PC2150, which is one of the largest they make. It also has dual terminals so you can use a pair strictly for your winch wiring, if desired. I have ordered the battery and will update the pics as I finish the last few details.
Hope this helps some out there that want a battery upgrade without necessarily wanting the cost or complexity of the aftermarket dual battery setups. For me, this is at least a substantial upgrade for now. I still may explore a dual battery setup later, but I like this option for now :thumb:
------------------------------------------------------------
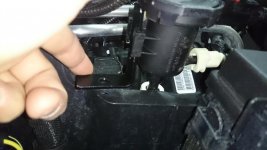
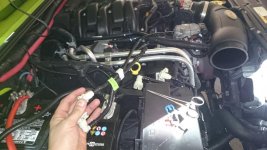
So in this pic, you see that the two hard plastic lines that go to the solenoid are just extensions that attach to the main lines on the far side (closer to the engine valve cover) of the fuse box. Interestingly, the connectors on the end of the main lines are the same sizes as the ones on the end of the extension pieces. There is a small U-shaped plastic clip that you slide out on each connector to release the connection. Use a really small screwdriver (or 2) and be careful because they are kinda brittle. In my hand are the two white connectors that originally went to the valve in the stock location.
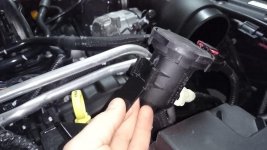
This is the extension line and solenoid/valve, removed.
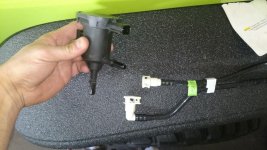
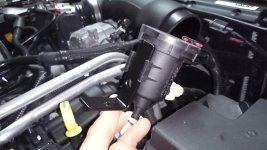
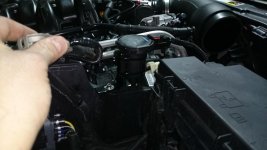
Here is the valve, and you can see the soon-to-be-used white connectors on the far side of the battery and fuse box.
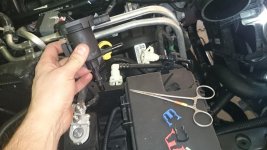
The next step is to rotate the lower connector 90 degrees, so it faces upward, like the original setup.
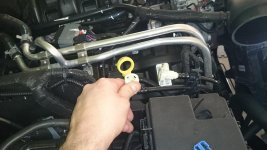
Now, locate the black plastic clip that is on the far side of the fuse box. This needs to be removed to allow the two hard lines to be spaced a little further apart. Again, a small screwdriver will release the clips. This one is pretty tough, though. If you break it, no big deal. It wasn't re-used on mine.
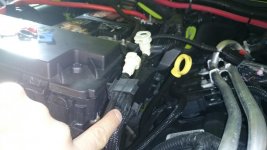
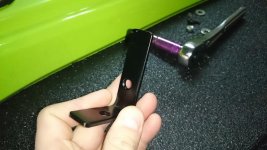
The clip, after removed.
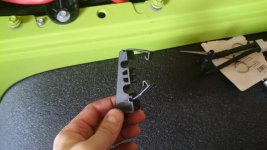
So now we reattach the valve to the hard lines WITHOUT the extension piece. They lines just slide over the connectors on the valve, and then you push the small plastic clips back you removed earlier back into place to lock the lines.
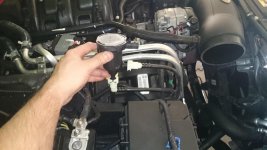
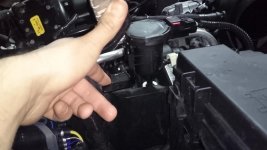
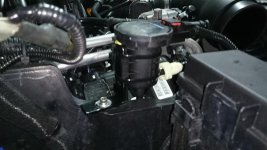
Here is the approximate new location that we are going to mount the valve. Looks kinda OEM!
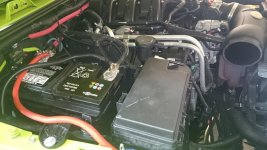
So, now, if you removed the battery, you will see this small approx 1"x2" plastic piece in the bottom of the battery tray. It pulls right out. It seems that mopar may use this tray with bigger batteries in some applications and this plastic piece just acts like a small bumper for our smaller battery.
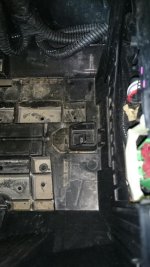
Here's the piece, removed.
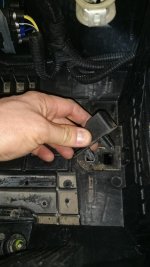
Another pic of the battery box with the piece removed, and notice all of that ROOM without the Evap Solenoid in the way!!
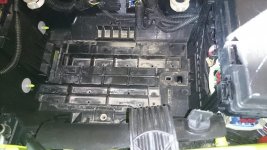
This is what it looks like towards the back of the box.
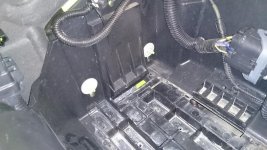
The last minor thing to do to give us a full 13" of width and allow a Group 31 battery is to shave off about 0.5" of this plastic edge near the firewall.
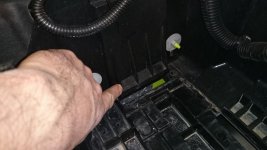
I have a few last pics to take tomorrow with the piece shaved off the back. The Group 31 commercial-size battery is the same approx 6.75" width as our stock one, so the factory battery hold-down clamp should still work. The height is approx 2 inches taller and should clear the hood with no issues at all. I will post the final mod pics tomorrow, and the installed battery pic once it arrives.
Comments are welcome.
I tossed around the idea of a dual-battery setup for my 2012 for a long time. Obviously a very attractive option and having a backup battery is ideal. But the dual-battery setups out there are pricey (around $500 just for the bracket!) and require quite an extensive slice and dice of the entire plastic battery/fusebox area. So... for now, I just wanted to be able to install a much larger battery with a bigger reserve capacity.
The stock battery tray is actually quite a bit bigger than the battery, but the EVAP purge solenoid (that funny valve-looking thing between the battery and the fuse box) is in the way of any 'bigger battery' mod. So, I decided to move it! Which ended up being way, way simpler than you'd think!!
I apologize in advance for not yet finishing the pics, but I wanted to get some up here for all to see. If anyone can take a pick of the solenoid in its factory location and add it to the thread, please do! I somehow forgot the starting pic
From the measurements I've taken, this will allow a commercial GROUP 31 size battery to fit! I have personally chosen a Odyssey 31M-PC2150, which is one of the largest they make. It also has dual terminals so you can use a pair strictly for your winch wiring, if desired. I have ordered the battery and will update the pics as I finish the last few details.
Hope this helps some out there that want a battery upgrade without necessarily wanting the cost or complexity of the aftermarket dual battery setups. For me, this is at least a substantial upgrade for now. I still may explore a dual battery setup later, but I like this option for now :thumb:
------------------------------------------------------------
So in this pic, you see that the two hard plastic lines that go to the solenoid are just extensions that attach to the main lines on the far side (closer to the engine valve cover) of the fuse box. Interestingly, the connectors on the end of the main lines are the same sizes as the ones on the end of the extension pieces. There is a small U-shaped plastic clip that you slide out on each connector to release the connection. Use a really small screwdriver (or 2) and be careful because they are kinda brittle. In my hand are the two white connectors that originally went to the valve in the stock location.

This is the extension line and solenoid/valve, removed.

Here is the valve, and you can see the soon-to-be-used white connectors on the far side of the battery and fuse box.

The next step is to rotate the lower connector 90 degrees, so it faces upward, like the original setup.

Now, locate the black plastic clip that is on the far side of the fuse box. This needs to be removed to allow the two hard lines to be spaced a little further apart. Again, a small screwdriver will release the clips. This one is pretty tough, though. If you break it, no big deal. It wasn't re-used on mine.

The clip, after removed.

So now we reattach the valve to the hard lines WITHOUT the extension piece. They lines just slide over the connectors on the valve, and then you push the small plastic clips back you removed earlier back into place to lock the lines.

Here is the approximate new location that we are going to mount the valve. Looks kinda OEM!

So, now, if you removed the battery, you will see this small approx 1"x2" plastic piece in the bottom of the battery tray. It pulls right out. It seems that mopar may use this tray with bigger batteries in some applications and this plastic piece just acts like a small bumper for our smaller battery.

Here's the piece, removed.

Another pic of the battery box with the piece removed, and notice all of that ROOM without the Evap Solenoid in the way!!

This is what it looks like towards the back of the box.

The last minor thing to do to give us a full 13" of width and allow a Group 31 battery is to shave off about 0.5" of this plastic edge near the firewall.

I have a few last pics to take tomorrow with the piece shaved off the back. The Group 31 commercial-size battery is the same approx 6.75" width as our stock one, so the factory battery hold-down clamp should still work. The height is approx 2 inches taller and should clear the hood with no issues at all. I will post the final mod pics tomorrow, and the installed battery pic once it arrives.
Comments are welcome.

