JeepFan
Hooked
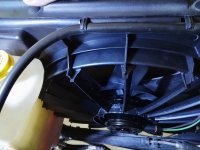
Recently the engine in our 2009 JK would intermittently run hot when idling at a stop. By hot I mean the temp gauge would slowly creep up to the 3/4 mark while running at a stop. The first time this happened I pulled over to the side of road and opened the hood to see what might be the cause. The first thing I noticed was the electric radiator fan was not running. I immediately turned the engine off to let it cool down. While I waited for the engine to cool down a bit, I checked for coolant leaks and inspected the cooling fan fuse. In addition, I swapped out the cooling fan relay with one of the other relays in the TIPM. Unable to find any obvious problem at that time I decided to start the engine and see if the temp gauge was reading in its normal range. As soon as I started the engine, the fan kicked in and started cooling the engine down. I let it run for several minutes and noticed the cooling fan was cycling on and off as it should. At that point I closed the hood and drove on down the road. So far so good I thought.
After several days of driving the Jeep trouble free, the problem came back! I stopped and opened the hood and discovered the fan was not running. This time I checked the big wire harness plug that connects to the fan resistor and the harness from the resistor to the fan motor to make sure it was on tight. As soon as I pulled on the plug that goes into the fan motor, the fan kicked in and started cooling the engine. Ah-ha! At that point I decided to just drive it home and check the electrical connections more closely after the engine was cold.
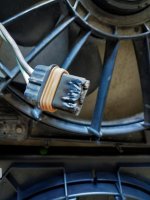
I first removed the big connector that goes from the under hood harness to the fan motor resistor. Didn't see any issue. Next, I removed the connector from the fan motor itself and found the plastic mold that holds the wire terminals in place was melted. Here's a pic...
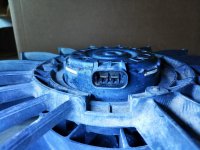
On the motor side, things did't look much better. Here you can see the terminals are pretty black and singed...
Not sure what caused this but after 139,000 miles I figured it was time to replace the fan assembly and resistor/harness.
What you will need:
Replacement Fan Assembly. Omix-Ada part number: 17102.57 Note: The picture of the part online shows it comes with the resistor harness. BEWARE: THE HARNESS IS NOT INCLUDED!
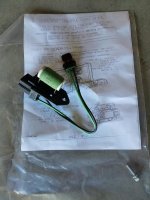
Replacement Wiring/Resistor harness: Mopar part number: 68026780-AA Note: This part does not come with the fan assembly.
7 plastic trim clips. You can find these at most auto parts stores.
1/4" ratchet
8mm socket
5/16" nut driver
Small screwdriver
Panel clip remover
Side cutters
Needle nose pliers
With a little guidance, all of the following work was performed by my awesome wife Stephanie!
Here's a pic of the harness with old and new fan assembly:
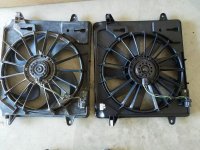
Notice the new fan has 9 blades compared with the old 6 blade fan.
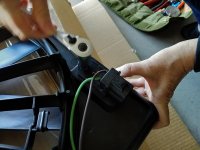
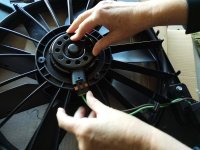
The first thing you will want to do is install the new harness to the new fan assembly:
Here's the old fan assembly still mounted to the radiator:
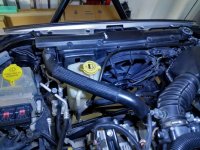
Next, to gain better access to the 8mm bolt holding the fan assembly to the radiator on the passengers side, the air filter housing should be removed. Using a 5/16" nut driver, loosen the air filter housing clamp and pull up on the housing to remove it from its mount.
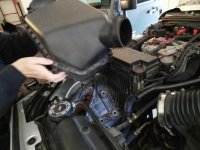
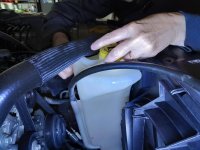
Next, remove the coolant recovery bottle by lifting it straight up and away from the fan shroud.
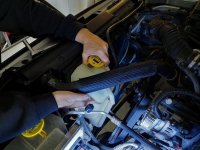
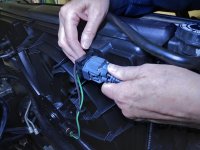
Now remove the electrical plug from the fan resistor. Use a small screwdriver to push in the locking clip, then release the connector from the plug.
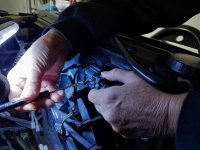
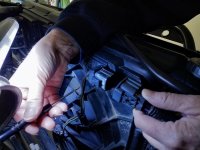
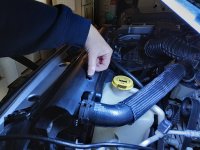
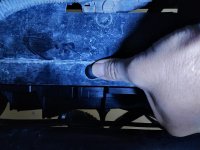
Next, you need to remove the four plastic christmas tree clips from the top radiator cover and lower shield. There are 4 on the top and 3 on the bottom. Use a panel clip remover or side cutters to break them free. Of course you will need new clips to re-install the cover.
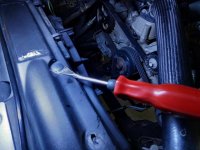
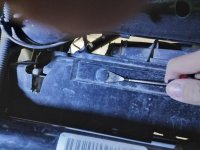
Now you're ready to remove the 2 8mm bolts that secure the fan assembly to the radiator.
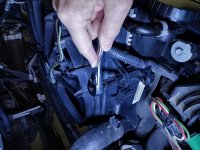
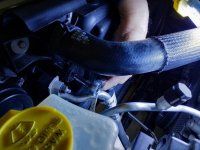
With the 2 8mm bolts removed, gently lift up on the fan assembly to free the lower mounting tabs from there purches.
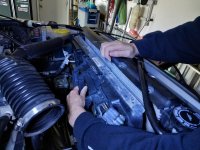
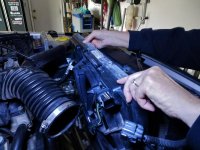
Here's a shot with the radiator fan assembly removed.
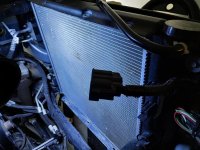
Basically do the reverse order of above to install the new radiator fan.
Lowering the new fan into position. Make sure the lower mounts of the fan assembly slip into their purches.
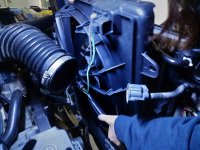
Install the bolts.
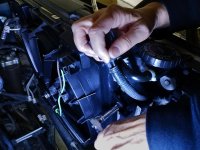
Continued on next post.
After several days of driving the Jeep trouble free, the problem came back! I stopped and opened the hood and discovered the fan was not running. This time I checked the big wire harness plug that connects to the fan resistor and the harness from the resistor to the fan motor to make sure it was on tight. As soon as I pulled on the plug that goes into the fan motor, the fan kicked in and started cooling the engine. Ah-ha! At that point I decided to just drive it home and check the electrical connections more closely after the engine was cold.
I first removed the big connector that goes from the under hood harness to the fan motor resistor. Didn't see any issue. Next, I removed the connector from the fan motor itself and found the plastic mold that holds the wire terminals in place was melted. Here's a pic...

On the motor side, things did't look much better. Here you can see the terminals are pretty black and singed...

Not sure what caused this but after 139,000 miles I figured it was time to replace the fan assembly and resistor/harness.
What you will need:
Replacement Fan Assembly. Omix-Ada part number: 17102.57 Note: The picture of the part online shows it comes with the resistor harness. BEWARE: THE HARNESS IS NOT INCLUDED!
Replacement Wiring/Resistor harness: Mopar part number: 68026780-AA Note: This part does not come with the fan assembly.
7 plastic trim clips. You can find these at most auto parts stores.
1/4" ratchet
8mm socket
5/16" nut driver
Small screwdriver
Panel clip remover
Side cutters
Needle nose pliers
With a little guidance, all of the following work was performed by my awesome wife Stephanie!
Here's a pic of the harness with old and new fan assembly:


Notice the new fan has 9 blades compared with the old 6 blade fan.
The first thing you will want to do is install the new harness to the new fan assembly:


Here's the old fan assembly still mounted to the radiator:

Next, to gain better access to the 8mm bolt holding the fan assembly to the radiator on the passengers side, the air filter housing should be removed. Using a 5/16" nut driver, loosen the air filter housing clamp and pull up on the housing to remove it from its mount.

Next, remove the coolant recovery bottle by lifting it straight up and away from the fan shroud.

Now remove the electrical plug from the fan resistor. Use a small screwdriver to push in the locking clip, then release the connector from the plug.


Next, you need to remove the four plastic christmas tree clips from the top radiator cover and lower shield. There are 4 on the top and 3 on the bottom. Use a panel clip remover or side cutters to break them free. Of course you will need new clips to re-install the cover.


Now you're ready to remove the 2 8mm bolts that secure the fan assembly to the radiator.


With the 2 8mm bolts removed, gently lift up on the fan assembly to free the lower mounting tabs from there purches.


Here's a shot with the radiator fan assembly removed.

Basically do the reverse order of above to install the new radiator fan.
Lowering the new fan into position. Make sure the lower mounts of the fan assembly slip into their purches.

Install the bolts.

Continued on next post.
Last edited:

