Project Blue Jeep

Good idea with the can. The epoxy didn’t hold?


2015 JKUR AEV JK350
1985 CJ8 Scrambler

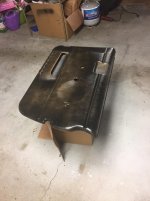
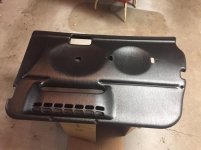
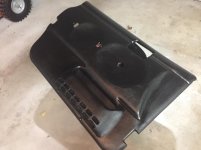
No I’m really kind of frustrated by that. I got the “plastic bonder” jb weld that is supposed to be the best for filling gaps and adhering to every plastic imaginable. I prepped the surface and as I said left overnight to cure instead of the 15-30 it says. And when I sanded it. The top of top to was hardened but the underside felt like plastidip and peeled right off. I redid it today and mixed in more hardener and it did the same thing, so I think it’s just not the quality it claims to be. I would understand if it didn’t adhere to the plastic but to not harden is just a bad epoxy. So I got parts of it to work, and gave up on perfection.
IMG_5063.jpg
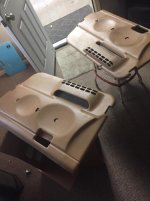
Hit with SEM adhesion promoting spray after a light sand

SEM color bond landau black which is supposed to be close to the OE black/charcoal coloring. It’s definitely gonna be darker than it should be but it’ll beat spice/khaki whatever these were.

Directions said to dust coat then wet coat until covered with 10 minute flash times.
IMG_5064.jpg
IMG_5065.jpg
IMG_5068.jpg
IMG_5069.jpg

Still drying.


Sent from my iPhone using WAYALIFE
 
Thanks! Yeah they’re coming along. I understand how they’re more convenient for popping off the upper and throwing them in the back to drive around and toss them back on quick when it rains. But I’m used to driving naked all summer anyways, and my biggest complaint is that it’s just the wrong height for my left arm. Its like 6-8” shorter than a full door and isn’t comfortable for my lazy leaned over style of driving.


Hope so. They’re in pretty good shape for 10 years old. Started snowing today so I know the aftermarket hard uppers will sell quick at least. Once I get the parts in to fix the handle on driver side I can list them locally, would like them out of my way for sure.


Sent from my iPhone using WAYALIFE
Replacing the outer door latch on those doors is a major pain in the dick, those little step bracket things. The engineer needs a swift kick in the nutsack


Sent from my iPhone using WAYALIFE mobile app
 
They really cleaned up well!


2015 JKUR AEV JK350
1985 CJ8 Scrambler

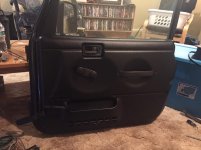
The passenger came out great, the driver side plastic was gouged and beat up and the rough epoxy job, with all things paint it’s all about the prep work and I kept it minimal. So it’s a bit rough but beats spice so it will work.

Replacing the outer door latch on those doors is a major pain in the dick, those little step bracket things. The engineer needs a swift kick in the nutsack


Sent from my iPhone using WAYALIFE mobile app
Funny you mention those, ones missing one and I’m waiting for ups to bring it 🤣


Sent from my iPhone using WAYALIFE
 
IMG_5102.jpg
IMG_5103.jpg
IMG_5105.jpg
IMG_5113.jpg
IMG_5112.jpg
IMG_5108.jpg
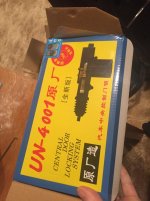
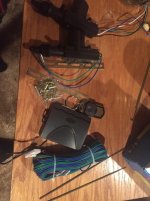
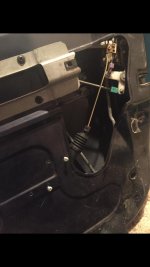
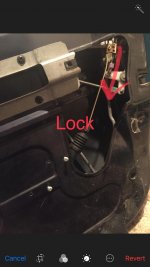
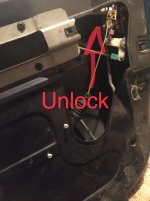
How to install keyless entry and power locks in a Jeep.
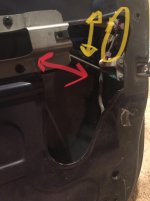
Locate lock bar. (Red)
Locate the bar that goes to the key (yellow)
I decided to use the yellow one as it was easier to get to.
Find a spot for the solenoid where it won’t interfere with linkages and window.
Mount solenoid. Adjust linkage. Run wire forwards and leave extra to wire on a quick connector. Rebuild door. Easy project and makes life way easier. All in under $30

IMG_5111.jpg
IMG_5114.jpg


Sent from my iPhone using WAYALIFE
 
Last edited:
View attachment 337706
View attachment 337707
View attachment 337708
View attachment 337709
View attachment 337710
View attachment 337711
How to install keyless entry and power locks in a Jeep.
Locate lock bar. (Red)
Locate the bar that goes to the key (yellow)
I decided to use the yellow one as it was easier to get to.
Find a spot for the solenoid where it won’t interfere with linkages and window.
Mount solenoid. Adjust linkage. Run wire forwards and leave extra to wire on a quick connector. Rebuild door. Easy project and makes life way easier. All in under $30

View attachment 337712
View attachment 337713


Sent from my iPhone using WAYALIFE
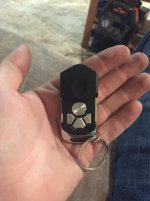
I think I might have to do that. Did you get that off of amazon?
 
I think I might have to do that. Did you get that off of amazon?

Yup amazon or eBay. They’re mostly all the same.
There are two different kits if you look closely. One that the driver door gets a 5 wire solenoid and three 2 wire solenoids. And a kit that has just four 2 wire solenoids.
I got the one with the five wire.
The difference is that it acts as a lock/ unlock switch. When you lock it manually either by pushing the lock or turning a key the solenoid will ‘see’ that it was locked and signal the module to lock the rest of the doors. Same for unlock obviously. However It is more annoying to find a small 5 pin quick connect for the wiring which you’ll need for easy door removal.

You can also install one for the tailgate lock, haven’t decided if I’m doing that on this Jeep I did on my last one. I just really am not in and out of the back that much and it’s a bit more of a pain to get everything mounted in the tight space.


Sent from my iPhone using WAYALIFE
Cool. Thanks, I’ll check those out.
 
Got the lock module installed and wired up, finished some other accessory wiring for the homelink garage door opener and the radar detector. Put a quick connect weatherpack on the lock wiring for pass door. Ran the wiring for the driver side as well so that’s ready for whenever I get the rest of the parts I’m waiting on show up on the brown truck. And it started snowing here so I officially didn’t beat winter.


Sent from my iPhone using WAYALIFE
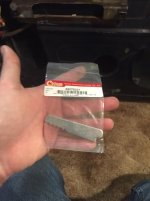
 
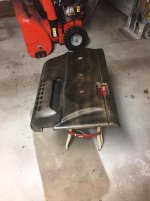
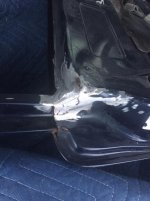
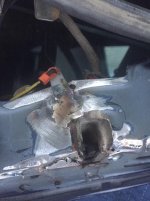
Prep day, went and got the work space all cleaned up. Organized some tools. Went and bought about $25 of bulk grade 8 bolts from TSC. Then did some work on the broken door, I’m not good at welding. I’m REALLY not good at welding thin ass sheet metal. But I managed to get some good metal and decent enough repair on the cracks.

59528988648__FB2A4F11-972D-479E-8FCC-081221A14015.jpg

Did what I could to clean up this horrible patch job. If I keep these doors I’ll redo this in the future when I’m not as hard pressed for time.

59528989997__5E29F945-B5DD-4E6C-9A11-D336542571DC.jpg

Will squirt some paint at it tomorrow.
Apparently the door handle part went from Kentucky to Alabama to Colorado and now to Indiana will supposedly be here tomorrow after its completed it’s tour of the country. I think now I have done everything I can think of to prep for the cutting and welding, gonna wait for the mercury to rise and attack it.


Sent from my iPhone using WAYALIFE
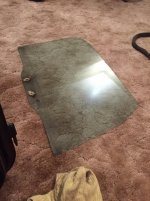
 
Not kidding about this handle holder. That is a bundle of fun.

Got it in. Had to take window out to do it. Which is fine because the felt window seal had been placed in incorrectly at some point as well and gave me a chance to fix that so the window will seal right. Picked up some auto store blue that looks pretty close, good enough for the few inches that’ll be visible.
IMG_5143.jpg
IMG_5144.jpg
IMG_5147.jpg


Sent from my iPhone using WAYALIFE
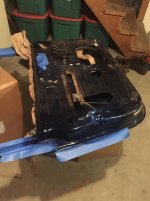
 
Not kidding about this handle holder. That is a bundle of fun.

Got it in. Had to take window out to do it. Which is fine because the felt window seal had been placed in incorrectly at some point as well and gave me a chance to fix that so the window will seal right. Picked up some auto store blue that looks pretty close, good enough for the few inches that’ll be visible.
View attachment 337797
View attachment 337798
View attachment 337799


Sent from my iPhone using WAYALIFE
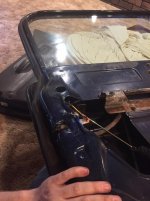
Yep that’s it, what a pain in the dick those are


Sent from my iPhone using WAYALIFE mobile app
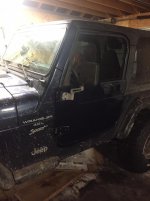
 
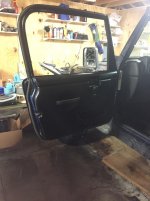
I’ve definitely got some new scars on my hand. On the upside. Door project is done. Swapped the lock cylinder over. Got the power lock installed. Got the door panel on. It looks great in dark pictures, but if I find a correct color door in the future I’ll likely snag it. They’re just more best up then I’d like and will have rust issues in the future. But for now I have doors again!

59538148477__7732BA97-5881-4576-B4F0-808265009055.jpg
IMG_5151.jpg
IMG_5152.jpg


Sent from my iPhone using WAYALIFE
 
Got some brake swap work done today.
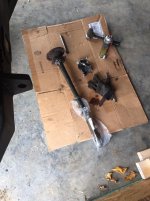
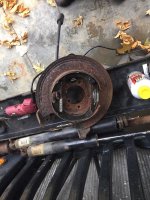
To do a rear brake disc swap from grand Cherokee zj it’s a direct bolt on for Dana 35s, but requires a little modification to put on a dana 44.

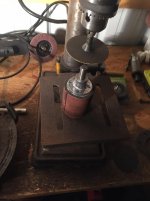
The backing plate axle hole needs to be enlarged for the bearing and seal to fit through.

Apparently this 1/2” thick steel plate is made of some kind of dwarven magical metal that is really damn hard to cut, sand, grind.
After like 3 hours and way too many tools I got them big enough to work. It’s always the little projects that take forever.

IMG_5188.jpg
59580116855__654BFBF3-F6F4-462E-9DC5-149839270B83.jpg
IMG_5192.jpg
IMG_5193.jpg


Sent from my iPhone using WAYALIFE
 
It’s pretty damn cool to learn things from your thread I’ve never knew existed. Very cool.

It does seem it is all those little details that you get stuck on.


2015 JKUR AEV JK350
1985 CJ8 Scrambler
 
It’s pretty damn cool to learn things from your thread I’ve never knew existed. Very cool.

It does seem it is all those little details that you get stuck on.


2015 JKUR AEV JK350
1985 CJ8 Scrambler

Always the little things man. Always.
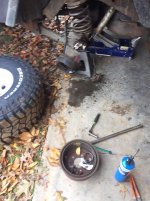
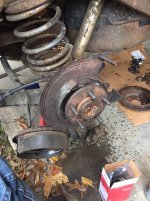
Spent the day under it to get the swap done.
Had an issue with rotors not fitting right over the e brake pads. After an hour with fucking with adjusters and cables I figured out pads somehow got pushed out of position whilst looking like they’re in perfect position. The d44 uses a different shape flange for drums and discs so had to swap the bearings and seals. Also you need longer wheel studs as the discs are thicker than the drums. I got a set of even longer then needed studs because the wheels I run are super thick.
Technically when you switch from drums to disc you want the proportioning valve on the master cylinder from the disc swap donor as well. However the cheater way is to open the end of the valve and remove a rubber o ring. This stops the limiting of fluid going to the rear. Will also cause the rear brakes to grab earlier then designed on a vehicle that was designed for them, this is perfectly fine with me it brakes flatter but still nose dives when you stand on the pedal, braking is greatly improved.

IMG_5217.jpg
IMG_5218.jpg
IMG_5220.jpg
IMG_5227.jpg

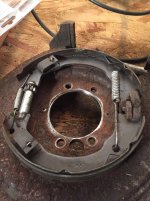
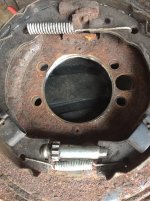
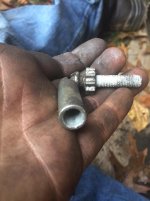
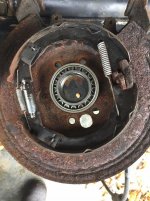
For the love of god somebody explain to me how a star adjuster works on the e brake drum so I can get this thing adjusted.
The star piece with the gear on it is one piece and threaded. The tube it goes into has no threads so it can free spin. How the hell is this supposed to work. I’ve gotta be missing something.
59597603550__0D3157B8-7C20-4726-B62B-3AE2E6ED2717.jpg
59597760347__3B36B928-38C0-4884-B0BB-E133A8D64F31.jpg

Got everything put back together with fresh rotors and pads. Got dark and cold so no pics cuz I was rushing and swearing a lot. It looks like shiny parts on rusty bits.

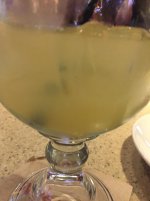
Here’s my giant margarita.
59599905866__F69F3976-411B-4324-AC13-34ECC7E9C281.jpg


Sent from my iPhone using WAYALIFE
 
Last edited:
For the love of god somebody explain to me how a star adjuster works on the e brake drum so I can get this thing adjusted.
The star piece with the gear on it is one piece and threaded. The tube it goes into has no threads so it can free spin. How the hell is this supposed to work. I’ve gotta be missing something.
View attachment 338068
View attachment 338069

Got everything put back together with fresh rotors and pads. Got dark and cold so no pics cuz I was rushing and swearing a lot. It looks like shiny parts on rusty bits.

Here’s my giant margarita.
View attachment 338070


Sent from my iPhone using WAYALIFE

The adjuster but should be threaded, and it travels down the threads to push the rod farther out.

The threaded rod doesn't turn, it is locked in place on the brake shoes.

Make sure the knurled piece turns free so it can adjust properly. If it gets tight against the end sometimes it will lock there and not work right.

I hope that makes sense.
 
Top Bottom