The "Delicate Flower" Build

jeeeep

Hooked
Ran into an interesting scenario last weekend. 10-15 Jeeps on a tight trail and the guy in front of me didn’t have a spare and aired down to 10psi on non beadlock wheels. He popped the bead. It took a lot of time getting air to his front tire via musical Jeeps. The lady in front of him didn’t have air and no one, including myself, had a long enough hose.

So I decided to run air lines to the front and rear of the JT. I also went ahead and isolated each line with a ball valve so if one line goes down I can shut it off and not affect the others from working.

View attachment 384607 View attachment 384608 View attachment 384609
nice work, but a lot of work because of a guy with no spare, airing down to 10psi no beadlocks, and no air source.
 
nice work, but a lot of work because of a guy with no spare, airing down to 10psi no beadlocks, and no air source.
You definitely have a point. I figured it would be beneficial to have anyways. Going to get a small Offroad trailer so figured it wouldn’t hurt.
 
So, did a couple of more things. Apparently I used air hose that wasn’t rated for the temps that are under the hood because first outing a couple of weeks back the main feed popped when I went to use the lockers.

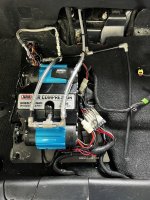
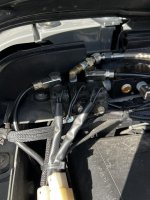
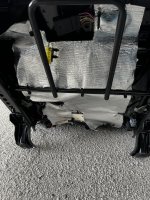
Because of that I switched everything to stainless that runs out of the cab (chucks front and rear and main feed from compressor to locker manifold. Everything that stayed air hose I upgraded the a much more heat tolerant tubingSince I redid everything I took some pics. The heat shield is wrapped around the plastic tubing since it sits right on the compressor with the seat on it. I did wrap the steel one as well just because. Also you can see how I did the underside of the seat with the heat shield.

Outside at my distribution block I also added another ARB solenoid that is controlled by the sPod that now controls the added chucks. That way I’m not wasting time filling up those lines every time. Now it’s only when it’s needed to run the chucks.

The compressor looks terrible because I ran it under the hood for a while.

DC2F49D6-3ECD-4BE2-86D4-8A725108E1B4.jpeg

6BDB9DA7-119B-46B5-B27E-771E3E321719.jpeg

0262EE53-F781-4B63-8CF1-20CACE510274.jpeg
 
I also added another sPod box. I really wanted to separate the ambers in both the front and rear bars. I also wanted to separate the fogs and the 10” bar out front.

Then I also needed to wire up the chase lights, add the air chucks button and wire up the rear white bar. Doing all of that I needed more than eight spots from only one sPod. Now I have three spots left.

I had to make a bracket but had to do two layers. The tiny screws that came with the add on box I was worried about coming loose and then all of a sudden I had loose electrical flying around in the engine bay while driving. So I used loctite on those, then sandwiched them between the two pieces of the mount I made, then bolted the assembly down to a vacant area that was used for the engine cover. No way it can come loose now.

2BDF3570-715D-48BB-978E-F792B7199D29.jpeg
 
Top Bottom