JKAnimal
Caught the Bug
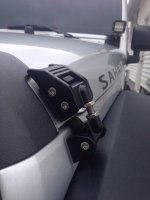
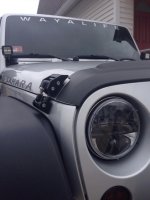
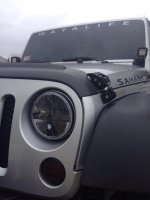
Besides looking cool these sweet hood latches stop the hood flutter you will get when your booking it to the trail head or on the highway to work. I finally ordered myself a pair. They magically appeared on my front porch yesterday and I made some time to install them. It was a very easy install aside from the small area you have to work in to remove the bottom portion of the hood latches. Good finger dexterity is a plus here!
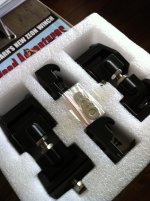
This is what you get, along with a vague set of instructions:
All the nuts are nylock so you don't have to worry about using Locktight on them.
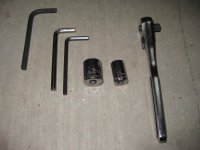
You need these tools:
1. Remove the hood side stock latches. There are two 10 mm nuts holding the the latch on. Once the nuts were loose they unscrewed by hand easily. There is a black plastic paint protector clipped to the edge of the hood. Just pull and it comes off easily. I screwed the nuts back on the bolts after removal so I don't loose them.
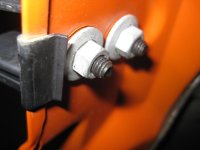
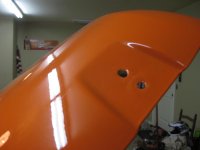
2. Remove the bottom/fender pieces of the hood latches. This is where it gets a little more difficult. If you have huge hands your going to need to get your wife or teenager to help you out. There is one 13 mm nut you have to loosen. I was able to get the ratchet in from the top and loosen the nut. Once it's loose it unscrews by hand very easy. I didn't find any of the nuts to be obnoxiously tight.
When you pull the bottom bracket off there is a small rubber hood bumper attached to the bracket, remove it gently. It basically "snaps" onto the bracket. Notice the tabs on the latch. The new latches have tabs that match so placement is easy.
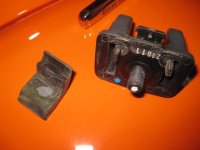
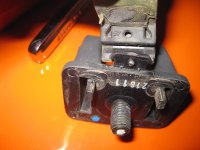
3. Before installing the new bottom brackets you will need to disconnect the small hinge bolt that connects the catch portion to the mounting bracket. You will need the two 4 mm Allen wrenches to disconnect the hinge. This step is documented in the instructions and is pretty self explanatory.
4. Next install the bottom brackets, get the more difficult part out of the way. You'll need your 5 mm Allen wrench and your 13 mm socket and drive for this. Use the Allen wrench in the head of the provided Rugged Ridge bolt. Attach the rubber hood bumper to the proper spot on the new bracket, it's pretty self explanatory. There is only one way for the new bracket to fit onto the body of the Jeep. Put the rubber gasket between the body and the bracket then insert the bolt. While holding one finger on the screw to keep it pushed through I was able to put the washer on the screw and get the nut started. That's probably the hardest part. You may have to use some tricks like taping the, washer, nut, and socket together with painter's/masking tape to help get this done. This is also a good time to have the wife and kids assist. I found it easier to use the Allen wrench to take the slack out of the bolt until the nut got tight. A good T-handle Allen wrench would have been nice here. Re-attach the hood catch to the bracket using the two 4 mm Allen wrenches. Make sure everything is straight then tighten it all up and move to the other side.
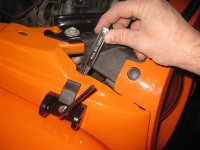
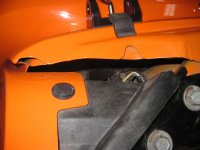
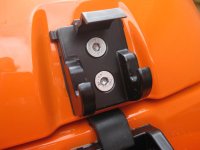
5. Time for the upper catch. You will need your 4 mm Allen wrench and 10 mm socket for this. Place the rubber gasket on the hood and place the bracket on top of the gasket and put the bolts in. This is easy but make sure to keep the gasket centered and lined up as there is more play on the top latch. Put the provided washer and nylock nut on the bolts and just snug them. Once you've looked to make sure the gasket is straight under the catch proceed to tighten.
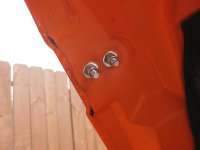
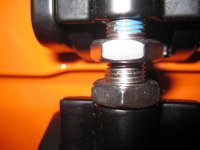
6. Now that you have the top catches on close the hood and test the fit. You will need to unscrew the jam nuts on the billet latch in order to adjust the width of the adjustment rod. Rotate the latch counter clockwise to open the gap which results in less compression of the hood or rotate it clockwise to close the gap creating a tighter compression of the hood. The hood should contact and slightly compress the hood bumper when the latches are adjusted properly. Once you have the latches adjusted properly use a 5/8" wrench to tighten the jam nut. I put a little dab of blue locktight under each jam nut just to be safe.
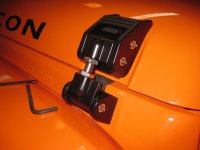

That's all there is to it! Enjoy no more hood flutter! :rock:
This is what you get, along with a vague set of instructions:
All the nuts are nylock so you don't have to worry about using Locktight on them.

You need these tools:
- 1/4" ratchet drive
- 10 mm socket
- 13 mm socket
- 5 mm Allen wrench
- Two 4 mm Allen wrenches
- 5/8" wrench (not pictured :blush: )

1. Remove the hood side stock latches. There are two 10 mm nuts holding the the latch on. Once the nuts were loose they unscrewed by hand easily. There is a black plastic paint protector clipped to the edge of the hood. Just pull and it comes off easily. I screwed the nuts back on the bolts after removal so I don't loose them.


2. Remove the bottom/fender pieces of the hood latches. This is where it gets a little more difficult. If you have huge hands your going to need to get your wife or teenager to help you out. There is one 13 mm nut you have to loosen. I was able to get the ratchet in from the top and loosen the nut. Once it's loose it unscrews by hand very easy. I didn't find any of the nuts to be obnoxiously tight.
When you pull the bottom bracket off there is a small rubber hood bumper attached to the bracket, remove it gently. It basically "snaps" onto the bracket. Notice the tabs on the latch. The new latches have tabs that match so placement is easy.


3. Before installing the new bottom brackets you will need to disconnect the small hinge bolt that connects the catch portion to the mounting bracket. You will need the two 4 mm Allen wrenches to disconnect the hinge. This step is documented in the instructions and is pretty self explanatory.
4. Next install the bottom brackets, get the more difficult part out of the way. You'll need your 5 mm Allen wrench and your 13 mm socket and drive for this. Use the Allen wrench in the head of the provided Rugged Ridge bolt. Attach the rubber hood bumper to the proper spot on the new bracket, it's pretty self explanatory. There is only one way for the new bracket to fit onto the body of the Jeep. Put the rubber gasket between the body and the bracket then insert the bolt. While holding one finger on the screw to keep it pushed through I was able to put the washer on the screw and get the nut started. That's probably the hardest part. You may have to use some tricks like taping the, washer, nut, and socket together with painter's/masking tape to help get this done. This is also a good time to have the wife and kids assist. I found it easier to use the Allen wrench to take the slack out of the bolt until the nut got tight. A good T-handle Allen wrench would have been nice here. Re-attach the hood catch to the bracket using the two 4 mm Allen wrenches. Make sure everything is straight then tighten it all up and move to the other side.


5. Time for the upper catch. You will need your 4 mm Allen wrench and 10 mm socket for this. Place the rubber gasket on the hood and place the bracket on top of the gasket and put the bolts in. This is easy but make sure to keep the gasket centered and lined up as there is more play on the top latch. Put the provided washer and nylock nut on the bolts and just snug them. Once you've looked to make sure the gasket is straight under the catch proceed to tighten.


6. Now that you have the top catches on close the hood and test the fit. You will need to unscrew the jam nuts on the billet latch in order to adjust the width of the adjustment rod. Rotate the latch counter clockwise to open the gap which results in less compression of the hood or rotate it clockwise to close the gap creating a tighter compression of the hood. The hood should contact and slightly compress the hood bumper when the latches are adjusted properly. Once you have the latches adjusted properly use a 5/8" wrench to tighten the jam nut. I put a little dab of blue locktight under each jam nut just to be safe.


That's all there is to it! Enjoy no more hood flutter! :rock:
Last edited:

