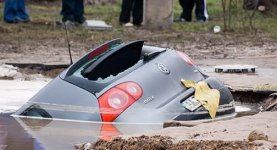
I have a 2015 JKU Sahara. I hydrolocked it at about 8000 miles - the pothole was deeper with a sharper drop-off than I expected. And, I was going to fast when I hit it. The insurance company replaced the engine (less the deductible) and I learned a lesson.
Since I got it back, however, I've been puddle (and rain, and any water) phobic. So I decided I needed a snorkel... not for fording but for my peace-of-mind. Did I really need it - probably not, but I feel better having it.
I did not want one that rode high on the A-pillar, so that left me with the River Raider Expedition Snorkel and Rugged Ridge XHD Snorkel. While I like how the Rugged Ridge laid low in the right cowl, I was a little worried about all of the low lying joints and water intrusion. Probably not a real issue but enough for me. Some might object to the River Raider's mushroom on the cowl, but I was OK with it. I chose the River Raider.
The components of the kit itself were all solid. The problem I had initially was that several small pieces were missing. This also had been noted in a write-up I found from several years ago. I called, got great customer service and I had the parts a couple of days later.
I read through the instructions (with pictures) several times but was not entirely sure I understood several parts. Certain steps had great detail and others seemed to be glossed over. To their credit, they were much clearer as I was actually doing the install.
The instructions have you start with the air box modifications, then do the battery relocation, finally cutting through the cowl and firewall. MY JK is my daily driver and I needed to be able to continue driving it for most of the installation, so I started with the battery relocation, then did the fire wall and cowl work, and finished with the air box. I had been hoping to do some kind of variation for the air box to include a high flow or cone filter. However, with Hurricane Matthew bearing down on us, I just followed the instruction. I may revisit the issue down the road.
Battery Relocation
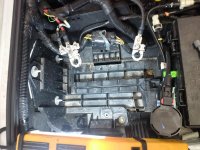
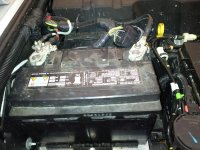
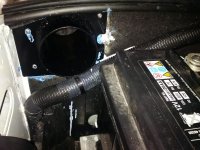
The battery relocation was relatively straight forward, except for a wiring connector not referenced in the instructions. It needs to be detached from its location (centered between battery connectors in the picture). The wires are relatively short and, when the battery is reinstalled, everything is very snug (it's jammed behind negative terminal). I tried to shift the battery as far over as I could, but it didn't give much more room.
Vacuum Hose Relocation
There is a vacuum hose connector located on the right outboard side of the engine compartment. This needs to be relocated to make space for the air hose. The instructions are not clear on how much lower the new bracket needs to be than the original. I just freed the connector up for the duration of the installation. I installed the new connector as I was routing the air hose. Lower is better.
Cowl Work
This is the most nerve racking part of the procedure - cutting through a finished, exposed surface. Again, deviating from the instructions, I cut the firewall first, so I got to practice and refine my technique.
There is a wiring harness running along the top of the firewall. This is detached, and flipped out of the way. The insulation is then cut away. Finally, a metal template is riveted to the fire wall to guide the hole saw (this was the main part that was missing from my kit). In looking at the template initially, I was unsure which way it went, but once the insulation was removed, I realized that the notches in the template line up with ridges on the firewall.
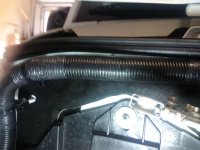
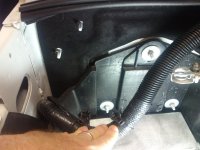
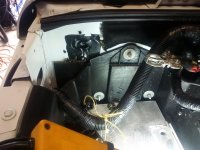
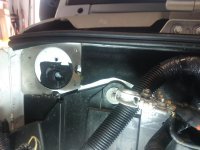
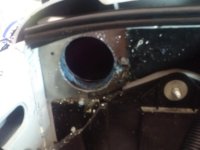
Getting a drill with hole saw attached was tight in the space available. The metal template made life much easier. As I could not be sure I would start in the exact center, I withdrew the guide bit on the hole saw so it was nearly flush with the edge of the blade and used the template to locate the hole. It bounced around a bit before it caught, but the template protected the painted surface (you can see the scratches on the template). I went through some the sheet metal and another layer of insulation.
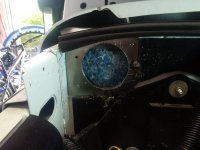
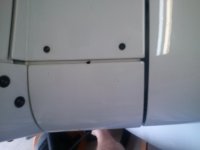
The included paper template gave the location of the center of the hole in the cowl itself. The center of the hole is on the seam between the two cowl pieces. I was afraid that if I drilled the pilot hole with a larger bit it would wander, so I started with a tiny hole and worked my way up through several bits until I was just smaller than the guide bit on the hole saw. I extended the guide bit on the hole saw back out. I then taped off the area where I would be drilling and protected the rest of the area with cardboard and a blanket. There were several layers of sheet metal to go through.
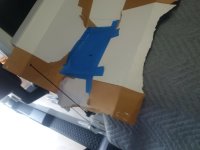
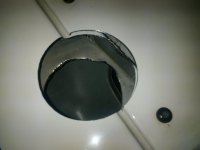
At this point, I removed the center cowl section (there were some plastic pins in the center which I later discovered could have been reached much more easily from under the hood). The instructions say to remove the two bolts holding the side section in place and to gently pull it up. That wasn't working. It turns out there was also a bolt under the A-pillar bracket.
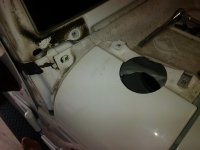
I touched up all of the raw metal surfaces (including holes drilled for the rivets) with a self-etching primer. A Q-tip worked well for getting to the backs and around corners.
The rest of the cowl assembly was relatively straight forward. The various pieces are partially assembled and put in place. I used RTV to seal the pipe that passes through the firewall. Some of the rubber pipes where hard to get over the metal pipes. Warming the rubber with a hair dryer and lubricating the pipe with spit did the trick.
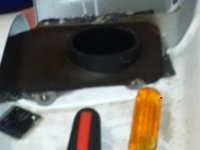
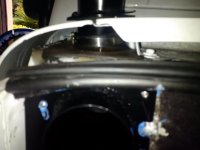
The pipe through the firewall and the cowl base are both pop riveted to the sheet metal. I had considered screwing them in place but was concerned about getting them tight without stripping the hole. A call to River Raider confirmed my concerns and I used the pop rivets (although I did use screws to attach the mushroom cap).
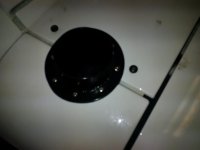
As I mentioned, I was going to play around with the air box at this point, but Matthew was knocking and I just followed the instructions. For this reason, I also have no pictures of the air box conversion.
The instructions we pretty clear for the air box conversion. They have you reverse the air flow through the box. I don't have a Dremmel (which other have suggested using to modify the air box), but I found a sharp chisel and hammer worked really well at removing the plastic ridges which had to be broken away. I used RTV between each of the plates and the air box when I installed the plate. On problem I had was that some of the screw holes wound up on interior plastic ridges. They had to be cut, drilled or chiseled away to make room for the nuts. Once the air box was done, I cut the tab off the side of the air filter so I could flip it over and air would still flow through it in the right direction.
Here are some pictures of the final install. The flexible air hose sits a little proud - I assume it is being slightly flattened when the hood is latched down.
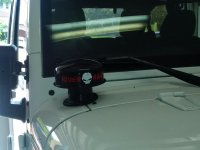
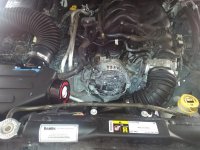
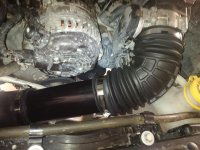
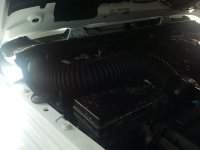
I am happy with the results and glad I chose it.
Since I got it back, however, I've been puddle (and rain, and any water) phobic. So I decided I needed a snorkel... not for fording but for my peace-of-mind. Did I really need it - probably not, but I feel better having it.
I did not want one that rode high on the A-pillar, so that left me with the River Raider Expedition Snorkel and Rugged Ridge XHD Snorkel. While I like how the Rugged Ridge laid low in the right cowl, I was a little worried about all of the low lying joints and water intrusion. Probably not a real issue but enough for me. Some might object to the River Raider's mushroom on the cowl, but I was OK with it. I chose the River Raider.
The components of the kit itself were all solid. The problem I had initially was that several small pieces were missing. This also had been noted in a write-up I found from several years ago. I called, got great customer service and I had the parts a couple of days later.
I read through the instructions (with pictures) several times but was not entirely sure I understood several parts. Certain steps had great detail and others seemed to be glossed over. To their credit, they were much clearer as I was actually doing the install.
The instructions have you start with the air box modifications, then do the battery relocation, finally cutting through the cowl and firewall. MY JK is my daily driver and I needed to be able to continue driving it for most of the installation, so I started with the battery relocation, then did the fire wall and cowl work, and finished with the air box. I had been hoping to do some kind of variation for the air box to include a high flow or cone filter. However, with Hurricane Matthew bearing down on us, I just followed the instruction. I may revisit the issue down the road.
Battery Relocation
The battery relocation was relatively straight forward, except for a wiring connector not referenced in the instructions. It needs to be detached from its location (centered between battery connectors in the picture). The wires are relatively short and, when the battery is reinstalled, everything is very snug (it's jammed behind negative terminal). I tried to shift the battery as far over as I could, but it didn't give much more room.


Vacuum Hose Relocation
There is a vacuum hose connector located on the right outboard side of the engine compartment. This needs to be relocated to make space for the air hose. The instructions are not clear on how much lower the new bracket needs to be than the original. I just freed the connector up for the duration of the installation. I installed the new connector as I was routing the air hose. Lower is better.
Cowl Work
This is the most nerve racking part of the procedure - cutting through a finished, exposed surface. Again, deviating from the instructions, I cut the firewall first, so I got to practice and refine my technique.
There is a wiring harness running along the top of the firewall. This is detached, and flipped out of the way. The insulation is then cut away. Finally, a metal template is riveted to the fire wall to guide the hole saw (this was the main part that was missing from my kit). In looking at the template initially, I was unsure which way it went, but once the insulation was removed, I realized that the notches in the template line up with ridges on the firewall.


Getting a drill with hole saw attached was tight in the space available. The metal template made life much easier. As I could not be sure I would start in the exact center, I withdrew the guide bit on the hole saw so it was nearly flush with the edge of the blade and used the template to locate the hole. It bounced around a bit before it caught, but the template protected the painted surface (you can see the scratches on the template). I went through some the sheet metal and another layer of insulation.


The included paper template gave the location of the center of the hole in the cowl itself. The center of the hole is on the seam between the two cowl pieces. I was afraid that if I drilled the pilot hole with a larger bit it would wander, so I started with a tiny hole and worked my way up through several bits until I was just smaller than the guide bit on the hole saw. I extended the guide bit on the hole saw back out. I then taped off the area where I would be drilling and protected the rest of the area with cardboard and a blanket. There were several layers of sheet metal to go through.


At this point, I removed the center cowl section (there were some plastic pins in the center which I later discovered could have been reached much more easily from under the hood). The instructions say to remove the two bolts holding the side section in place and to gently pull it up. That wasn't working. It turns out there was also a bolt under the A-pillar bracket.

I touched up all of the raw metal surfaces (including holes drilled for the rivets) with a self-etching primer. A Q-tip worked well for getting to the backs and around corners.
The rest of the cowl assembly was relatively straight forward. The various pieces are partially assembled and put in place. I used RTV to seal the pipe that passes through the firewall. Some of the rubber pipes where hard to get over the metal pipes. Warming the rubber with a hair dryer and lubricating the pipe with spit did the trick.


The pipe through the firewall and the cowl base are both pop riveted to the sheet metal. I had considered screwing them in place but was concerned about getting them tight without stripping the hole. A call to River Raider confirmed my concerns and I used the pop rivets (although I did use screws to attach the mushroom cap).


As I mentioned, I was going to play around with the air box at this point, but Matthew was knocking and I just followed the instructions. For this reason, I also have no pictures of the air box conversion.
The instructions we pretty clear for the air box conversion. They have you reverse the air flow through the box. I don't have a Dremmel (which other have suggested using to modify the air box), but I found a sharp chisel and hammer worked really well at removing the plastic ridges which had to be broken away. I used RTV between each of the plates and the air box when I installed the plate. On problem I had was that some of the screw holes wound up on interior plastic ridges. They had to be cut, drilled or chiseled away to make room for the nuts. Once the air box was done, I cut the tab off the side of the air filter so I could flip it over and air would still flow through it in the right direction.
Here are some pictures of the final install. The flexible air hose sits a little proud - I assume it is being slightly flattened when the hood is latched down.


I am happy with the results and glad I chose it.
Last edited:

