What was done to your rig this week?

jeeeep

Hooked
Are you happy with the performance of the calipers so far? I need a brake upgrade on another vehicle (non Jeep) and Powerstop is one of the brands I was looking at.
I've run powerstop brake kits on the JKU and the Toyota Sequoia, was real happy with the performance on both.
 

GP NOIR

Hooked
I can tell you what wasn't done to my Jeep- Installation of chromoly front axle shafts. Ordered a set of Alloy USA Axle Shafts which were scheduled to arrive yesterday. Tracking on Tuesday had the shafts showing delivery was on time. Wednesday showed the shipment was undeliverable, the order cancelled and the shafts sent back. A call to Amazon revealed the package was damaged by the carrier and sent back to the seller. Card won't be credited back until the seller receives the shafts because it's a "high value item" so I can't order another set until they do.

Oh well. I've always wondered what it'd be like to run Moab in 3 wheel drive. See you guys out there this weekend!
 

duktrx

Active Member
I swapped out the hard top for the soft top and put the Spidershades back on so that when I have the top open, I don't identify as a lobster, and the puppers can get some shade.
A couple of years ago, I installed steel molle panels in the triangle of the roll bars to give me something to attach to another shade and a bungee cargo net I made to keep the doggo safe and in the shade when I need to run into someplace quick. The problem is it makes swapping tops a pain.

As I looked for the knobs for the soft top door surrounds, I found the Delrin hinge liners I ordered eight years ago. I decided today was the day I would finally make taking my doors off a reality. I have tried many times in the past and have not gotten them to budge. I have been diligent about soaking them in PB blaster to try and break through the crud. I got the driver's door off and beat out the OEM crap pretty quickly. Then driver's side rear door came off with a little more effort, but the liner took some brute force and realignment of the upper hinge when I was done. The front passenger side door came off with more effort than the driver's door, but the liners pushed out with one tap of the hammer. The rear passenger door was a bear; I had to pull out the floor jack and a 2x6 to lift the Jeep by the door and wiggle it back and forth. The liner had to be drilled out, I went just barely smaller than the liner, and the bit dug into the liner and twisted out.

I took a plumber's wire brush for cleaning inside 1/2" copper fittings, worked like magic cleaning up the inside of the hinges. I worked over the hinge pins with some plumber's emory cloth. Coated the liners and hinges with white lithium grease to fend off the elements. My wife was amazed at how smooth the doors are now.
 

kevman65

Hooked
FINALLY got around to installing my Synergy drag link bar. Ordered all 3 steering components at same time in 2020, but drag link was delayed a few months and then life got in the way for a couple of years.
Had to drop passenger tie rod end to make room to drop drag link, learned a lesson, anti-seize on all exposed threads on steering components. Had to pickle hammer the tie rod end, boot survived (whew), Driver side drag link end (anyone that's messed with it knows) is a PITA. Recessed allen in top of stud, just enough room to get wrench in let alone an allen. Cut the boot off and used Channel Locks to hold the stud. Got the nut to finger loose and then pickle fork time. It took some beating, but it finally popped loose. Reinstalling everything was a piece of cake. Did find out that an old man needs to buy a longer 1/2" torque wrench to do the higher torques in tight places. Wore me out doing the 90 pounders on the pinch bolts.

Now for the good news. Took her out for a test spin and to see how much the steering wheel was out. ALL of my little oscillations in the steering are gone, so I know what the culprit was. Steering wheel was off about 15 degrees to passenger, loosened pinch bolt, did some counter clockwise on double adjuster, snugged up pinch bolt and drove for a little bit. Within a degree of being perfect so tightened pinch bolt and called it done.
 

tweeve

Member
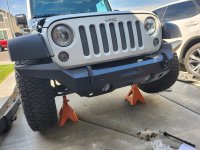
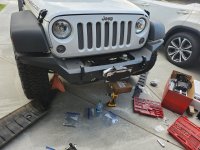
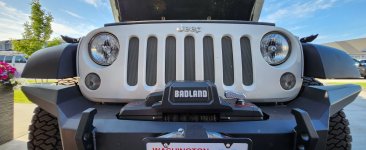
I finally got my new rugged ridge full-width bumper installed with the help of a friend. I also test-fitted the Winch.
Plan to install the winch next weekend.
 

Attachments

  • 20230527_155438.jpg
    20230527_155438.jpg
    205.2 KB · Views: 7
  • 20230527_170712.jpg
    20230527_170712.jpg
    218.2 KB · Views: 7
  • 20230528_182123.jpg
    20230528_182123.jpg
    116.9 KB · Views: 7

boardsurfer

Active Member
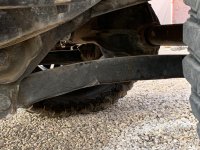
I did a rebuild on one of my control arm joints that was making some racket. Getting is apart is easy.. snap ring, press it out, no problem. Cleaned out the inside of the johnny joint and the center piece and tried to get it all back together. Huge hassle.

Drop the new retaining ring in, the new cup, then the center ball section and the other cup on top. Not too bad after I found the right combination of sockets and spacers to fit in the vise and squeeze it all together. Then comes the final snap ring. Holy hell. I think I started with my axle nut socket on the back side and the pitman arm socket on the front to compress the whole thing so the snap ring can go in its place. Nope, too big, wont fit in the vise. Swap out the back side socket for some old retainer rings from previous rebuilds, cram it all back in the vise and it fits.. barely. Except now the front socket Im using to compress the cups is too wide. No room for the snap ring. Take it all apart and dig for the perfect socket to use. Has to be wide enough to press the retainer ring, but narrow enough to leave room for the snap ring. Finally come up with a 1 1/8 impact socket that looks to fit just right.

Cram it all back in the vise and squeeze the shit out of it. Aaaand the snap ring pliers broke. 15 minutes of cussing and a trip to the store later and I got the ring in.

Only 13 more to go! 😫
 

WJCO

Meme King
I did a rebuild on one of my control arm joints that was making some racket. Getting is apart is easy.. snap ring, press it out, no problem. Cleaned out the inside of the johnny joint and the center piece and tried to get it all back together. Huge hassle.

Drop the new retaining ring in, the new cup, then the center ball section and the other cup on top. Not too bad after I found the right combination of sockets and spacers to fit in the vise and squeeze it all together. Then comes the final snap ring. Holy hell. I think I started with my axle nut socket on the back side and the pitman arm socket on the front to compress the whole thing so the snap ring can go in its place. Nope, too big, wont fit in the vise. Swap out the back side socket for some old retainer rings from previous rebuilds, cram it all back in the vise and it fits.. barely. Except now the front socket Im using to compress the cups is too wide. No room for the snap ring. Take it all apart and dig for the perfect socket to use. Has to be wide enough to press the retainer ring, but narrow enough to leave room for the snap ring. Finally come up with a 1 1/8 impact socket that looks to fit just right.

Cram it all back in the vise and squeeze the shit out of it. Aaaand the snap ring pliers broke. 15 minutes of cussing and a trip to the store later and I got the ring in.

Only 13 more to go! 😫
Those things really are tight during rebuilding. I still love the technology though. Great product.
 

TrailHunter

Hooked
I did a rebuild on one of my control arm joints that was making some racket. Getting is apart is easy.. snap ring, press it out, no problem. Cleaned out the inside of the johnny joint and the center piece and tried to get it all back together. Huge hassle.

Drop the new retaining ring in, the new cup, then the center ball section and the other cup on top. Not too bad after I found the right combination of sockets and spacers to fit in the vise and squeeze it all together. Then comes the final snap ring. Holy hell. I think I started with my axle nut socket on the back side and the pitman arm socket on the front to compress the whole thing so the snap ring can go in its place. Nope, too big, wont fit in the vise. Swap out the back side socket for some old retainer rings from previous rebuilds, cram it all back in the vise and it fits.. barely. Except now the front socket Im using to compress the cups is too wide. No room for the snap ring. Take it all apart and dig for the perfect socket to use. Has to be wide enough to press the retainer ring, but narrow enough to leave room for the snap ring. Finally come up with a 1 1/8 impact socket that looks to fit just right.

Cram it all back in the vise and squeeze the shit out of it. Aaaand the snap ring pliers broke. 15 minutes of cussing and a trip to the store later and I got the ring in.

Only 13 more to go! 😫
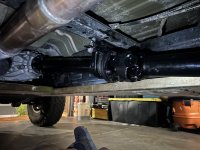
Can you describe the “racket”.. I think I have the same issue. I thought it was my Rancho shocks.. but lying under the Jeep a couple weeks ago pulling and pushing on things, the joint(s) seemed to be the culprit “squeaking” noise. Was able to pump a little grease into one.. but it didnt help. Maybe I need to rebuild a few of them.
 

wayoflife

Administrator
Staff member
I did a rebuild on one of my control arm joints that was making some racket. Getting is apart is easy.. snap ring, press it out, no problem. Cleaned out the inside of the johnny joint and the center piece and tried to get it all back together. Huge hassle.

Drop the new retaining ring in, the new cup, then the center ball section and the other cup on top. Not too bad after I found the right combination of sockets and spacers to fit in the vise and squeeze it all together. Then comes the final snap ring. Holy hell. I think I started with my axle nut socket on the back side and the pitman arm socket on the front to compress the whole thing so the snap ring can go in its place. Nope, too big, wont fit in the vise. Swap out the back side socket for some old retainer rings from previous rebuilds, cram it all back in the vise and it fits.. barely. Except now the front socket Im using to compress the cups is too wide. No room for the snap ring. Take it all apart and dig for the perfect socket to use. Has to be wide enough to press the retainer ring, but narrow enough to leave room for the snap ring. Finally come up with a 1 1/8 impact socket that looks to fit just right.

Cram it all back in the vise and squeeze the shit out of it. Aaaand the snap ring pliers broke. 15 minutes of cussing and a trip to the store later and I got the ring in.

Only 13 more to go! 😫
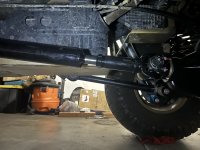
If you've got the room for one, a small harbor freight shop press makes this a lot easier.
 

boardsurfer

Active Member
Can you describe the “racket”.. I think I have the same issue. I thought it was my Rancho shocks.. but lying under the Jeep a couple weeks ago pulling and pushing on things, the joint(s) seemed to be the culprit “squeaking” noise. Was able to pump a little grease into one.. but it didnt help. Maybe I need to rebuild a few of them.
It was a gritty kind of squeak.

Those things really are tight during rebuilding. I still love the technology though. Great product.
They are pretty great and honestly, I'm not sure replacing the internals was totally necessary based on the way the cups looked when I pulled them out. I think a good clean and re-greasing would have sufficed.
 
Top Bottom