The WAYALIFE Jeep JT Gladiator Antenna Mount is a perfect compliment to the ACC BAR and it is designed to be installed on either side of the truck bed, just behind the rear window using existing holes and work with a factory tonneau cover. The mount is made out of unfinished, laser cut and bent, 3/16" thick stainless steel and it comes complete with stainless steel hardware for optimum performance and corrosion resistance. The following video and write-up will show you just how super easy it is to install and how it can be done in just minutes using basic tools. While the mount is intended for use with a CB antenna, an optional NMO adapter can be purchased separately to allow for the use of GMRS and race radio antennas. As an added bonus, the mount can also be used to install a small rear facing light or flag.
WAYALIFE Jeep Gladiator Antenna/Light Mount: https://wayalife.com/store/proddetail.php?prod=PARTS-JT-ANTENNA-MOUNT
WAYALIFE ACC BAR: https://wayalife.com/store/proddetail.php?prod=PARTS-CB-BAR
• For use on 2021-Up Jeep Gladiators
• Designed for truck bed mounting of a radio antenna
• Optional NMO style antenna mount can be installed
• Allows for the installation of a small light
• Will work with factory Tonneau Cover
• Made out of stainless steel
• Includes stainless steel hardware
• Easy to install and with basic tools
• MADE IN THE USA
BUY the following to complete your Antenna Mount for NMO
NMO Adapter: https://wayalife.com/store/proddetail.php?prod=PARTS-NMO-ADAPTER
Rugged Radios No Ground Plane Antenna: https://amzn.to/3xVCISs
Wilson Coax Cable w/Adapter: https://amzn.to/3xUUNzZ
BUY the following to complete your Antenna Mount for CB
FireStik Antenna Stud Mount : https://amzn.to/2O5jv8n
Firestik Antenna Spring : https://amzn.to/2NxIaVT
Wilson Coax Cable w/Adapter: https://amzn.to/3xUUNzZ
Firestik 3' CB Antenna : https://amzn.to/2QjODlY
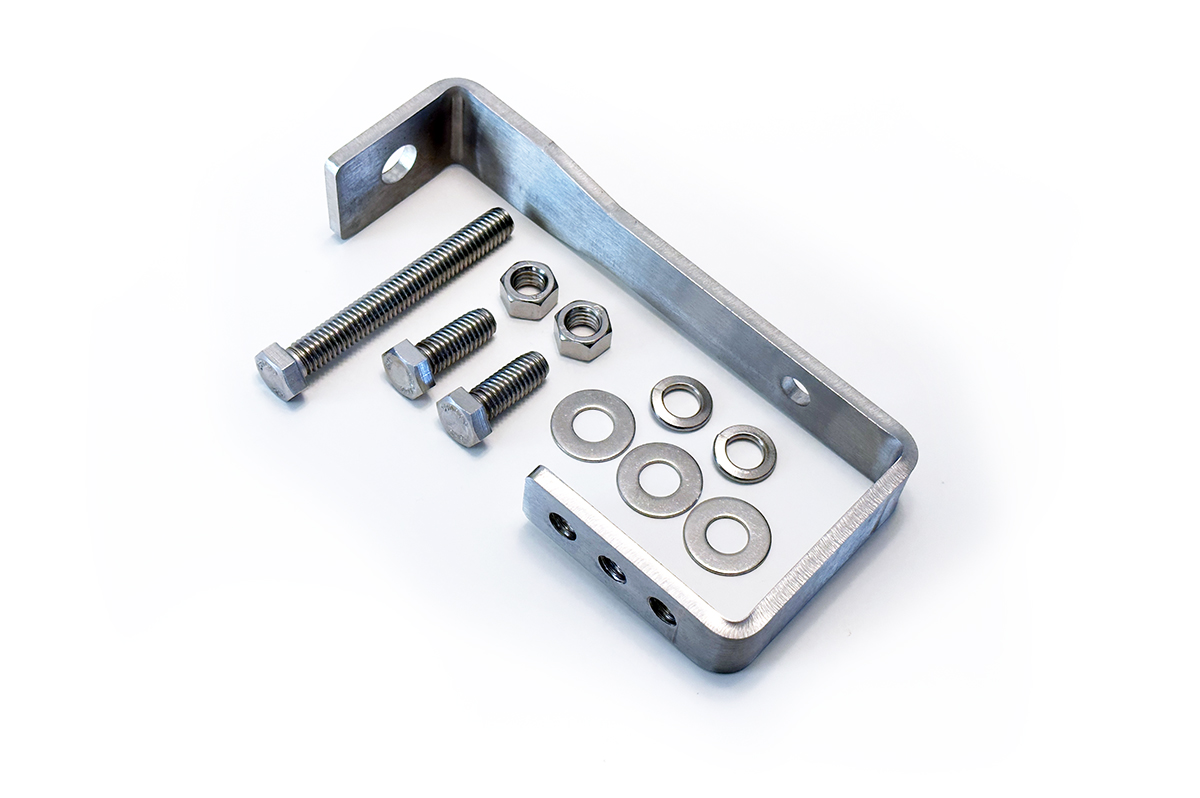
WHAT YOU WILL GET
(1) WAYALIFE Jeep Gladiator Stainless Steel Antenna/Light Mount
(1) 3/8"-16 x 3" Stainless Steel Bolt
(2) 3/8"-16 x 3/4" Stainless Steel Bolts
(2) 3/8" Stainless Steel Nuts
(2) 3/8" Stainless Steel Split Washers
(2) 3/8" Stainless Steel Washers
TOOLS YOU WILL NEED
• 9/16", 3/4" Socket & Wrench
• Ratchet
• Crescent Wrench
INSTALLATION
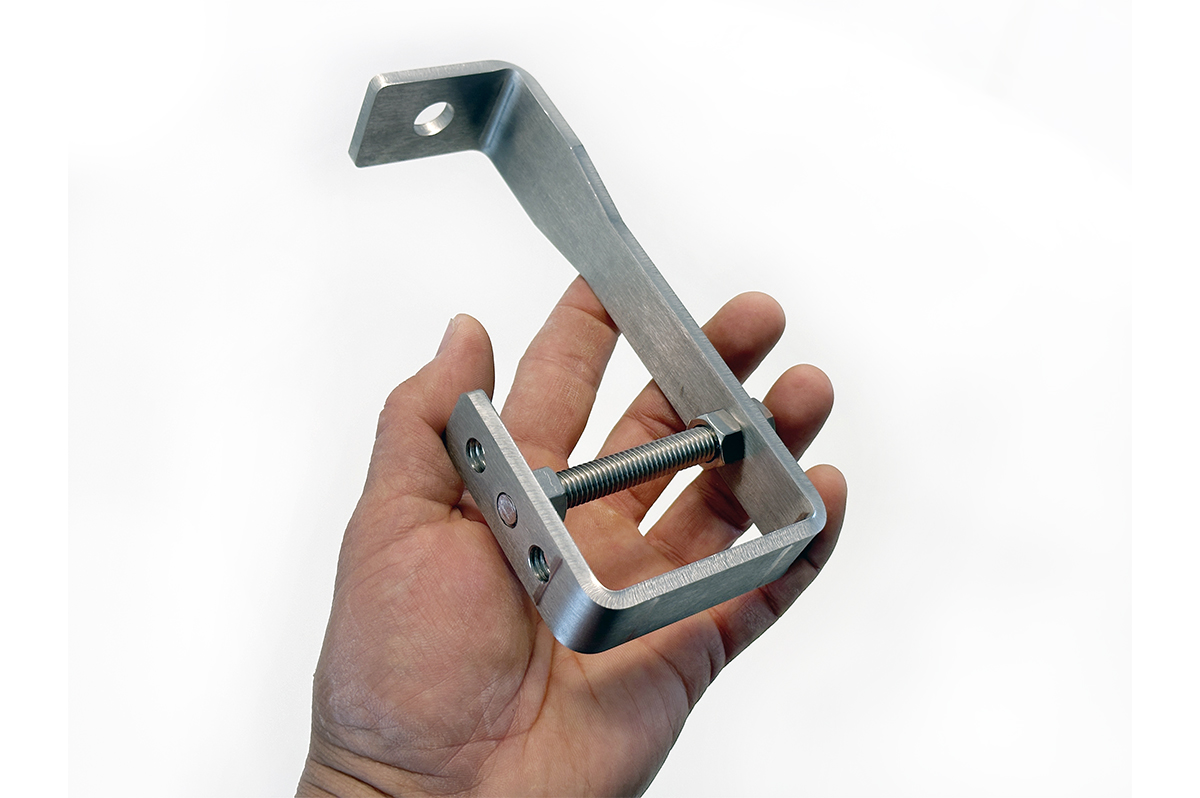
1. Begin assembling the JT Antenna/Light Mount by placing one of the 3/8" flat washers onto the long 3/8"-16x3" bolt and then insert it though the back hole as shown.
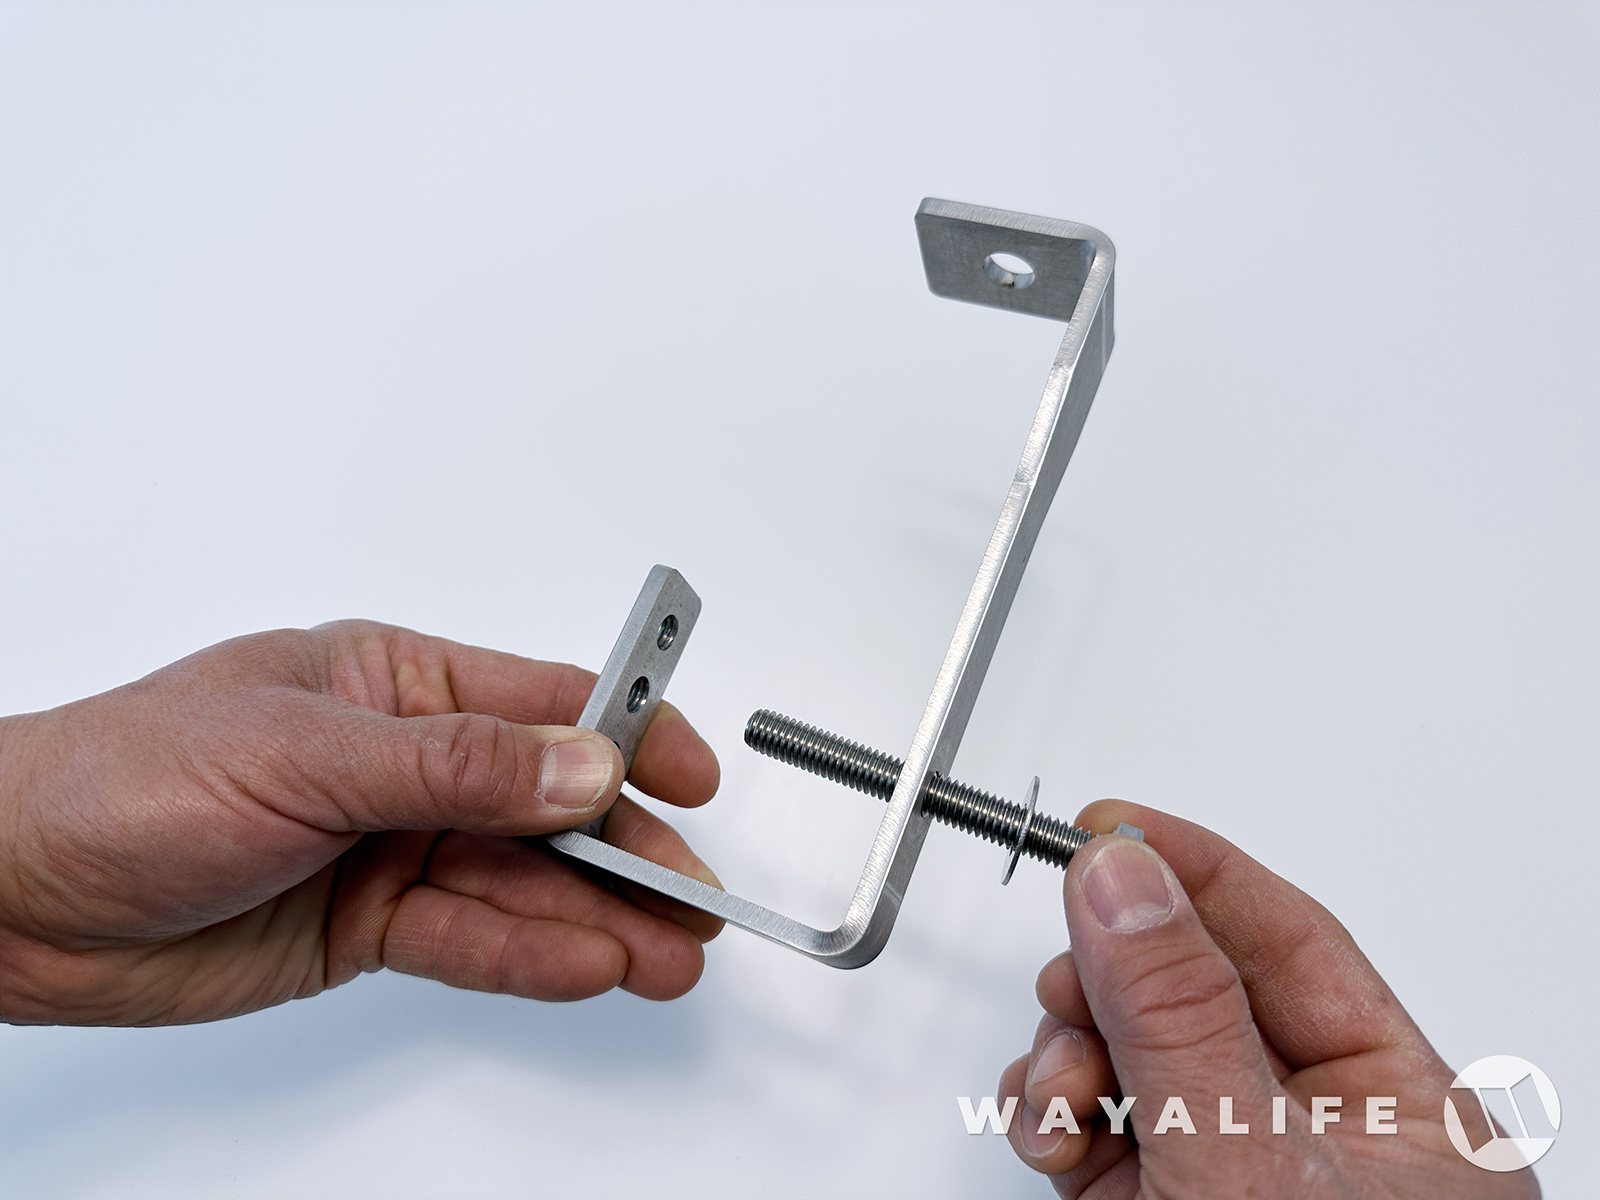
2. Thread on the two 3/8" nuts onto the bolt.
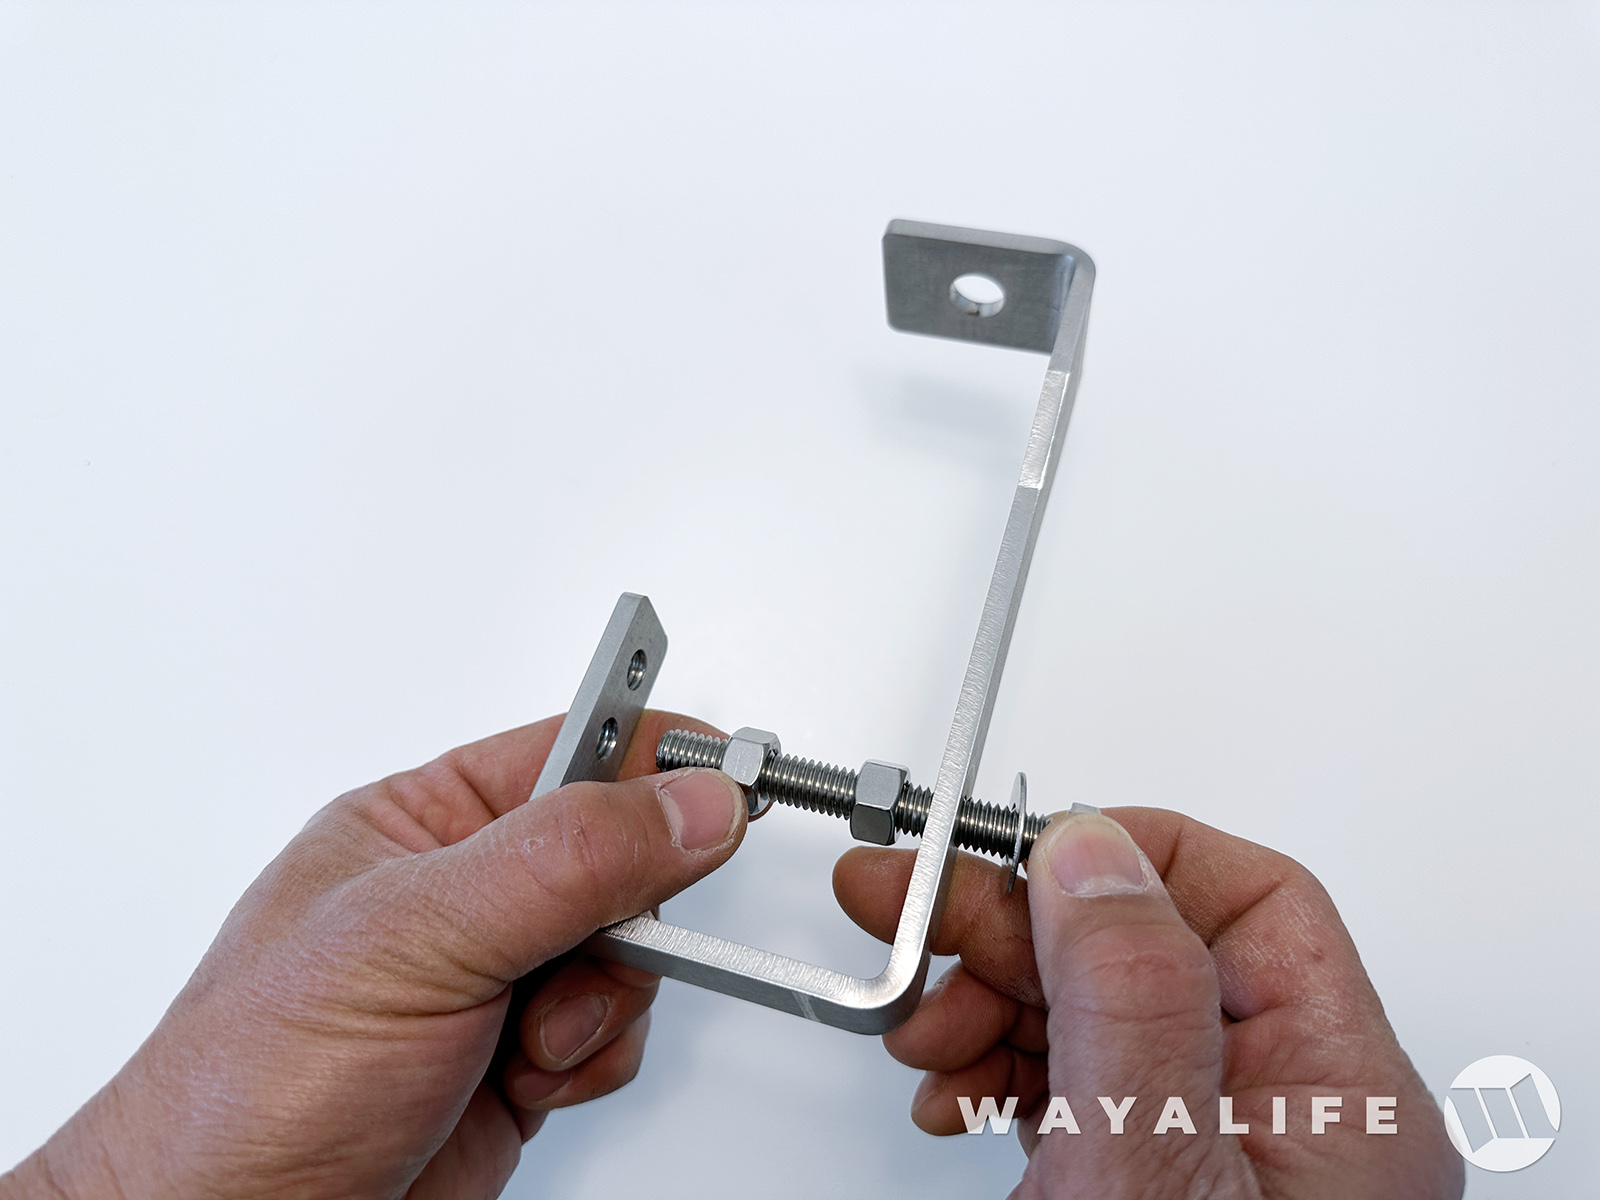
3. Push the bolt all the way to the front of the mount, thread it into the middle hole and tighten it using a 9/16" wrench.
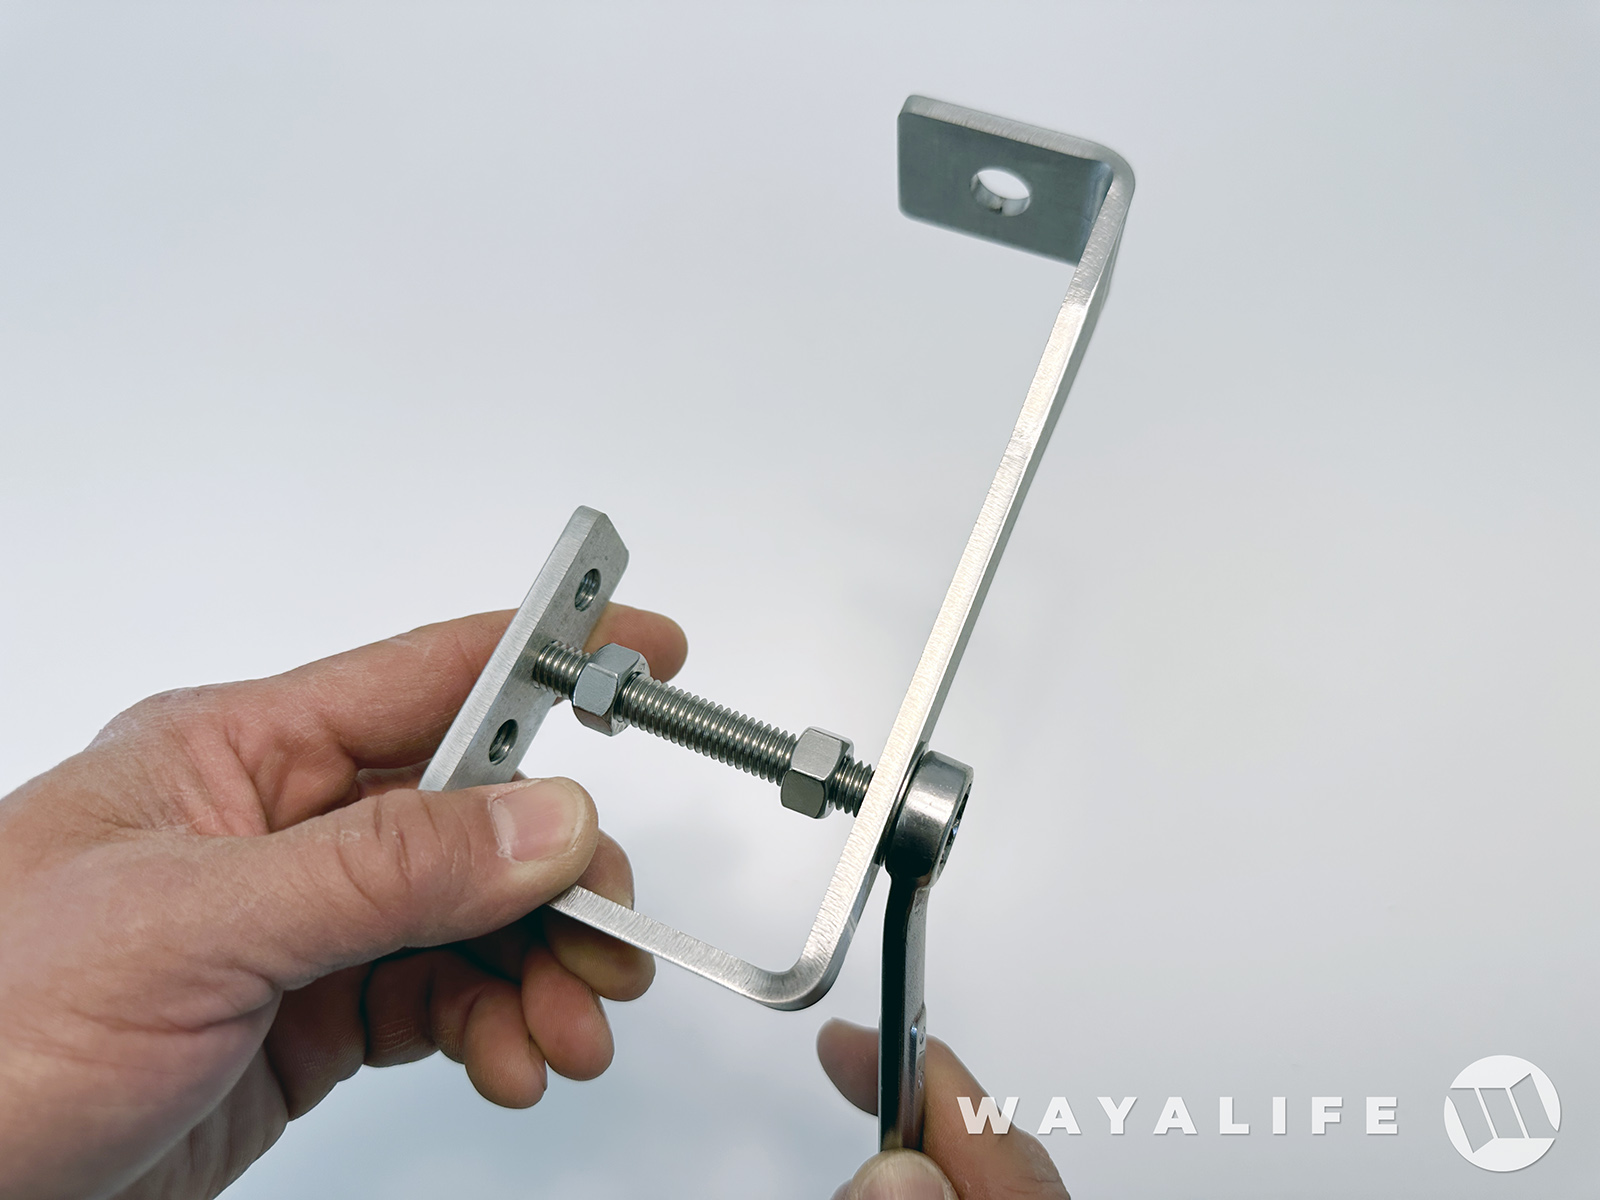
4. Using a 9/16" wrench, tighten the two nuts onto each side of the mount.

This is what the JT Antenna/Light Mount should look like when completely assembled.
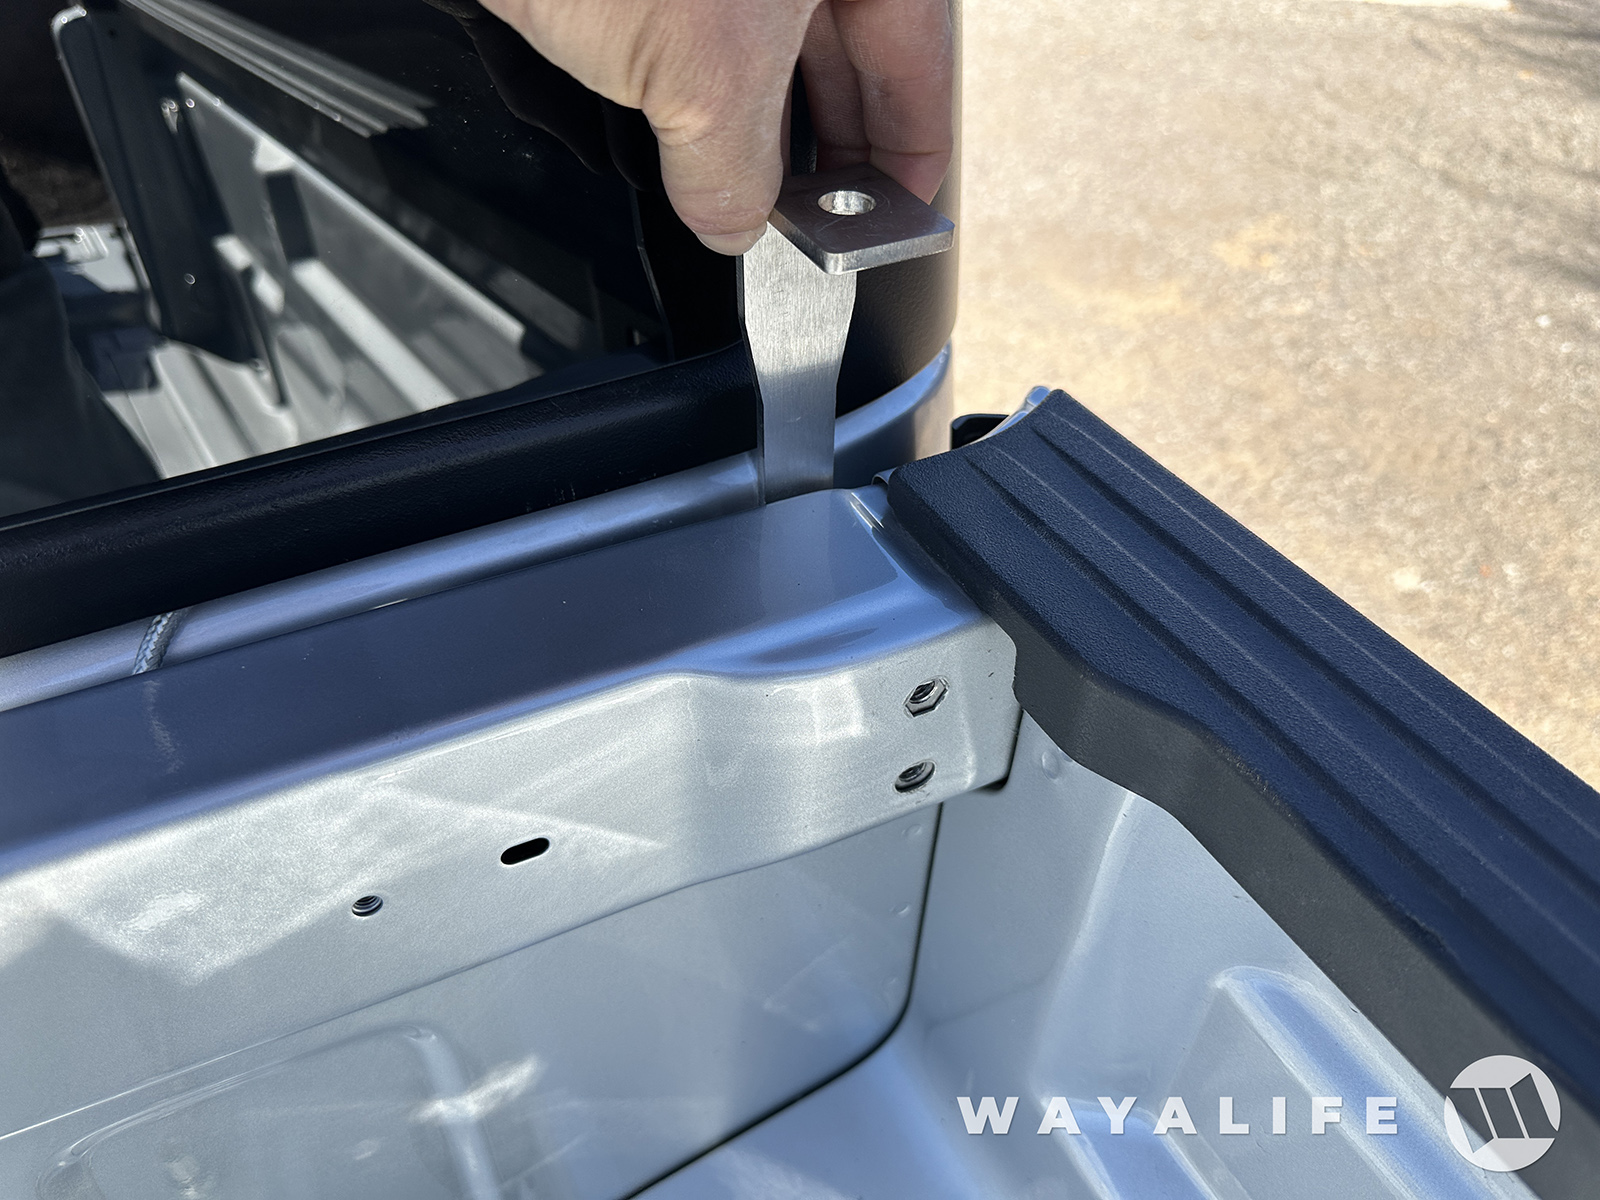
5. Choose which side of your Jeep Gladiator you would like to install the mount and then slip it in between the bulkhead and the cab.
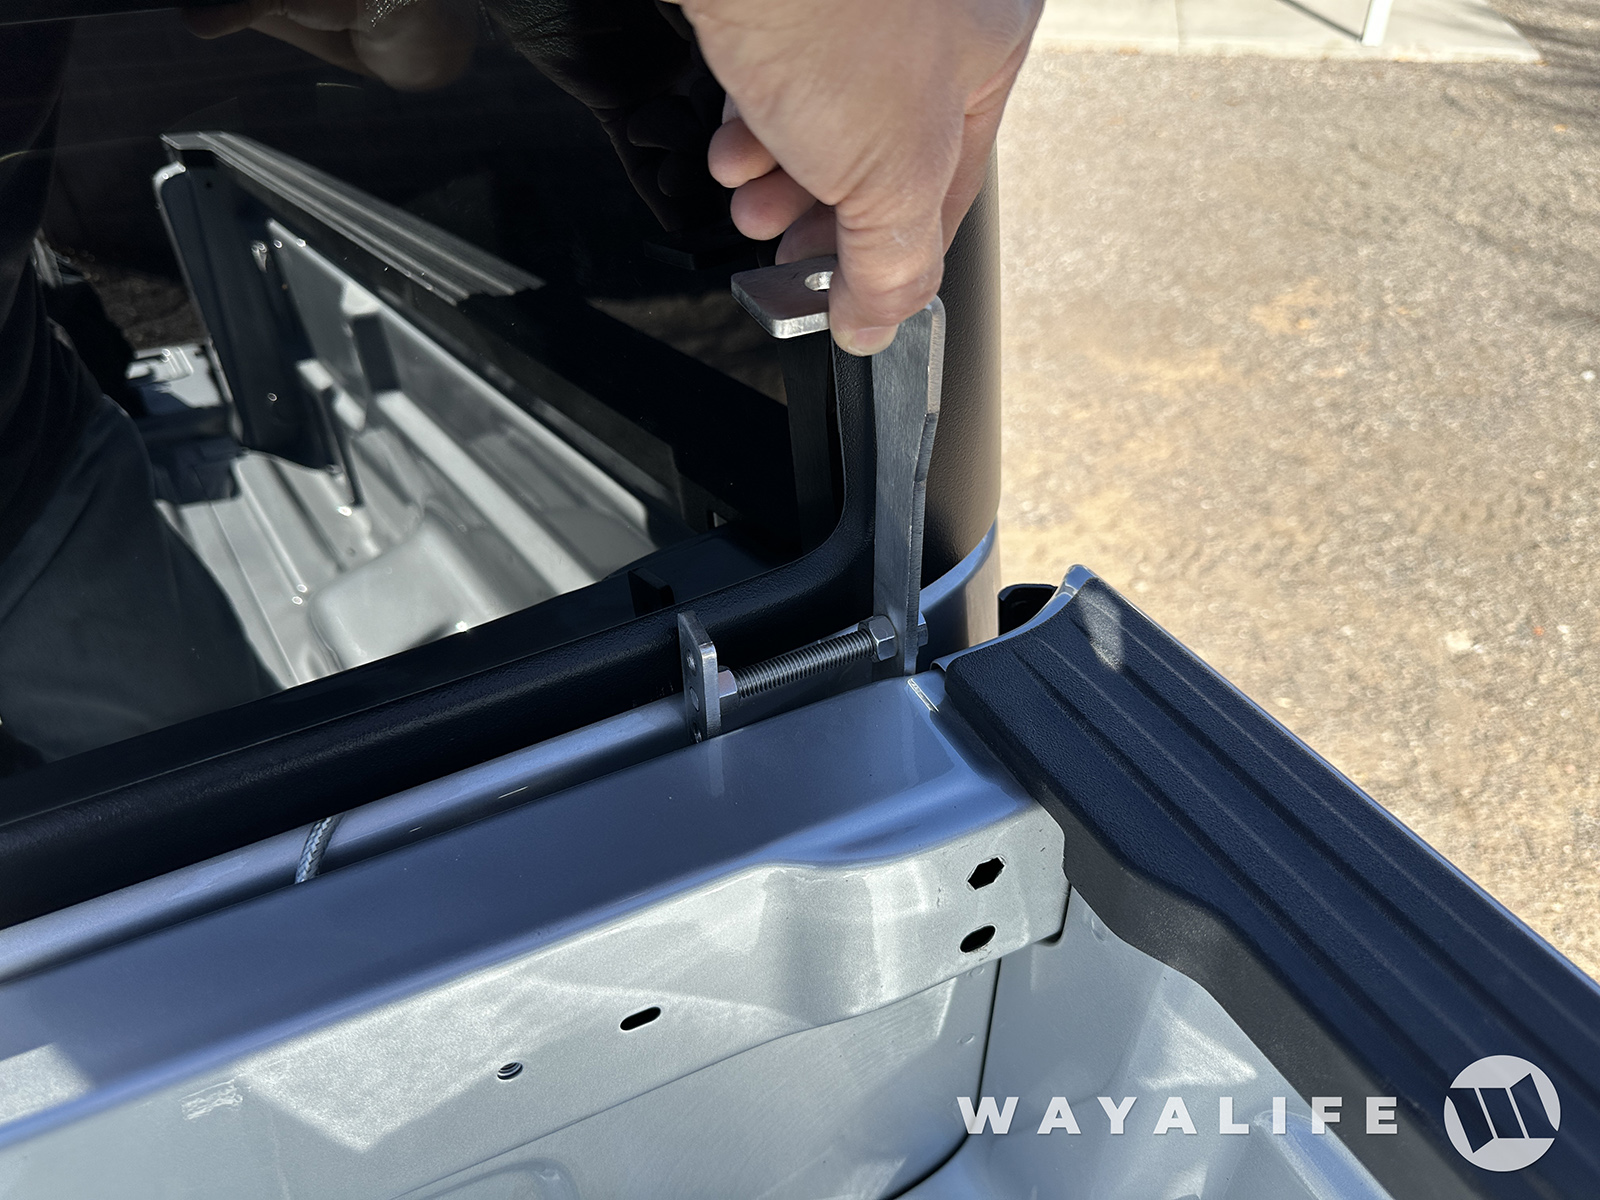
6. Once the front of the mount has cleared the lip of the bulkhead rail, rotate the mount and pull it up to the two existing holes in the bulkhead.
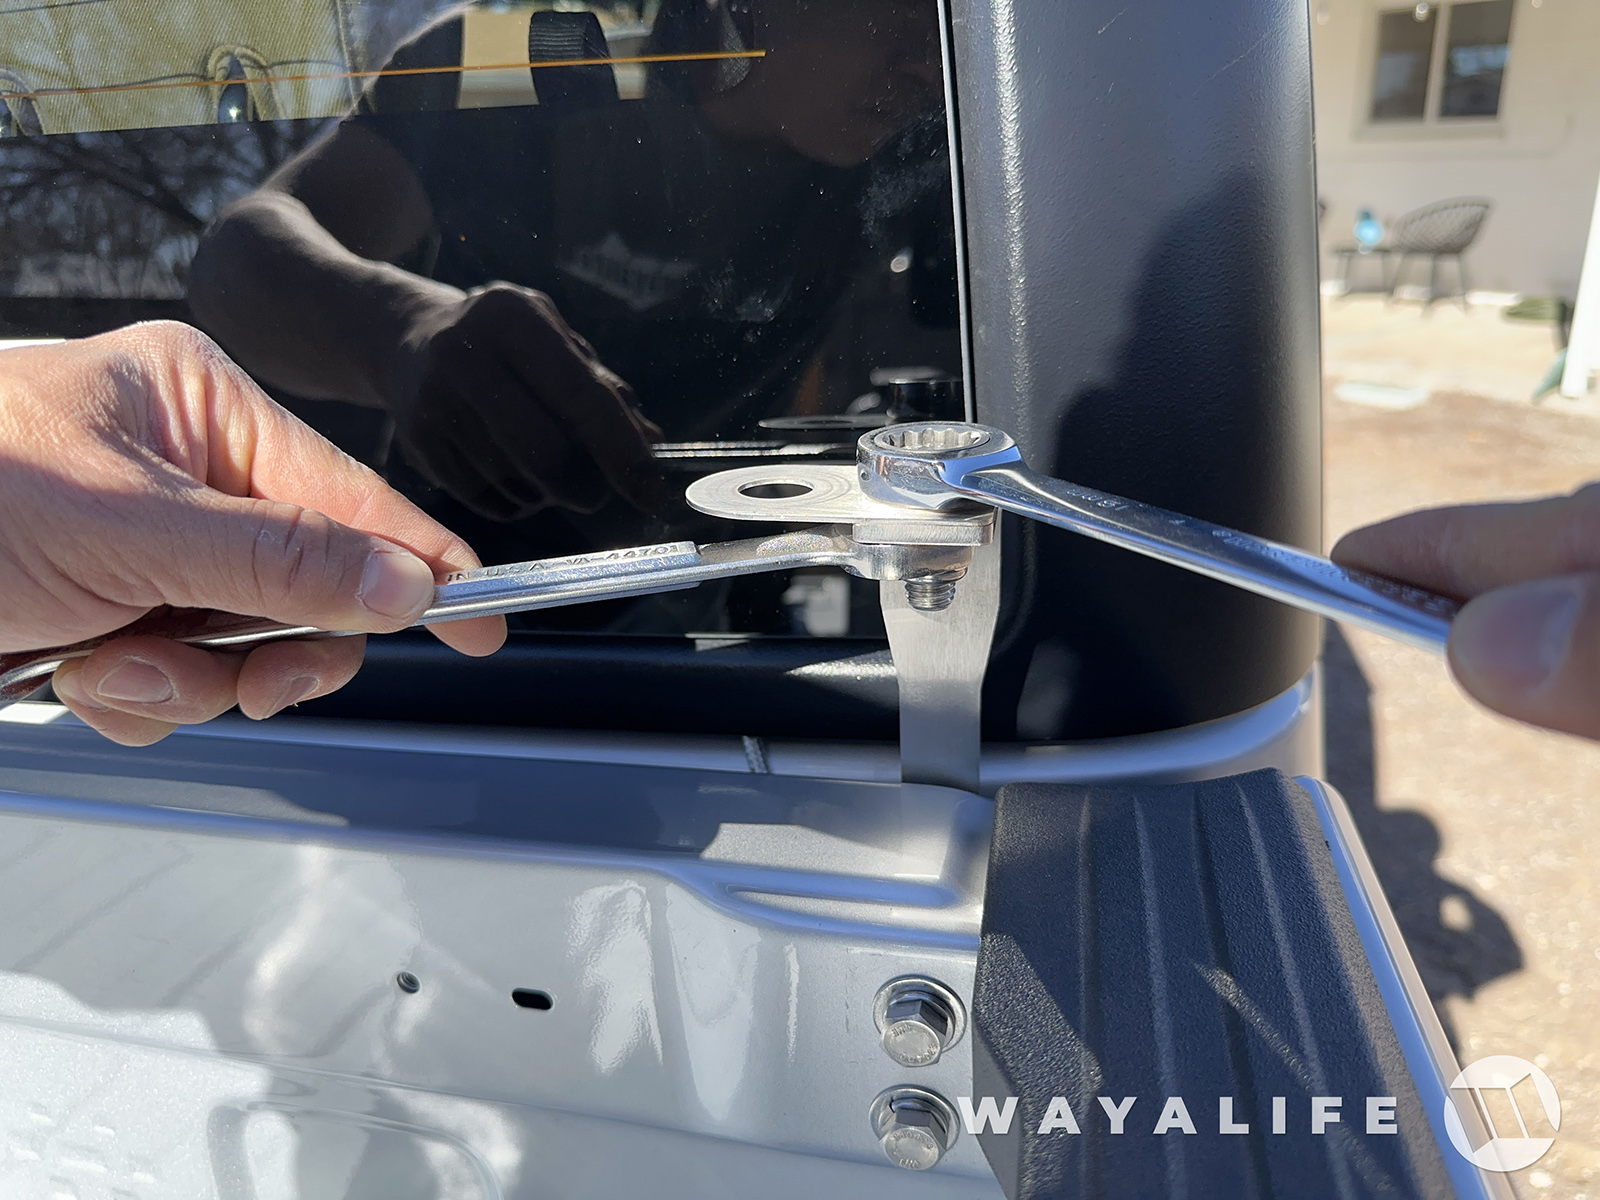
7. Place a split washer and a flat washer onto the 3/8"-16 x 3/4" bolts and then thread it into the antenna/light mount.
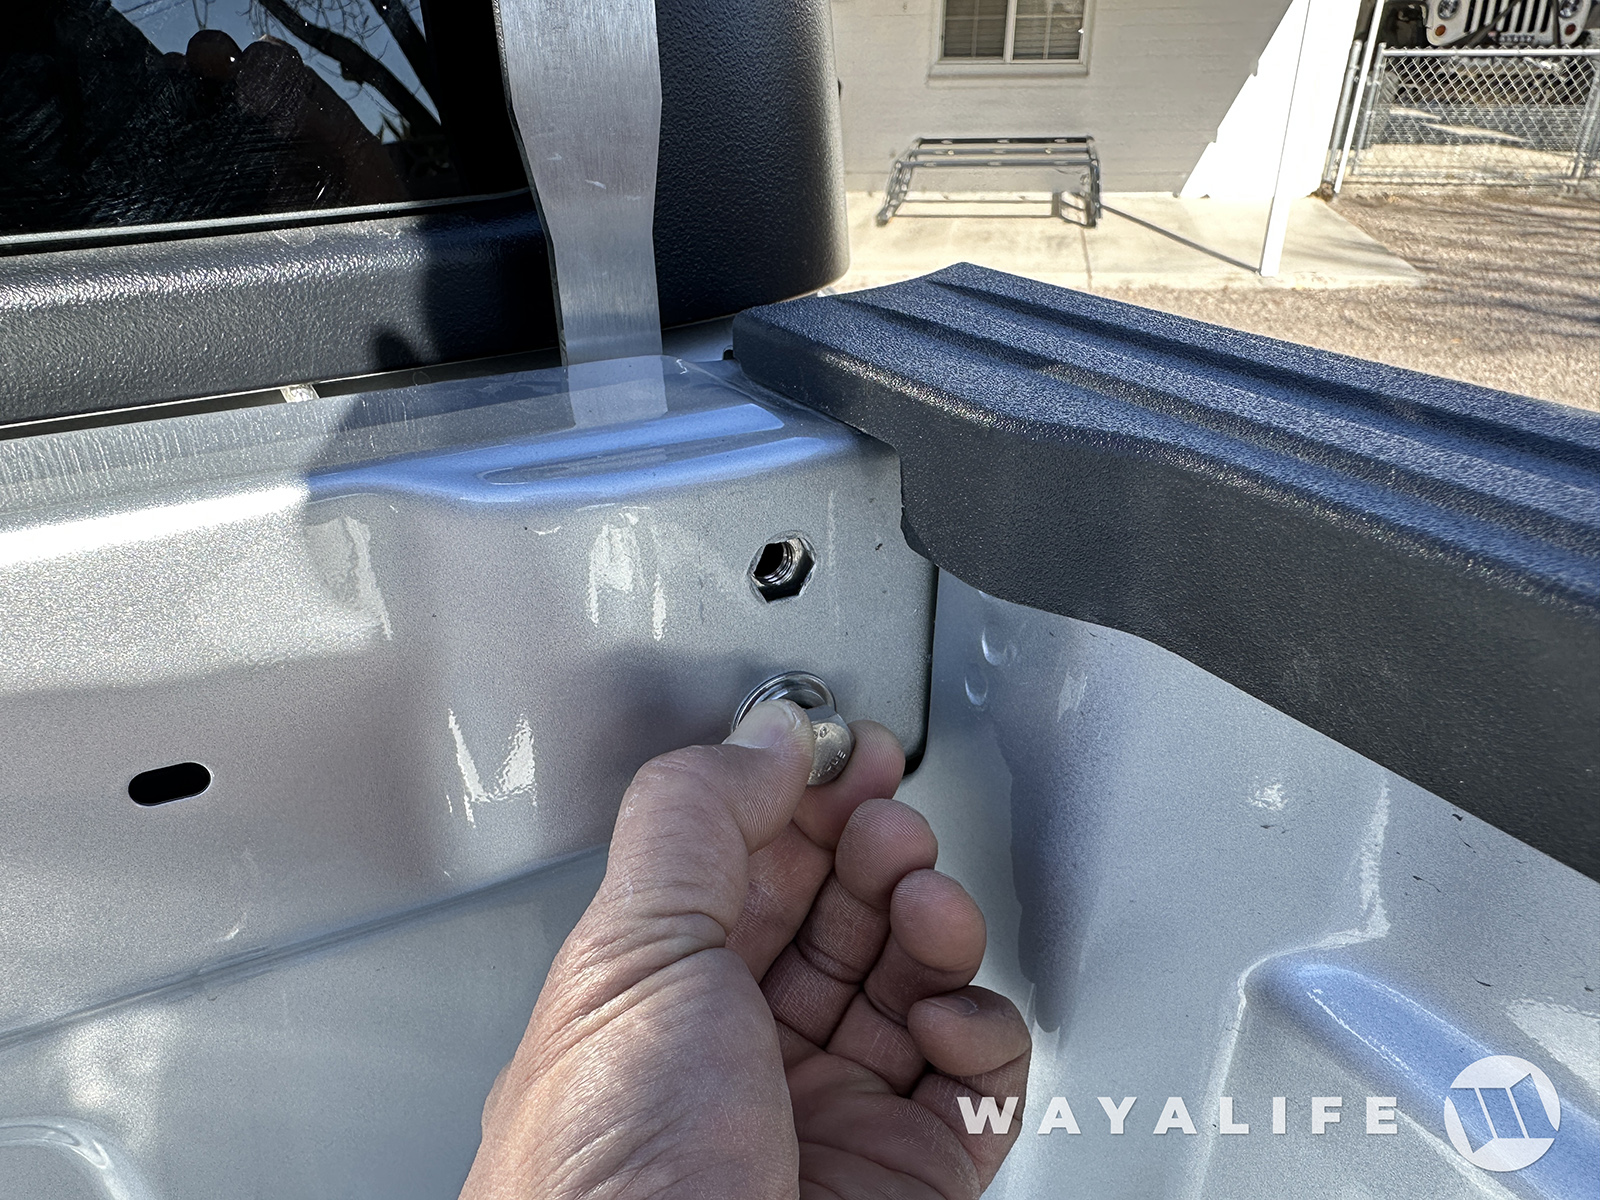
8. Use a 9/16" socket to tighten the bolts and secure the mount to the bulkhead.
CB RADIO ANTENNA INSTALLATION
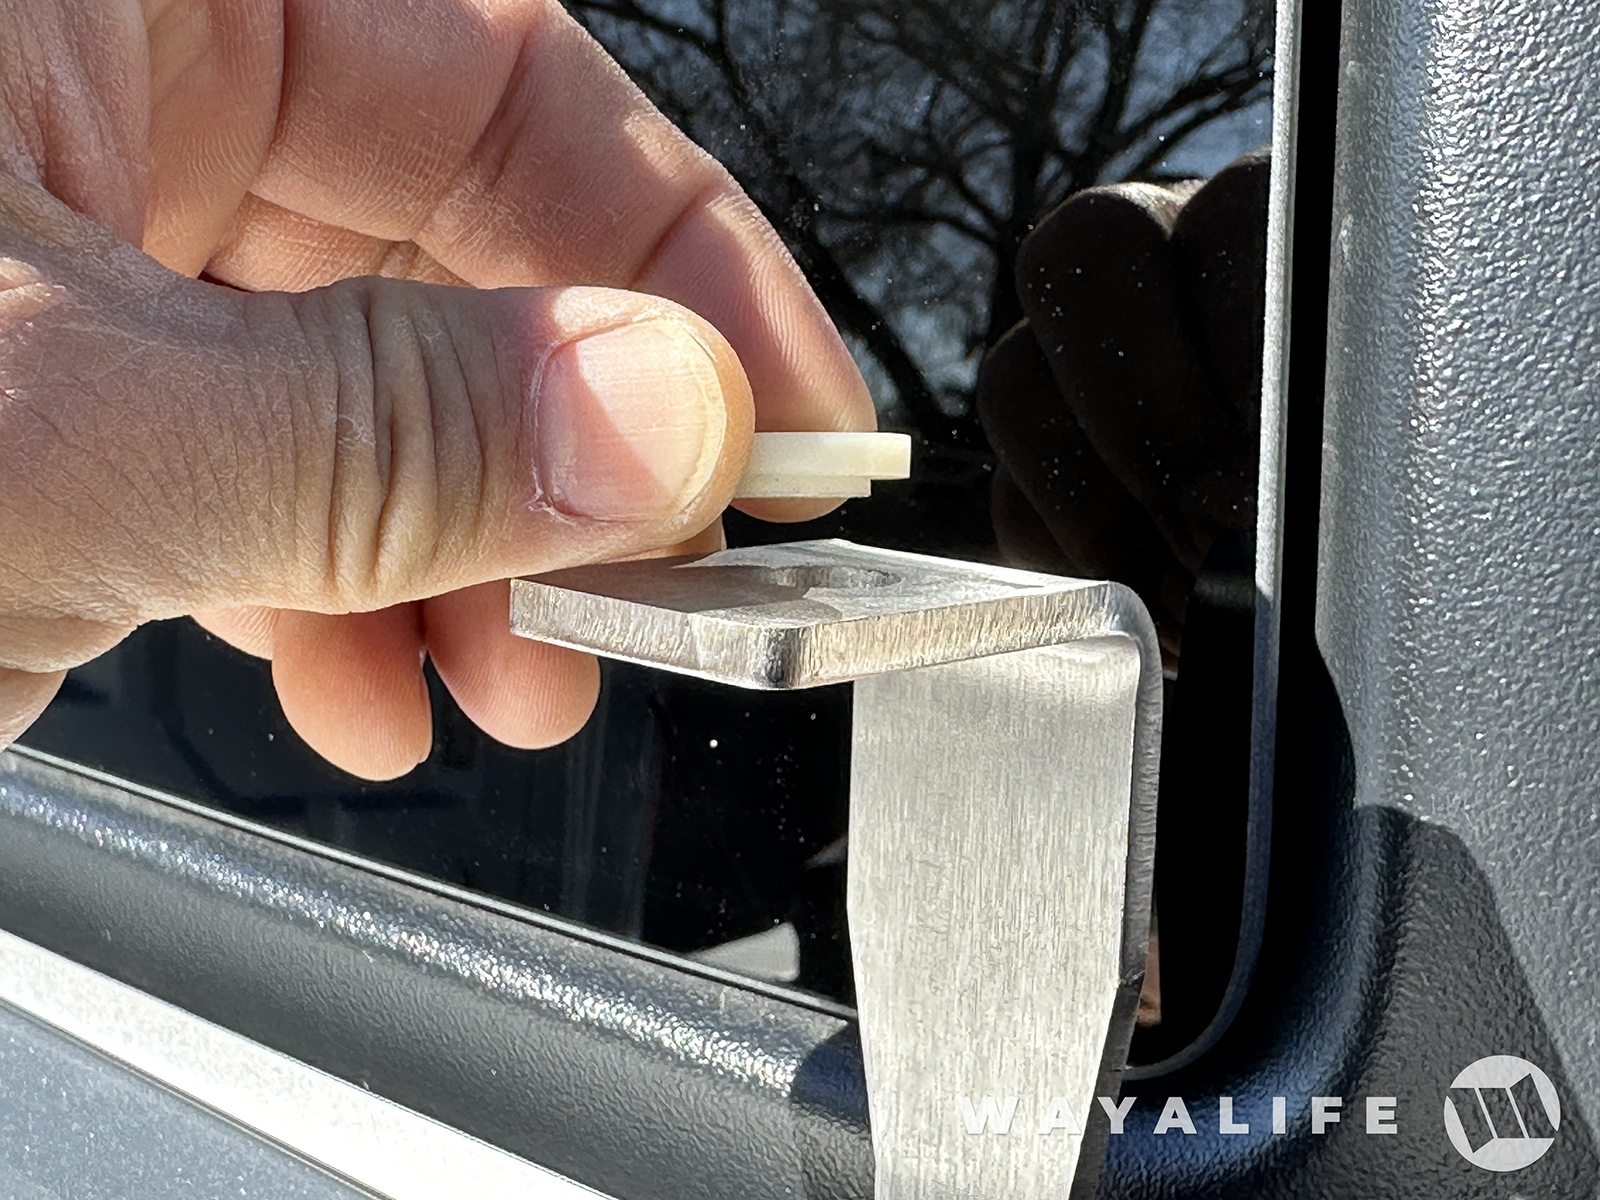
1. If you're installing a CB Radio antenna, you will need to place the stepped nylon washer on top of the mount and making sure that the step sits inside the hole.
2. Place the mounting stud or spring on top of the nylon washer, install the base with a spoked or lock washer on the threads and then use a 3/4" wrench to secure it in place.
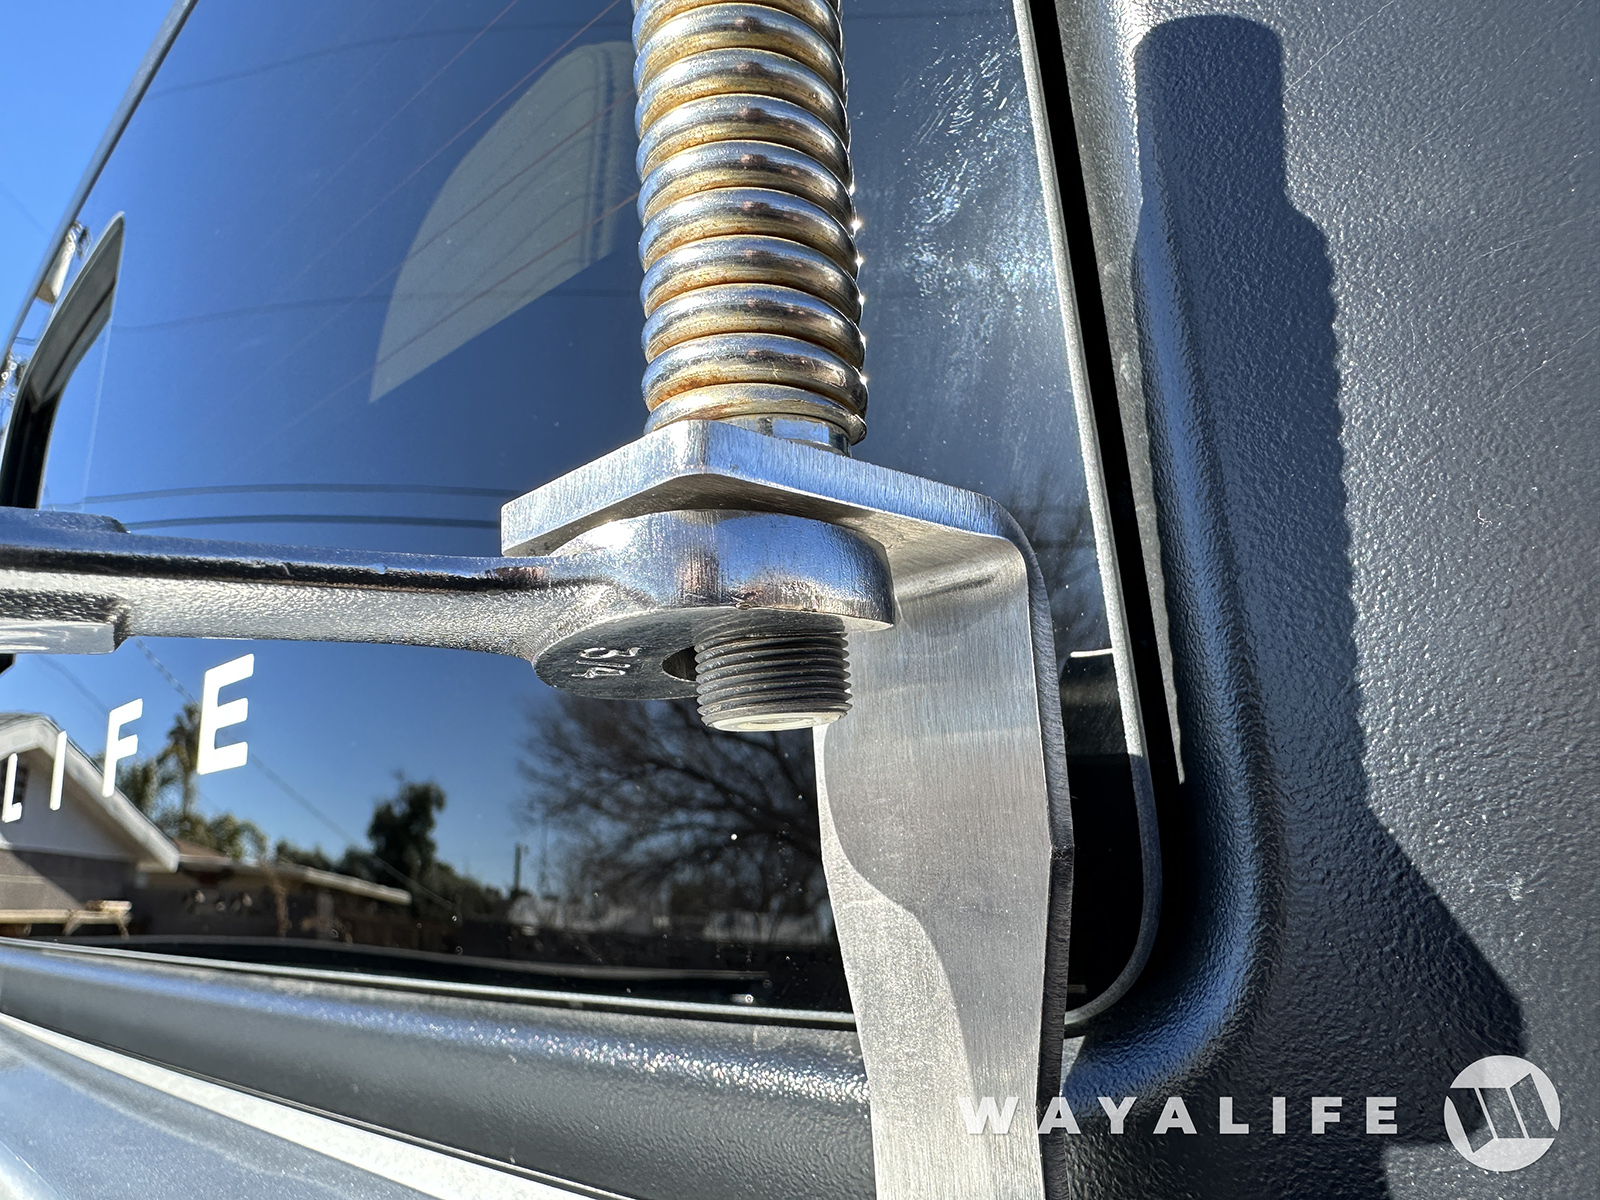
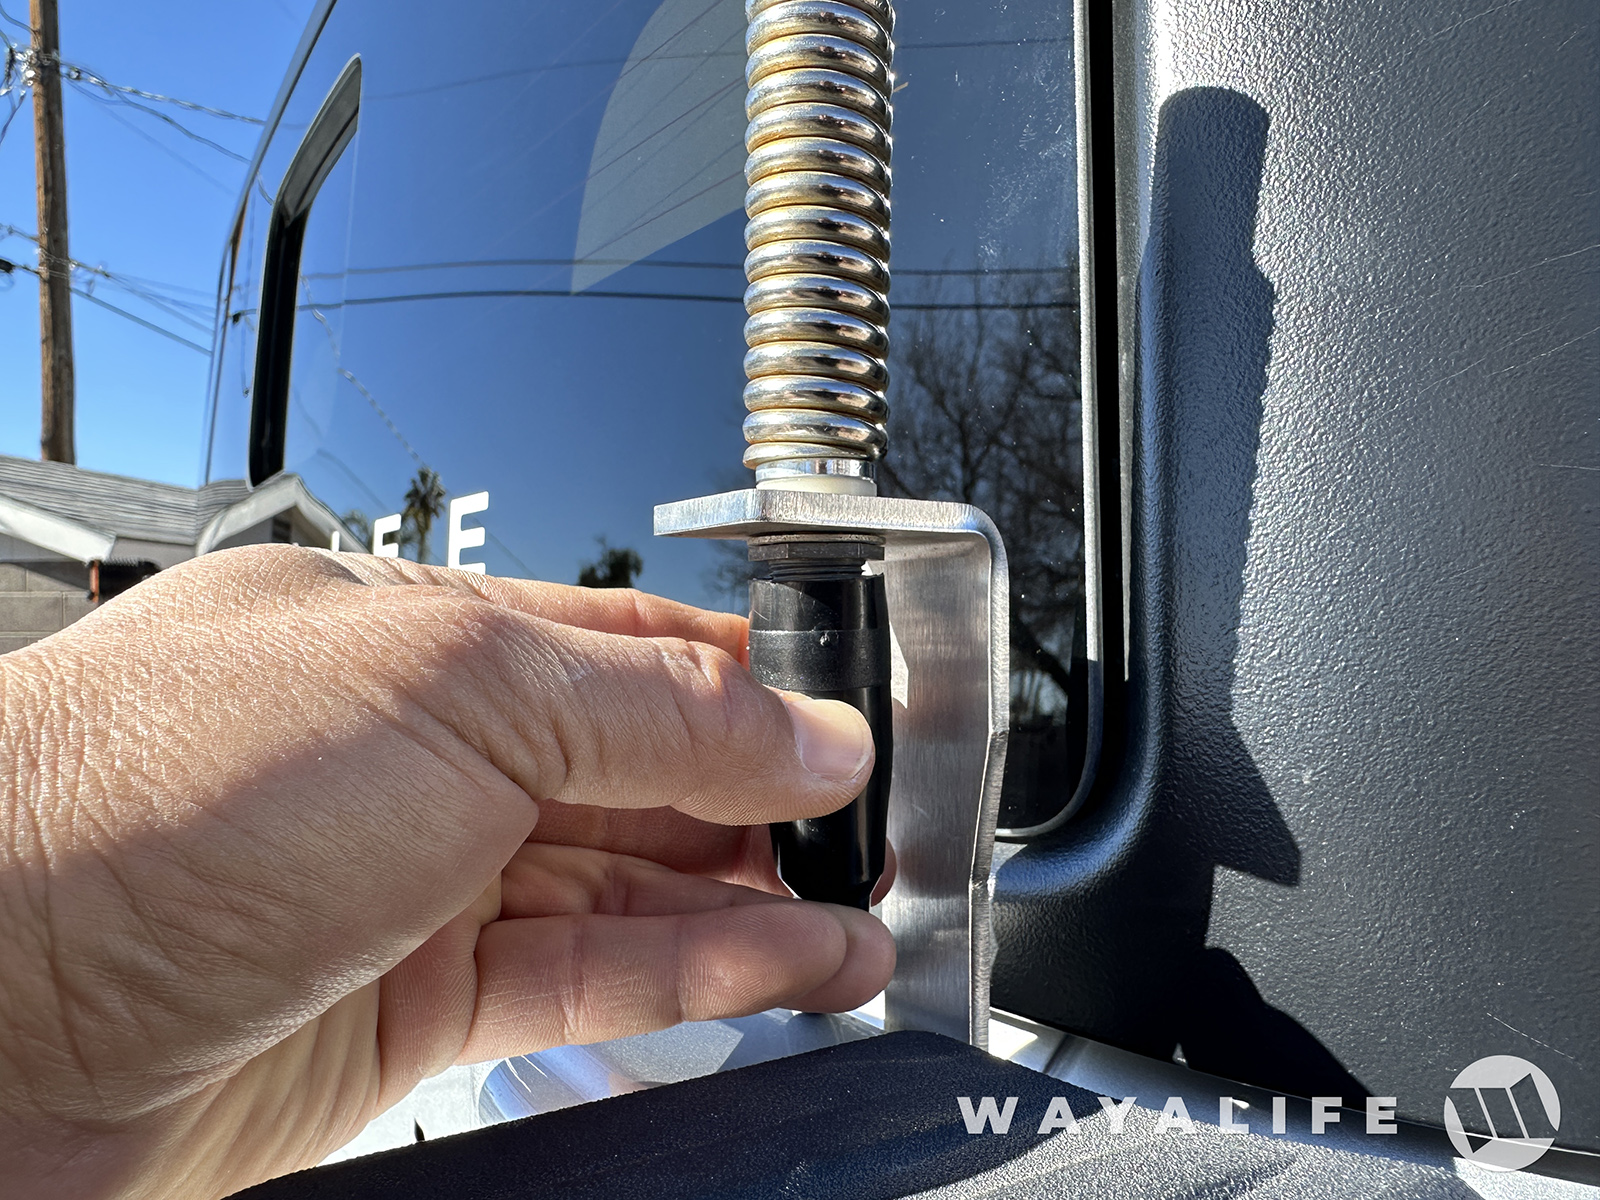
3. Finally, connect your coax cable to the CB Radio antenna mount base.
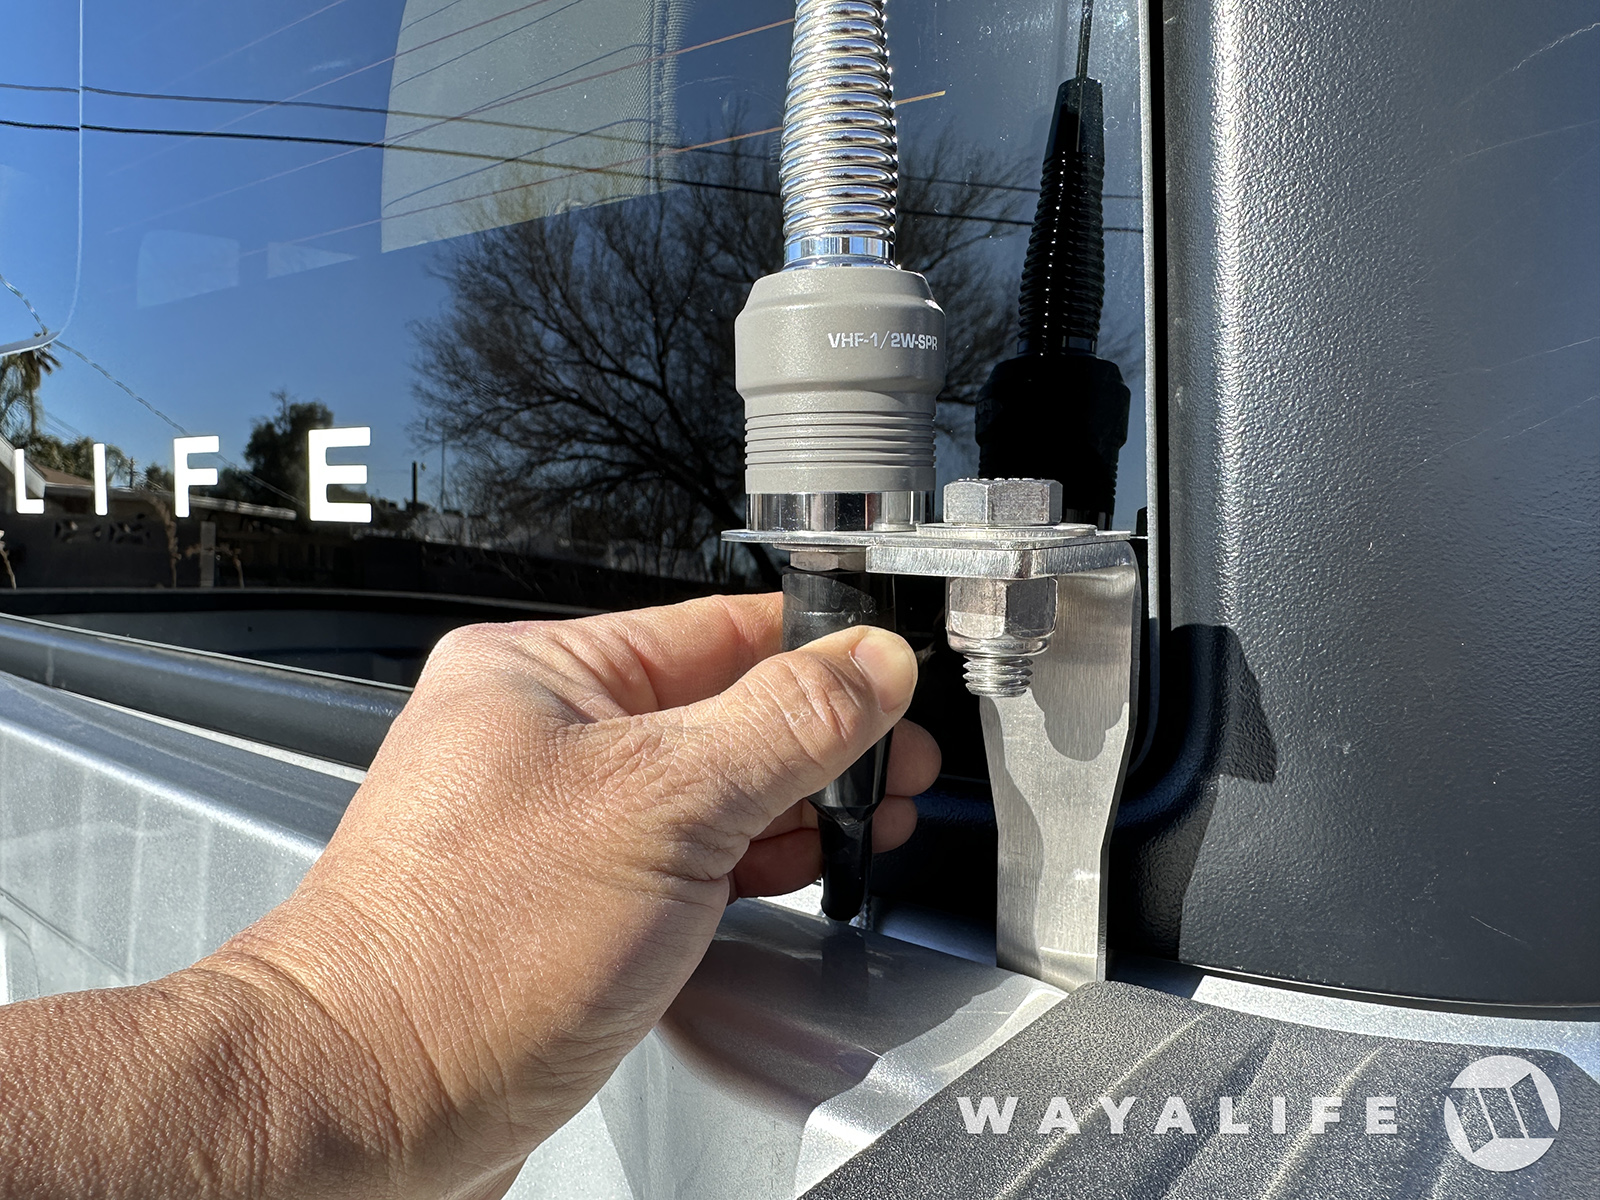
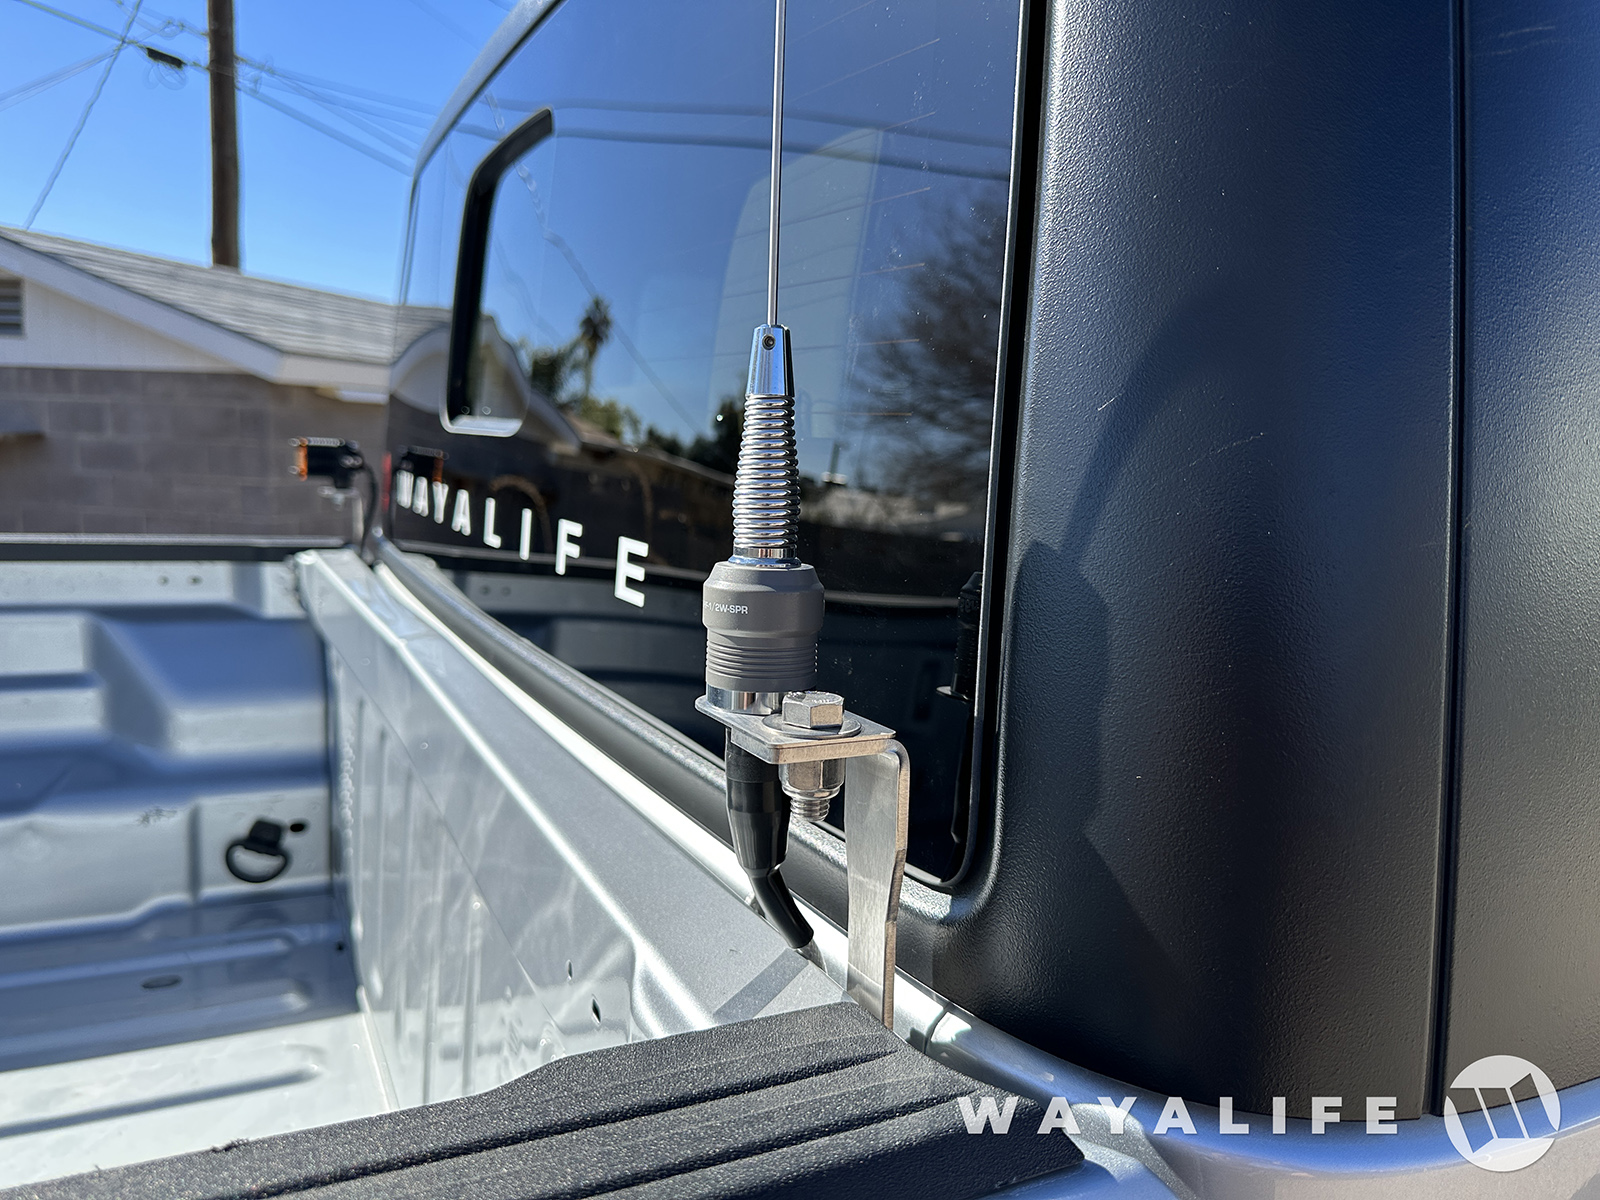
NMO ADAPTER AND ANTENNA INSTALLATION
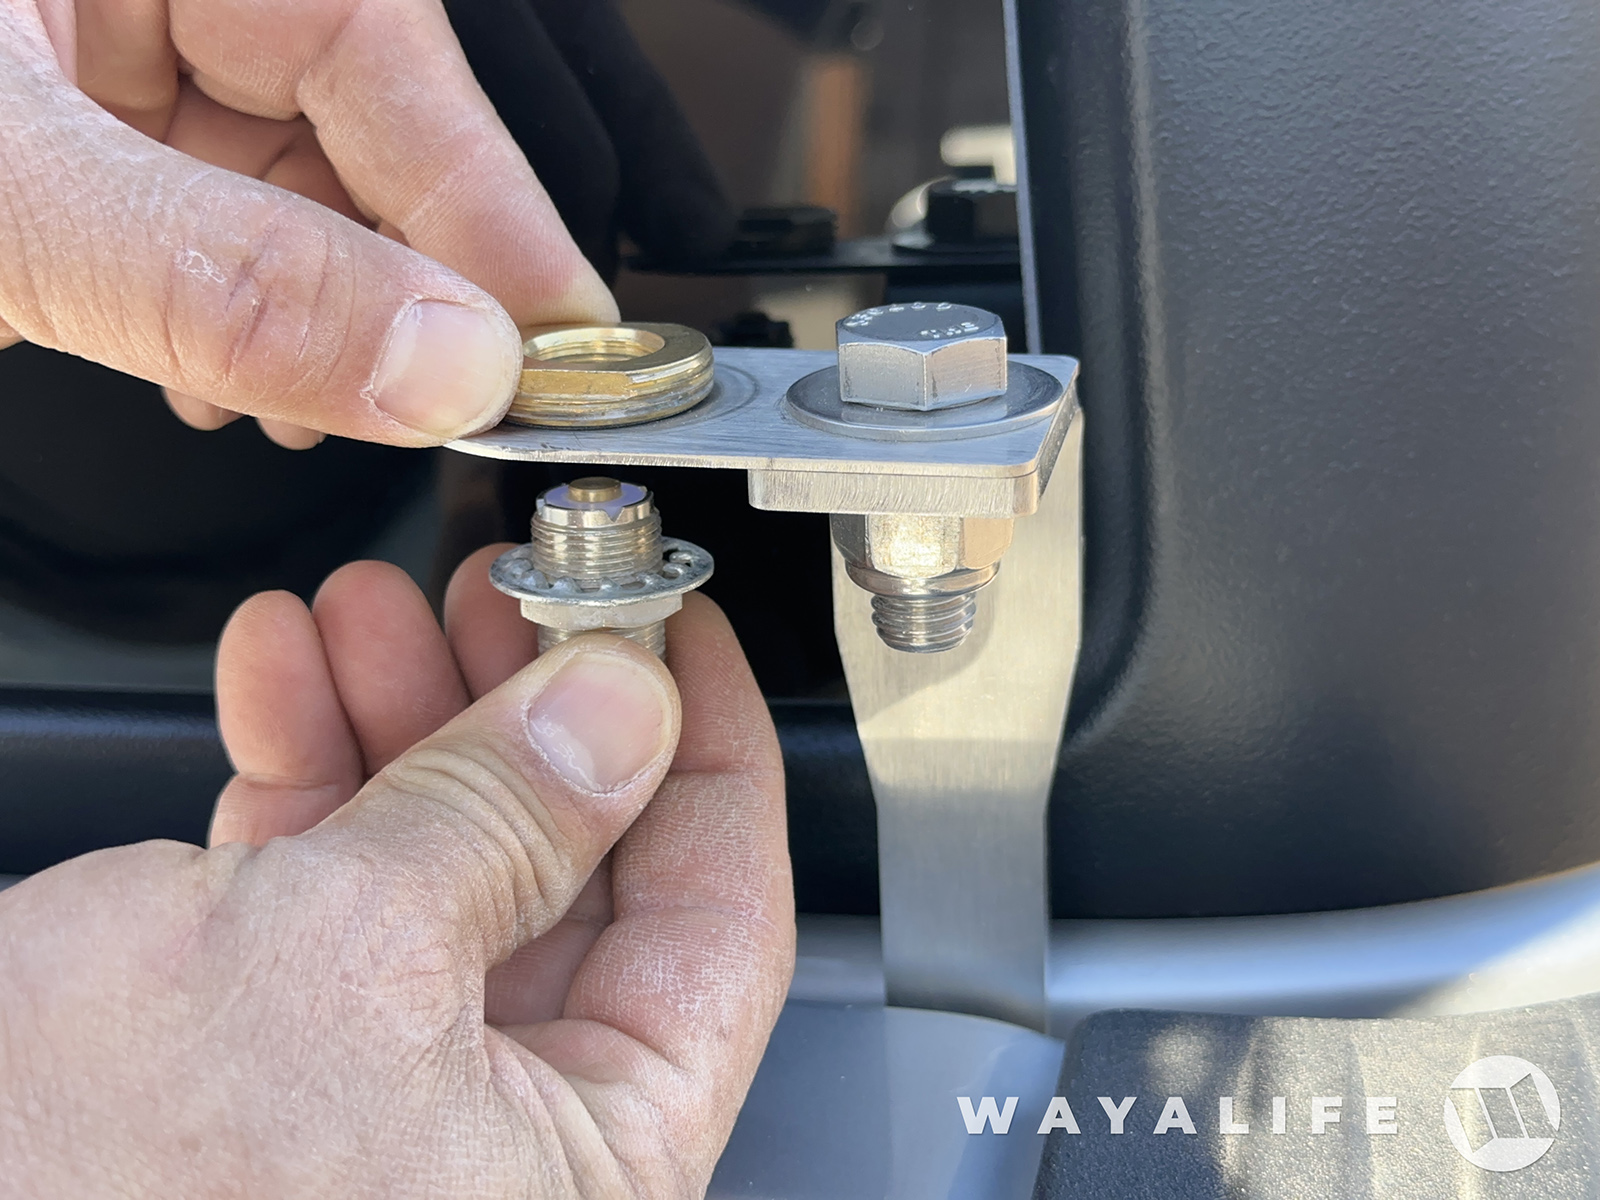
1. If you will be using a New Motorola or what is also known as an NMO antenna for use with a HAM, GMRS or Race Radio, you will need to install and optional WAYALIFE NMO adapter. To do that, simply place the adapter plate on top of the JT Antenna/Light Mount and then secure it in place using the provided bolt, washer and nylock nut. A 3/4" wrench and socket will be needed for this or you can use a 19mm as well.
2. Place the brass female upper half of the NMO mount on top of the adapter and then thread in the male base up and through the adapter.
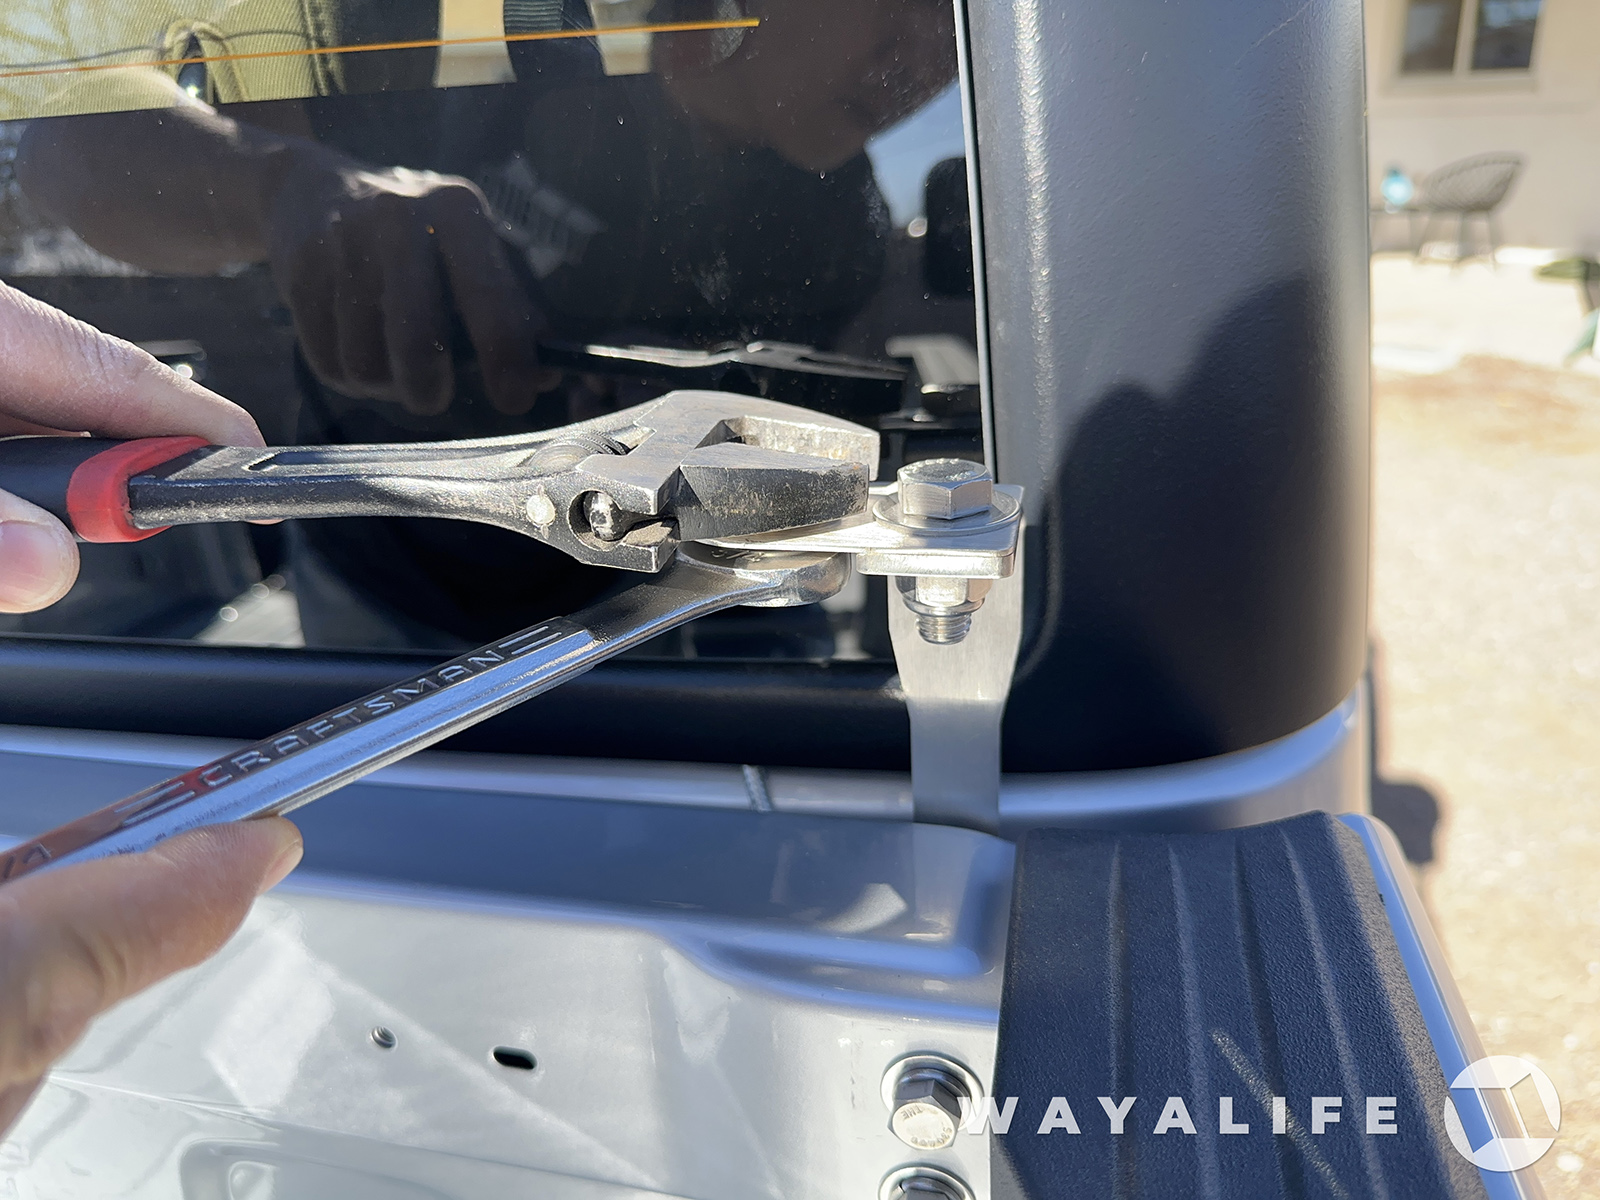
3. Use a crescent wrench to hold the female upper half of the mount and then tighten the lower male half onto it using a 3/4" wrench.
4. Secure your NMO style antenna to the mount.
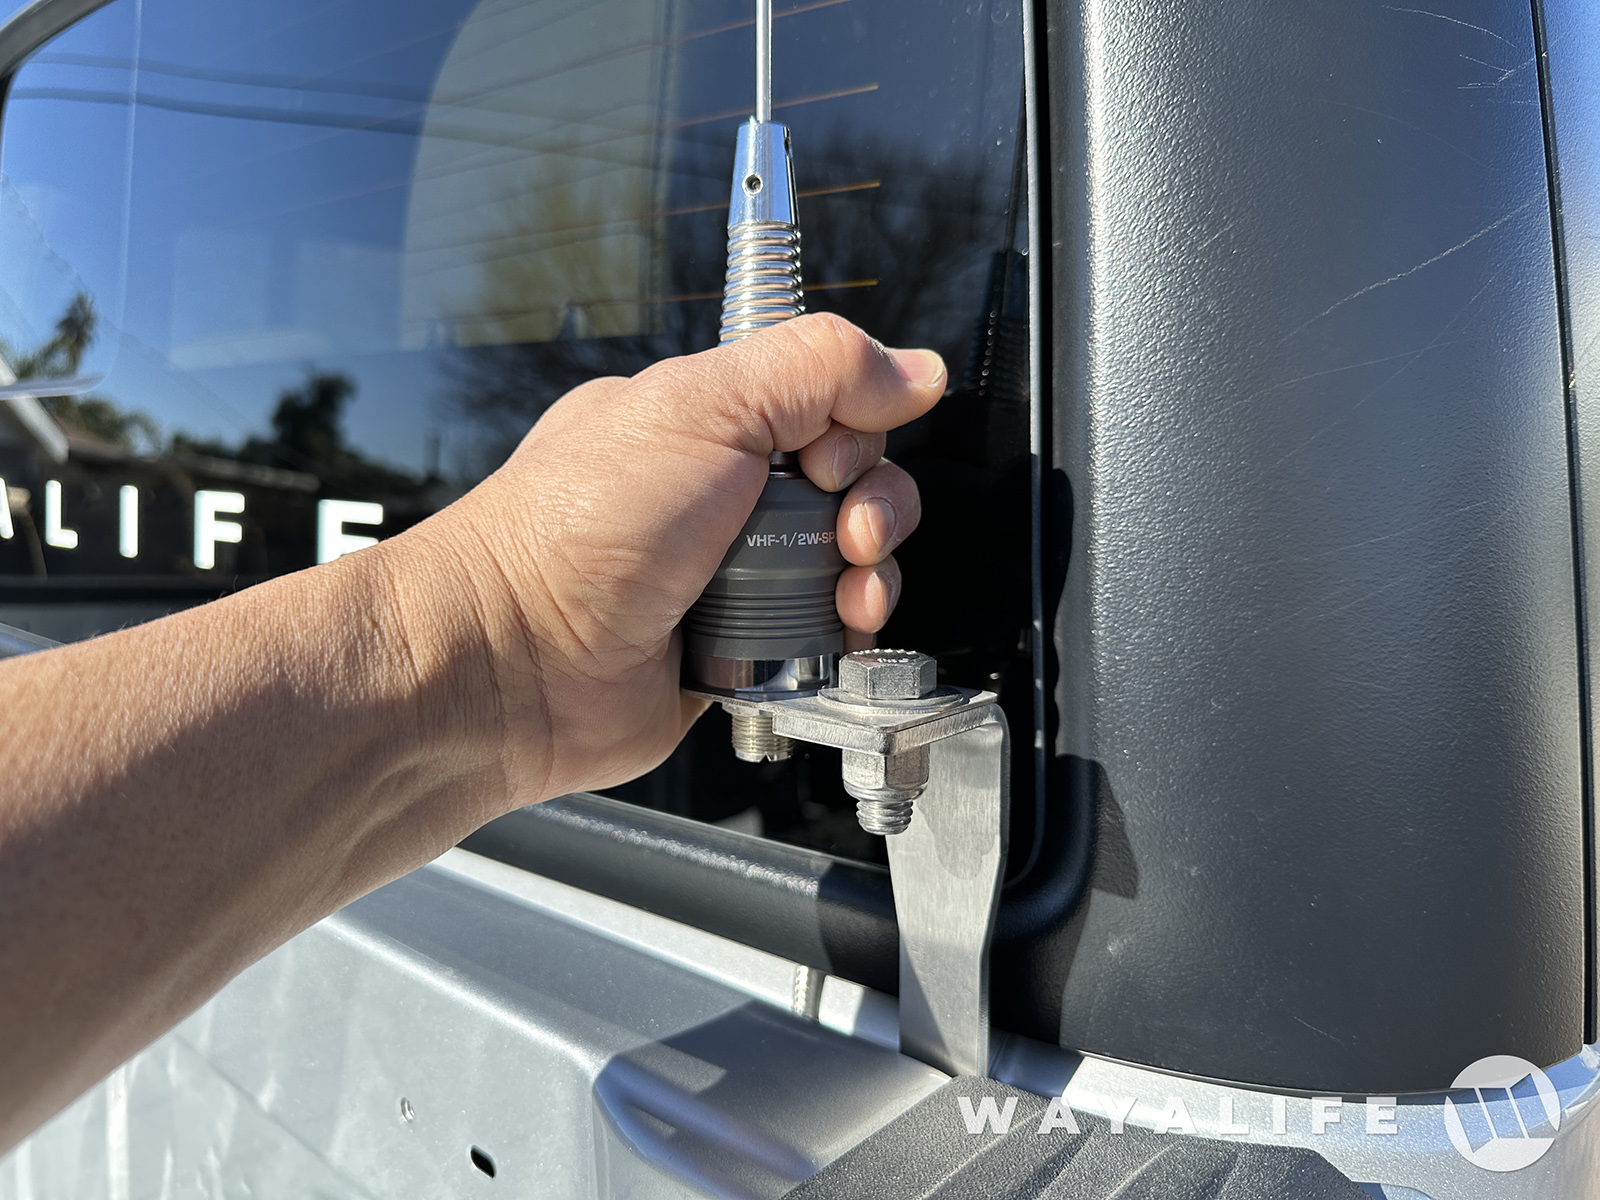
5. And finally, attach the coax cable to the base of it.
Shot of what everything looks like once installed.
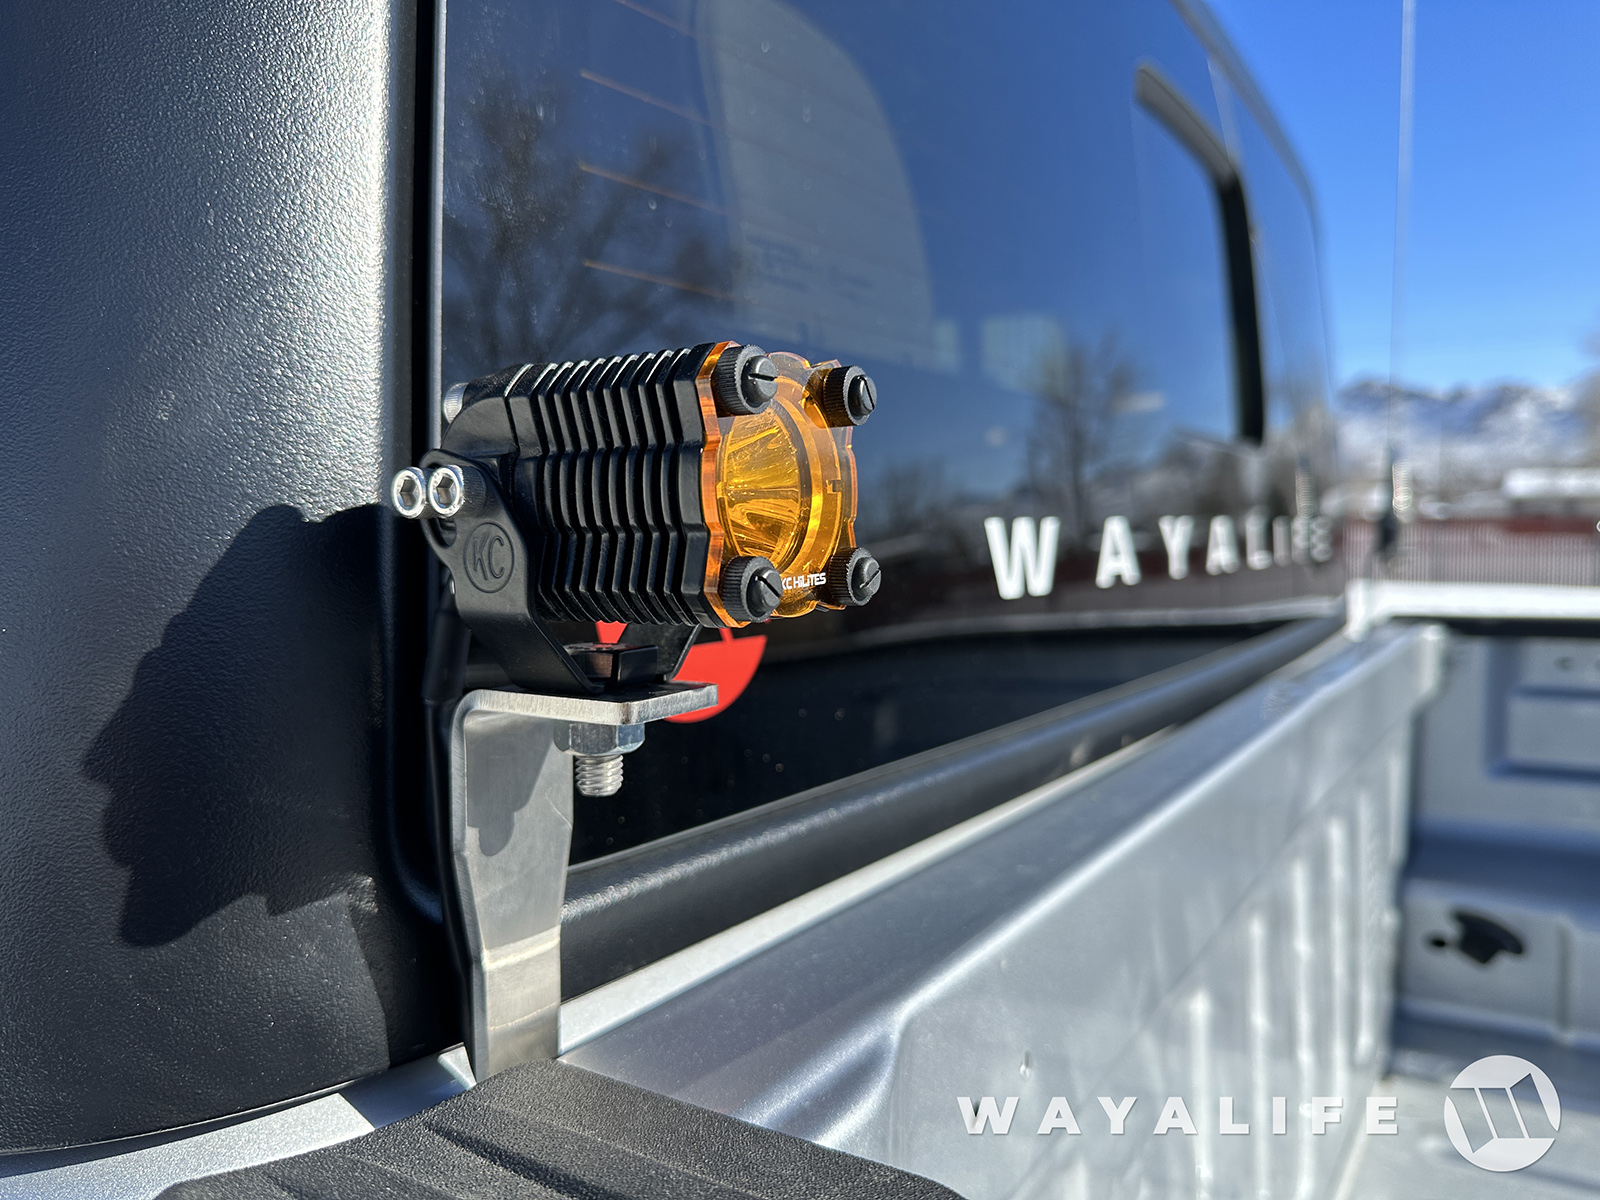
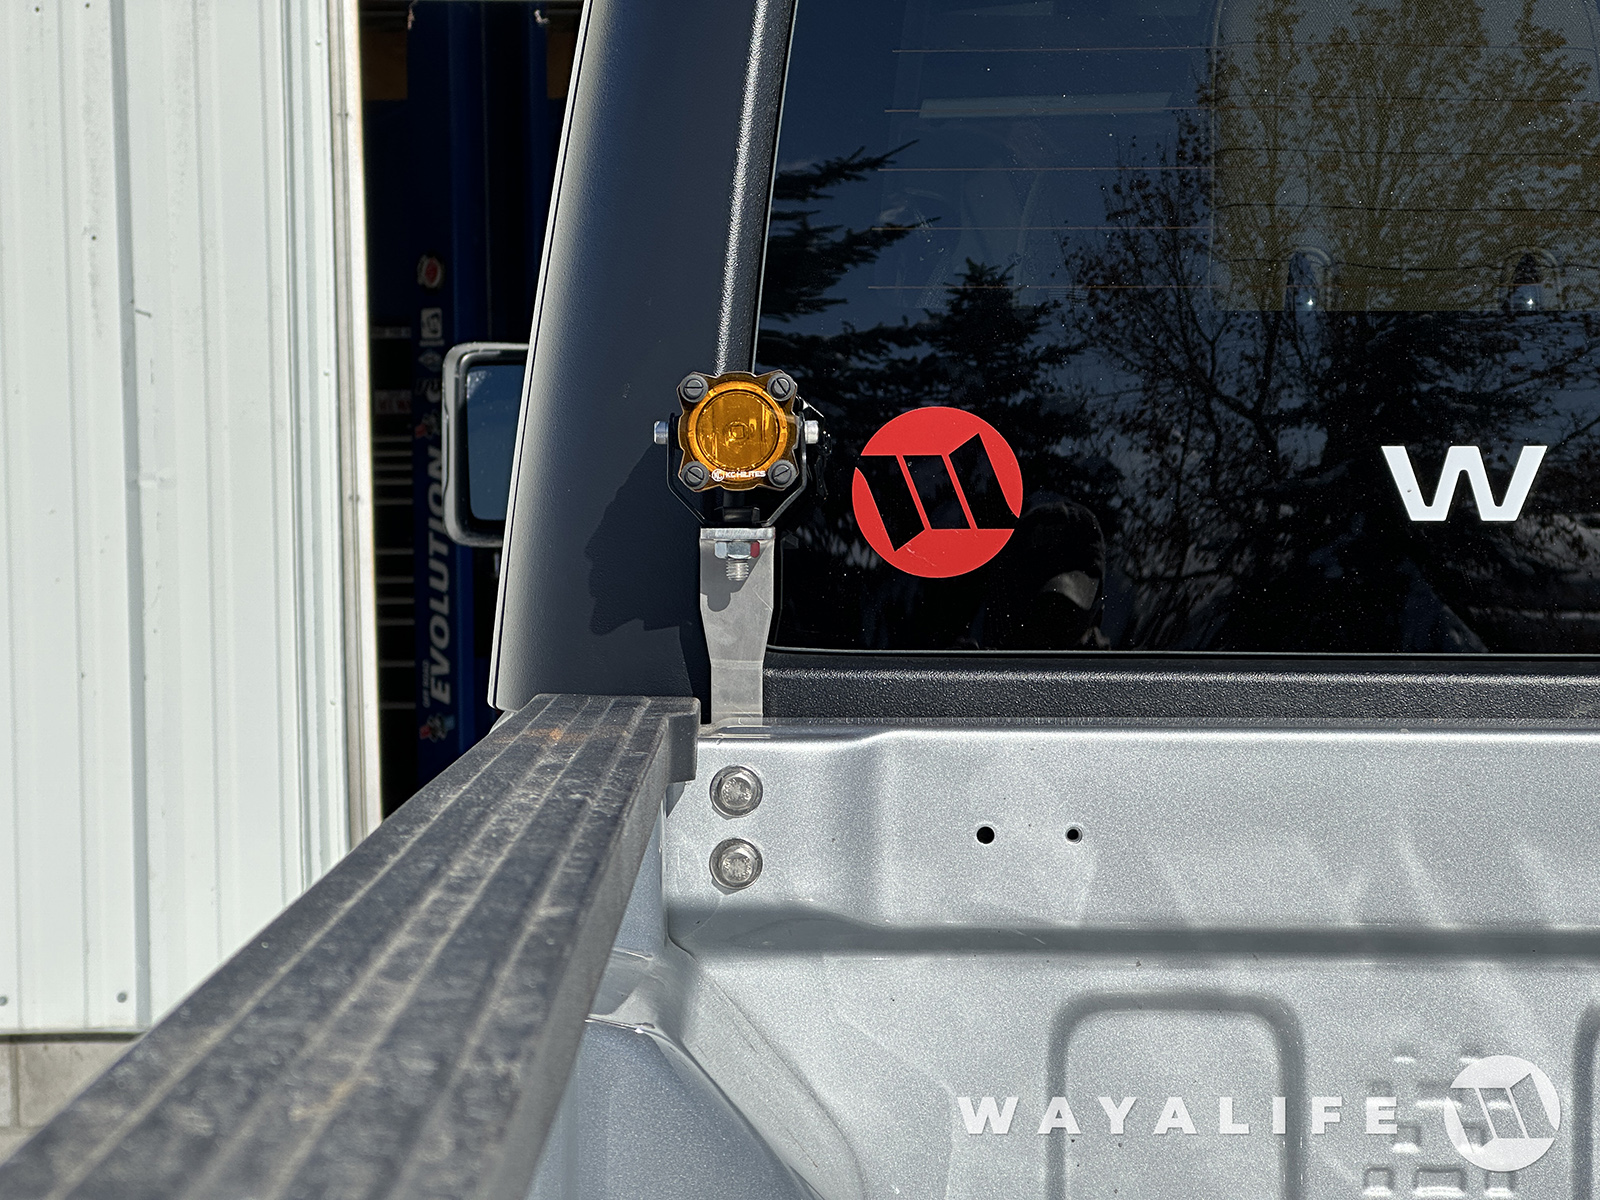
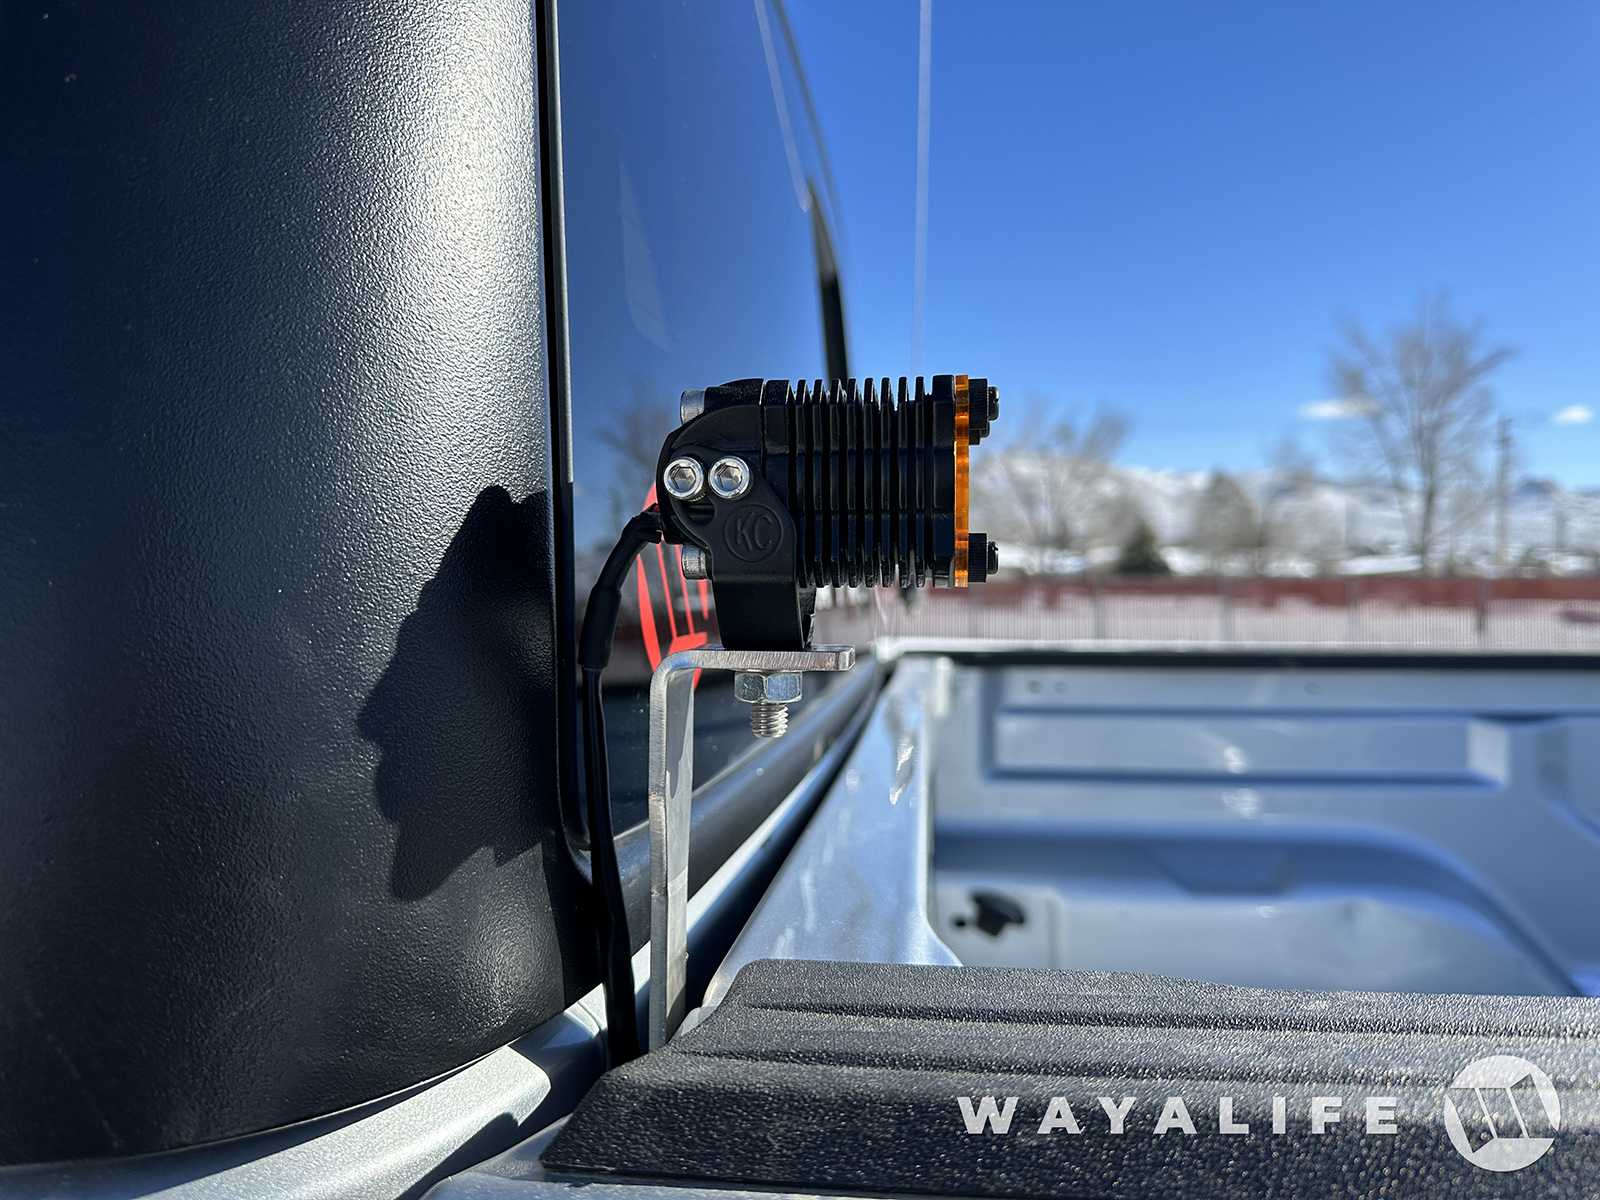
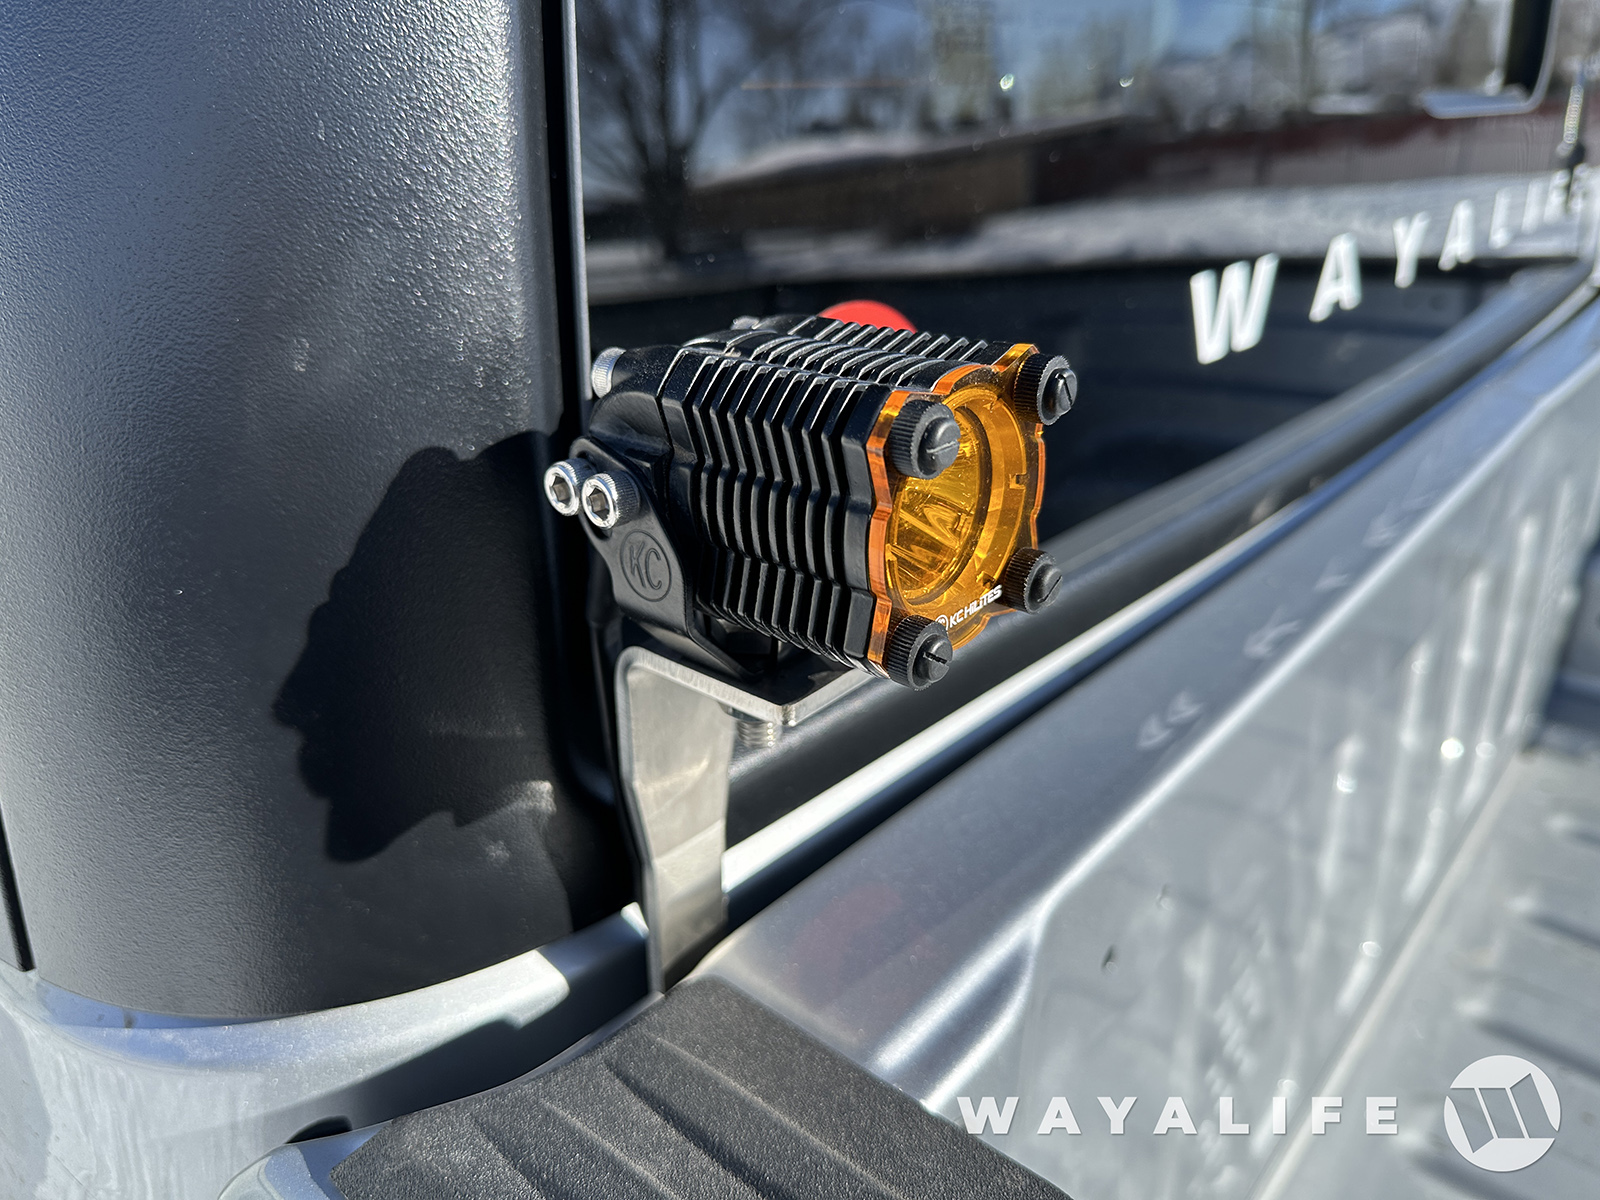
LIGHT MOUNT INSTALLATION
Being that every light is a little different and typically comes with its own hardware, the following are photos to give you an idea of how you can install something like a KC Flex ERA Single LED Light to this mount.
#jeep #jeepgladiator #antennamount #jtgladiator #gladiatorjt #jeepjt #jtjeep #gladiatortruck #jeeptruck #jeepwrangler #jlwrangler #wranglerjl #jeepjl #jljeep #offroad #cbradio #gmrs #raceradio #lightmount #wayalife
* Please note that the Amazon links posted are associate links and purchases made through them will help support this channel.
WAYALIFE Jeep Gladiator Antenna/Light Mount: https://wayalife.com/store/proddetail.php?prod=PARTS-JT-ANTENNA-MOUNT
WAYALIFE ACC BAR: https://wayalife.com/store/proddetail.php?prod=PARTS-CB-BAR
• For use on 2021-Up Jeep Gladiators
• Designed for truck bed mounting of a radio antenna
• Optional NMO style antenna mount can be installed
• Allows for the installation of a small light
• Will work with factory Tonneau Cover
• Made out of stainless steel
• Includes stainless steel hardware
• Easy to install and with basic tools
• MADE IN THE USA
BUY the following to complete your Antenna Mount for NMO
NMO Adapter: https://wayalife.com/store/proddetail.php?prod=PARTS-NMO-ADAPTER
Rugged Radios No Ground Plane Antenna: https://amzn.to/3xVCISs
Wilson Coax Cable w/Adapter: https://amzn.to/3xUUNzZ
BUY the following to complete your Antenna Mount for CB
FireStik Antenna Stud Mount : https://amzn.to/2O5jv8n
Firestik Antenna Spring : https://amzn.to/2NxIaVT
Wilson Coax Cable w/Adapter: https://amzn.to/3xUUNzZ
Firestik 3' CB Antenna : https://amzn.to/2QjODlY
WHAT YOU WILL GET
(1) WAYALIFE Jeep Gladiator Stainless Steel Antenna/Light Mount
(1) 3/8"-16 x 3" Stainless Steel Bolt
(2) 3/8"-16 x 3/4" Stainless Steel Bolts
(2) 3/8" Stainless Steel Nuts
(2) 3/8" Stainless Steel Split Washers
(2) 3/8" Stainless Steel Washers
TOOLS YOU WILL NEED
• 9/16", 3/4" Socket & Wrench
• Ratchet
• Crescent Wrench
INSTALLATION
1. Begin assembling the JT Antenna/Light Mount by placing one of the 3/8" flat washers onto the long 3/8"-16x3" bolt and then insert it though the back hole as shown.
2. Thread on the two 3/8" nuts onto the bolt.
3. Push the bolt all the way to the front of the mount, thread it into the middle hole and tighten it using a 9/16" wrench.
4. Using a 9/16" wrench, tighten the two nuts onto each side of the mount.
This is what the JT Antenna/Light Mount should look like when completely assembled.
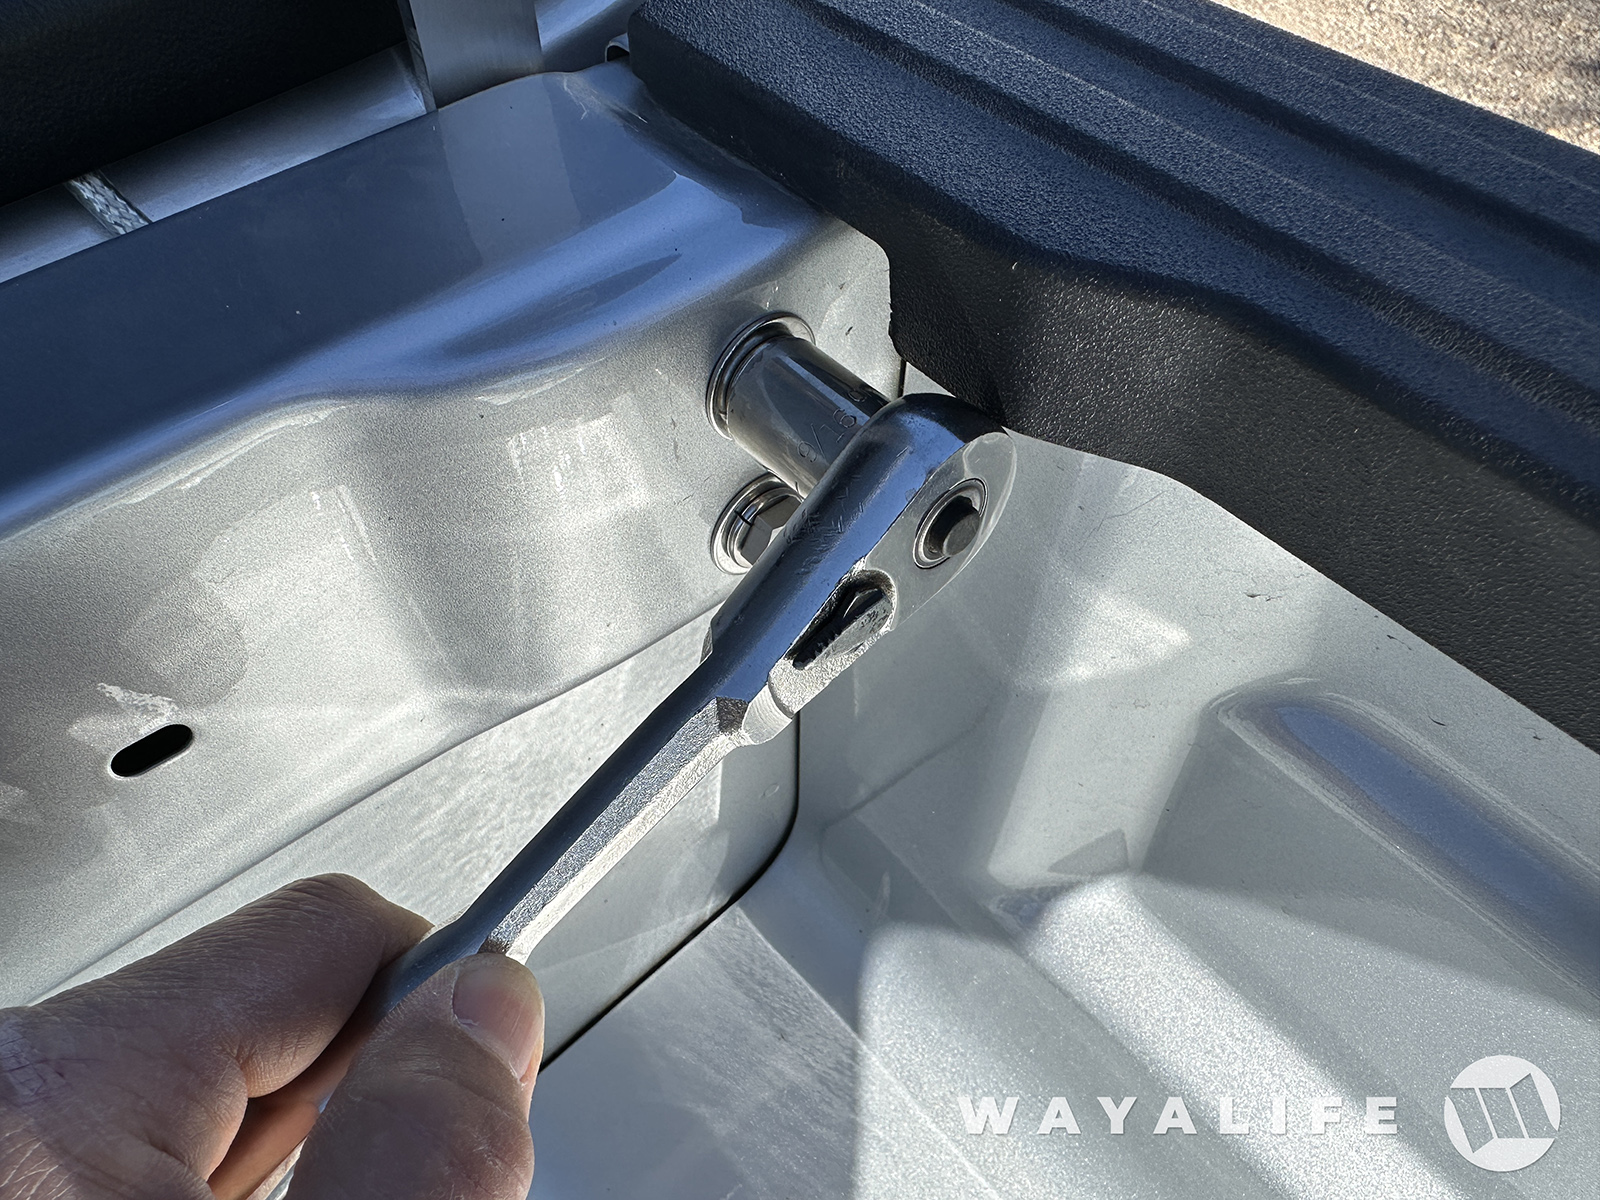
5. Choose which side of your Jeep Gladiator you would like to install the mount and then slip it in between the bulkhead and the cab.
6. Once the front of the mount has cleared the lip of the bulkhead rail, rotate the mount and pull it up to the two existing holes in the bulkhead.
7. Place a split washer and a flat washer onto the 3/8"-16 x 3/4" bolts and then thread it into the antenna/light mount.
8. Use a 9/16" socket to tighten the bolts and secure the mount to the bulkhead.
CB RADIO ANTENNA INSTALLATION
1. If you're installing a CB Radio antenna, you will need to place the stepped nylon washer on top of the mount and making sure that the step sits inside the hole.
2. Place the mounting stud or spring on top of the nylon washer, install the base with a spoked or lock washer on the threads and then use a 3/4" wrench to secure it in place.
3. Finally, connect your coax cable to the CB Radio antenna mount base.
NMO ADAPTER AND ANTENNA INSTALLATION
1. If you will be using a New Motorola or what is also known as an NMO antenna for use with a HAM, GMRS or Race Radio, you will need to install and optional WAYALIFE NMO adapter. To do that, simply place the adapter plate on top of the JT Antenna/Light Mount and then secure it in place using the provided bolt, washer and nylock nut. A 3/4" wrench and socket will be needed for this or you can use a 19mm as well.
2. Place the brass female upper half of the NMO mount on top of the adapter and then thread in the male base up and through the adapter.
3. Use a crescent wrench to hold the female upper half of the mount and then tighten the lower male half onto it using a 3/4" wrench.
4. Secure your NMO style antenna to the mount.
5. And finally, attach the coax cable to the base of it.
Shot of what everything looks like once installed.
LIGHT MOUNT INSTALLATION
Being that every light is a little different and typically comes with its own hardware, the following are photos to give you an idea of how you can install something like a KC Flex ERA Single LED Light to this mount.
#jeep #jeepgladiator #antennamount #jtgladiator #gladiatorjt #jeepjt #jtjeep #gladiatortruck #jeeptruck #jeepwrangler #jlwrangler #wranglerjl #jeepjl #jljeep #offroad #cbradio #gmrs #raceradio #lightmount #wayalife
* Please note that the Amazon links posted are associate links and purchases made through them will help support this channel.
Last edited:
")

